Chrysler Le Baron, Dodge Dynasty, Plymouth Acclaim. Manual — part 111
If equipped, unplug torque converter clutch
plug, located near the dipstick.
CAUTION: Raise vehicle. Remove front wheels. Refer
to Suspension, Group 2 to remove or install wheel
hub nut and both drive shafts.
Remove torque converter dust cover. Mark
torque converter and drive plate with chalk, for
reassembly. Remove torque converter mounting
bolts.
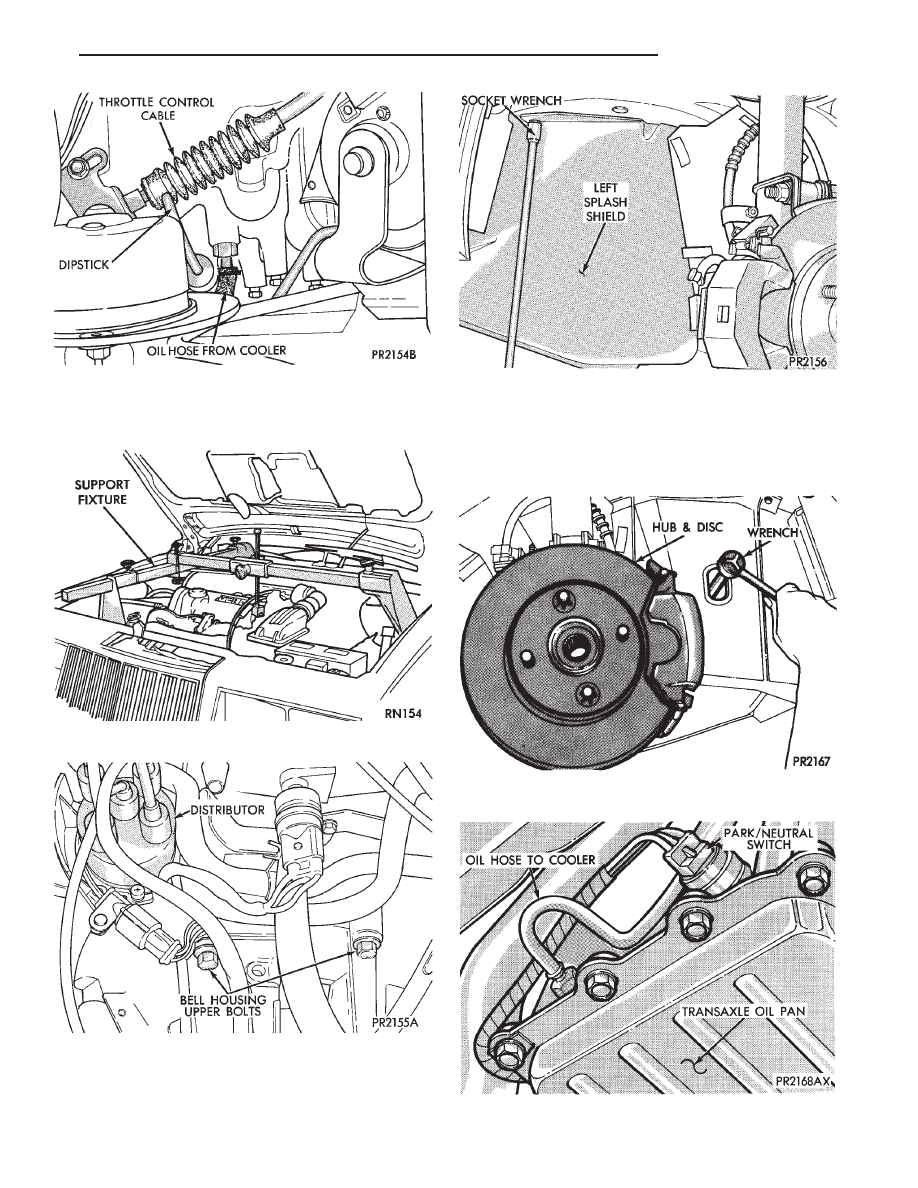
Fig. 1 Remove Upper and Lower Oil Cooler Hoses
Fig. 2 Engine Support Fixture
Fig. 3 Remove Bell Housing Upper Bolts
Fig. 4 Remove or Install Left Splash Shield
Fig. 5 Remove or Install Access Plug in Right
Splash Shield to Rotate Engine Crankshaft
Fig. 6 Remove or Install Wire to Neutral/Park Safety
Switch
Ä
TRANSAXLE
21 - 49
Remove or install starter. Remove or install lower
bell housing bolts.
Carefully work transaxle and torque converter as-
sembly rearward off engine block dowels and disen-
gage converter hub from end of crankshaft. Attach a
small ‘‘C’’ clamp to edge of bell housing. This will
hold torque converter in place during transaxle
removal. Lower transaxle and remove assembly from
under the vehicle.
When installing transaxle, reverse the above proce-
dure.
If torque converter was removed from transaxle be
sure to align pump inner gear pilot flats with torque
converter impeller hub flats.
Adjust gearshift and throttle cables.
Refill transaxle with MOPAR
t ATF PLUS (Auto-
matic Transmission Fluid) Type 7176.
DISASSEMBLY SUBASSEMBLY REMOVAL
Prior to removing any transaxle subassemblies,
plug all openings and thoroughly clean exterior of
the unit, preferably by steam. Cleanliness through
entire disassembly and assembly cannot be overem-
phasized. When disassembling, each part should be
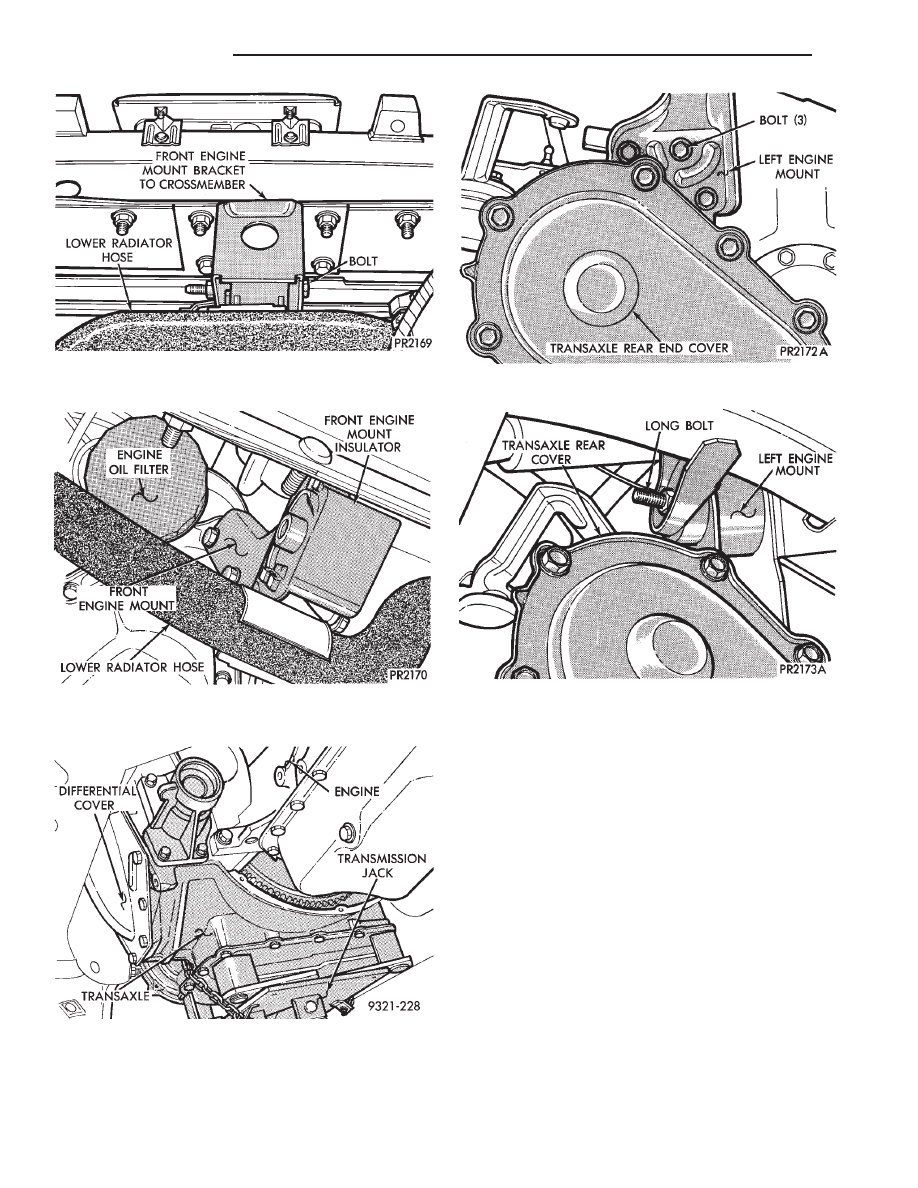
Fig. 7 Remove or Install Engine Mount Bracket from
Front Crossmember
Fig. 8 Remove or Install Front Mount Insulator
Through-Bolt and Bell Housing Bolts
Fig. 9 Positioning Transmission Jack
Fig. 10 Remove or Install Left Engine Mount
Fig. 11 Remove or Install Left Engine Mount from
Engine
21 - 50
TRANSAXLE
Ä

washed in a suitable solvent, then dried by com-
pressed air. Do not wipe parts with shop towels. All
mating surfaces in the transaxles are accurately ma-
chined; therefore, careful handling of all parts must
be exercised to avoid nicks or burrs.
Remove all old sealant before applying new MO-
PAR
t Adhesive Sealant.
Use only MOPAR
t Adhesive Sealant when install-
ing oil pan.
Put MOPAR
t Adhesive Sealant on the oil pan
flange (Fig. 2) and on all oil pan bolts (underside of
bolt head).
Fig. 12 Raise or Lower Transaxle
Fig. 13 Pry Engine for Clearance
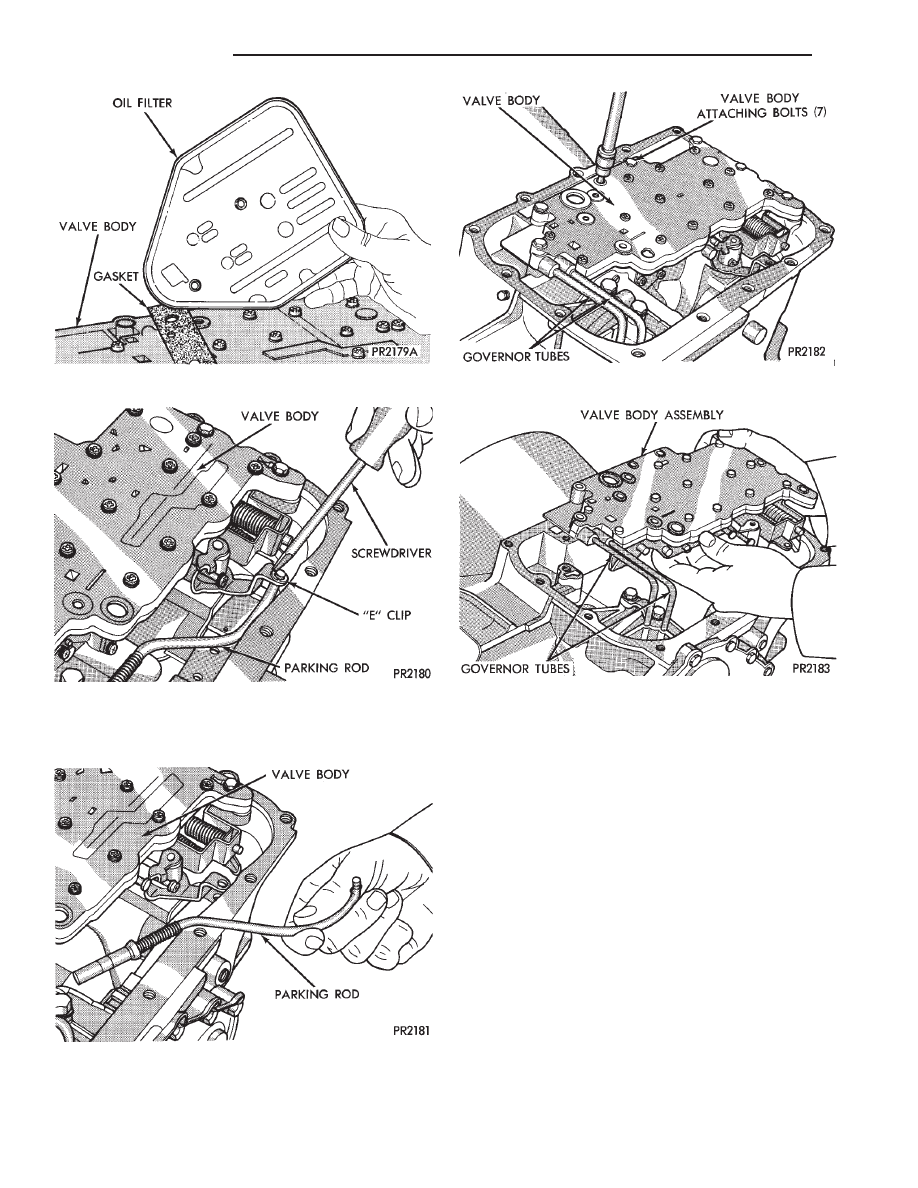
Fig. 1 Transaxle Oil Pan Bolts
Fig. 2 Transaxle Oil Pan
Fig. 3 Oil Filter Screws
Ä
TRANSAXLE
21 - 51
Remove or install neutral starting and back-up
lamp switch.
Measuring input shaft end play before disassembly
will usually indicate when a thrust washer change is
required, (except when major parts are replaced). The
thrust washer is located between input and output
shafts.
Attach a dial indicator to transaxle bell housing
with its plunger seated against end of input shaft
(Fig. 9).
Move input shaft in and out to obtain end play
reading. End play specifications are 0.19 to 1.50 mm
(.008 to .060 inch).
Record indicator reading for reference when reas-
sembling the transaxle.
Fig. 4 Oil Filter
Fig. 5 Remove or Install Parking Rod E-Clip
Fig. 6 Parking Rod
Fig. 7 Valve Body Attaching Bolts
Fig. 8 Valve Body and Governor Tubes
21 - 52
TRANSAXLE
Ä
Нет комментариевНе стесняйтесь поделиться с нами вашим ценным мнением.
Текст