SsangYong Korando II (1996-2006 year). Manual — part 381
HEATING AND VENTILATION SYSTEM 7A-21
SSANGYONG MY2002
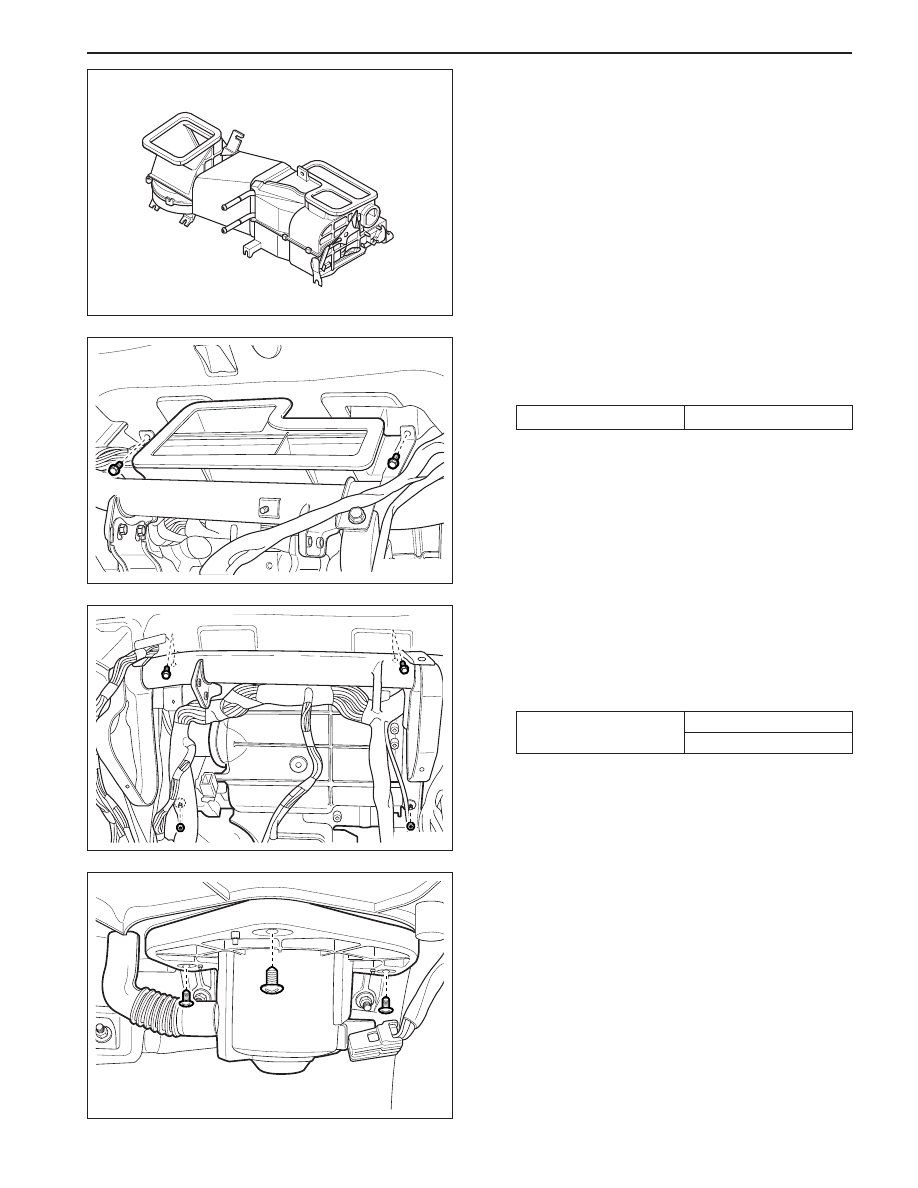
8. Remove one bolt, one nut and two screws that se-
curing the heater/air distributor case-to-blower unit
duct.
9. Remove the heater/air distributor case-to-blower
unit duct.
KAA7A090
KAA7A100
KAA7A110
KAA7A120
10. Remove two bolts and the heater/air distributor
case-to-defroster duct.
Installation Notice
11. Remove electrical connector to the mode control
actuator.
12. Remove one bolt and two nuts that securing heater/
air distributor case.
Installation Notice
13. Remove the heater/air distributor case.
14. Installation should follow the removal procedure
in the reverse order.
Tightening Torque
Bolt 5 N•m (44 lb-it)
Nut 5 N•m (44 lb-it)
BLOWER MOTOR
Removal and Installation Procedures
1. Disconnect the negative battery cable.
2. Remove the glove box. Refer to Section 9E, Instru-
mentation/Driver Information.
3. Disconnect the blower motor electrical connector.
4. Remove the blower motor cooling hose.
5. Remove the screws that secure the motor to the
heater/air distributor case.
6. Remove the blower motor from the blower unit by
gently pulling the motor straight down and out.
Tightening Torque
5 N•m (44 lb-in)
SSANGYONG MY2002
7A-22 HEATING AND VENTILATION SYSTEM
7. Installation should follow the removal procedure
in the reverse order.
Installation Notice: After install the blower motor
confirm that the blower motor operates properly.
KAA7A130
KAA7A140
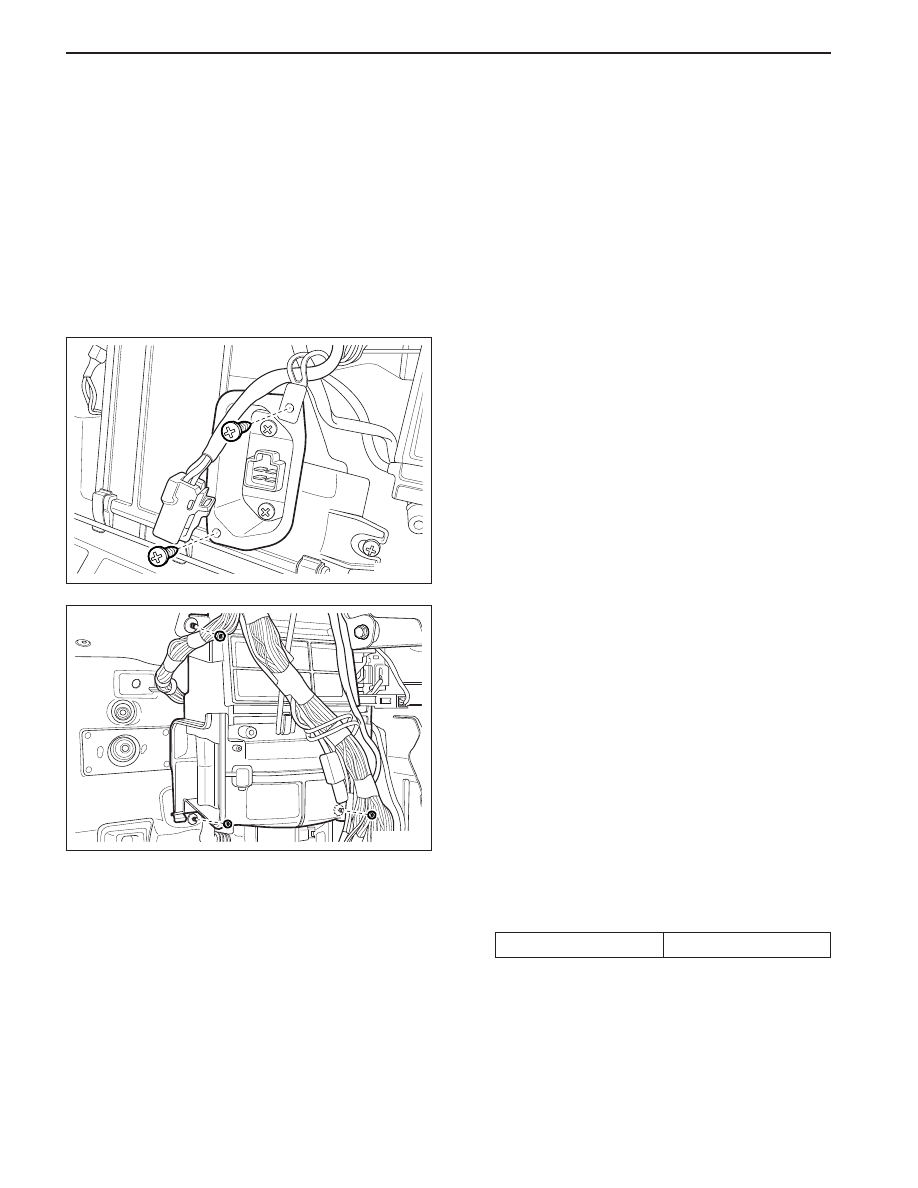
BLOWER RESISTOR
Removal and Installation Procedures
1. Disconnect the negative battery cable.
2. Remove the glove box. Refer to Section 9E, Instru-
mentation/Driver Information.
3. Disconnect the electrical connector at the resistor.
4. Remove two screws from the resistor.
5. Remove the resistor from the heater/air distributor
case by gently pulling the resistor.
6. Installation should follow the removal procedure
in the reverse order.
BLOWER UNIT
Removal and Installation Procedures
1. Disconnect the negative battery cable.
2. Remove the instrument panel carrier assembly.
Refer to Section 9E, Instrumentation/Driver
Information.
3. Remove one nut, one bolt and two screws that
securing the heater/air distributor case-to-blower
unit duct.
4. Remove the heater/air distributor case-to-blower
unit duct.
5. Disconnect the connector for air intake door
actuator and the connector for blower motor.
6. Remove three nuts that securing the blower unit.
Installation Notice
7. Remove the blower unit.
8. Installation should follow the removal procedure
in the reverse order.
Tightening Torque
5 N•m (44 lb-it)
HEATING AND VENTILATION SYSTEM 7A-23
SSANGYONG MY2002
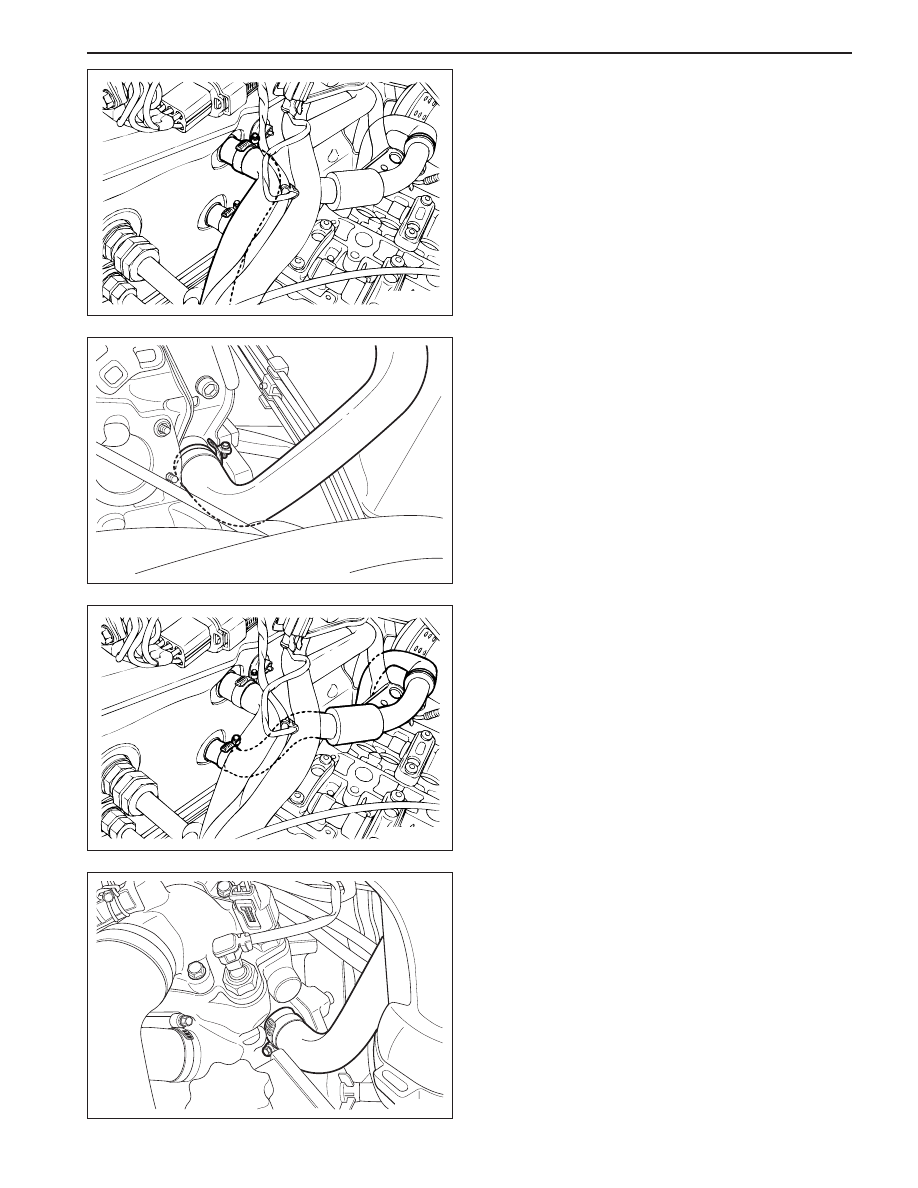
HEATER INLET HOSE
Removal and Installation Procedures
1. Partially drain the cooling system. Refer to Section
1D, Engine Cooling.
2. Remove the clip and slide rearward the inlet heater
hose clamp at the firewall.
3. Gently twist the hose from the left to right and
back again to loosen the bond between the hose
and the tube.
4. Remove the end of the hose from the tube.
KAA7A150
KAA7A160
KAA7A170
KAA7A180
5. Remove the clip and slide rearward the inlet heater
hose at the engine block.
6. Remove the inlet heater hose from the vehicle.
7. Installation should follow the removal procedure
in the reverse order.
HEATER OUTLET HOSE
Removal and Installation Procedures
1. Partially drain the cooling system. Refer to Section
1D, Engine Cooling.
2. Remove the clip and slide rearward the outlet
heater hose clamp at the firewall.
3. Gently twist the hose from the left to right and
back again to loosen the bond between the hose
and the tube.
4. Remove the end of the hose from the tube.
5. Remove the intake manifolds. Refer to Section 1C,
DOHC Engine Mechanical.
6. Remove the clip and slide rearward the outlet
heater hose at the thermostat housing.
7. Remove the outlet heater hose from the vehicle.
8. Installation should follow the removal procedure
in the reverse order.
SSANGYONG MY2002
7A-24 HEATING AND VENTILATION SYSTEM
HEATER CORE
Removal and Installation Procedures
1. Disconnect the negative battery cable.
2. Remove the heater/air distribution case from the
vehicle. Refer to “Heater/Air Distribution Case
Assembly” in this section.
3. Remove the plastic holder and two screws that
secure the heater core to heater/air distributor case
assembly.
4. Slowly separate the heater/air distributor case as-
sembly and remove the heater core.
5. Installation should follow the removal procedure
in the reverse order.
REAR HEATER DUCT
This vehicle is equipped with rear seat heater ducts.
Should there be no airflow to the rear, look for any ob-
structions, such as items on the floor under the front
seats. Also check for air leaks between the heater/air
distributor assembly and the rear ducts.
KAA7A190
KAA7D130
KAA7D140
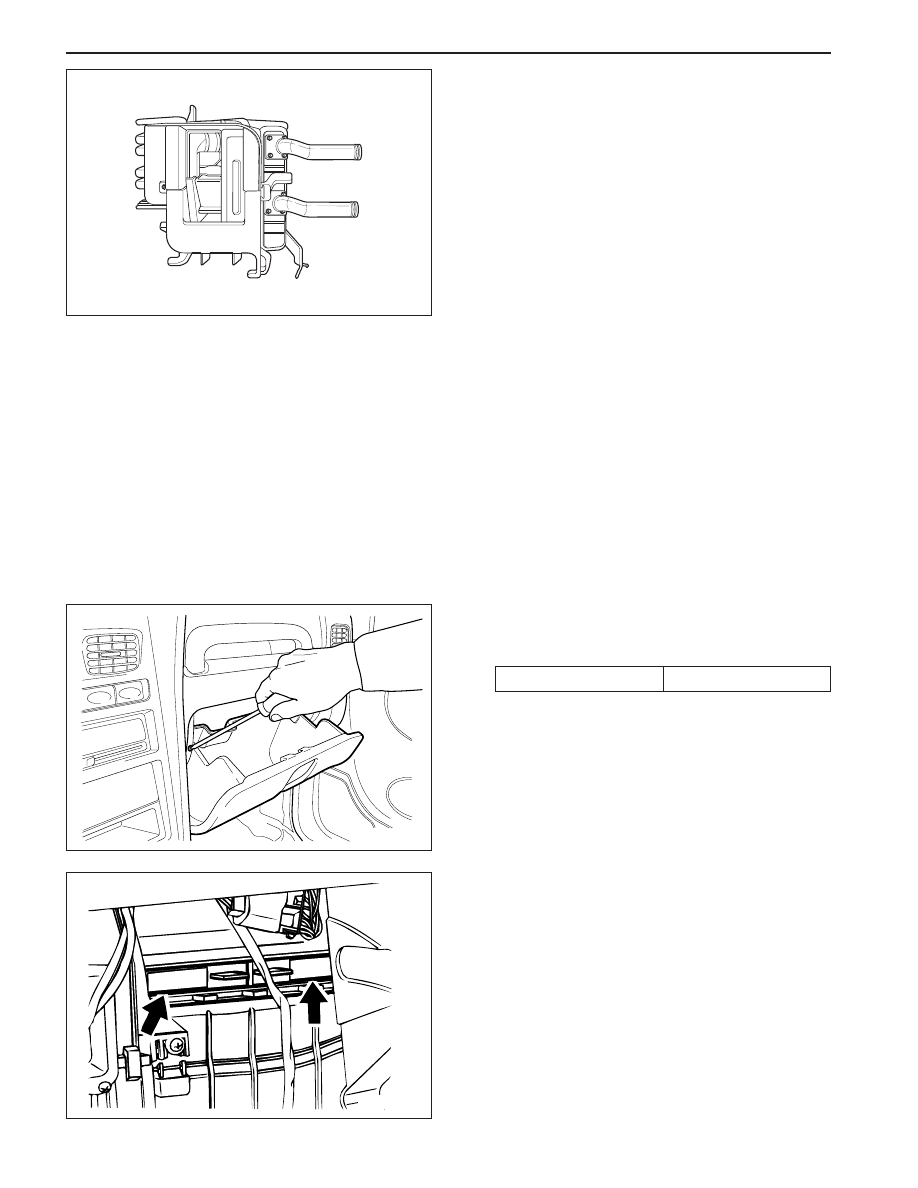
AIR FILTER
Removal and Installation Procedures
Notice: Replace earlier if air pollution is heavy.
1. Open the glove box and pull it inward to release
the upper left and right locking portion.
Notice: Remove the glove box by unscrewing
lower 2 screws, if necessary.
2. Press the 2 filter cover holds and remove the air
filter cover.
3. Remove the 2 air filters.
Notice: For installation, remember the installed
direction of the air filter before removal.
Replacement Interval
Every 10,000 km
Нет комментариевНе стесняйтесь поделиться с нами вашим ценным мнением.
Текст