SsangYong Musso. Manual — part 257
M162 ENGINE MECHANICAL 1B1-71
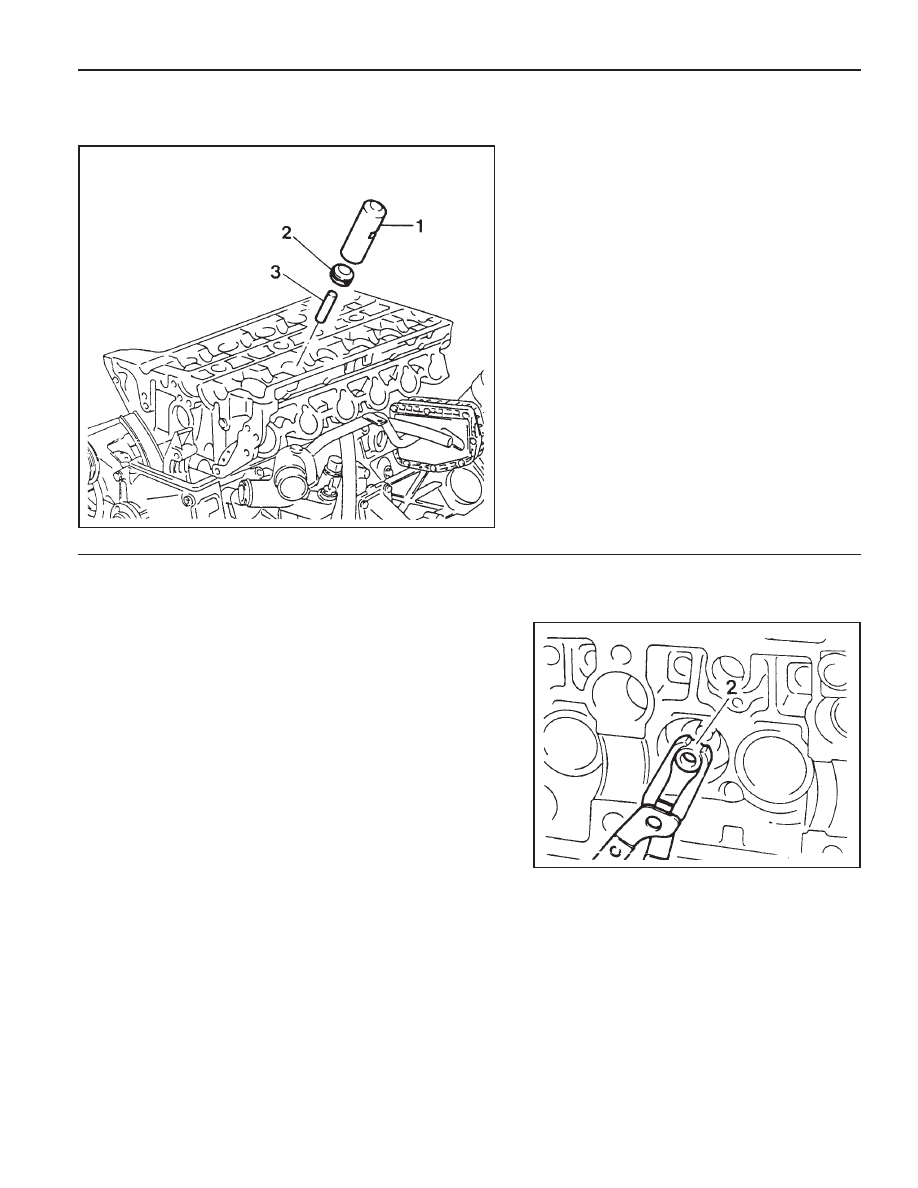
VALVE STEM SEAL
Preceding Work : Removal of valve spring
1 Drift (Special Tool)
2 Valve Stem Seal
3 Protective Sleeve
Drift 119 589 00 43 00
Pliers 104 589 00 37 00
Tools Required
104 589 00 37 00 Pliers
119 589 00 43 00 Drift
Replacement Procedure
1. Remove the valve stem seal (2) using the pliers.
Notice
Check the valve stem seal for damage and replace if
necessary.
2. Coat the valve stem seal with oil and assemble it with the
protective sleeve.
3. Insert the valve stem seal by pressing it with the drift.
1B1-72 M162 ENGINE MECHANICAL
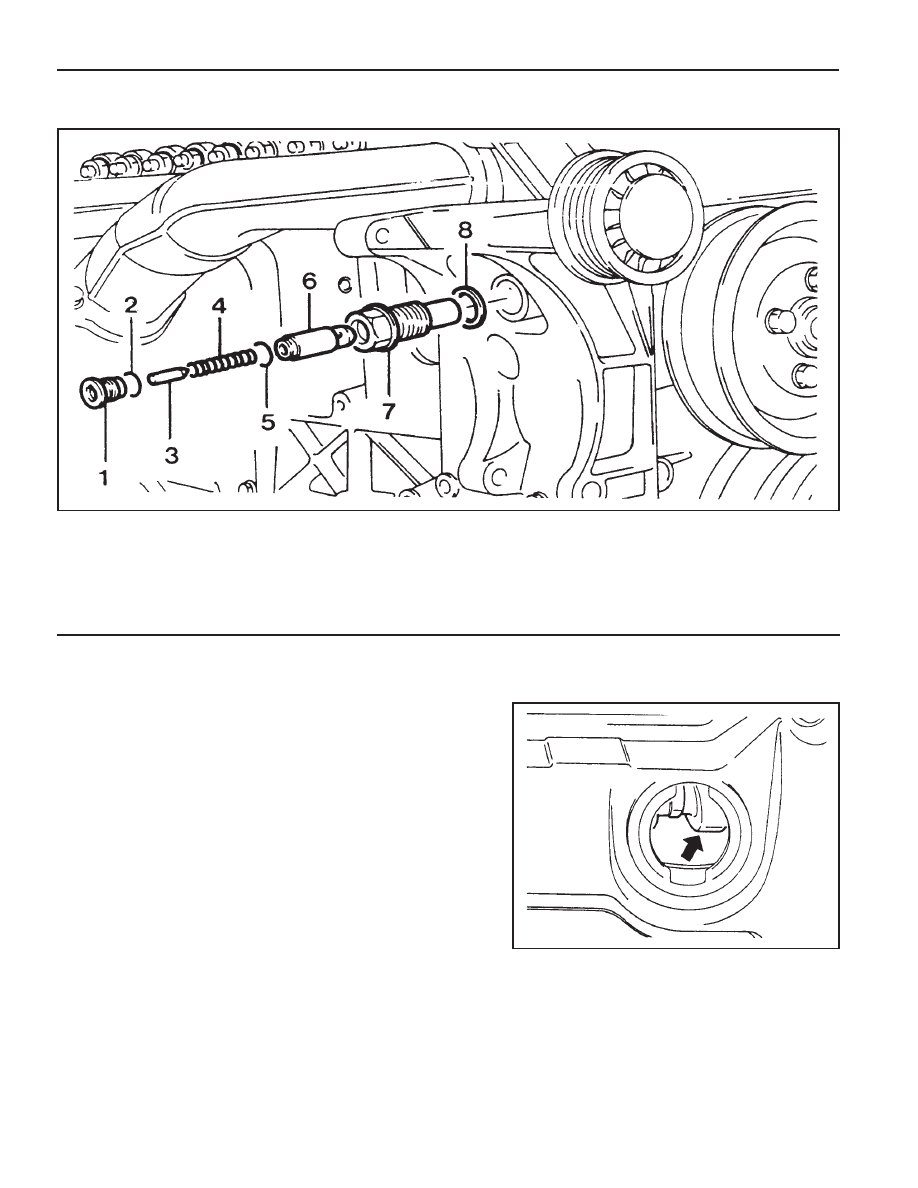
CHAIN TENSIONER
1 Screw Plug . . . . . . . . . . . . 40 Nm
2 Seal
3 Filler Pin
4 Compression Spring
5 Snap Ring
6 Thrust Pin
7 Chain Tensioner Housing . . . . . . 72-88 Nm
8 Seal
Removal Procedure
1. Position the No.1 cylinder to TDC (OT).
Notice
Remove the oil filler cap at adjustment position, and check
whether the intake camshaft cam’s lobe (arrow) stays in the
upper side.
2. Cover the alternator with a clean cloth.
3. Release the tension by unscrewing the screw plug once.
Notice
In case that the tension is reduced by unscrewing the screw
plug, reinstall after completely removing the chain tensioner.
If the chain tensioner is tightened again without completely
reducing its tension, then the detent spring doesn’t return
to the original position and the tension gets excedded.

M162 ENGINE MECHANICAL 1B1-73
Installation Procedure
1. Connect the thrust pin (6) and the snap ring (5) to the chain
tensioner housing (7).
Notice
When connecting the thrust pin, push in the thrust pin far
enough so that it doesn’t protrude at the chain tensioner
housing.
4. Carefully unscrew the screw plug (1), and remove the seal
(2).
Notice
z
For the removal of screw plug, be careful that it can be
jumped out due to the force of compression spring.
z
Remove the screw plug only when the seal and
compression spring are damaged.
5. Carefully remove the filler pin (3), compression spring (4),
snap ring (5), and the thrust pin (6).
6. Remove the chain tensioner housing (7) and the seal (8).
3. Insert the compression spring (4) with the filler pin (3) into
chain tensioner housing.
2. Install the chain tensioner housing (7), thrust pin (6), snap
ring (5), and the seal (8).
Installation Notice
Tightening Torque
35 - 40 Nm
1B1-74 M162 ENGINE MECHANICAL
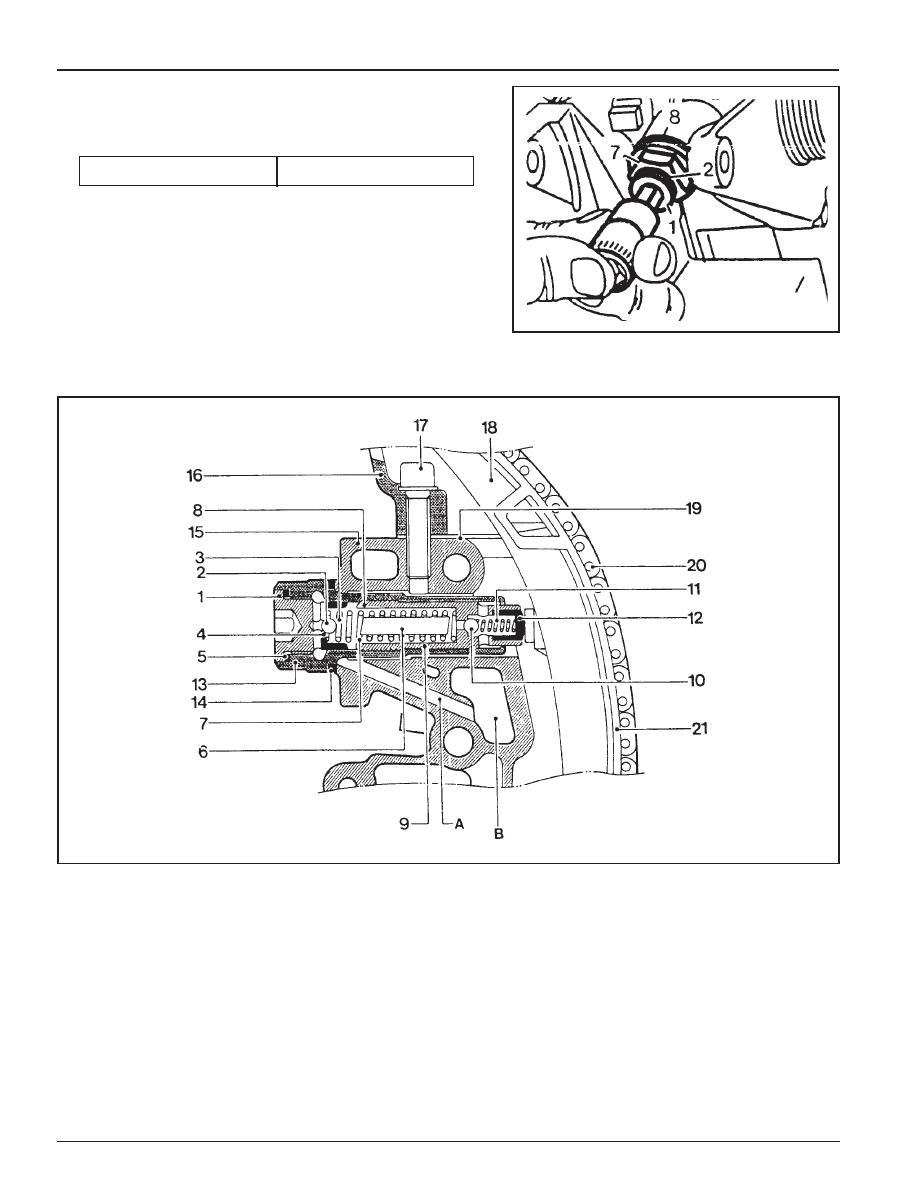
4. Lightly apply the grease to the seal (2) and install the screw
plug (1).
Installation Notice
Sectional View
1 Screw Plug
2 Ball (Nonreturn Valve)
3 Compression Spring
4 Ball Guide
5 Seal (Aluminum)
6 Filler Pin
7 Compression Spring
8 Snap Ring
9 Thrust Pin
10 Ball (Nonreturn Valve)
11 Compression Spring
12 Thrust Piece
13 Chain Tensioner Housing
14 Seal
15 Timing Gear Case Cover
16 Cylinder Head
17 Bolt / Washer
18 Tensioning Rail
19 Cylinder Head Gasket
20 Timing Chain
21 Tensioning Rail Base (Sliding Surface)
A Oil Supply Hole
B Chain Tensioner Oil Storage Hole
5. Check for leaks by operating the engine.
Tightening Torque
40 Nm
Нет комментариевНе стесняйтесь поделиться с нами вашим ценным мнением.
Текст