Isuzu D-Max / Isuzu Rodeo (TFR/TFS). Manual — part 1014
CAB 10-1
SECTION 10
CAB
TABLE OF CONTENTS
PAGE
Servicing. . . . . . . . . . . . . . . . . . . . . . . . . . . . . . . .10- 2
Windshield and Back Light Glasses . . . . . . . . . . . . . . . . . . . . 10- 3
Sliding Rear Window Assembly . . . . . . . . . . . . . . . . . . . . . ...10- 8
Doors . . . . . . . . . . . . . . . . . . . . . . . . . . . . . . . . ..10- 12
Instrument Panel. . . . . . . . . . . . . . . . . . . . . . . . . . . . 10- 26
Console Box. . . . . . . . . . . . . . . . . . . . . . . . . . . . . ...10- 31
Head Lining . . . . . . . . . . . . . . . . . . . . . . . . . . . . . . 10- 33
Quarter Glass (Space Cab) . . . . . . . . . . . . . . . . . . . . . . . ...10- 36
Front Seat . . . . . . . . . . . . . . . . . . . . . . . . . . . . . . ...10- 37
Front and Rear Seat Belt . . . . . . . . . . . . . . . . . . . . . . . . ...10- 39
Jump Seat. . . . . . . . . . . . . . . . . . . . . . . . . . . . . . ...10- 40
Jump Seat Belt. . . . . . . . . . . . . . . . . . . . . . . . . . . . ...10- 41
INDEX
10-2 CAB
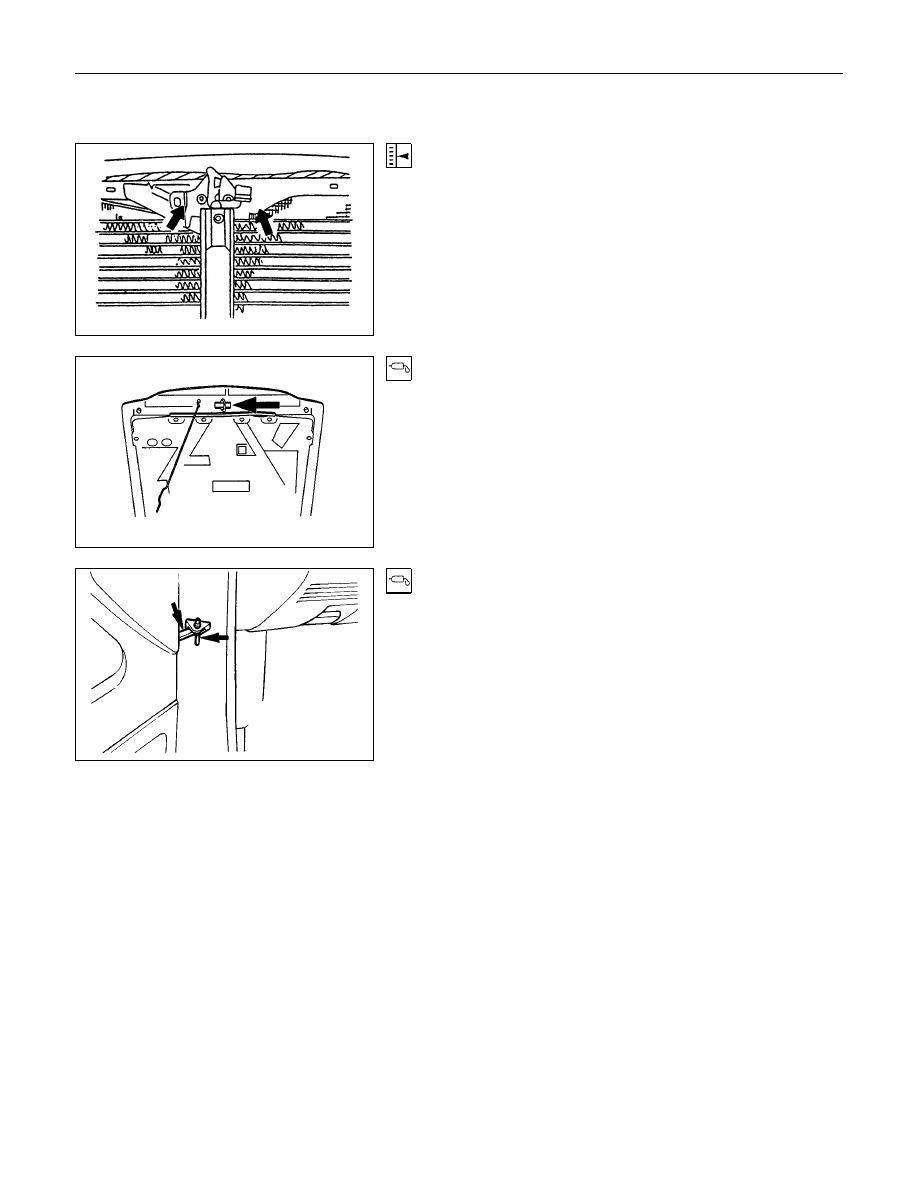
SERVICING
Engine Hood Lock
Align the engine hood lock with the installation holes.
Engine Hood Striker
Apply a light coat of grease to the striker.
Door Checker Arm and Pin
Apply a light coat of grease to the checker arm and pin.

CAB 10-3
WINDSHIELD AND BACK LIGHT GLASSES
GENERAL DESCRIPTION
This vehicle uses two types of safety glass: (1) laminated safety plate, for the windshield, and (2) solid tempered
safety plate, for the back glass.
The windshield glass is one-piece and is directly retained in the windshield opening by the adhesive.
When replacing a cracked windshield glass, it is very important that the cause of the glass breakage be determined
and the condition corrected before a new glass is installed. Otherwise, it is possible that a small obstruction or high
spot somewhere around the windshield opening will continue to crack or break the newly installed windshield. This
is especially true when the strain on the glass caused by this obstruction is increased by such conditions as wind
pressures, extremes of temperature, motion of the vehicle, etc. The procedure for removal of the windshield
applies to the complete windshield assembly.
WINDSHIELD GLASS
BACK LIGHT GLASS
10-4 CAB
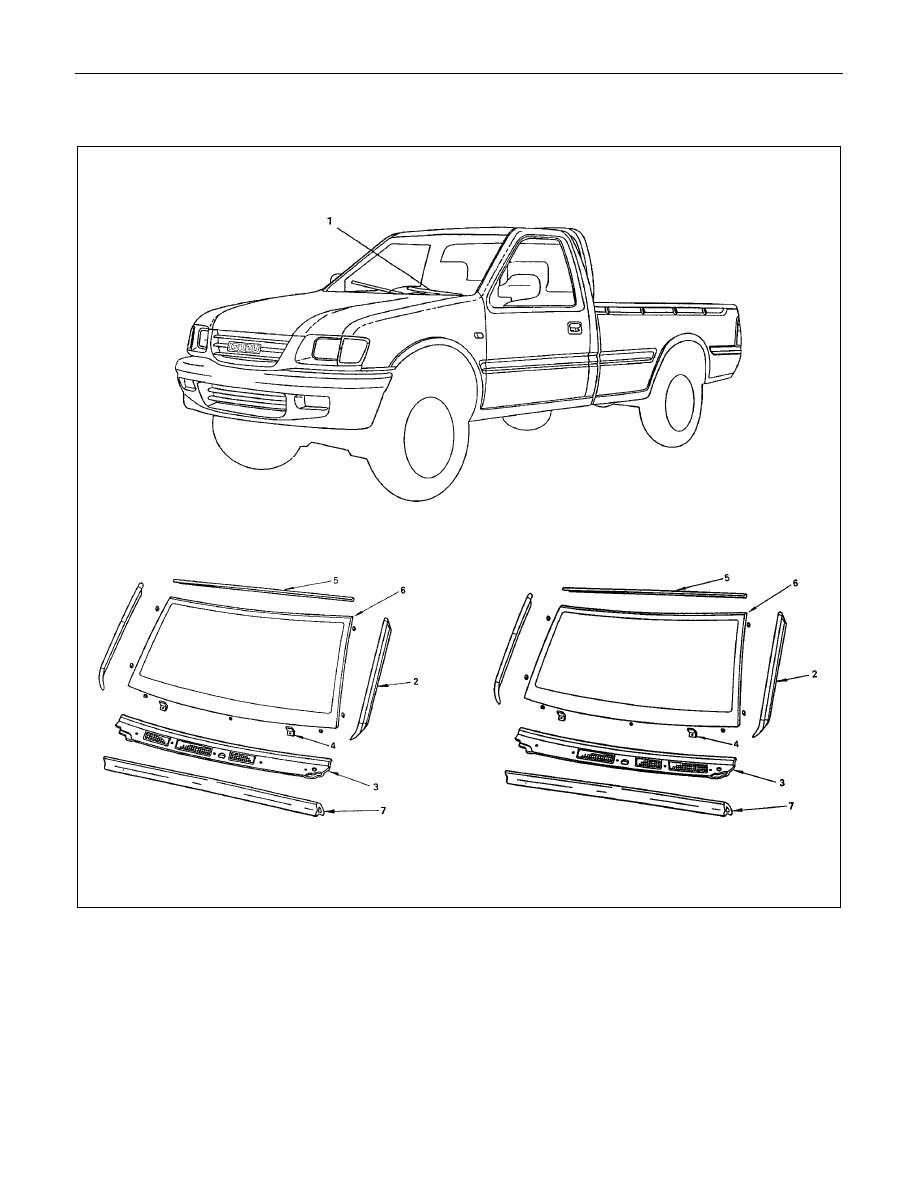
REMOVAL AND INSTALLATION
For RHD model
For LHD model
Removal Steps
1. Wiper arm assembly
2. Side moulding
3. Vent cowl cover
4. Windshield stopper
5. Upper moulding
▲
6. Windshield glass
7. Engine hood rear seal
Installation Steps
▲
7. Engine hood rear seal
▲
6. Windshield glass
▲
5. Upper moulding
▲
4. Windshield stopper
3. Vent cowl cover
▲
2. Side moulding
1. Wiper arm assembly
Нет комментариевНе стесняйтесь поделиться с нами вашим ценным мнением.
Текст