Isuzu D-Max / Isuzu Rodeo (TFR/TFS). Manual — part 1808
MSG MODEL (2WD) 7B-9
Engine Lifting Hanger
1. Attach the engine lifting hanger to the front portion of the
engine.
2. Attach the lifting wire to both ends of the engine lifting
hanger.
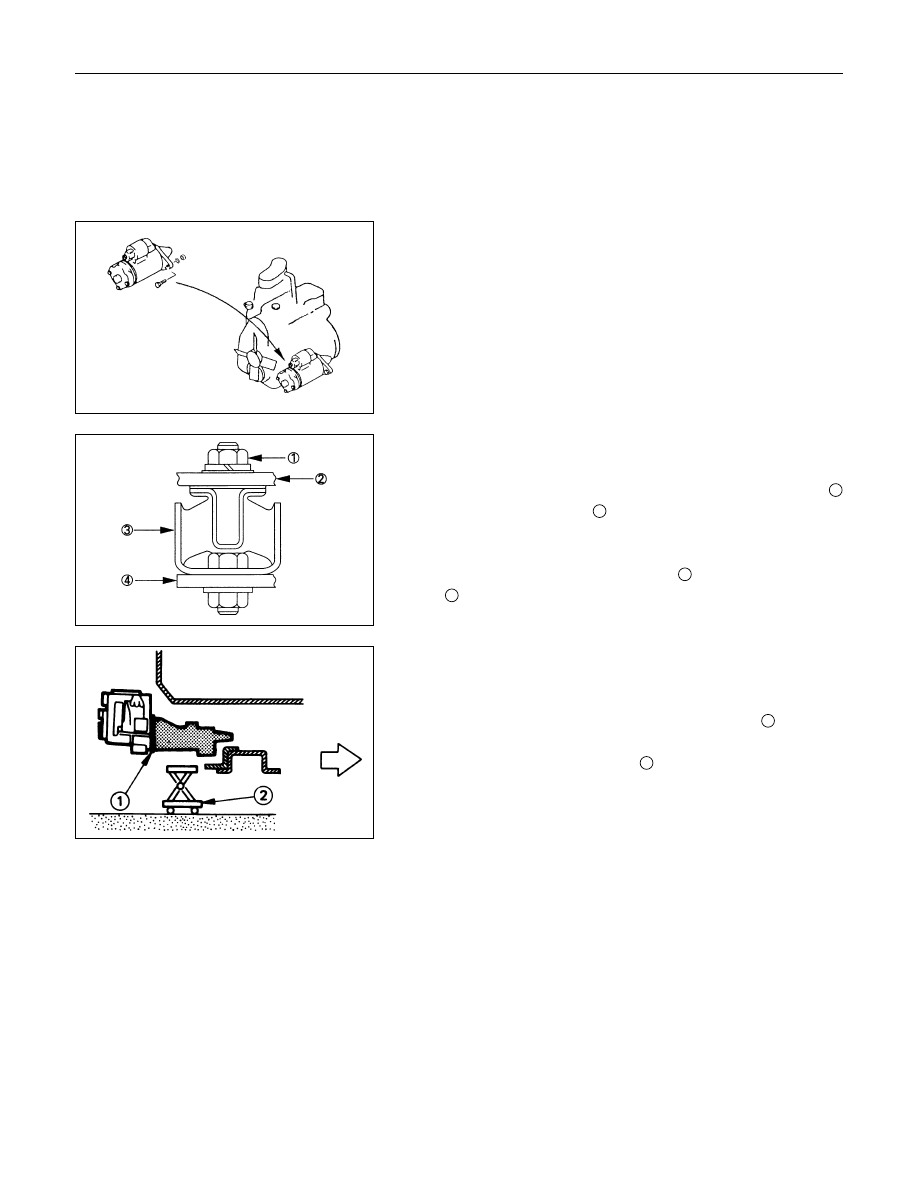
Starter Motor
Remove the starter motor motor from the engine rear plate.
Transmission
1. Support the transmission with a transmission jack.
2. Remove the engine rear mounting bracket bolts and nuts
1
from the transmission
2
.
3. Remove the bracket from No.3 crossmember.
4. Loosen the nuts for the rear mounting rubber.
5. Remove the rear mounting rubber
3
from the transmission
4
.
6. Remove the gear control box from the transmission.
7. Remove the transmission from the engine.
The removal of the transmission will require the cooperative
efforts of two mechanics.
1) Remove the transmission nuts and bolts
1
from the
engine rear plate.
2) Place a transmission jack
2
beneath the transmission .
Do not raise the transmission jack.
7B-10 MSG MODEL (2WD)
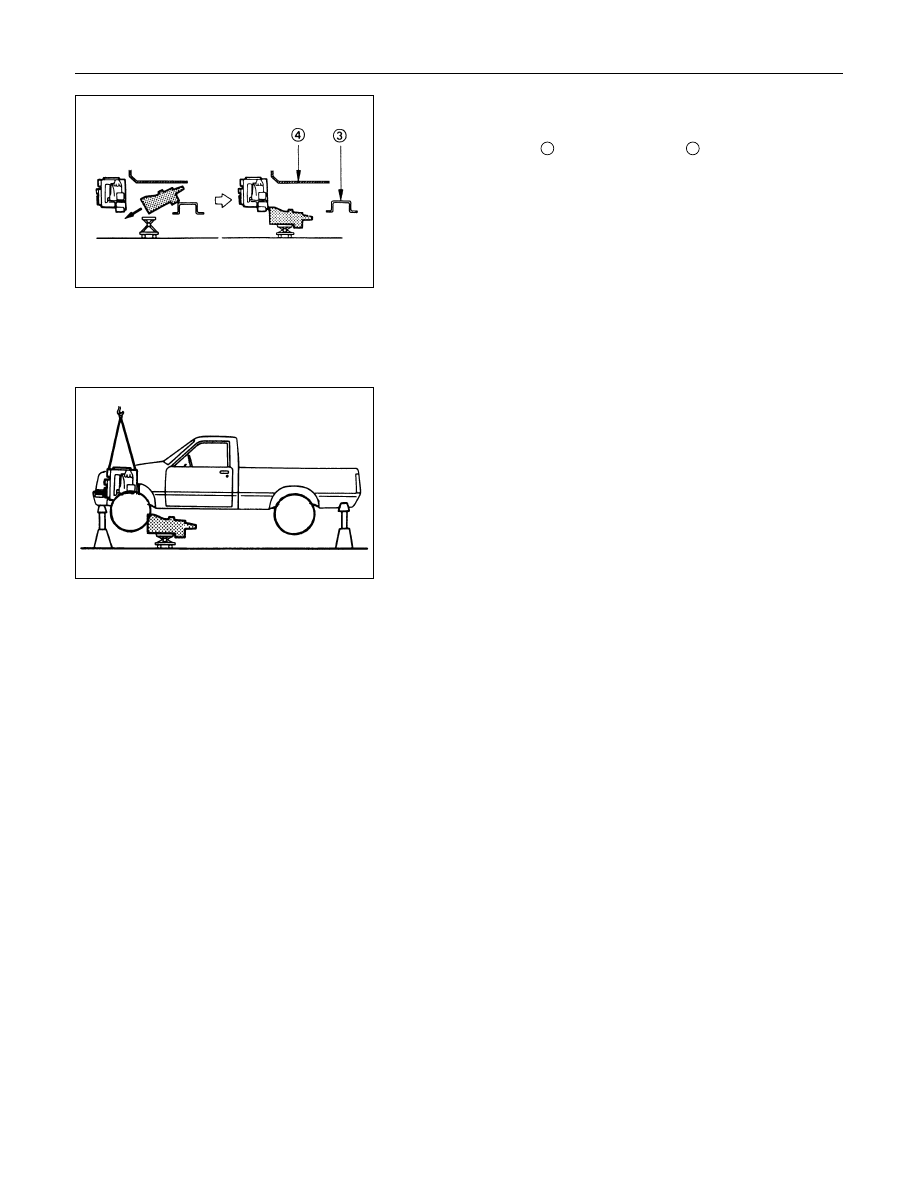
3) Manually move the transmission as far as possible toward
the rear of the vehicle (into the space between the No.3
crossmember
3
and the floor panel
4
.
4) Lower the clutch housing end of the transmission toward the
transmission jack.
The rear of the transmission is supported by the No.3
crossmember at this time.
5) Firmly grasp the transmission rear cover (1st mechanic).
Raise the transmission jack toward the transmission (2nd
mechanic).
Carefully lower the transmission onto the transmission jack.
The transmission must be centered on the transmission
jack.
8. Carefully pull the transmission jack with the transmission
from beneath the vehicle.
MSG MODEL (2WD) 7B-11
Important Operations - Installation
Follow the removal procedure in the reverse order to perform
the installation procedure.
Pay careful attention to the important points during the
installation procedure.
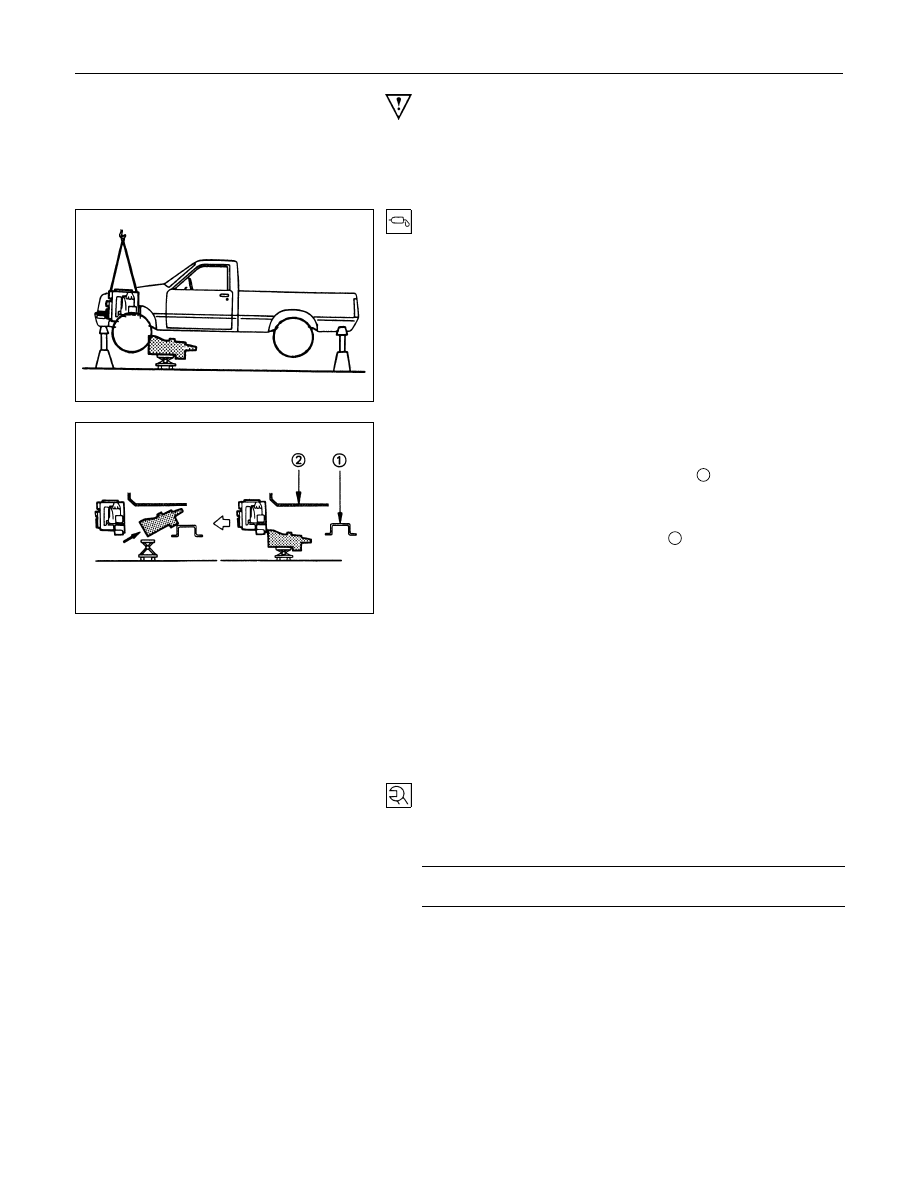
Transmission
1. Apply a thin coat of molybdenum disulfide grease to the top
gear shaft spline.
2. Place the transmission on a transmission jack.
3. Carefully move the transmission jack and transmission into
position behind the engine.
4. Slowly operate the transmission jack to raise the
transmission until the rear of the transmission is at the
same level as the No.3 crossmember
1
.
5. Manually support the transmission rear cover.
Move the transmission into position between the No.3
crossmember and the floor panel
2
.
6. Slowly raise the transmission jack until the front of the
transmission is aligned with the rear of the engine.
The slope of the engine and the transmission must be the
same.
7. Install the gear control box the transmission.
8. Align the top gear shaft spline with the clutch drive plate
spline.
9. Install the transmission to the engine.
Tighten the transmission nuts and bolts to the specified
torque.
Transmission Nut and Bolt Torque
N
⋅m (kgf⋅m/lb⋅ft)
M10 : 40
± 10 (4.1 ± 1.0/30 ± 7.2)
M12 : 78
± 16 (8.0 ± 1.6/58 ± 12)
7B-12 MSG MODEL (2WD)
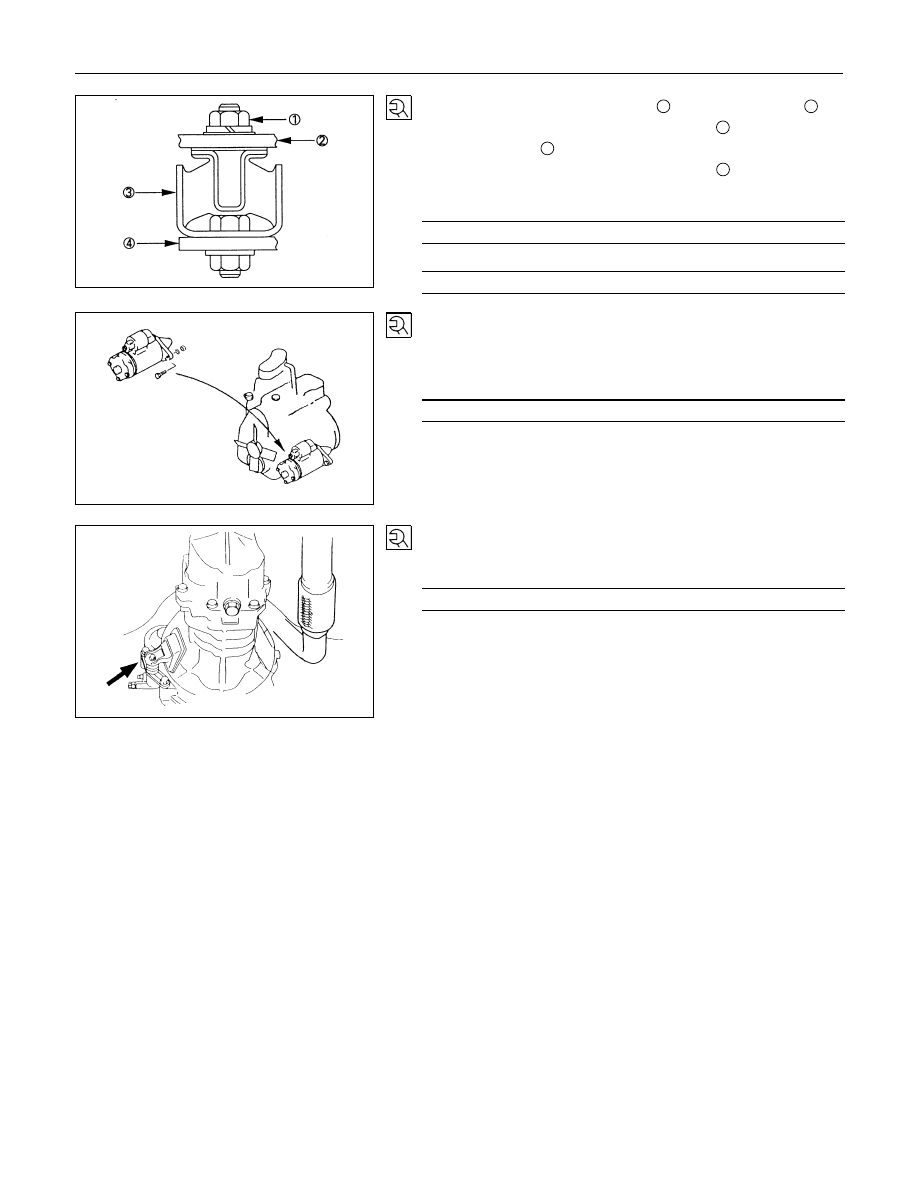
10.Install the rear mounting rubber
3
to the transmission
2
.
Install the rear mounting rubber
3
to the No.3
crossmember
4
.
11.Tighten the rear mounting rubber nuts
1
to the specified
forque.
Rear Mounting Rubber Nut Torque
N
⋅m (kgf⋅m/lb⋅ft)
41
± 4.9 (4.2 ± 0.5 / 30 ± 3.6)
Mounting Bolt Torgue
N
⋅m (kgf⋅m/lb⋅ft)
41
± 4.9 (4.2 ± 0.5 / 30 ± 3.6)
Starter Motor
1. Install the starter motor to the engine rear plate.
2. Tighten the starter motor bolts to the specified torque.
Starter Motor Torque
N
⋅m (kgf⋅m/lb⋅ft)
78
± 16 (8.0 ± 1.6 / 58 ± 12)
Slave Cylinder
Install the slave cylinder to the transmission case.
Slave Cylinder Bolt Torque
N
⋅m (kgf⋅m/lb⋅ft)
78
± 16 (8.0 ± 1.6 / 58 ± 12)
Harness Connector
Connect the back up light switch connector and speedometer
sensor connector.
Нет комментариевНе стесняйтесь поделиться с нами вашим ценным мнением.
Текст