Isuzu Rodeo UE. Manual — part 261

6E1–415
RODEO X22SE 2.2L ENGINE DRIVEABILITY AND EMISSION
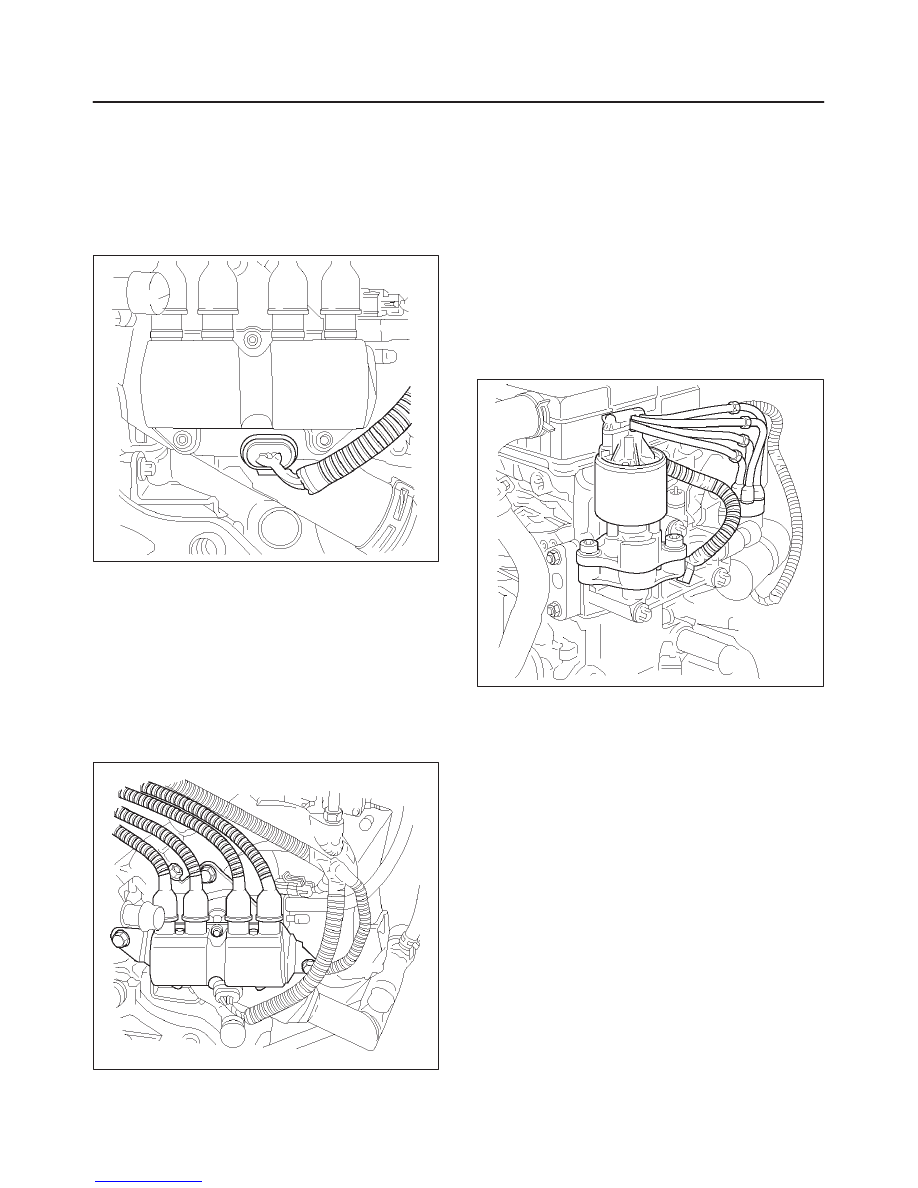
type spark plug with the same physical dimensions as the
original equipment spark plug.
3. Check the gaskets for damage and replace if
necessary.
4. Measure the spark plug gap. The specification is 1.05
mm (0.040”).
5. Adjust the spark gap by bending the grounded
electrode.
014RX048
Installation Procedure
1. Tighten the spark plug to the 25 Nm (18 lb ft).
2. Push the spark plug cable in until it snaps in.
3. Install spark plug cover onto valve cover and secure it
with four retaining bolts.
014RX049
Spark Plug Cables
Spark Plug Cables
The cable contains a synthetic conductor which is easily
damaged. Never stretch or kink the cable. Disconnect the
cable from spark plug and the ignition coil.
The original equipment cables and the ignition coil are
marked to show correct location of the cables. If spark
plug cables or the ignition coil are replaced previously,
before cables are removed from the ignition coil, mark the
cables and the coil so they can be reconnected in the
same position.
014RX050
Inspection Procedure
NOTE: Never puncture the spark plug cable’s insulation
with a needle or the pointed end of a probe into the cable.
An increase in resistance would be created which would
cause the cable to become defective.
1. If the cable has broken or cracked insulation, it must
be replaced.
2. If the terminals are corroded or loose, the cable must
be replaced.
3. Check that the cable resistance does not exceed 10 k
W
per foot.
014RX051
6E1–416
RODEO X22SE 2.2L ENGINE DRIVEABILITY AND EMISSION
EMISSIONS Catalytic Converter
Catalytic Converter
Refer to Engine Exhaust.
Air Conditioning Relay
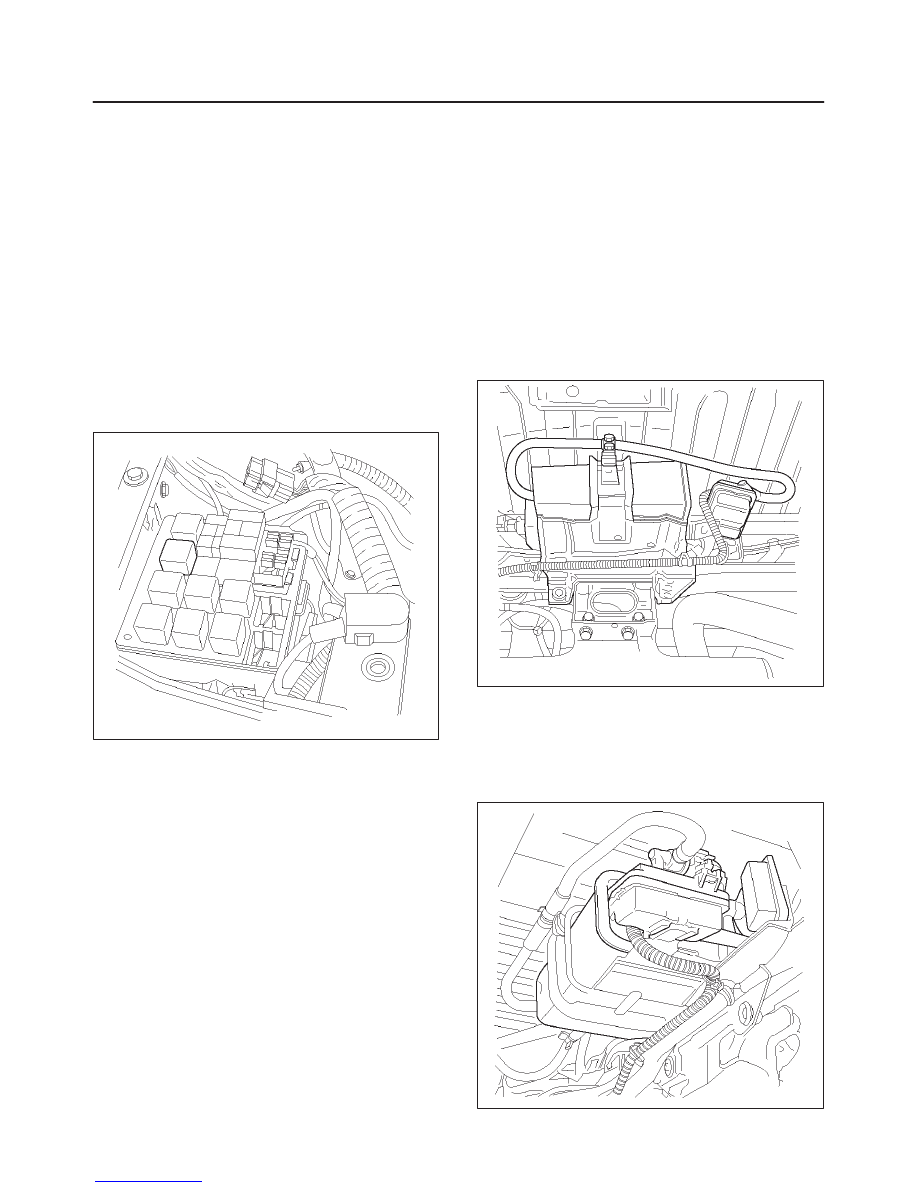
Removal Procedure
1. Remove the fuse and relay box cover at right side of
engine room.
2. Refer to the diagram on the cover to determine which
is the correct relay.
3. Insert small screwdriver or use thumb pressure to
release the retainer of the relay.
4. Pull the relay straight up and out of the fuse and relay
box.
014RX052
Installation Procedure
1. Insert the relay into the correct place in the fuse and
relay box with the catch slot aligned to retainer.
2. Press down until the catch of retainer engages.
3. Install fuse and relay box cover.
Ignition Timing Adjustment
Ignition Timing Adjustment
There is no timing adjustment. The timing signal is
furnished by the CKP and the CMP signal. PCM control
the ignition timing.
EVAP Canister Hoses
EVAP Canister Hoses
To see the routing of the EVAP canister hoses, refer to
Vehicle Emission Control Information in Diagnosis or
Emission Label located bottom side ofthe hood. Use
6148M or equivalent when you replace the EVAP canister
hoses.
EVAP Canister
Removal Procedure
1. Disconnect all hoses.
2. Remove two mounting bracket nuts.
Inspection Procedure
1. Inspect the hoses for cracks, damage and leaks.
2. Inspect the canister for damages.
014RX001
Installation Procedure
1. Install EVAP canister onto crossmember with two
mounting bolts.
2. Connect all hoses and secure them with clamps.
014RX054

6E1–417
RODEO X22SE 2.2L ENGINE DRIVEABILITY AND EMISSION
EVAP Canister Vent Solenoid
Removal Procedure
1. Disconnect the negative battery cable.
2. Disconnect electrical connector at the vent valve.
3. Disconnect vent hoses from the solenoid valve.
4. Remove the filter and vent valve solenoid assembly
by pulling it out from bracket.
5. Remove a screw holding the solenoid.
6. Remove vent valve solenoid from filter.
014RX055
Installation Procedure
1. Install the vent valve solenoid to the filter and secure it
witha screw.
2. Insert the vent valve assembly onto EVAP canister
bracket.
3. Connect all hoses and secure them with clamps.
4. Connect electrical connector at vent valve solenoid.
5. Connect the negative battery cable.
014RX054
EVAP Canister Purge Valve So-
lenoid
Removal Procedure
1. Disconnect the negative battery cable.
2. Disconnect electrical connector from EVAP purge
solenoid located just front of the ignition coil.
3. Disconnect the vacuum hoses from the solenoid.
4. Remove the ignition coil. Refer toIgnition Coil
Removal Procedure.
014RX044
6E1–418
RODEO X22SE 2.2L ENGINE DRIVEABILITY AND EMISSION
5. Remove the three bolts holding the ignition coil
bracket.
6. Remove the ignition coil bracket with the purge
solenoid still attached to it.
7. Insert small screw driver into the catch from the
bottom hole to release the catch.
8. Slide EVAP purge solenoid out form the ignition
bracket.
014RX042
Installation Procedure
1. Insert EVAP purge solenoid valve onto the ignition
coil bracket.
2. Install the ignition coil bracket to back of intake
manifold.
3. Install the ignition coil. Refer to Ignition Coil
Installation Procedure.
4. Connect vacuum hoses and electrical connector at
the purge valve.
014RX044
Linear Exhaust Gas Recircula-
tion (EGR) Valve
Removal Procedure
1. Disconnect the negative battery cable.
2. Disconnect electrical connector at EGR valve.
3. Disconnect the electrical connector at Intake Air
Temperature Sensor.
4. Remove air intake duct. Refer to Air Intake Duct
Removal Procedure.
5. Remove crankshaft breather hose.
6. Remove two bolts holding EGR valve.
7. Remove EGR valve and gasket from the manifold.
057RX001
Inspection Procedure
1. Inspect the air passage for a restrtiction. If there is
restriction, remove the object. Do not use any type of
solvent, it may damage electrical system of EGR
valve.
Нет комментариевНе стесняйтесь поделиться с нами вашим ценным мнением.
Текст