Isuzu Rodeo UE. Manual — part 618
8F–45
BODY STRUCTURE
Adjustment
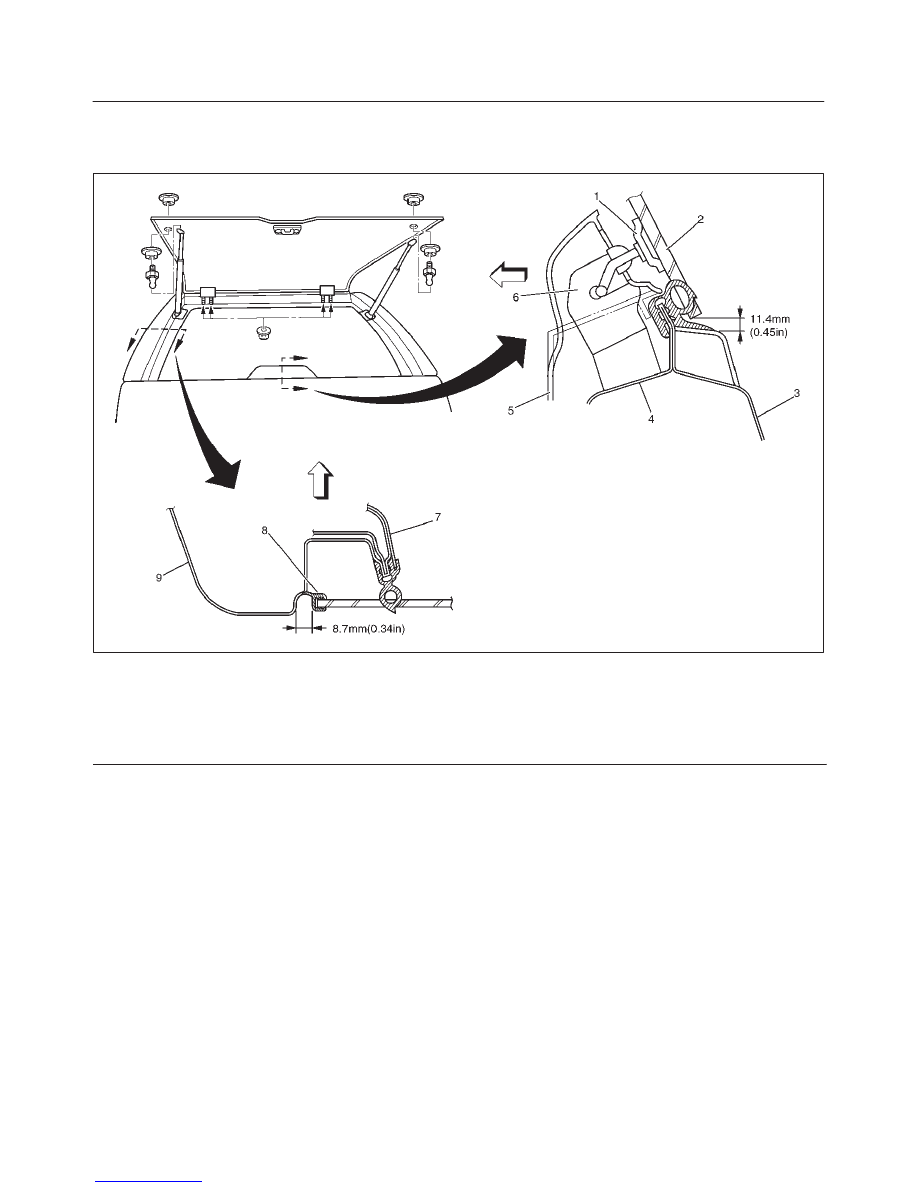
f
Hatchgate alignment is obtained by moving
hatchgate hinges.
682RW004
Legend
(1) Hatchgate Striker
(2) Hatchgate Glass
(3) Tailgate Outer Panel
(4) Tailgate Inner Panel
(5) Trim Cover
(6) Hatchgate Lock Assembly
(7) Quarter Trim
(8) Hatchgate Glass Seal
(9) Quarter Outer Panel
8F–46
BODY STRUCTURE
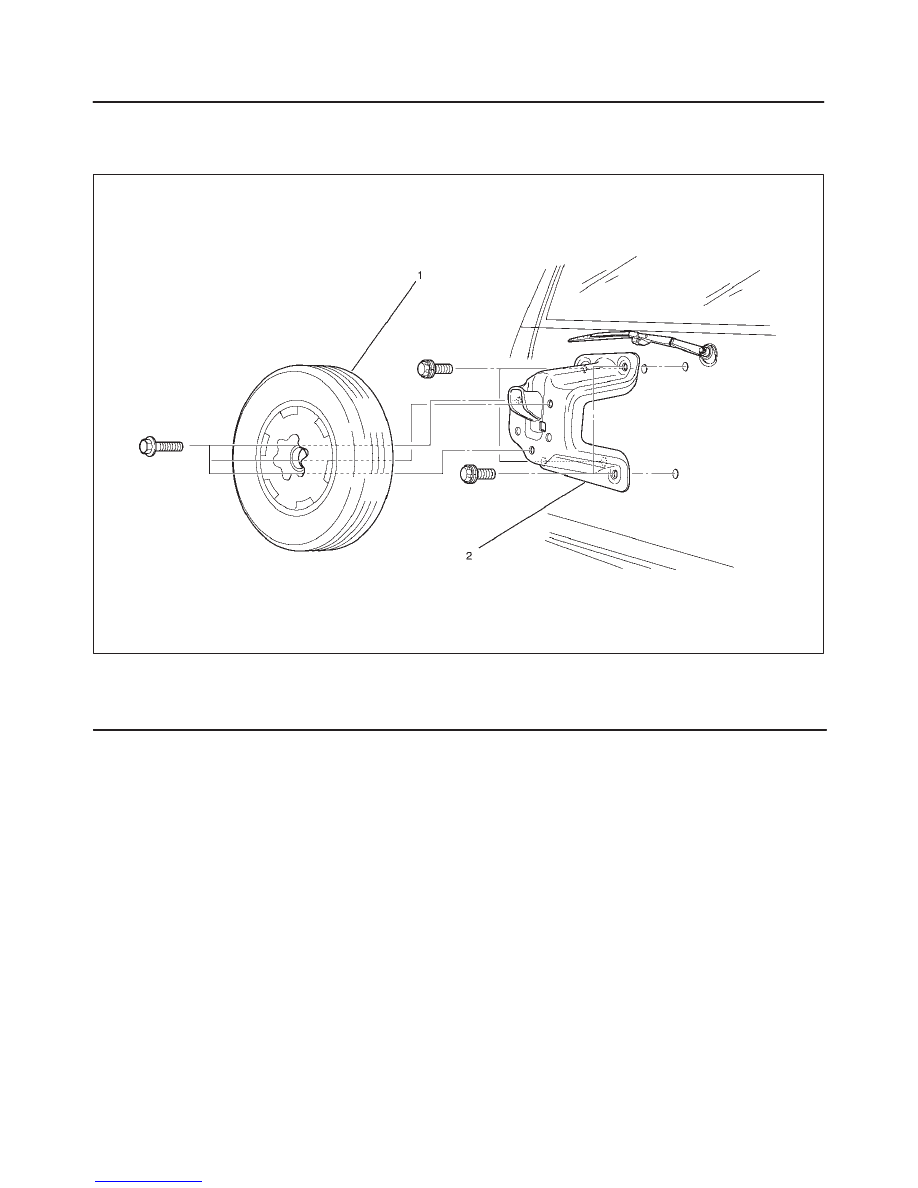
Spare Tire Carrier
Parts Location
530RW003
Legend
(1) Spare Tire
(2) Spare Tire Carrier
Removal
1. Remove spare tire (1).
2. Remove spare tire carrier (2) by using spare tire
carrier nut wrench J–34355.
Installation
1. Spare tire carrier.
f
Tighten the carrier fixing bolts to the specified
torque.
Torque : 31 N·m (23 lb ft)
2. Spare tire
f
Tighten the spare tire fixing bolts to the specified
torque.
Torque : 118 N·m (87 lb ft)
8F–47
BODY STRUCTURE
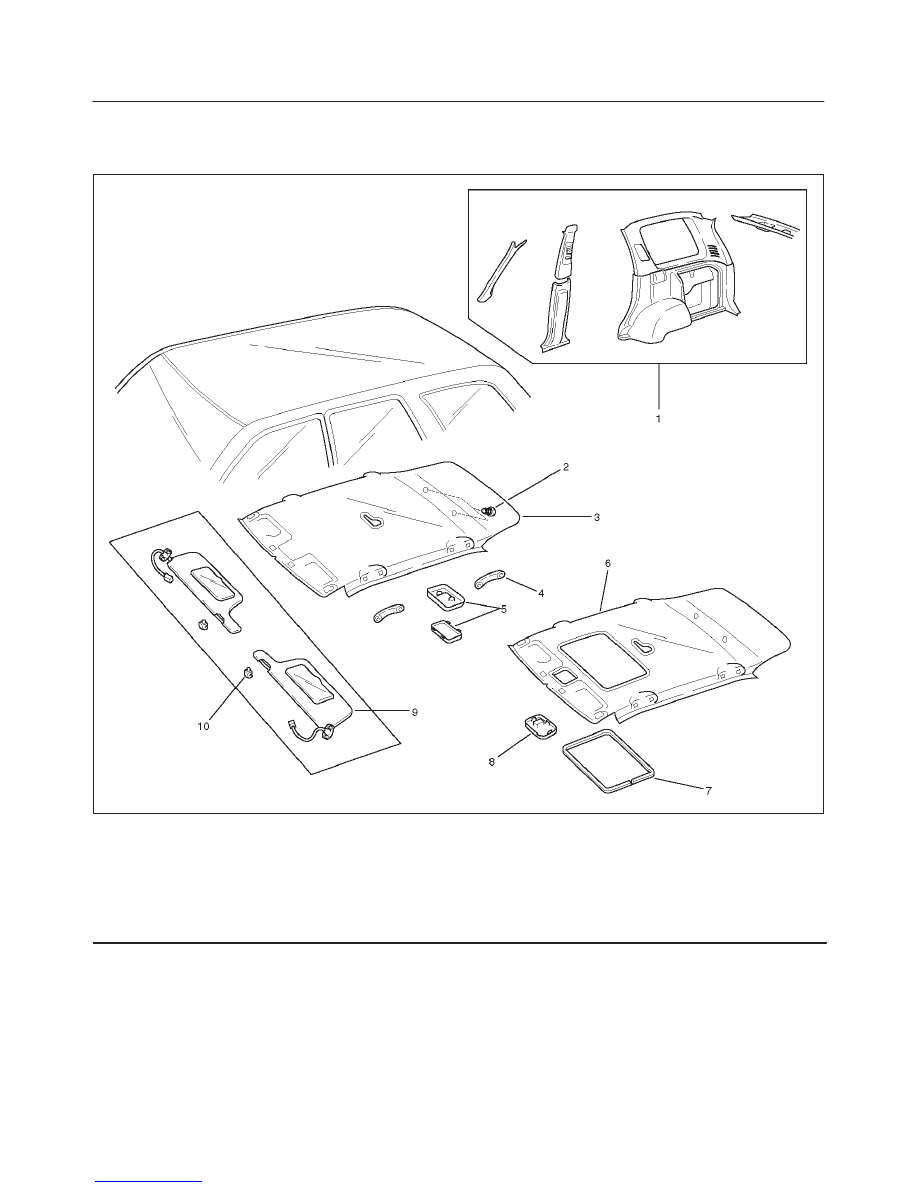
Headlining
Parts Location
666RW001
Legend
(1) Interior Trim Panels
(2) Clip
(3) Headlining (Without Sun Roof)
(4) Assist Grip
(5) Dome Light
(6) Headlinng (With Sun Roof)
(7) Sun Roof Finisher (With Sun Roof)
(8) Sun Roof Switch (With Sun Roof)
(9) Sunvisors
(10) Sunvisor Holder

8F–48
BODY STRUCTURE
Removal
1. Disconnect the battery ground cable.
2. Remove interior trim panels.
f
Refer to Interior Trim Panels in this section.
3. Remove dome light.
f
Remove the dome light lens and the fixing screws.
f
Disconnect the dome light connectors.
4. Remove sun roof switch.
f
Pry the clip free from the sun roof switch bracket
and disconnect the connector.
665RW002
5. Remove sunvisors.
f
Remove the fixing screw and pull out the sunvisor
holder (1) to remove it.
f
Disconnect the vanity mirror illumination connector.
743RS006
6. Remove sun roof finisher (With sun roof).
7. Remove headlining.
f
Remove the headlining fixing clips.
Installation
To install, follow the removal steps in the reverse order,
noting the following points.
1. Install the headlining so that the fixing clips will not
come off.
2. To install the sun roof finisher (1), first fit it in at one
place with the headlining (3) close to the sun roof
frame complete (2), then install the entire finisher
tightly by hitting it with a plastic hammer, not allowing
it to move up.
665RW003
Нет комментариевНе стесняйтесь поделиться с нами вашим ценным мнением.
Текст