Isuzu Rodeo UE. Manual — part 46

REAR SUSPENSION
3D–7
Shock Absorber
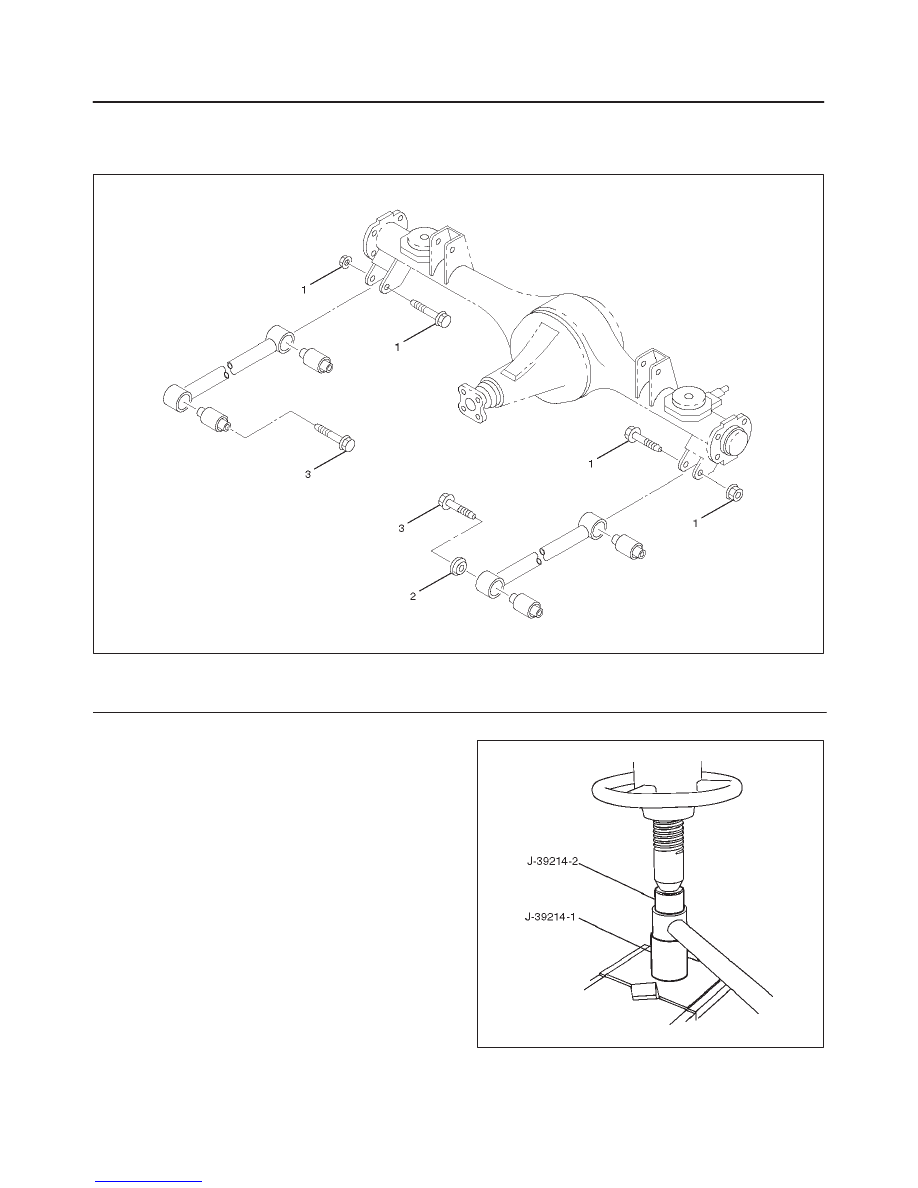
Shock Absorber and Associated Parts
461RW001
Legend
(1) Nut, Bush and Washer
(2) Shock Absorber
(3) Nut and Washer
Removal
1. Remove shock absorber fixing nut, bush and washer
(upper side).
2. Remove shock absorber fixing nut and washer (lower
side).
3. Remove shock absorber.
Inspection and Repair
Make necessary correction or parts replacement if wear,
damage, corrosion or any other abnormal condition are
found through inspection.
Check the following parts:
f
Shock absorber
f
Rubber bushing
NOTE: When mounting rubber bushings, be sure not to
use grease on bushings or any other nearby part.
Installation
1. Install shock absorber. When mounting shock
absorber, be sure not to use grease on bushings or
any other nearby part.
2. Install nut and washer (lower side), then tighten the
nut lightly. Retighten to the bolt and nut specified
torque after the vehicle is at curb height.
Torque: 78 N·m (58 lb ft)
3. Install nut, bush and washer (upper side), then tighten
the nut lightly. Retighten to the nut specified torque
after the vehicle is at curb height.
Torque: 20 N·m (14 lb ft)
3D–8
REAR SUSPENSION
Trailing Link
Trailing Link and Associated Parts
460RW005
Legend
(1) Bolt and Nut (Axle side)
(2) Protector (Left side only)
(3) Bolt (Frame side)
Removal
1. Remove the parking brake cable from the trailing link.
2. Remove the trailing link fixing bolt, nut and protector.
3. Remove trailing link.
Inspection and Repair
Make necessary correction or parts replacement if wear,
damage, corrosion or any other abnormal condition are
found through inspection.
1. Trailing link
2. Rubber bushing
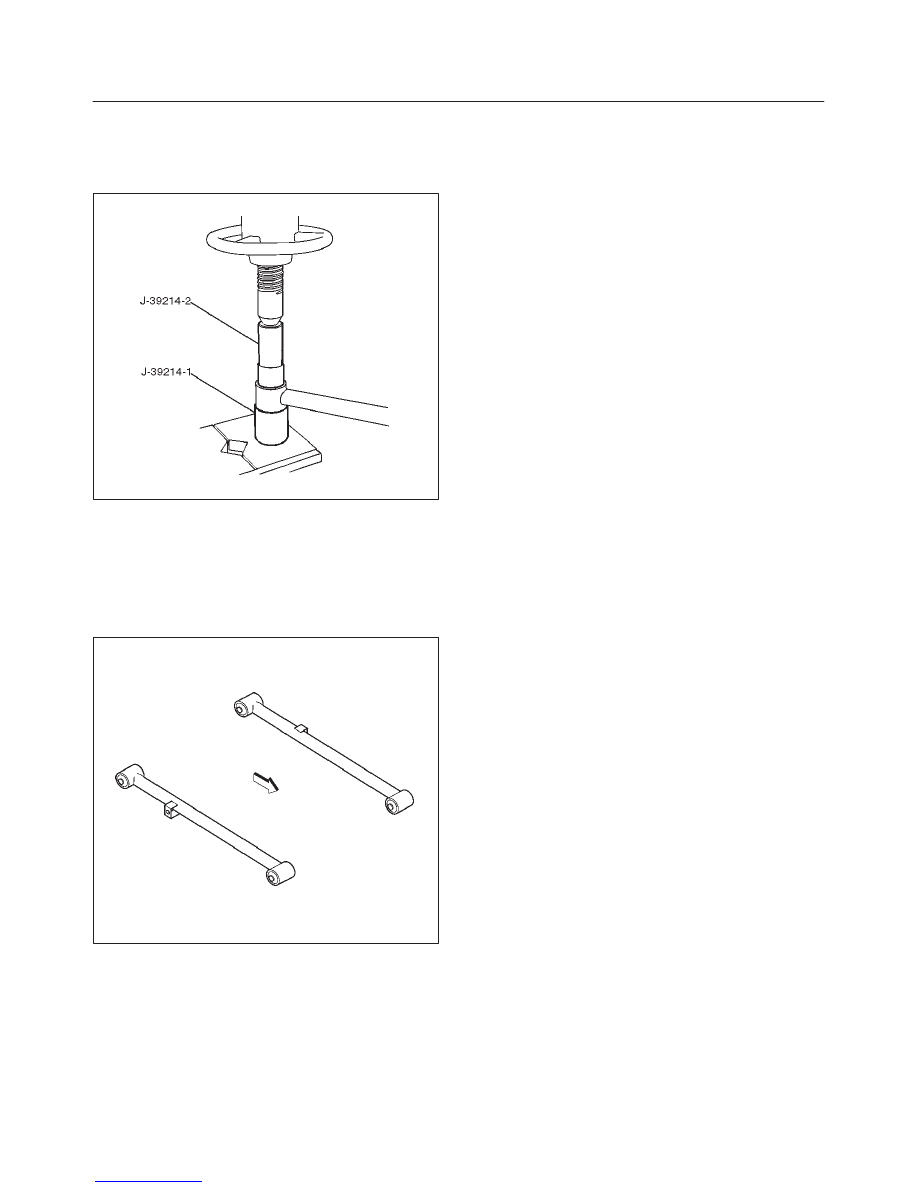
f
Remove the rubber bushing by using remover
J–39214.
901RW058
REAR SUSPENSION
3D–9
f
Install the rubber bushing by using installer
J–39214.
NOTE: When mounting rubber bushings, be sure not to
use grease on bushings or any other nearby part.
901RW059
Installation
1. Install trailing link. Make sure that the trailing link is in
its correct position.
NOTE: When mounting trailing link, be sure not to use
grease on bushings or any other nearby part.
460RW011
2. Install bolt, nut and protector. Tighten the bolts and
nuts lightly, then retighten them to the specified
torque after the vehicle is at curb height.
Torque: 137 N·m (101 lb ft)
3. Install parking brake cable.
CAUTION: The parking brake cable should not be
overstrained or slackened.
3D–10
REAR SUSPENSION
Upper Link
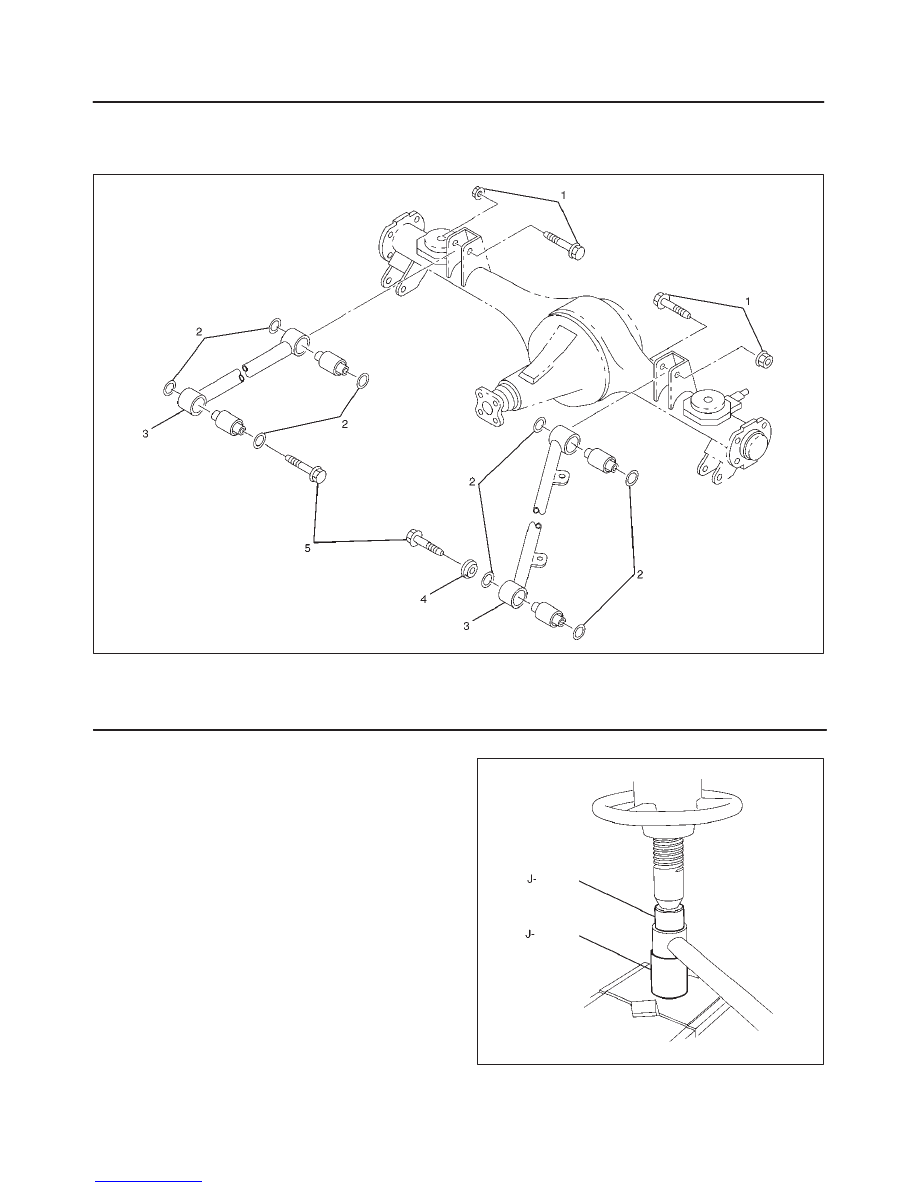
Upper Link and Associated Parts
460RW006
Legend
(1) Bolt and Nut (Axle side)
(2) Rubber Plate
(3) Upper Link
(4) Protector (Left side only)
(5) Bolt (Frame side)
Removal
1. Remove fuel tank. Refer to Engine Fuel in Engine
section.
2. Remove the speed sensor cable from the upper link.
3. Remove bolt, nut, rubber plate and protector.
4. Remove upper link.
Inspection and Repair
Make necessary correction or parts replacement if wear,
damage, corrosion or any other abnormal condition are
found through inspection.
1. Upper link
2. Rubber bushing
f
Remove the rubber bushing by using remover
J–xxxxx–x.
901RW158
Нет комментариевНе стесняйтесь поделиться с нами вашим ценным мнением.
Текст