Isuzu KB P190. Manual — part 641

Engine Mechanical – V6
Page 6A1–85
4
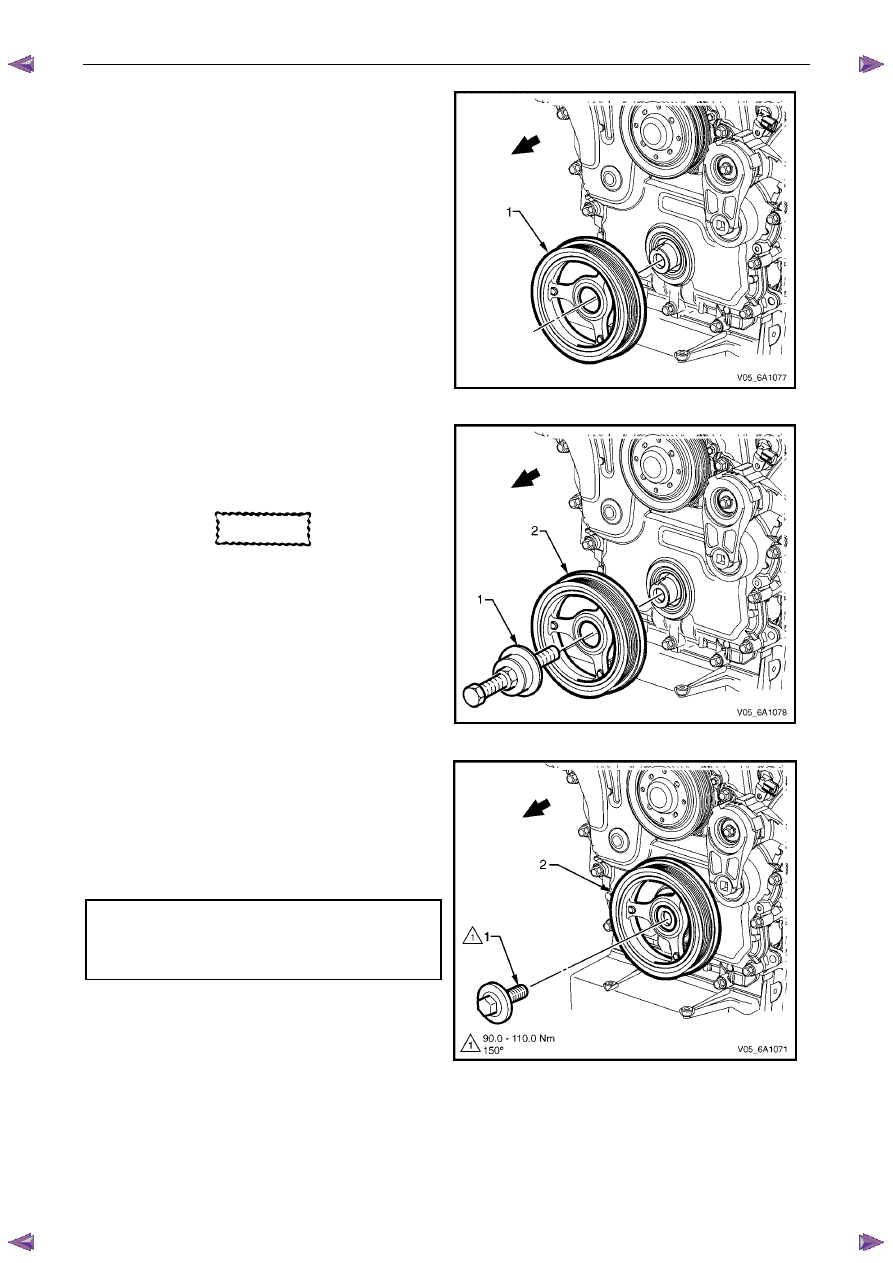
Remove the bolt (1) attaching the crankshaft balancer
assembly (2) to the crankshaft.
Figure 6A1 – 76
5
Remove the crankshaft balancer assembly (1) from
the crankshaft using the appropriate tool:
Tool No. J-41816 (2) or equivalent.
Figure 6A1 – 77
Clean and Inspect
1
Using a suitable non-corrosive cleaning solvent and a soft bristled parts cleaning brush, clean the crankshaft
balancer assembly.
Safety glasses must be worn when using
compressed air.
2
Dry the crankshaft balancer assembly using compressed air.
3
Inspect the crankshaft balancer assembly for the following fault conditions:
•
Hub to crankshaft inner surface for wear or damage,
•
Sealing surface for wear, grooving or scoring,
•
Rubber ring between the hub and the pulley for wear, chunking and general deterioration, and
•
Drive belt ribs of the pulley for damage.
Reinstall
CAUTION
Do not lubricate the crankshaft front oil seal
or crankshaft balancer sealing surfaces. The
crankshaft balancer must be installed onto a
dry seal.
1
Lubricate the crankshaft balancer assembly hub bore.
Engine Mechanical – V6
Page 6A1–86
2
Partially install the crankshaft balancer assembly onto
the crankshaft.
Figure 6A1 – 78
3
Using crankshaft balancer installer, Tool No.
J-41998-B (1), fully install the crankshaft balancer
assembly into the crankshaft.
CAUTION
To prevent damage to the crankshaft
threads, fully install crankshaft balancer
installer, Tool No. J-41998-B (1) into the
crankshaft before pressing the pulley and
balancer assembly.
Figure 6A1 – 79
4
Apply Loctite 272 or equivalent to the thread of a new
crankshaft balancer assembly retaining bolt (1).
5
Install the crankshaft balancer assembly retaining bolt
and tighten to the correct torque specification.
Crankshaft balancer retaining
bolt torque specification:
Stage 1 . . . 90.0 – 110.0 Nm
Stage
2 . . . . . . . ...150
°
Figure 6A1 – 80
Engine Mechanical – V6
Page 6A1–87
3.14 Crankshaft Front Seal
Replace
1
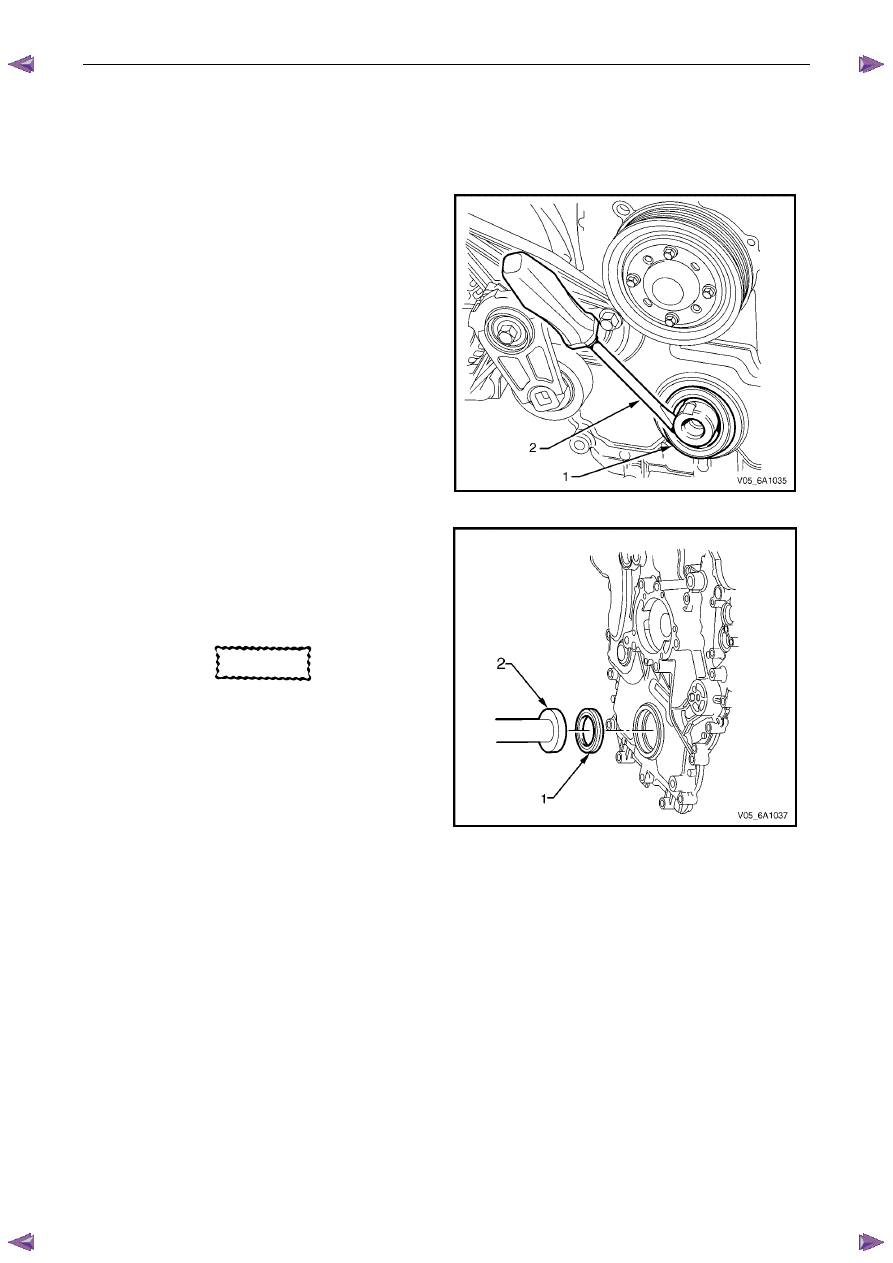
Remove the crankshaft balancer assembly, refer to 3.13 Crankshaft Balancer Assembly.
2
Using a flat bladed tool (2) or seal remover, Tool No.
E-308, carefully remove the crankshaft front seal (1)
from the front cover.
Figure 6A1 – 81
3
Using crankshaft front seal installer, Tool No. J-29184
(2) and a suitable hammer, install a new crankshaft
front seal (1) until fully seated against the front cover
housing.
4
Install the crankshaft balancer assembly, refer to 3.13
Crankshaft Balancer Assembly.
CAUTION
Do not lubricate the crankshaft front oil seal
or crankshaft balancer sealing surfaces. The
crankshaft balancer is installed into a dry
seal.
Figure 6A1 – 82
3.15 Front Cover Assembly
Remove
1
Drain the engine coolant, refer to 6B1_Engine Cooling.
2
Remove the water outlet pipe and coolant pump assembly, refer to 6B1_ Engine Cooling:
3
Remove the camshaft covers, refer to 3.12
Camshaft Cover.
4
Remove the crankshaft balancer assembly, refer to 3.13 Crankshaft Balancer Assembly.
5
Disconnect the purge vent hose from the water outlet pipe.
N O T E
Do not disconnect the power steering pipes or
drain the power steering fluid.
6
Remove the power steering pump reservoir mounting bracket, refer to 3.8 Power Steering Pump Bracket.
7
Remove the camshaft position sensor, refer to 6C1-3 Engine Management – V6 – Service Operations.
Engine Mechanical – V6
Page 6A1–88
N O T E
Do not disconnect the A/C compressor pipes.
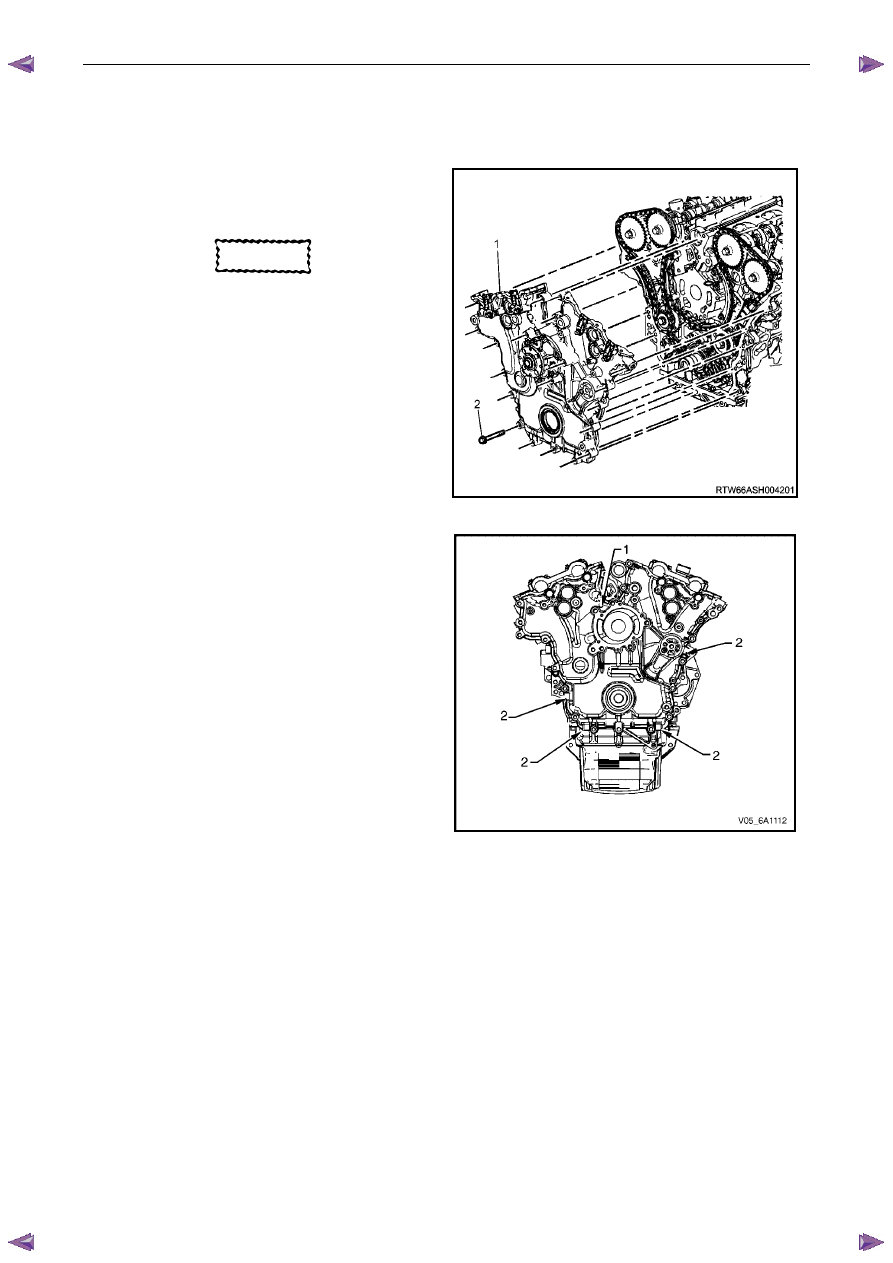
8
Remove the bolt (2), 22 places, attaching the front
cover assembly (1).
CAUTION
Only use the prise points and a bolt in the
jackscrew hole to remove the engine front
cover.
9
Loosely install a 10 x 1.5 mm bolt in the jackscrew
hole (1).
10
Using the prise points (2) located at the edge of the
front cover and the jackscrew, shear the RTV sealant.
Figure 6A1 – 83
Figure 6A1 – 84
Нет комментариевНе стесняйтесь поделиться с нами вашим ценным мнением.
Текст