Isuzu KB P190. Manual — part 1276
8A-166 ELECTRICAL-BODY AND CHASSIS
LIGHTING SYSTEM
REMOVAL AND INSTALLATION
3
2
1
RTW78ASH000101
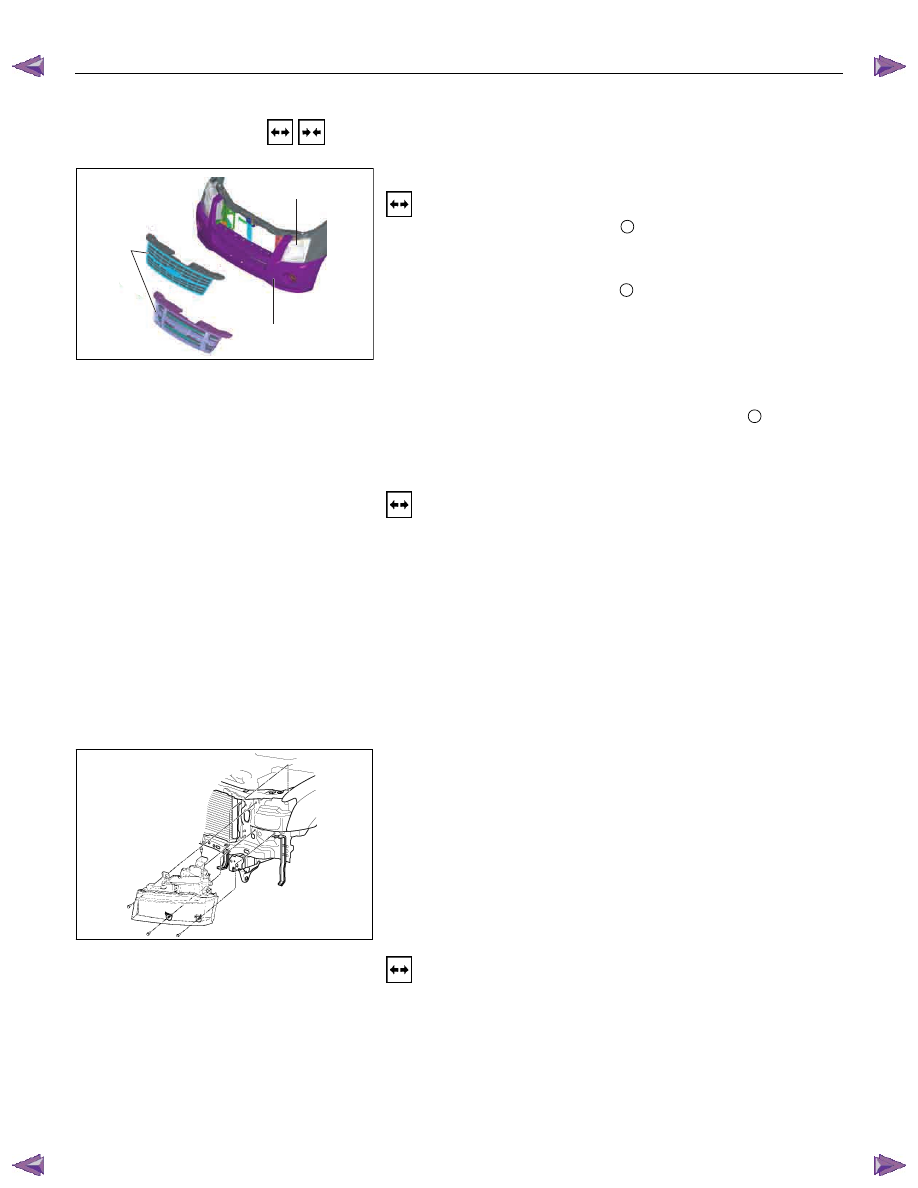
FRONT COMBINATION LIGHT (A type)
Removal
1. Remove the radiator grille
1
.
Refer to the removal procedure of the RADIATOR GRILLE
in Section 2B “SHEET METAL”.
2. Remove the front bumper
3
.
Refer to the removal procedure of the FRONT BUMPER in
Section 2A “FRAME AND BUMPER”.
3. Disconnect the headlight connector.
4. Disconnect the clearance light connector.
5. Disconnect the turn signal light connector.
6. Remove the front combination light assembly
2
.
• Remove four fixing screws.
HEADLIGHT ASSEMBLY (B type)
Removal
1. Open the bonnet.
2. Remove the front combination light assembly.
• Refer to "Front Combination Light Assembly" removal
procedure in this section.
3. Remove the radiator grille.
• Refer to "Radiator grille" removal procedure in 2B
section.
4. Remove the front bumper.
• Refer to "Front Bumper" removal procedure in 2B
section.
5. Disconnect headlight bulb connectors.
RTW580SH0008001
6. Remove the bolts of headlight assembly.
7. Remove the headlight assembly.
Installation
To install the front combination light assembly, follow the
removal procedure in reverse order.

ELECTRICAL-BODY AND CHASSIS 8A-167
HEADLIGHT (HALOGEN STD TYPE)
(A type)
Removal
1. Remove the head light socket.
2. Remove the headlight dust cover.
3. Slide out the lock spring.
4. Remove the bulb.
1
RTW78ASH000801
HEADLIGHT (HALOGEN PROJECTOR
TYPE)
Removal
1. Remove the head light socket.
2. Remove the headlight dust cover
1
.
1
RTW78ASH000901
3. Turn the bulb socket counterclockwise to remove it.
4. Remove the headlight bulb
1
.

8A-168 ELECTRICAL-BODY AND CHASSIS
HALOGEN HEADLIGHT BULB (B type)
Removal
1. Open the bonnet.
2. Disconnect the headlight bulb connectors.
RTW580SH000101
3. Turn the bulb counterclockwise to remove it.
Installation
To install the headlight, follow the removal procedure in
reverse order.
Pay close attention to the important points mentioned in the
following paragraphs.
Connector
Be absolutely sure that the headlight connector is securely
connected.
This will prevent a contact and an open circuit.
ELECTRICAL-BODY AND CHASSIS 8A-169
Installation
Follow the removal procedure in the reverse order to install the
headlight.
Pay close attention to the important points mentioned in the
following paragraphs.
Connector
Be absolutely sure that the headlight connector is securely
connected.
This will prevent a contact and an open circuit.
RTW780SH000901
This illustration is based on RHD model
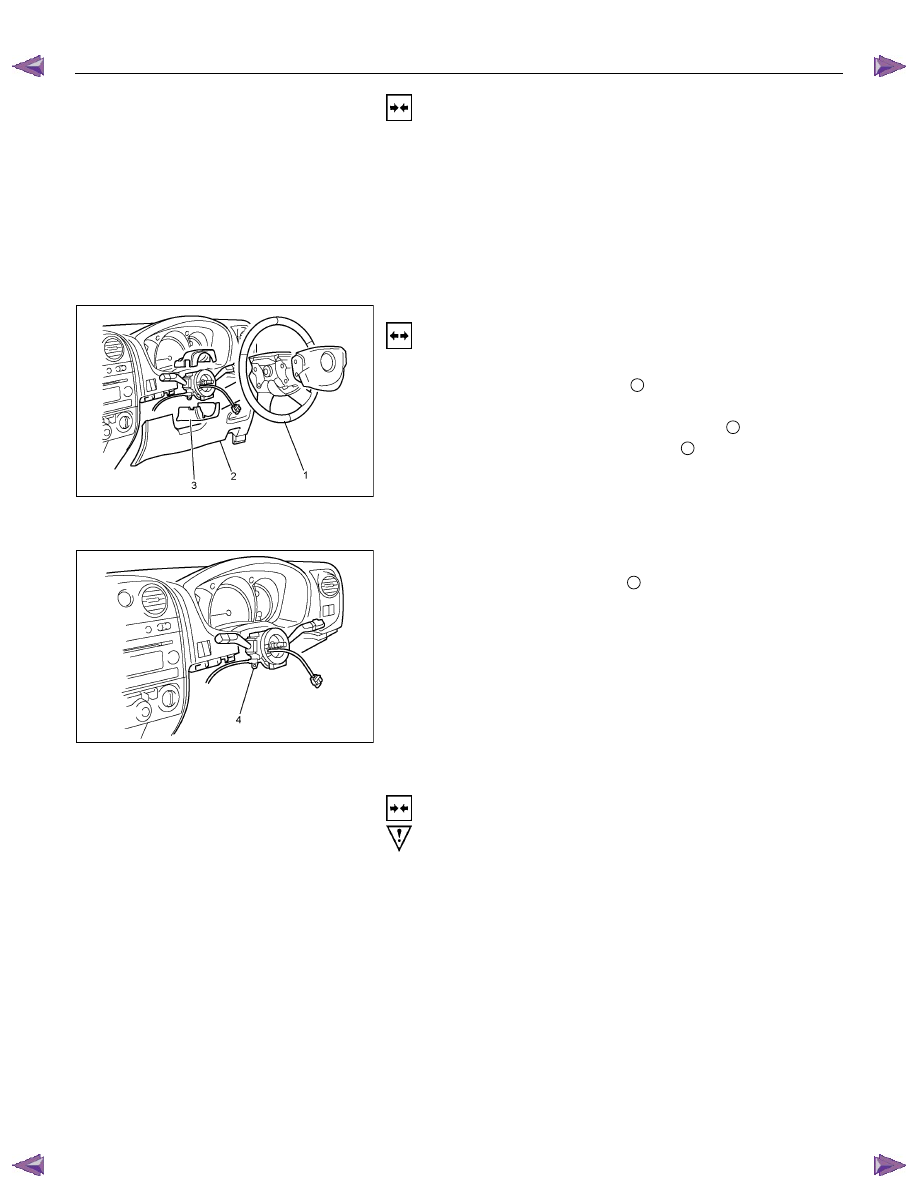
LIGHTING SWITCH
Removal
1. Disconnect the battery ground cable.
2. Remove the steering wheel
1
.
Refer to the “STEERING” Section of this manual.
3. Remove the Instrument panel lower cover
2
.
4. Remove the steering column cover
3
.
RTW780SH001001
This illustration is based on RHD model
5. Disconnect the connector.
6. Remove the lighting switch
4
from the steering shaft.
Installation
Follow the removal procedure in the reverse order to install the
lighting switch.
Pay close attention to the important points mentioned in the
following paragraphs.
Connector
Be absolutely sure that the lighting switch connector is securely
connected.
This will prevent a poor contact and an open circuit.
Wire Harness
Do not pinch the wire harnesses between the cluster and the
meter hood during the cluster installation procedure.
Wire damage will result.
Нет комментариевНе стесняйтесь поделиться с нами вашим ценным мнением.
Текст