Suzuki Grand Vitara JB416 / JB420. Manual — part 385
9E-13 Glass / Windows / Mirrors:
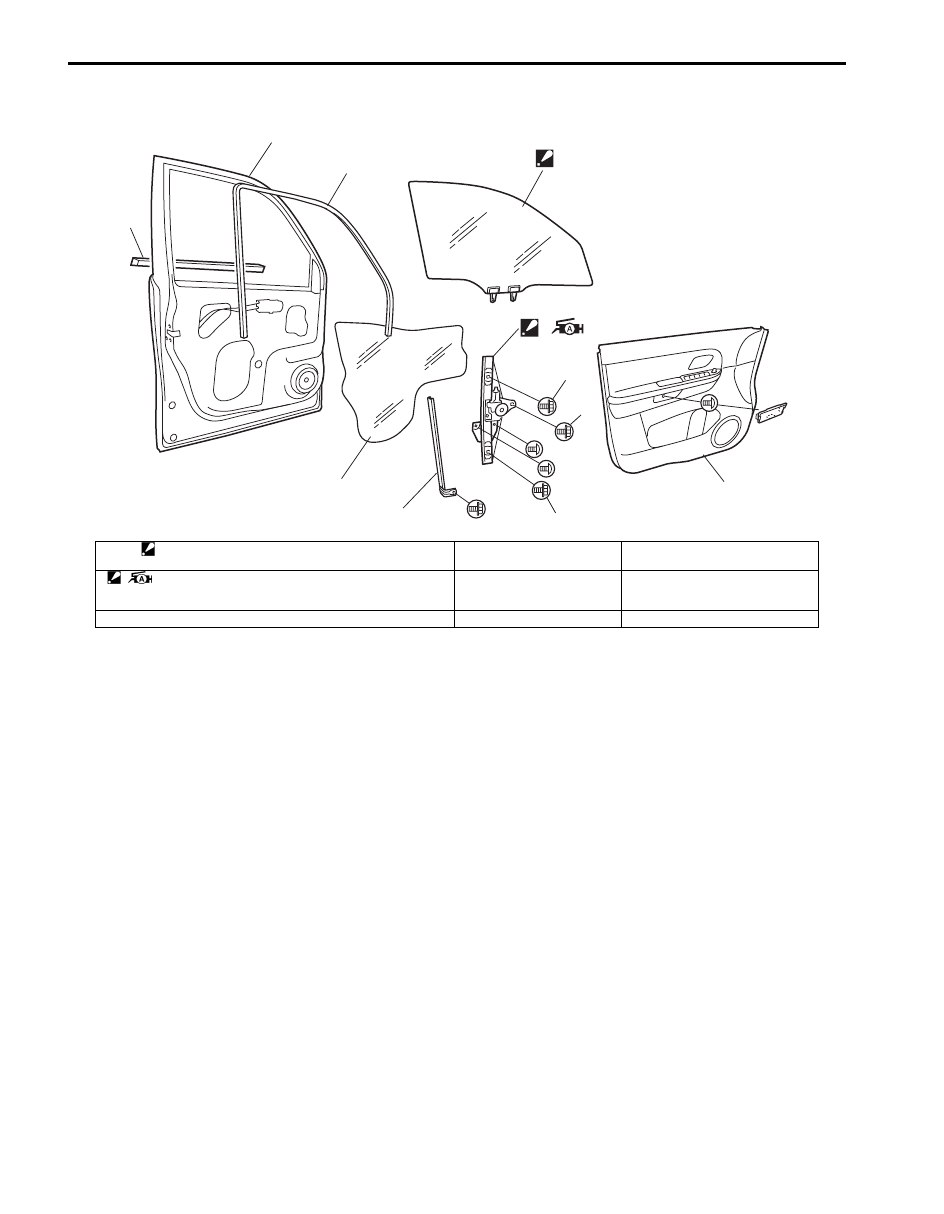
Front Door Window Components
S5JB0A9506002
1
2
5
3
6
7
4
8
“1”
“3”
“2”
I5JB0A950009-01
1. Door glass
: Tightening order rear to front.
4. Door trim
7. Front door sash
2. Window regulator assembly
: Apply lithium grease 99000-25010 to sliding part.
: Tightening order “1”
→ “2” → “3”.
5. Door sealing cover
8. Front door outer weather-strip
3. Glass run
6. Door panel
Glass / Windows / Mirrors: 9E-14
Front Door Glass Removal and Installation
S5JB0A9506003
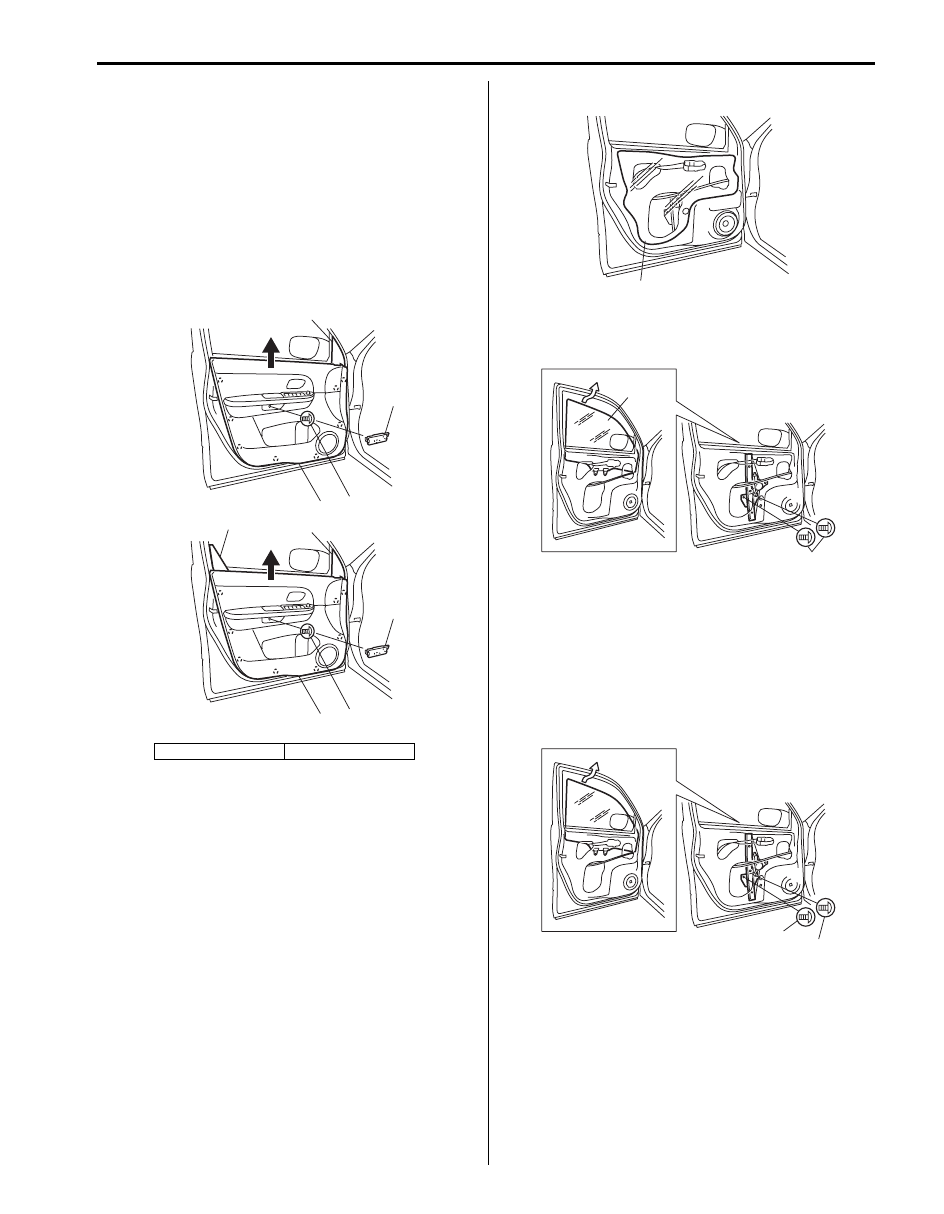
Removal
1) Remove door mirror trim (1), front door inner garnish
(2) (3 door model only) and door trim screw cover
(3).
2) Remove door trim screw (5).
3) Remove door trim (4) as shown.
And disconnect power window switch lead wire and
door illumination lamp lead wire at coupler.
4) Remove door sealing cover (1).
5) Remove door glass mounting screws (1).
6) Remove door glass (2) while tilting it as shown.
Installation
Reverse removal procedure noting the following
instructions.
• If there is deformity for glass run, replace it with a new
one.
• Tighten door glass rear mounting screw (1) first, and
then tighten door glass front mounting screw (2).
[A]: 5 door model
[B]: 3 door model
1
3
5
4
2
1
3
5
4
[A]
[B]
I5JB0A950010-01
1
I5JB0A950011-02
2
1
I5JB0A950012-02
1
2
I5JB0A950013-02
9E-15 Glass / Windows / Mirrors:
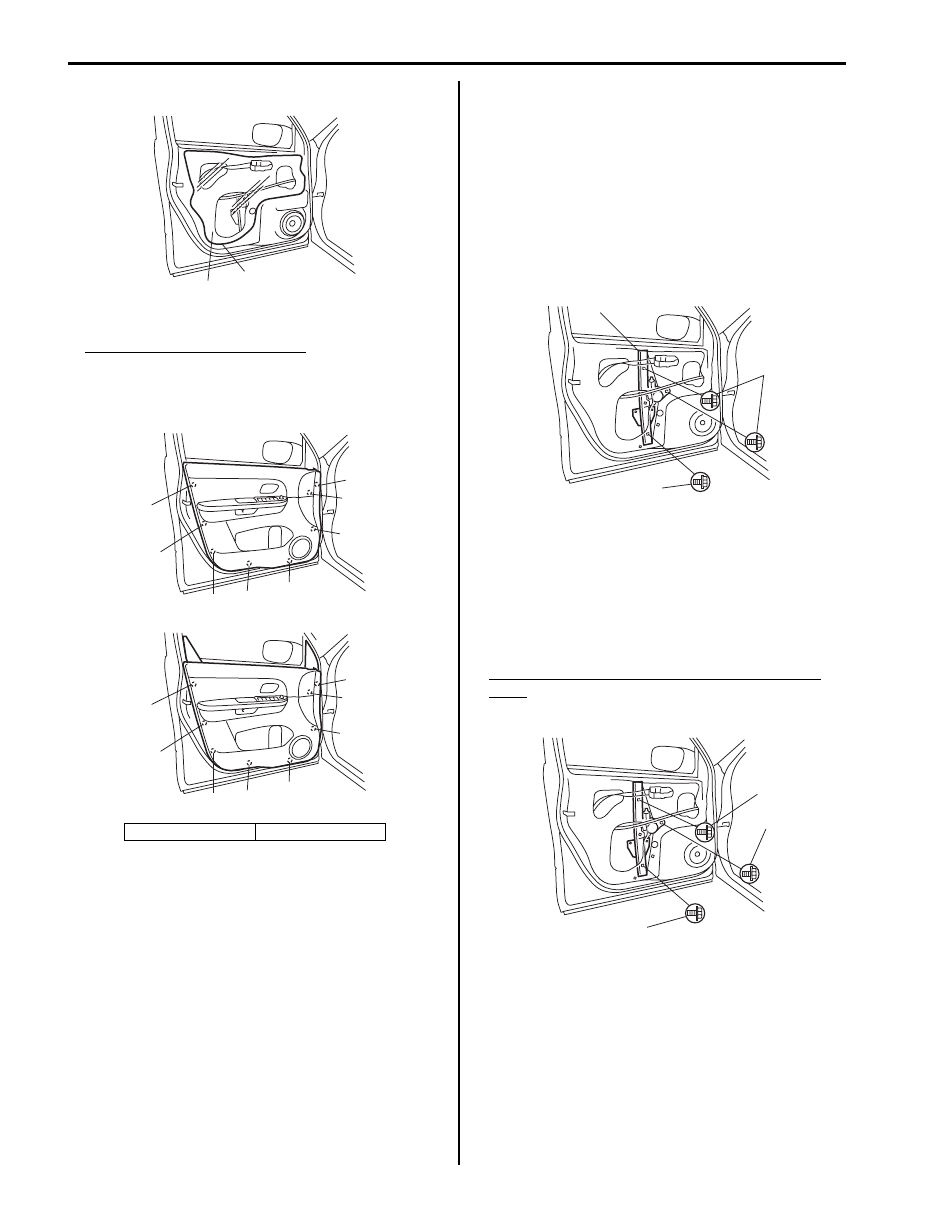
• Secure door sealing cover (1) with adhesive (2).
• Install front door trim.
Front door trim attaching order
(1)
→ (2) → (3) → (4) → (5) → (6) → (7) → (8)
Front Door Window Regulator Removal and
Installation
S5JB0A9506004
Removal
1) Remove door glass referring to “Front Door Glass
2) Disconnect power window motor lead wire at
coupler.
3) Remove regulator mounting screws (1), and then
remove front door window regulator (2).
Installation
Reverse removal procedure noting the following
instruction.
• Apply grease to sliding portions of window regulator.
: Grease 99000–25010 (SUZUKI Super Grease A)
• Tighten front door window regulator attaching screws.
Front door window regulator screw tightening
order
(a)
→ (b) → (c)
Front Door Window Regulator Inspection
S5JB0A9506005
Check the following parts for wear, damage, smooth
operation and lubrication:
• Check regulator sliding and rotating parts.
• Check rollers.
[A]: 5 door model
[B]: 3 door model
1
2
I5JB0A950014-02
1
2
3
4
5
6
7
8
1
2
3
4
5
6
7
8
[A]
[B]
I5JB0A950015-03
1
1
2
I5JB0A950016-01
(b)
(a)
(c)
I5JB0A950017-01
Glass / Windows / Mirrors: 9E-16
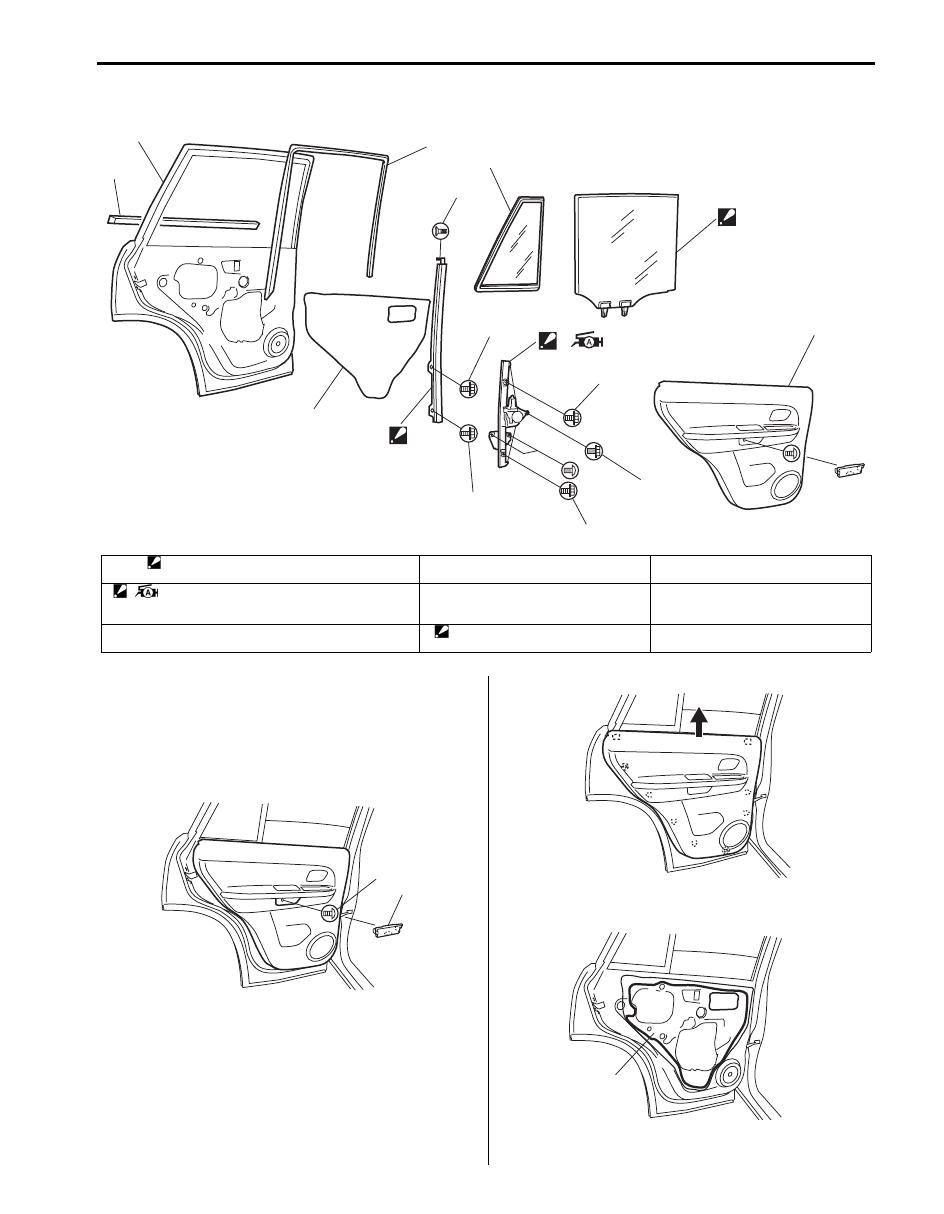
Rear Door Window Components
S5JB0A9506006
Rear Door Glass Removal and Installation
S5JB0A9506007
Removal
1) Remove door trim screw cover (1).
2) Remove door trim screw (2).
3) Remove door trim (1) as shown.
4) Remove door sealing cover (1).
8
7
3
9
1
4
2
5
“a”
“b”
“3”
“c”
“1”
“2”
6
I5JB0A950018-01
1. Door glass
: Tightening order rear to front.
4. Door trim
7. Door panel
2. Window regulator assembly
: Apply lithium grease 99000-25010 to sliding part.
: Tightening order “1”
→ “2” → “3”.
5. Door sealing cover
8. Rear door outer weather-strip
3. Glass run
6. Door sash
: Tightening order “a”
→ “b” → “c”.
9. Rear door partition glass.
2
1
I5JB0A950019-01
I5JB0A950020-01
1
I5JB0A950021-01
Нет комментариевНе стесняйтесь поделиться с нами вашим ценным мнением.
Текст