BMW 3 (E46). Manual — part 173

and free from
grease
See Front brake
rotor
8
-
Rear brake rotor
retaining screw
Torque to 16 Nm
(12 ft-lb)
9
-
Rear brake rotor
Make sure contact
surfaces are clean
and free from
grease.
Parking brake drum
dia. 160 mm (6.3
in.)
See Rear brake
rotor
For brake rotor
specifications see
Table c
and
Table d
10
-
Parking brake
shoes with
hardware
Min. lining thickness
1.5 mm (0.06 in.)
11
-
Rear brake dust
shield
12
-
Brake pad
carrier
Make sure contact
surfaces are clean
and free from
grease
See Brake pad
carrier
13
-
Brake pad
carrier retaining
bolts
Front: torque to 110
Nm (81 ft-lb)
Rear: torque to 65
Nm (48 ft-lb)
Oil bolts lightly.
Make sure contact
surfaces are clean
and free from
grease.
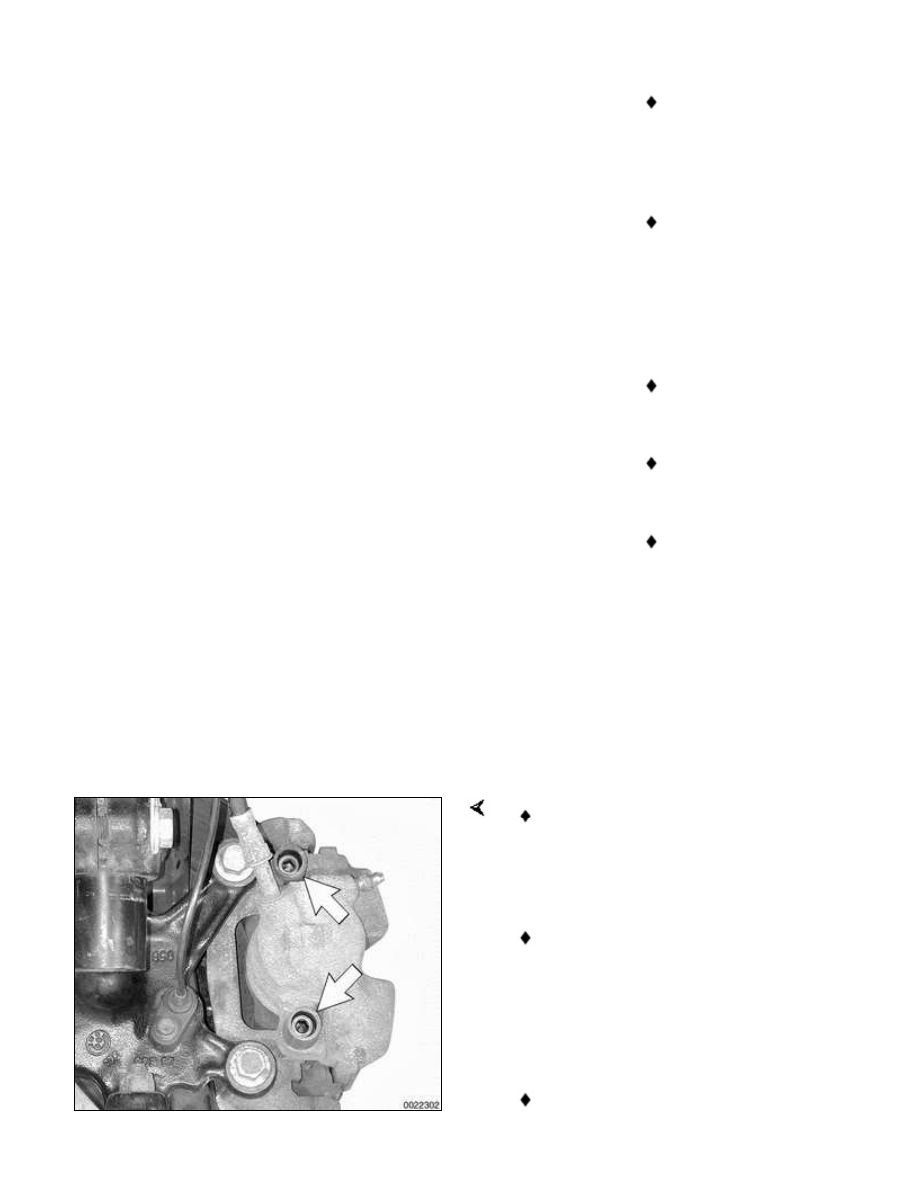
Caliper removal
Remove plastic caps from caliper
mounting bolts and remove caliper
mounting bolts (arrows). Remove
caliper from pad carrier.
Brake caliper hydraulic line only
needs to be removed when
replacing brake caliper with a new
unit. If removing brake caliper to
service brake pads or rotors, leave
hydraulic line connected.
If there is a ridge on rotor edge,
caliper piston will have to be
pressed back into caliper before
caliper can be removed.
CAUTION!
Pressing caliper piston in may cause
brake fluid reservoir to overflow. To
prevent this, use a clean syringe to
first remove some fluid from reservoir.
Open caliper bleeder screw only
when applying force to the piston.
Do not allow air to be drawn in
through bleeder screw. Catch
expelled fluid in appropriate
container.
Do not let brake caliper hang from
brake hose. Suspend it from
chassis using stiff wire.
Inspect brake caliper for signs of
leakage. Check that caliper piston
slides smoothly into caliper.
Replace caliper if any faults are
found.
Thoroughly clean all contact points
on caliper and brake pad carrier.
Clean guide bolts and make sure
they slide freely.
Do not lubricate guide bolts.
Bleed brake system if hydraulic line
to caliper has been removed or
replaced. See
Bleeding brakes
.
Tightening torque
Caliper to brake
pad carrier
mounting bolts
30 Nm (22 ft-lb)
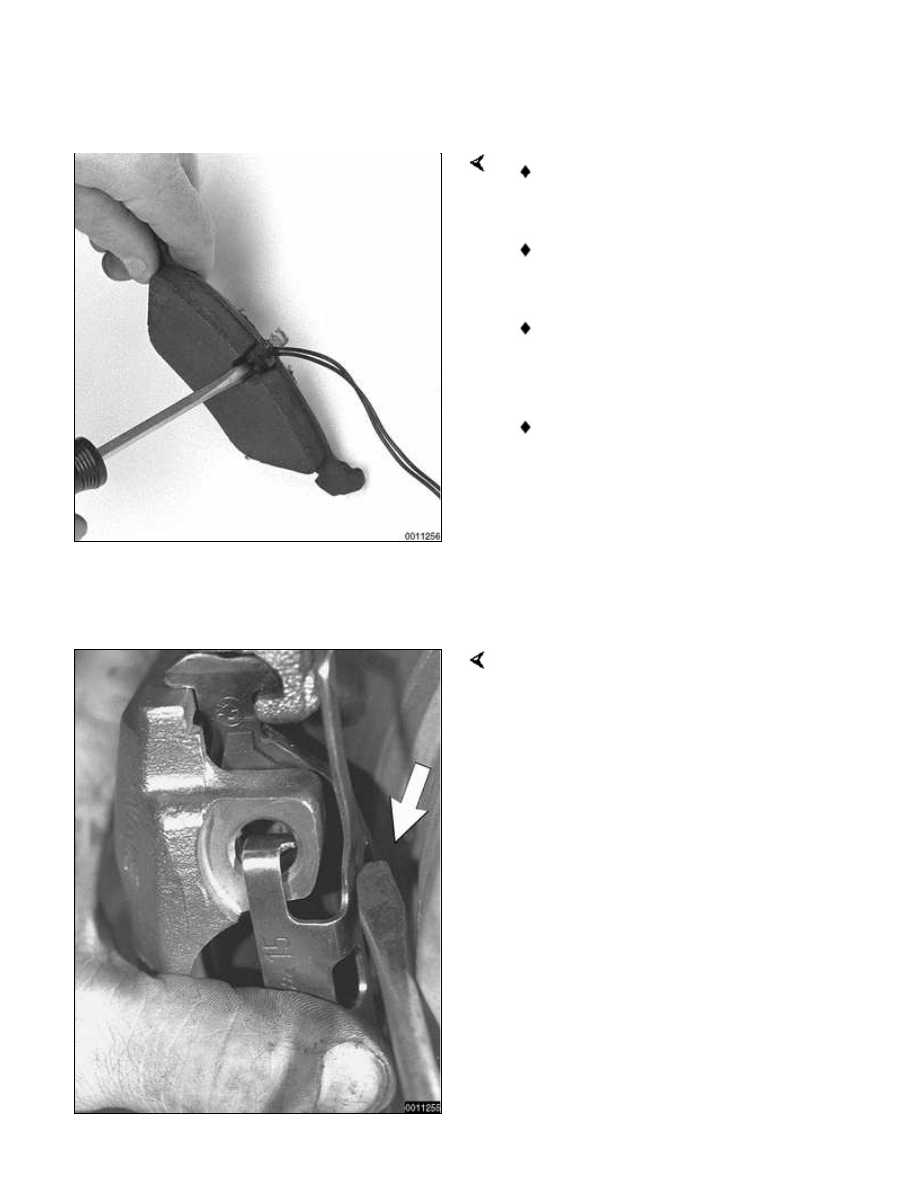
Brake pad wear sensor
Carefully pry pad wear sensor from
brake pad.
Insert brake pad wear sensor into
cutout in new pad where applicable.
If brake lining indicator light
illuminated prior to brake pad
replacement, replace wear sensor.
Route pad wear sensor wiring
through caliper opening and
bleeder dust cap.
Brake pad anti-rattle clip
Remove anti-rattle clip by unhooking at
top and bottom. Use screwdriver as an
aid (arrow).
Нет комментариевНе стесняйтесь поделиться с нами вашим ценным мнением.
Текст