Jaguar XJ (X350). Manual — part 411
3 . Check cylinder head face for distortion, across the center and from corner to corner.
4 . For cylinder head face distortion data, refer to specifications.
For additional information, refer to Specifications
5
.
NOTE:
For cylinder head with distortion above the maximum allowance, the cylinder head
material must be measured.
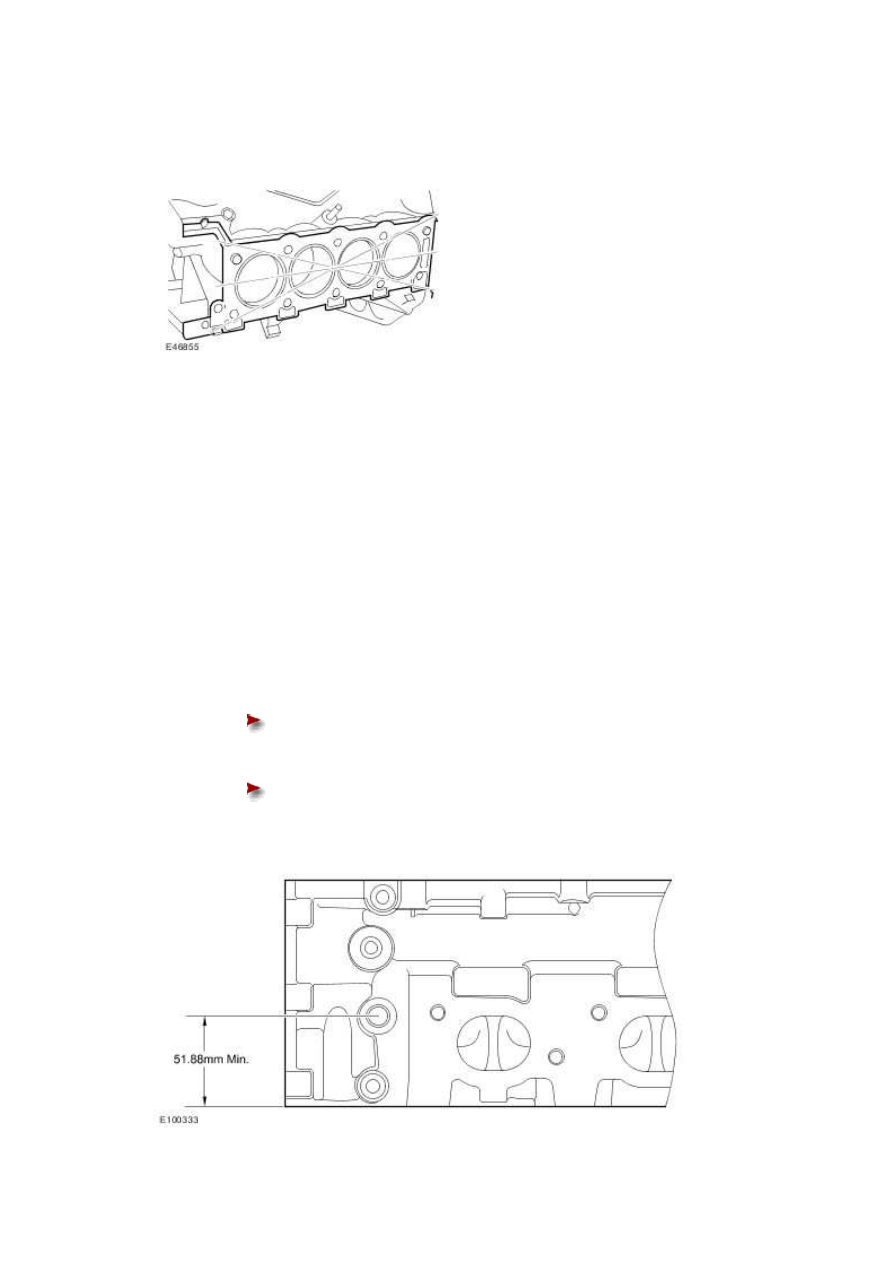
Measure the cylinder head material.
Check measurement from the centre of the exhaust dowel to the cylinder
head face as shown.
If the measurement is less than 51.88 mm the cylinder head requires
replacement.
6 .
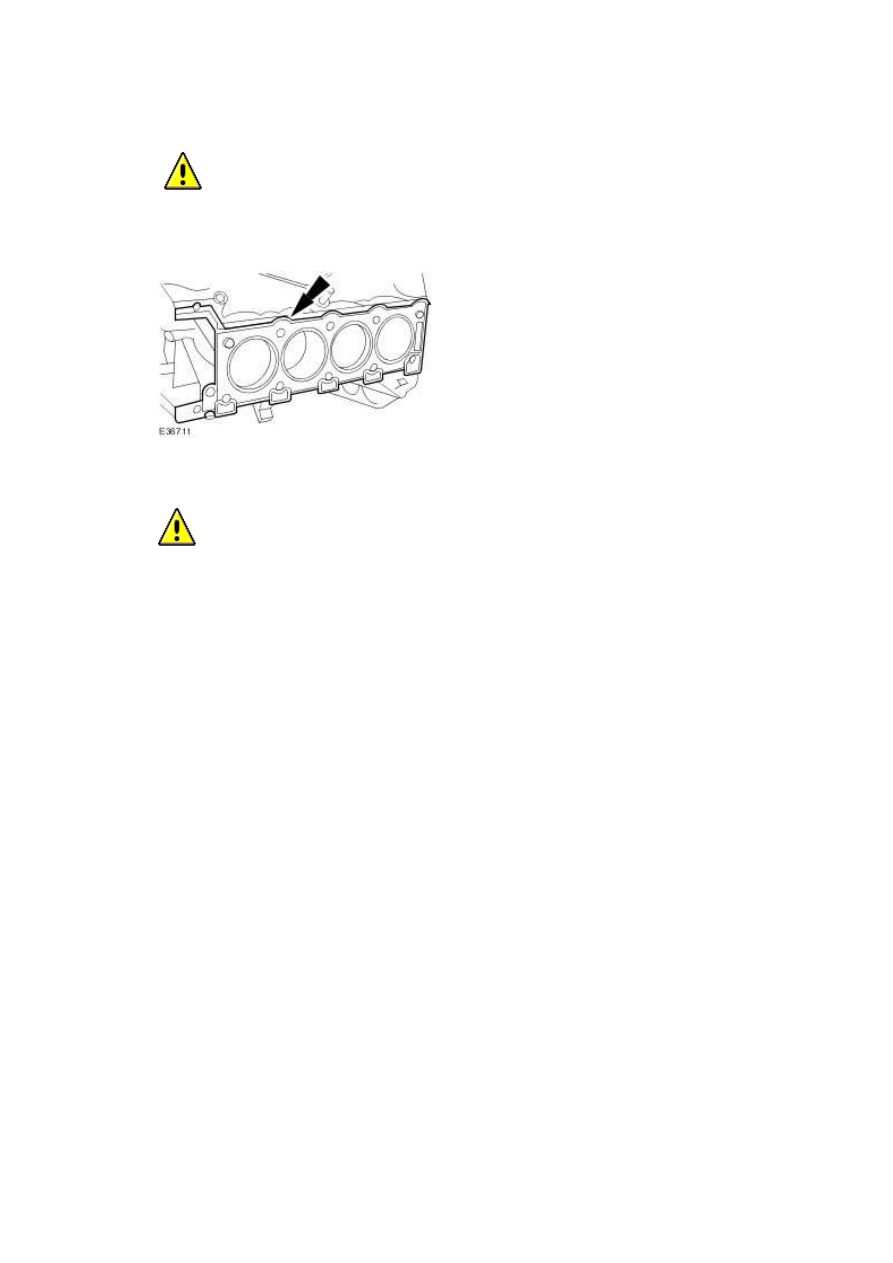
CAUTION: The head gasket must be installed over the cylinder block dowels.
Install a new cylinder head gasket
7
.
CAUTION: Vehicles fitted with Polydrive cylinder head bolts, the cylinder head bolts
must be installed using a 10 mm Polydrive socket or a 10 mm Allen key. Failure to follow
this instruction may result in damage to the component.
NOTE:
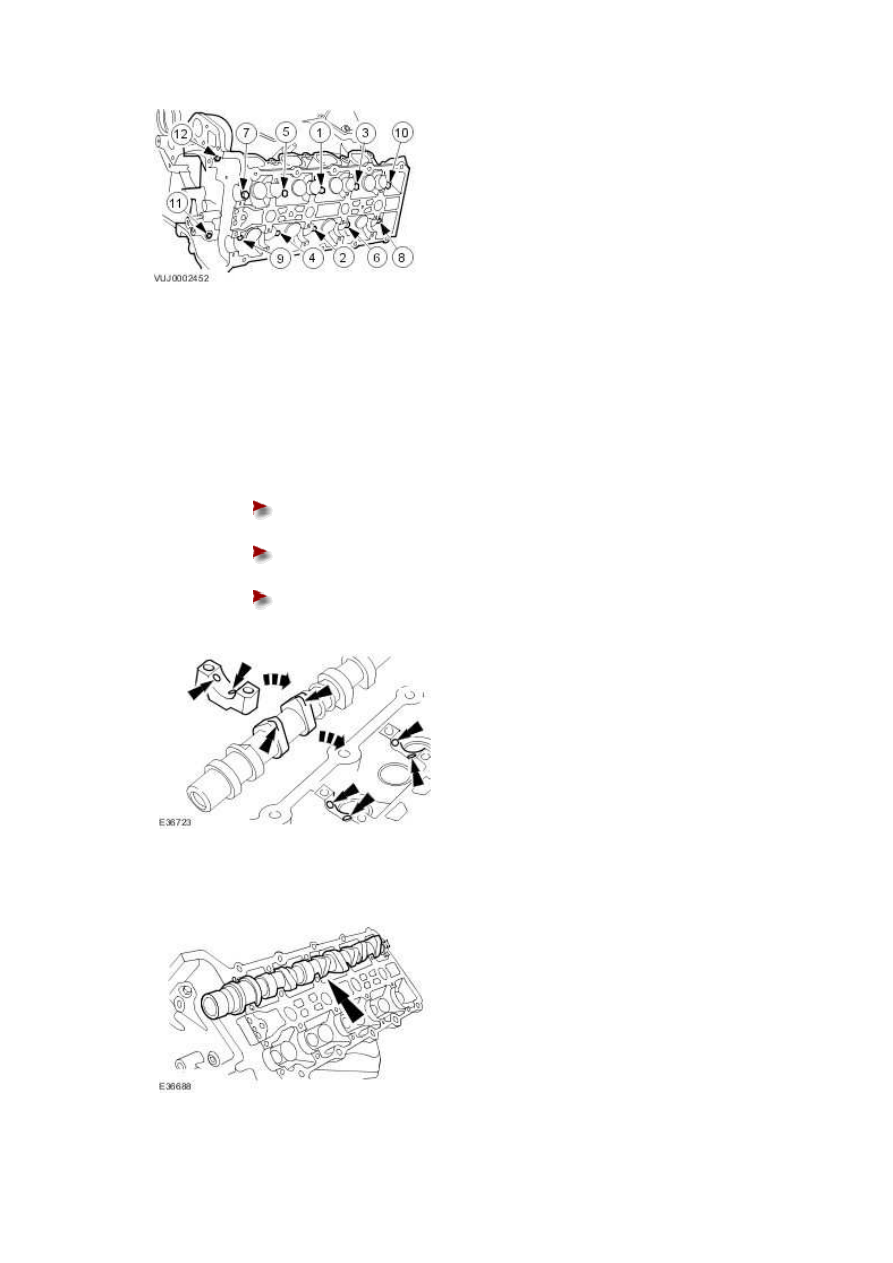
Tighten the bolts 1 to 10 in the sequence shown.
Install the left-hand cylinder head.
1) Tighten bolts 1 to 10 to 20 Nm.
2) Tighten bolts 1 to 10 to 35 Nm.
3) Tighten bolts 1 to 10 to 90°.
4) Tighten bolts 1 to 10 to 90°.
5) Tighten bolts 11 to 12 to 25 Nm.
www.
8 . NOTE:
Make sure all components are clean.
Apply oil (EP-90) to the camshaft and bearing surfaces, as follows:
To the upper face of each bearing surface in the cylinder head.
To the upper face of each bearing surface in each bearing cap.
On the cam lobes ONLY, not on the base circle area.
9 . Install the left-hand inlet camshaft.

10 .
CAUTION: Alternate bolt tightening to correctly seat the camshaft bearing caps.
Install the camshaft bearing cap bolts evenly.
Tighten to 10 Nm.
11 . Install the left-hand exhaust camshaft.
12 .
CAUTION: Alternate bolt tightening to correctly seat the camshaft bearing caps.
Install the camshaft bearing cap bolts evenly.
Tighten to 10 Nm.
www.
Нет комментариевНе стесняйтесь поделиться с нами вашим ценным мнением.
Текст