Jaguar XJ (X350). Manual — part 193

3
.
NOTE:
Remove the forcing screw from the brake caliper piston retractor tool and install to the
crankshaft pulley/damper remover.
NOTE:
Left-hand shown, right-hand similar.
Install new brake pads.
Install the brake pad anti-rattle spring plates.
4 .
CAUTION: The brake caliper must be supported at all times.
NOTE:
Left-hand shown, right-hand similar.
Remove the tie strap.
5 . NOTE:
Left-hand shown, right-hand similar.
Attach the caliper.
Install new brake caliper lower retaining bolts.
Tighten to 34 Nm.

6 . Install both rear wheels and tires.
For additional information, refer to
7
.
CAUTION: Calibrate the electric park brake using Jaguar approved diagnostic system.
If the Jaguar approved diagnostic system is not available disconnect the battery for
approximately 30 seconds, the vehicle will then prompt the driver to carry out the
calibration procedure as per the vehicle hand book on re-connection.
Calibrate the electric parking brake module using the Jaguar approved diagnostic system.
8
.
NOTE:
Do not start the engine or operate the electronic park brake before depressing the
brake pedal.
Repeatedly depress the brake pedal until brake pressure is evident.
www.
Brake Pads - Vehicles With: High
Performance Brakes, VIN Range: G00442-
>G45703 (70.40.03)
Removal
1
.
CAUTION: Whilst carrying out rear parking brake related service procedures, the
tension on the rear parking brake release actuator will need to be released. Failure to
follow this instruction may result in the parking brake to function incorrectly or become
inoperative.
Carry out the parking brake cable tension release.
For additional information, refer to
2
.
WARNING: BRAKE DUST, IF INHALED CAN DAMAGE YOUR HEALTH. ALWAYS
REMOVE BRAKE DUST USING A VACUUM BRUSH. DO NOT USE A COMPRESSED-AIR LINE TO
DISPERSE BRAKE DUST INTO THE ATMOSPHERE. Failure to follow this instruction may result
in personal injury.
CAUTION: Brake pads must always be replaced in axle sets.
CAUTION: Replacement of nuts and bolts: Various thread-locking devices are used
on nuts and bolts throughout the vehicle. These devices restrict the number of times a nut
or bolt can be used.
For additional information, refer to
General Service Information
CAUTION: The High performance brake caliper is aligned to the brake disc when it is
first installed to the vehicle, therefore, care must be taken not to disturb this alignment.
When removing the caliper; remove the bolts that secure the anchor bracket to the vertical
link only. DO NOT loosen any other caliper bolts.
Open engine compartment and fit paint work protection covers to fenders.
3 . Raise rear of vehicle and support on stands.
For additional information, refer to
Jacking
4 . Remove rear wheels.
For additional information, refer to
5
.
CAUTION: Remove brake fluid spillage immediately from paint work, with clean
water.
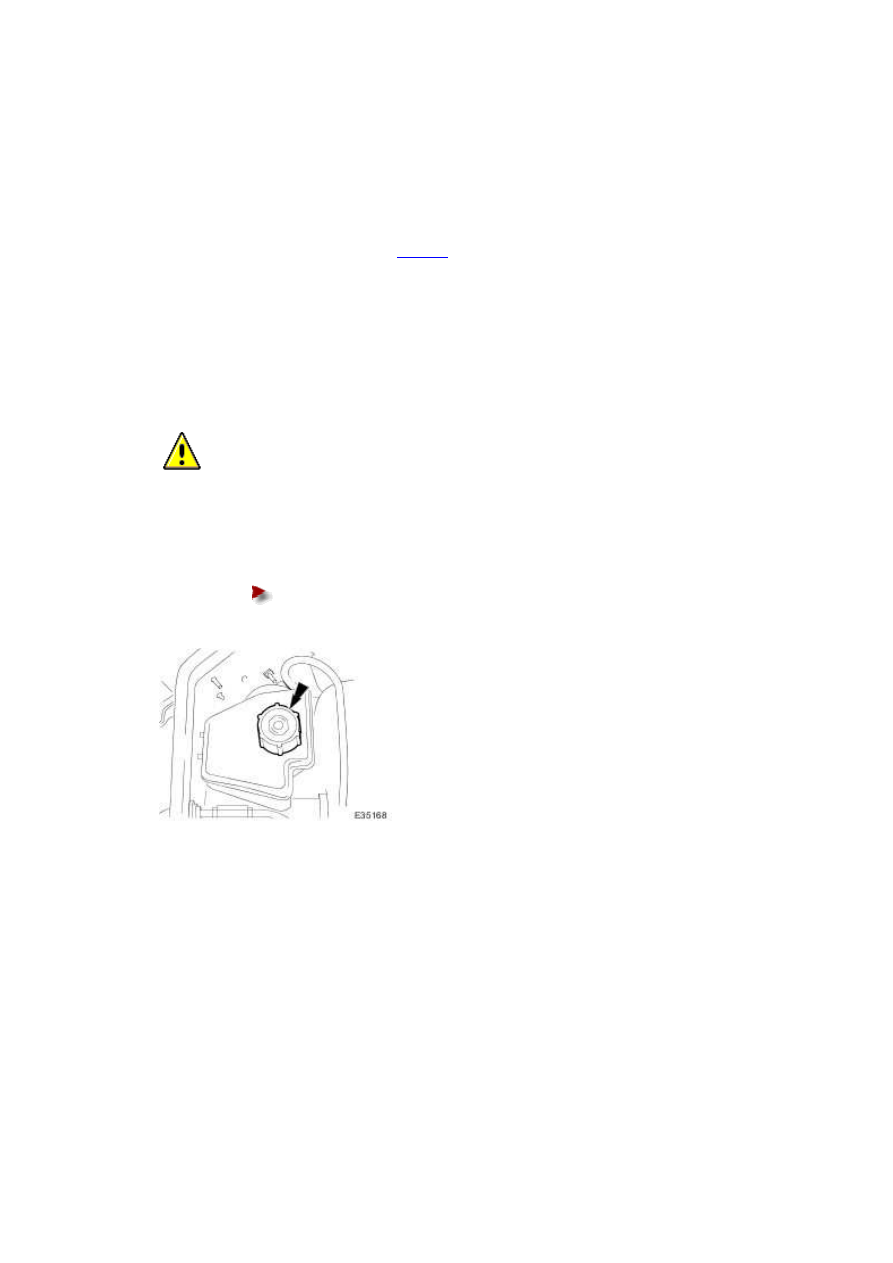
Loosen brake fluid reservoir-cap.
Position a cloth around the reservoir to collect any fluid spillage.
6 . Remove brake pads from caliper.
1) Withdraw pins from caliper.
2) Remove anti-rattle spring.
3) Remove brake pads.
www.
Нет комментариевНе стесняйтесь поделиться с нами вашим ценным мнением.
Текст