Jaguar XJ (X350). Manual — part 133
Make sure correct alignment is maintained.
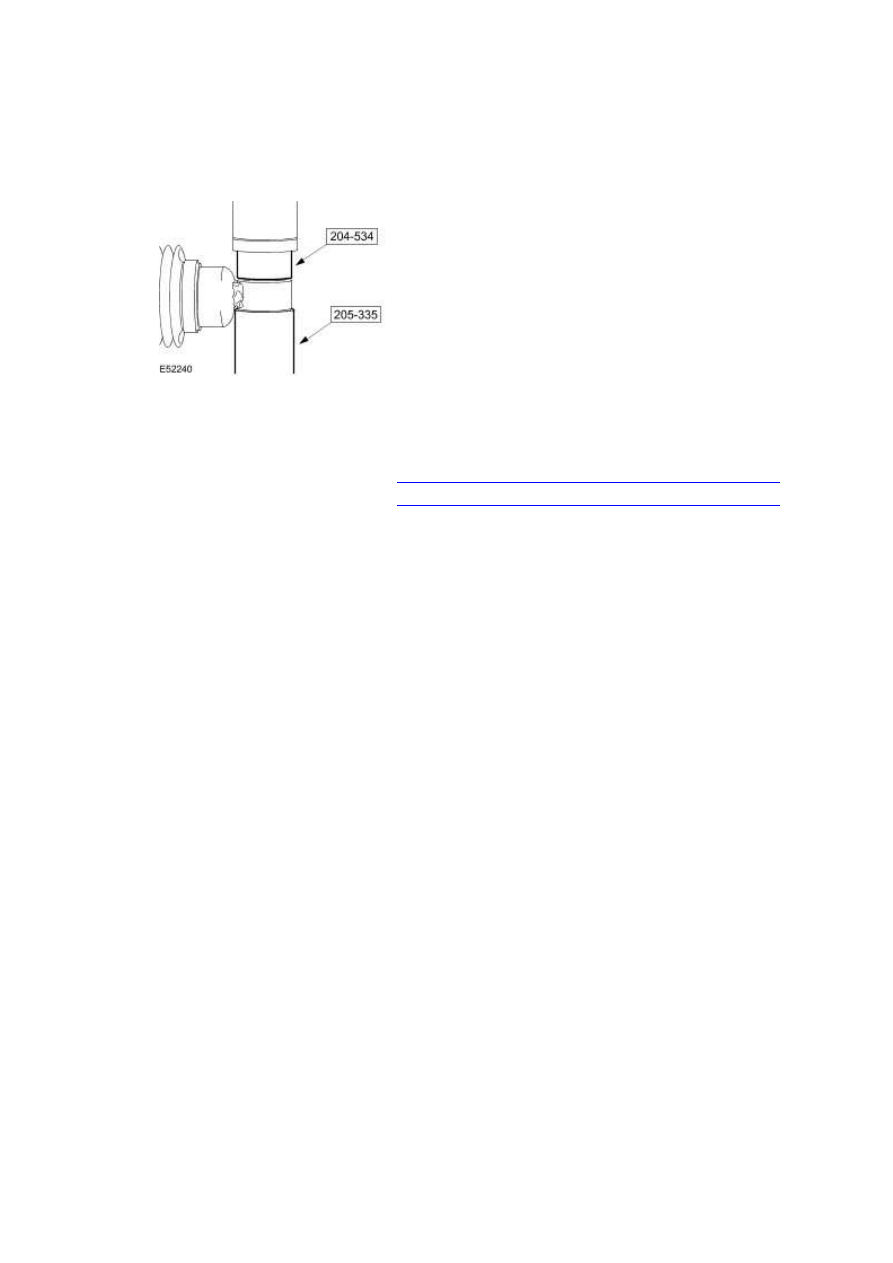
Slowly push the bush into the air spring until the tool reaches the stop.
4 . Install the rear air spring.
For additional information, refer to
Rear Air Spring - VIN Range: G00442->G45703 (60.32.10)
For additional information, refer to
Rear Air Spring - VIN Range: G45704->G99999 (60.32.10)
3 . NOTE:
Rear Vertical Accelerometer (86.56.55)
Removal
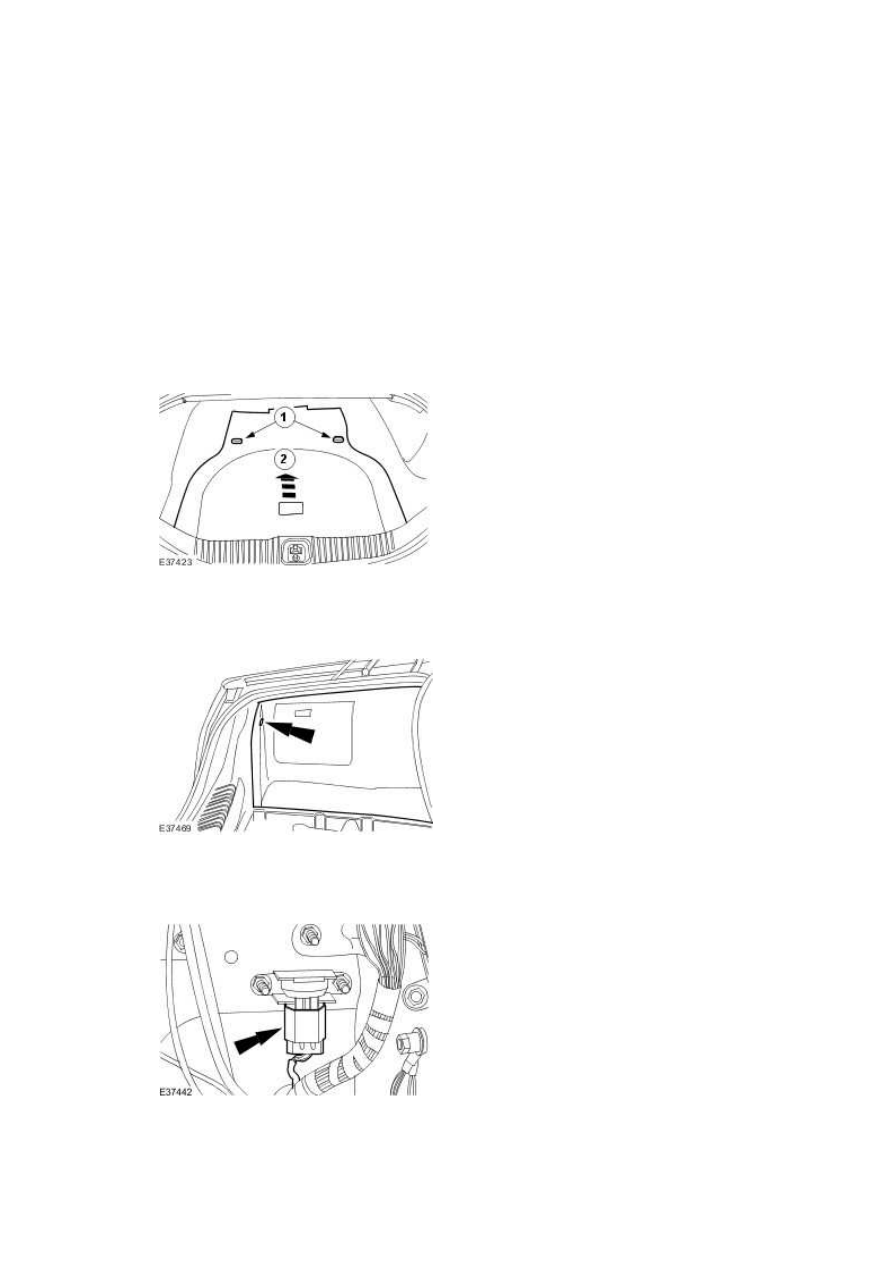
1 . Remove the luggage compartment floor covering.
1) Remove the luggage compartment floor covering securing screws.
2) Remove the luggage compartment floor covering.
2 . Remove the luggage compartment side trim panel.
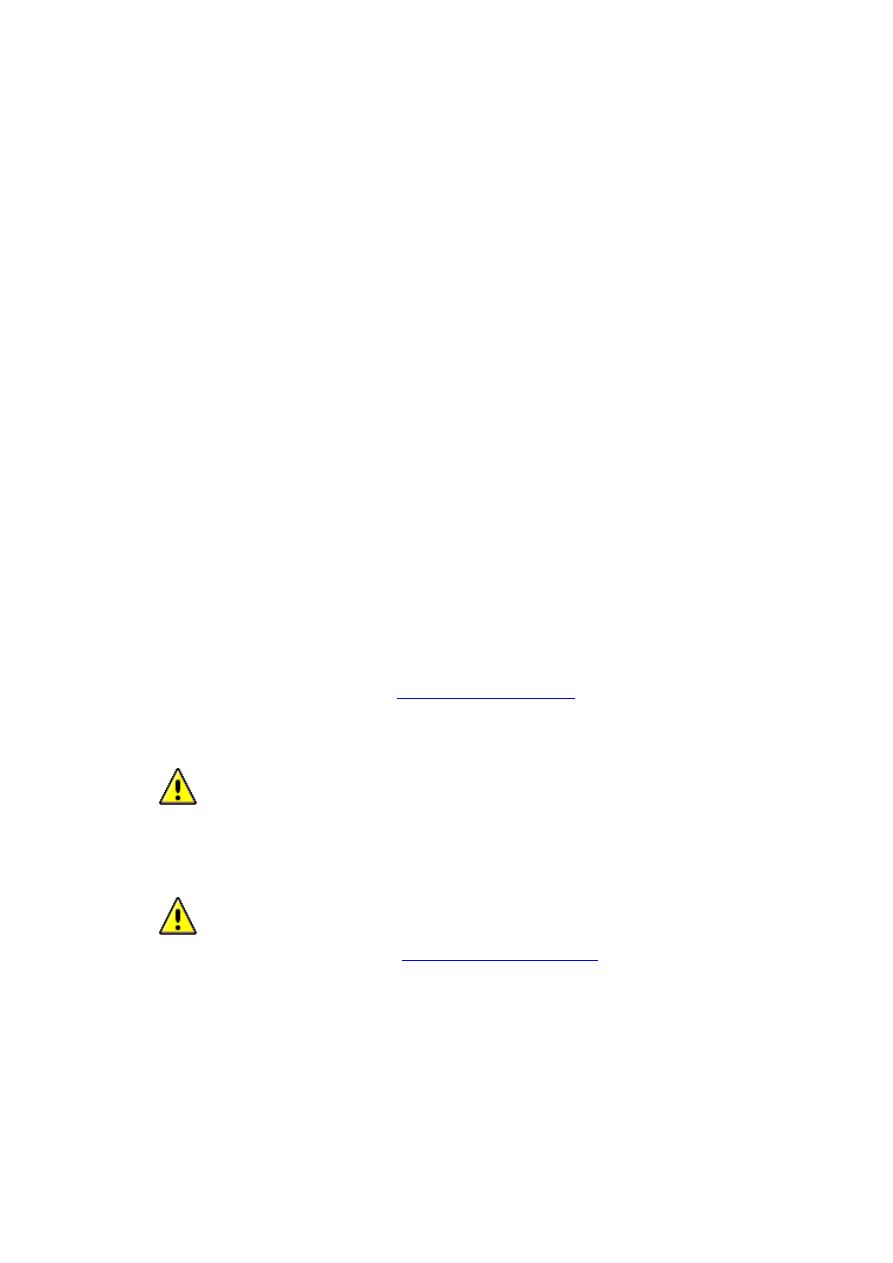
3 . Disconnect the rear vertical accelerometer electrical connector.
www.

4
.
CAUTION: Make sure the vertical accelerometer is not dropped in transit as damage
will be caused to internal components.
Remove the rear vertical accelerometer.
Installation
1 . To install, reverse the removal procedure.
Tighten to 4 Nm.
Suspension Height Sensor (60.32.05)
Removal
NOTE:
Vehicles built before December 2003 have four suspension height sensors which are mounted
on the front and rear subframe assemblies, two front and two rear. Vehicles built after
December 2003 have only three (the right front sensor being deleted), although the functionality
of the system remains the same. There may be some early vehicles which will have four sensors
fitted, but which have the three-sensor module, making the right front sensor redundant. To
confirm the level of equipment, read the module part number from the special applications
menu in configuration on the Jaguar approved diagnostic system. Part numbers before 'BJ' are
four sensor, while 'BJ' and after are three sensor. If the Jaguar approved diagnostic system is not
available, remove the rear seat and sound deadening and read the part number from the
module.
NOTE:
The later module can be fitted in place of the four sensor module, but the right front sensor
must be left in place, even though the system will not use it.
1 . Remove the wheel and tire assembles.
For additional information, refer to
Wheel and Tire (74.20.05)
2
.
CAUTION: Do not spray solvents or cleaning agents inside the height sensor. Failure
to follow this instruction may result in damage to the vehicle.
CAUTION: Make sure the height sensor is thoroughly cleaned prior to disassembly.
For additional information, refer to
General Service Information
NOTE:
Front shown, rear similar.
Disconnect the front air suspension height sensor electrical connector.
www.
Нет комментариевНе стесняйтесь поделиться с нами вашим ценным мнением.
Текст