Jaguar XJ (X350). Manual — part 505
.
•
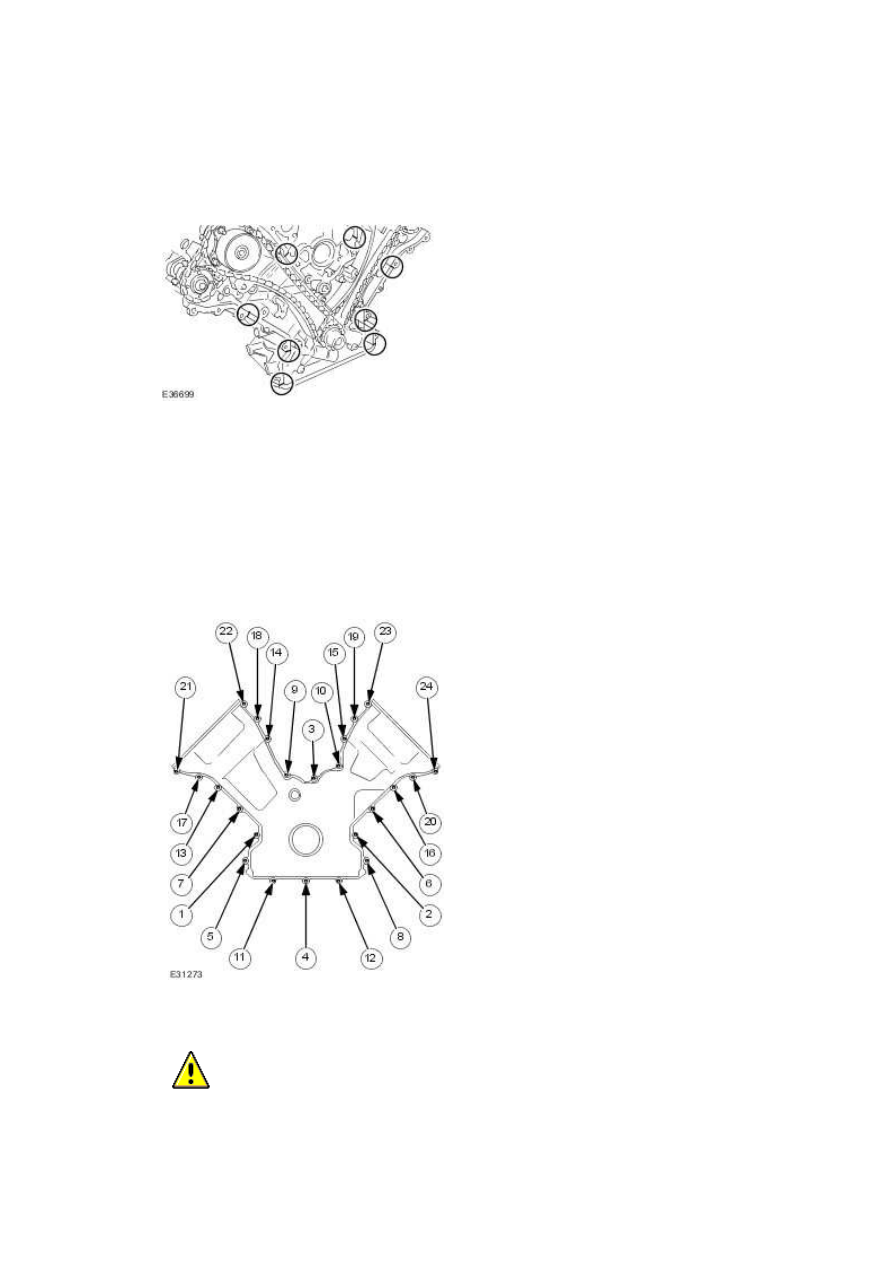
Sealant beads to be 3mm diameter and 12mm long. Cut the nozzle of the sealant tube
to produce a 3 mm bead. (Install and tighten the securing bolts within twenty minutes of
sealant application).
84 . Install the timing cover.
•
Tighten in the sequence shown.
•
Tighten to 13 Nm.
85 .
CAUTION: Make sure the crankshaft front seal mating faces are clean and dry.
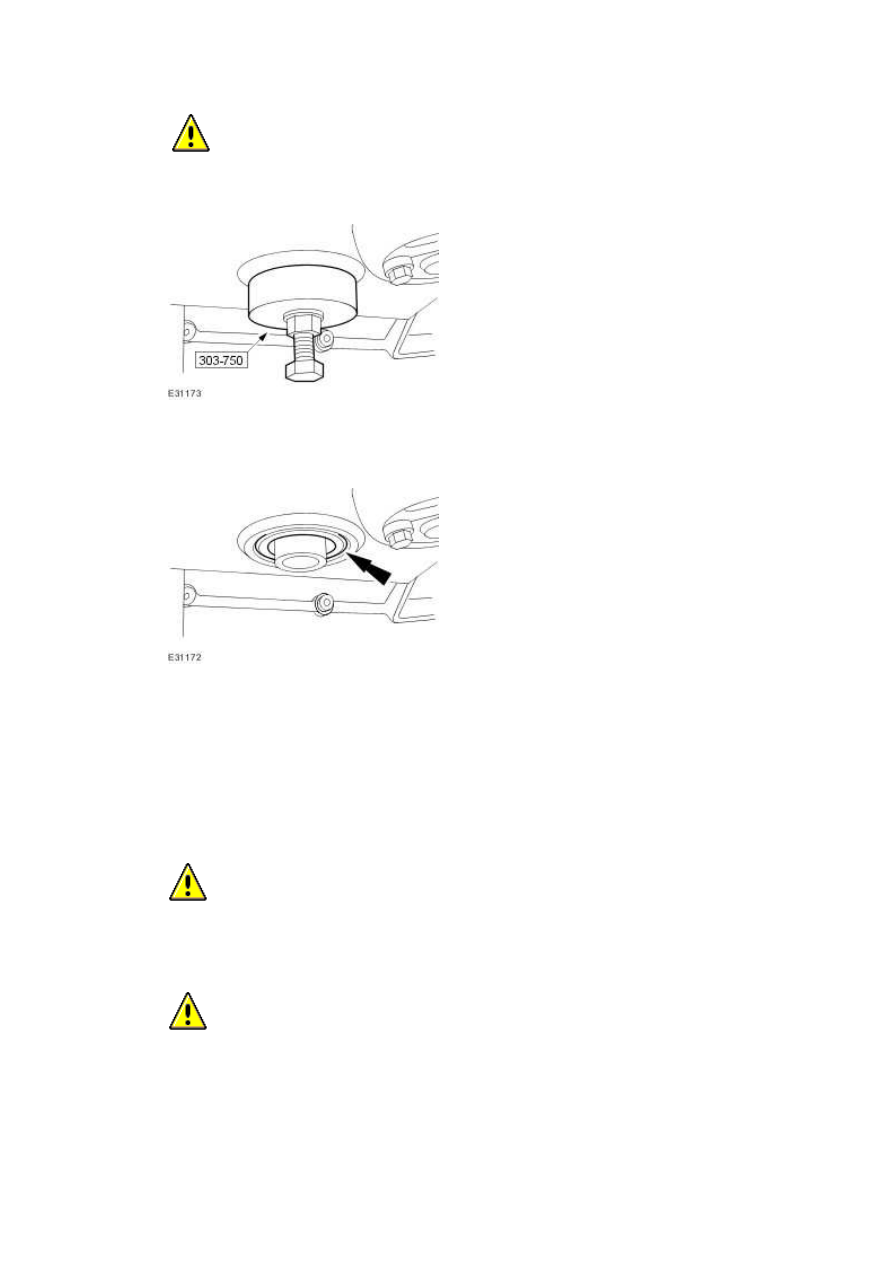
CAUTION: Do not remove the crankshaft front seal protector.
Using the special tool, install a new crankshaft front seal.
86 . Remove the crankshaft seal protector.
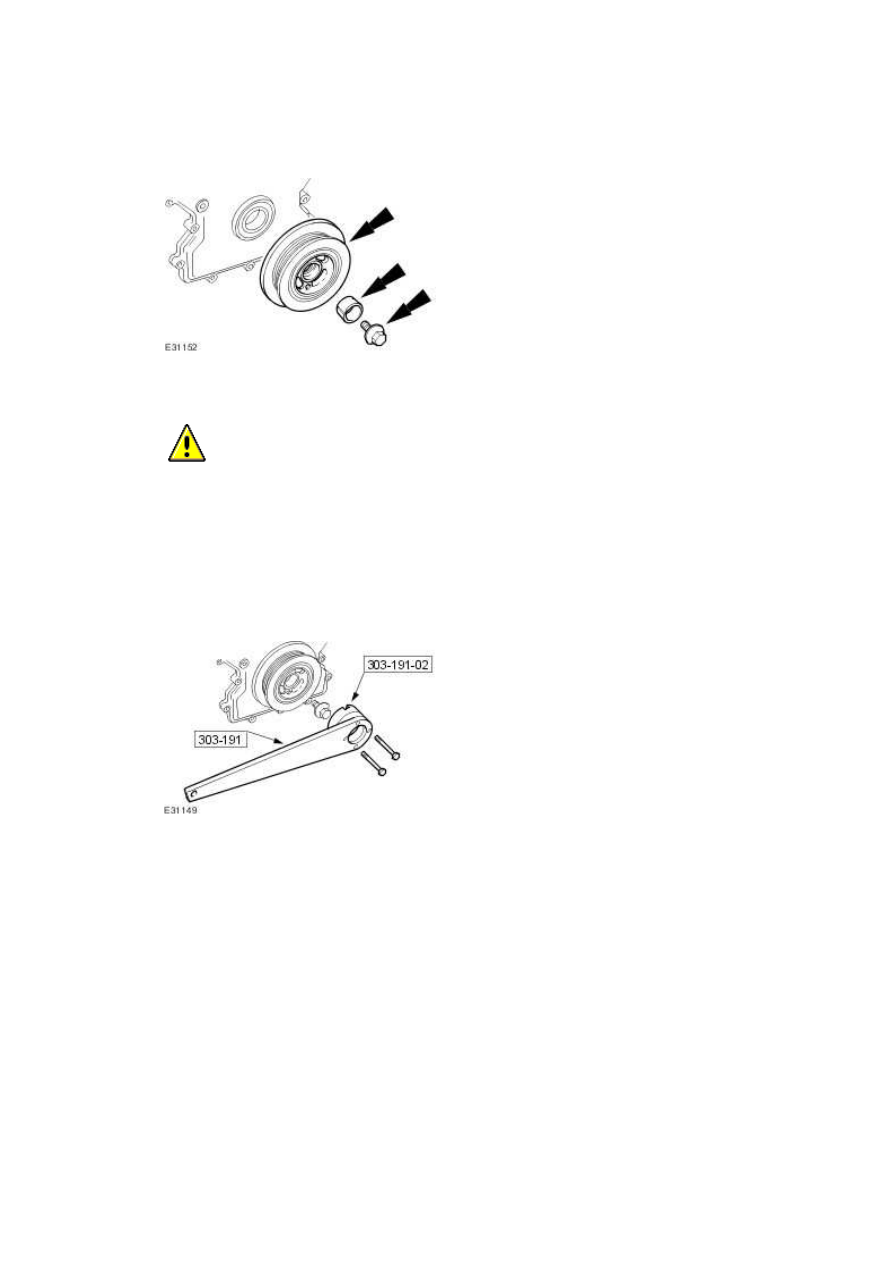
87 . Install a new O-ring seal to the crankshaft pulley.
•
Lubricate the new O-ring.
88
.
CAUTION: The screw thread in the crankshaft must be cleaned out before a new
crankshaft pulley bolt is installed.
CAUTION: A new crankshaft pulley bolt must be used.
Install, but do not tighten, a new crankshaft pulley retaining bolt.
www.
•
Install the crankshaft pulley and locking ring to the crankshaft.
89
.
CAUTION: Under no circumstances should the crankshaft setting peg 303-645 be
used in the following operations to lock the crankshaft.
Using special tools, retain the crankshaft pulley.
•
Tighten the crankshaft pulley retaining bolt to 375 Nm.
90 . Remove the special tools.
91 . Carry out a valve clearance check.
For additional information, refer to
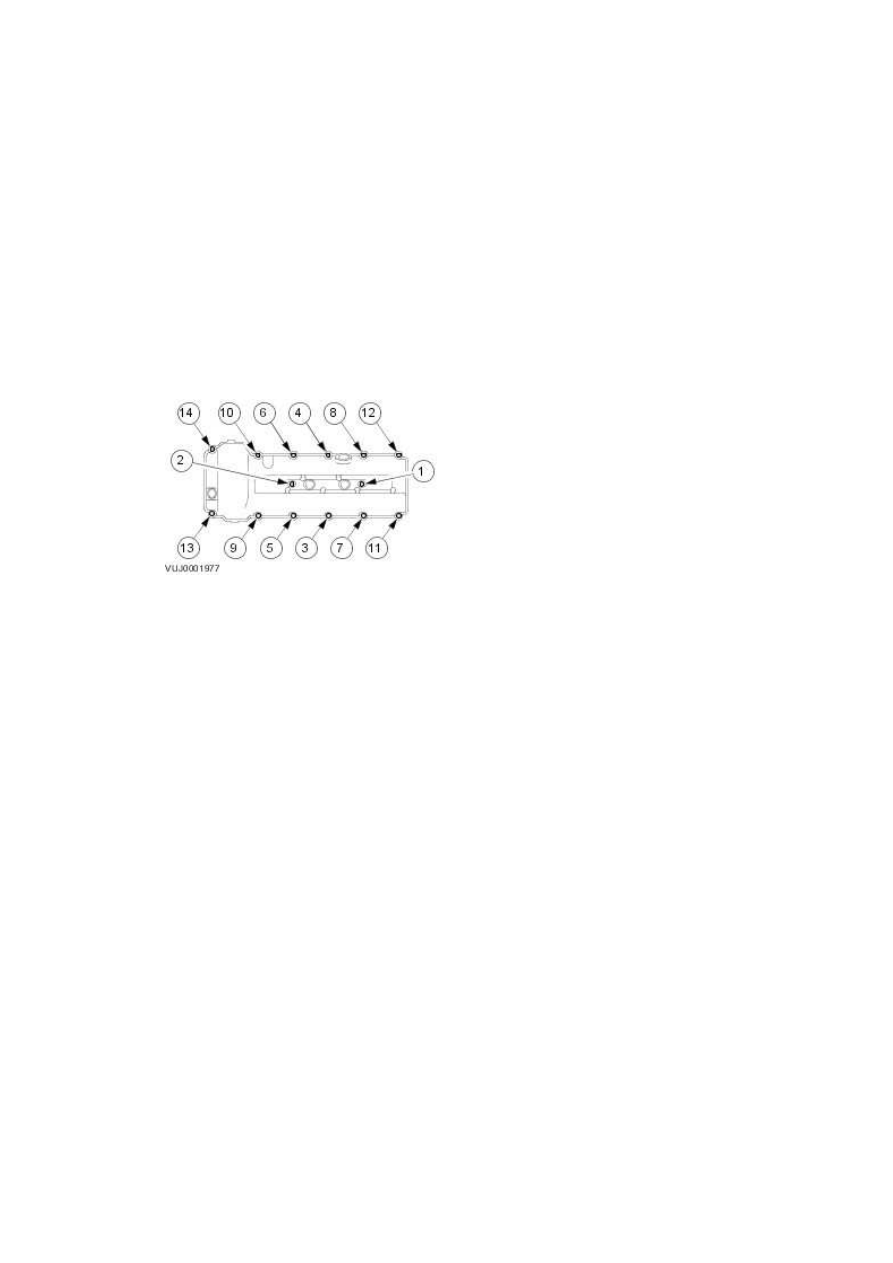
Apply an 8mm diameter bead of silicone gasket sealant on the two places where the
cylinder head and front cover join.
Install the left-hand valve cover.
•
Install new valve cover gaskets.
•
Tighten in the sequence shown.
•
Tighten to 10 Nm.
93
.
NOTE:
Apply an 8mm diameter bead of silicone gasket sealant on the two places where the
cylinder head and front cover join.
Install the right-hand valve cover.
•
Install new valve cover gaskets.
•
Tighten in the sequence shown.
•
Tighten to 10 Nm.
92
.
NOTE:
www.
Нет комментариевНе стесняйтесь поделиться с нами вашим ценным мнением.
Текст