Jaguar XJ (X350). Manual — part 1585
Clockspring (86.65.92)
Removal
WARNING: Always wear safety glasses when repairing an air bag supplemental
restraint system (SRS) vehicle and when handling an air bag module.
WARNING: Carry a live air bag module with the air bag and trim cover pointed
away from your body. This will reduce the risk of injury in the event of an accidental
deployment. Failure to follow this instruction may result in personal injury.
WARNING: Do not set a live air bag module down with the trim cover face down.
Failure to follow this instruction may result in personal injury.
WARNING: After deployment, the air bag surface can contain deposits of sodium
hydroxide, a product of the gas generant combustion that is irritating to the skin. Wash
your hands with soap and water afterwards. Failure to follow this instruction may result
in personal injury.
WARNING: Never probe the connectors on the air bag module. Doing so may
result in air bag deployment, which may result in personal injury. Failure to follow this
instruction may result in personal injury.
WARNING: Air bag modules with discolored or damaged trim covers must be
replaced, not repainted.
WARNING: Vehicle sensor orientation is critical for correct system operation. If
a vehicle equipped with an air bag supplemental restraint system (SRS) is involved in a
collision, inspect the sensor mounting bracket and wiring pigtail for deformation. If
damaged, replace the sensor whether or not the air bag is deployed.
WARNING: To avoid accidental deployment and possible personal injury, the
backup power supply must be depleted before repairing or replacing any air bag
supplemental restraint system (SRS) components. To deplete the backup power supply
energy, disconnect the battery ground cable and wait one minute. Failure to follow this
instruction may result in personal injury.
CAUTION: Make sure the wheels are in the straight-ahead position. Failure to
follow this instruction may result in damage to the component.
NOTE:
Repair is made by replacement only. If a part is replaced and the new part does not
correct the condition, install the original part and carry out the diagnostic procedure
again.
1
.
CAUTION: Make sure that special tool 211-326 is installed to the
clockspring.
CAUTION: Failing to install the special tool to the clockspring may result
in damage to the vehicle.
CAUTION: Make sure that the road wheels are in the straight ahead
position, failure to follow this instruction may result in damage to the vehicle.
Remove the steering wheel.
For additional information, refer to Steering Wheel (57.60.01) .
2
.
Remove the steering column multifunction switch left-hand.
For additional information, refer to Steering Column Multifunction Switch LH
(86.65.78)
3
.
Remove the steering column multifunction switch right-hand.
For additional information, refer to Steering Column Multifunction Switch RH
(86.65.41)
4
.
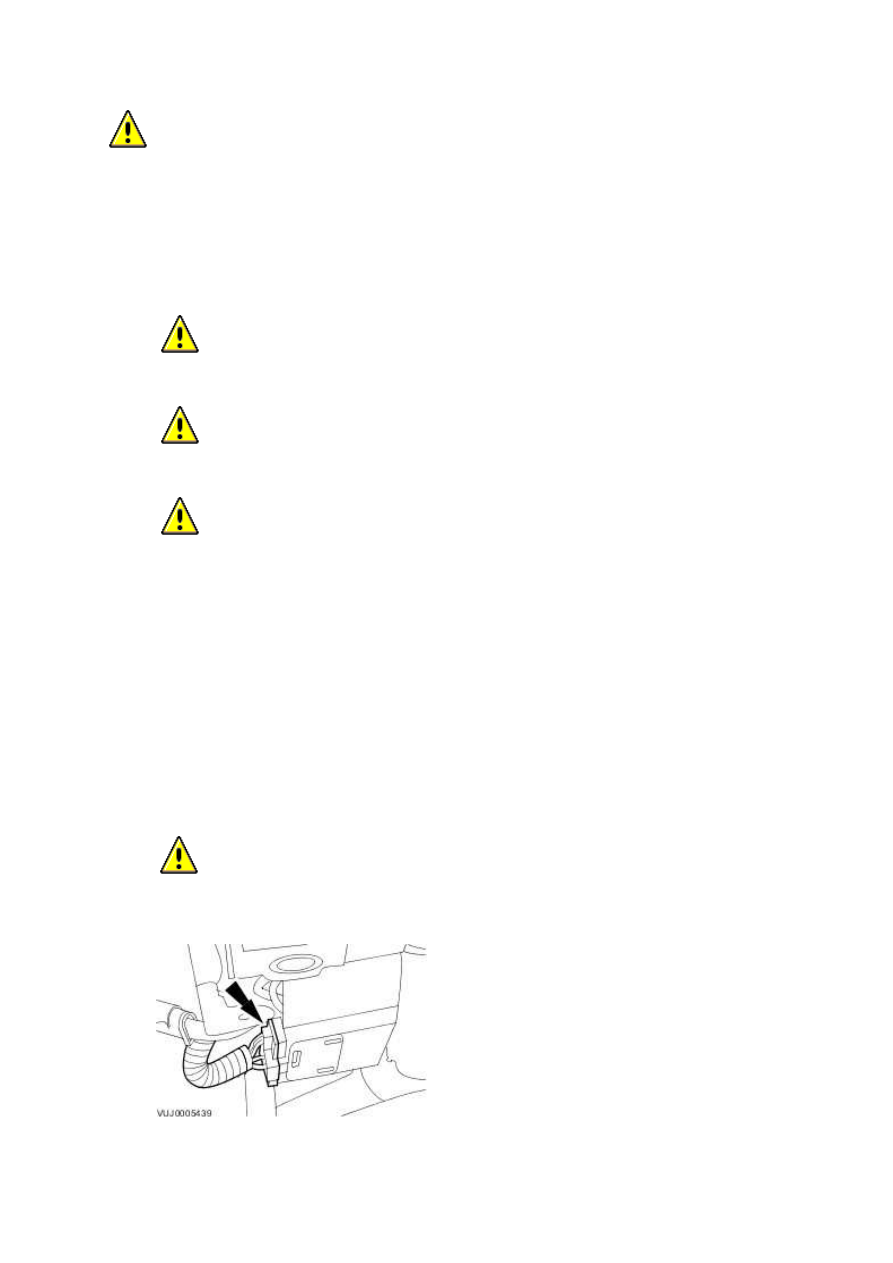
CAUTION: Make sure no damage is occured to the electrical connectors.
Failure to follow this instruction may result in damage to the vehicle.
Disconnect the electrical connector.
www.
5
.
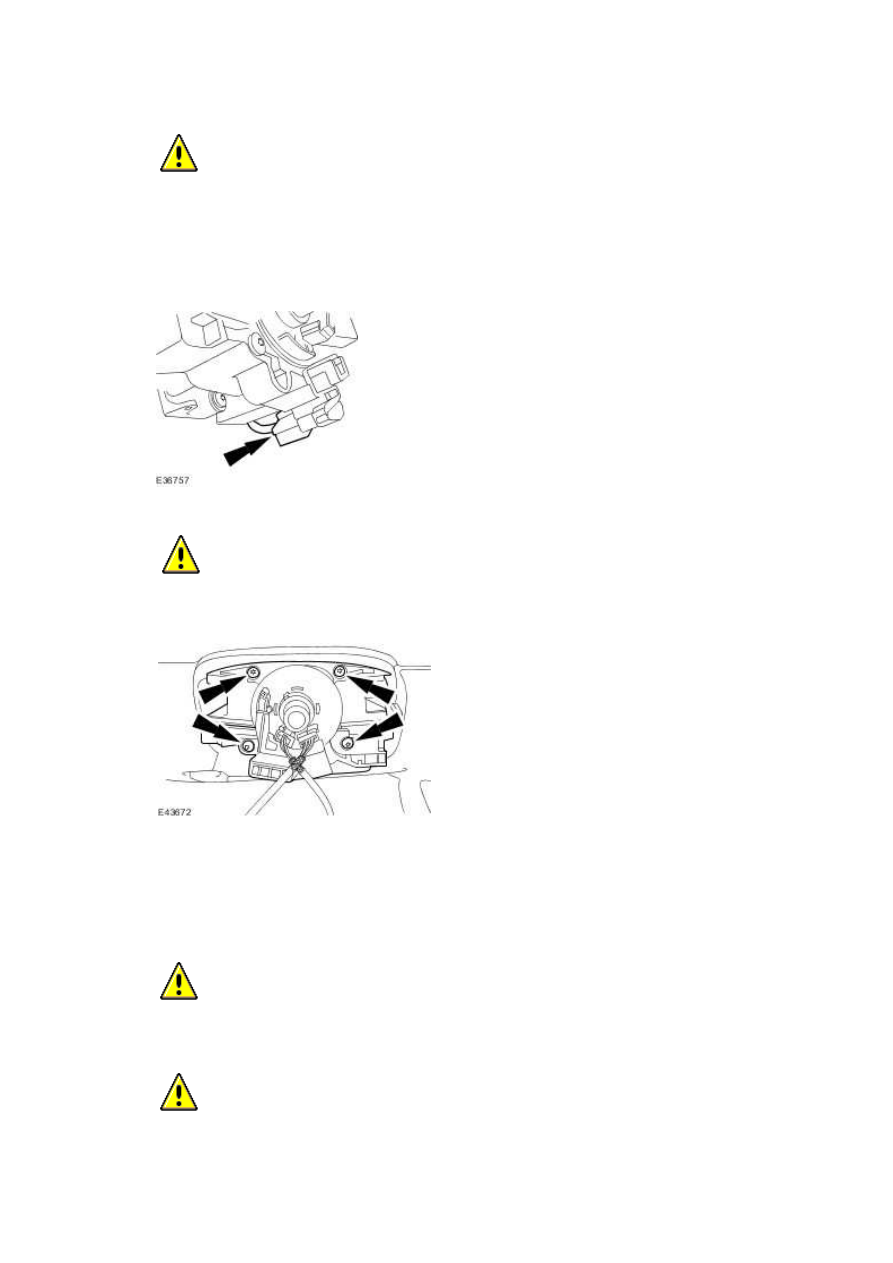
CAUTION: Make sure no damage is occured to the electrical connectors.
Failure to follow this instruction may result in damage to the vehicle.
NOTE:
For vehicles fitted with a heated steering wheel only.
Disconnect the electrical connector.
6
.
CAUTION: Failing to install the special tool to the clockspring may result
in damage to the vehicle.
Remove the clockspring.
Installation
1
.
CAUTION: Make sure the locking tool is correctly installed to the
clockspring. Failure to follow this instruction may result in damage to the
component.
CAUTION: Make sure the wheels are in the straight-ahead position.
Failure to follow this instruction may result in damage to the component.
To install, reverse the removal procedure.
Tighten to 5 Nm.
2
.
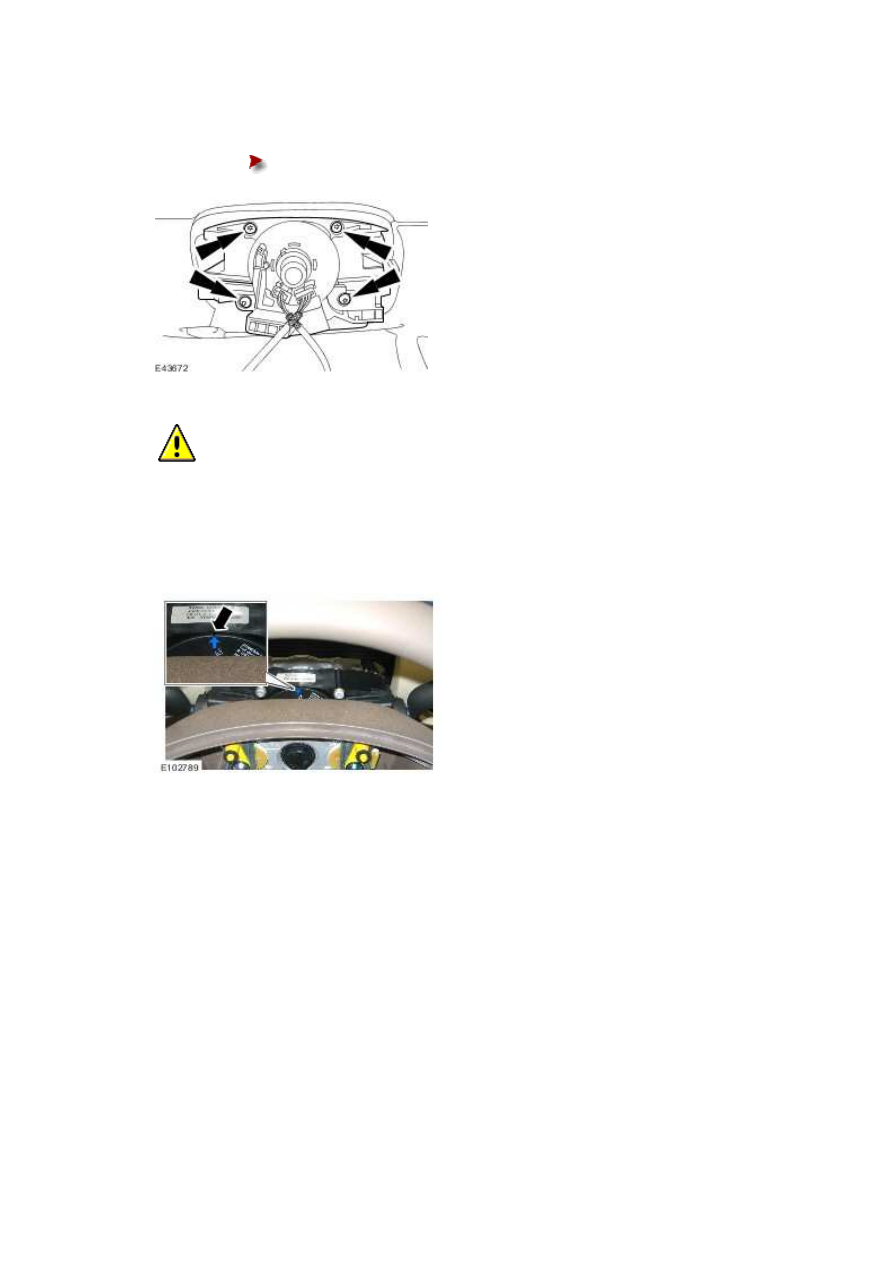
CAUTION: Make sure that the arrow on the cassette is centered and
pointing vertically prior to the steering wheel installation. On removal of the
special tool, keep the clockspring cables taught to prevent the cassette moving
from the set position. Failure to follow this instruction may result in damage to
the component.
Install the steering wheel.
www.
Нет комментариевНе стесняйтесь поделиться с нами вашим ценным мнением.
Текст