Jaguar XJ (X350). Manual — part 711
NOTE:
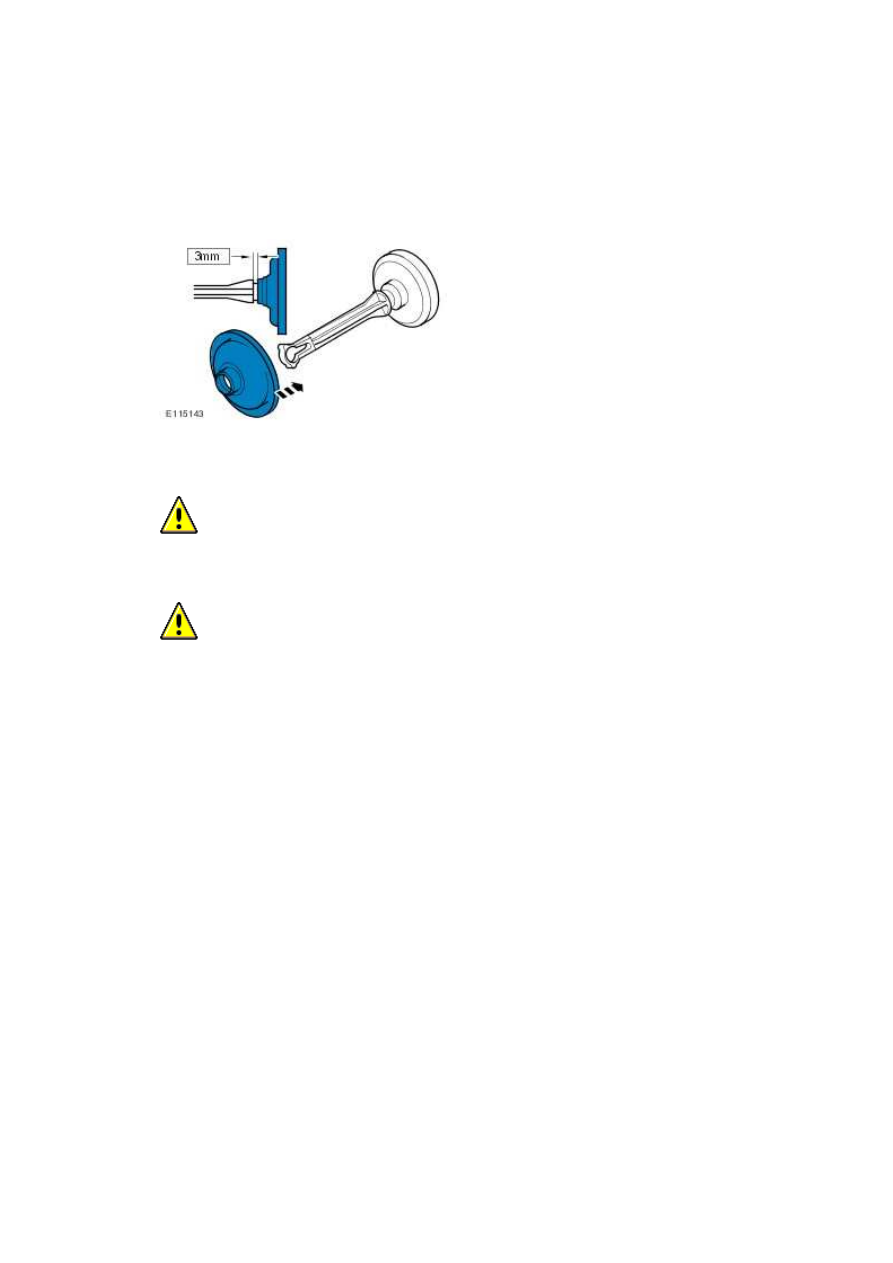
Make sure the diaphragm is fully seated on the connecting rod.
Install the new port deactivation diaphragm to the new connecting rod.
2
.
CAUTION: Make sure that the mating faces are clean and free of foreign material.
CAUTION: Make sure the port deactivation rod is correctly aligned to the port
deactivation valve arm.
NOTE:
Make sue the new port deactivation diaphragm and rod are installed in the correct
orientation to the port deactivation linkage.
Install the port deactivation vale connecting rod and diaphram.

3 . Install the port deactivation valve spring.
4
.
CAUTION: Using a mirror check all clips are fully latched.
CAUTION: Make sure the port deactivation rod is not rotated once the cap has been
installed, if rotation occurs the diaphragm will be damaged.
NOTE:
An audible click is heard when the clips are fully latched.
www.
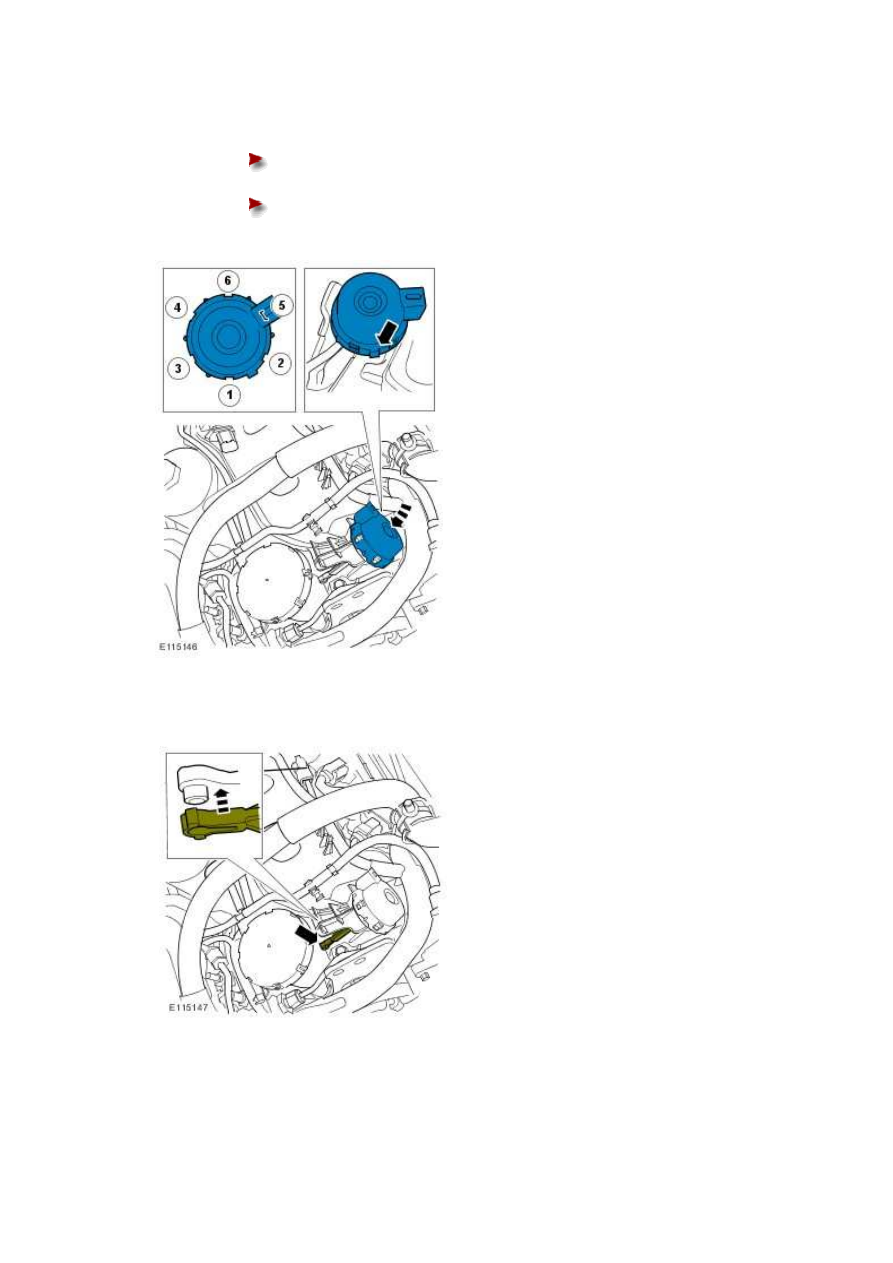
Install the port deactivation valve cap.
Make sure the cap is correctly aligned within the timing marks.
Secure the clips in the sequence shown.
5 . Attach the port deactivation valve connecting rod.
6 . Repeat the above procedure on the opposite side.
7
.
NOTE:
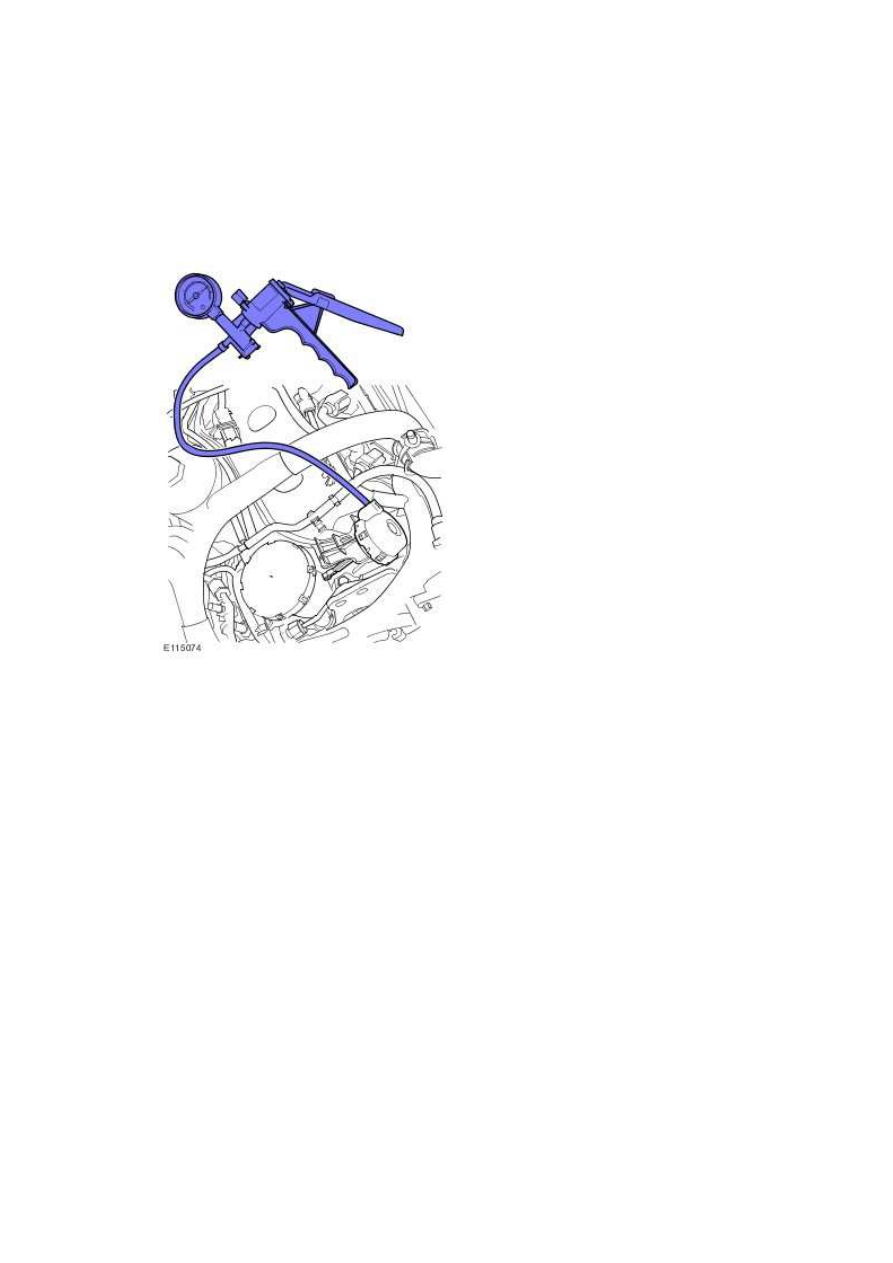
Check the vacuum gauge and any hoses to be used for leaks prior to using on the
vehicle.
Check the port deactivation valve diaphragms using a vacuum gauge.
8
.
NOTE:
When the LH hose is re-connected to the valve the right angle bend must be turned
downwards, make sure the hose lies correctly in the gap between the engine cover
support and the valve cover.
Connect the port deactivation valve vacuum hoses.
www.
Нет комментариевНе стесняйтесь поделиться с нами вашим ценным мнением.
Текст