DAF 95XF. Manual — part 142
6
Removal and installation
BRAKE COMPONENTS
2-7
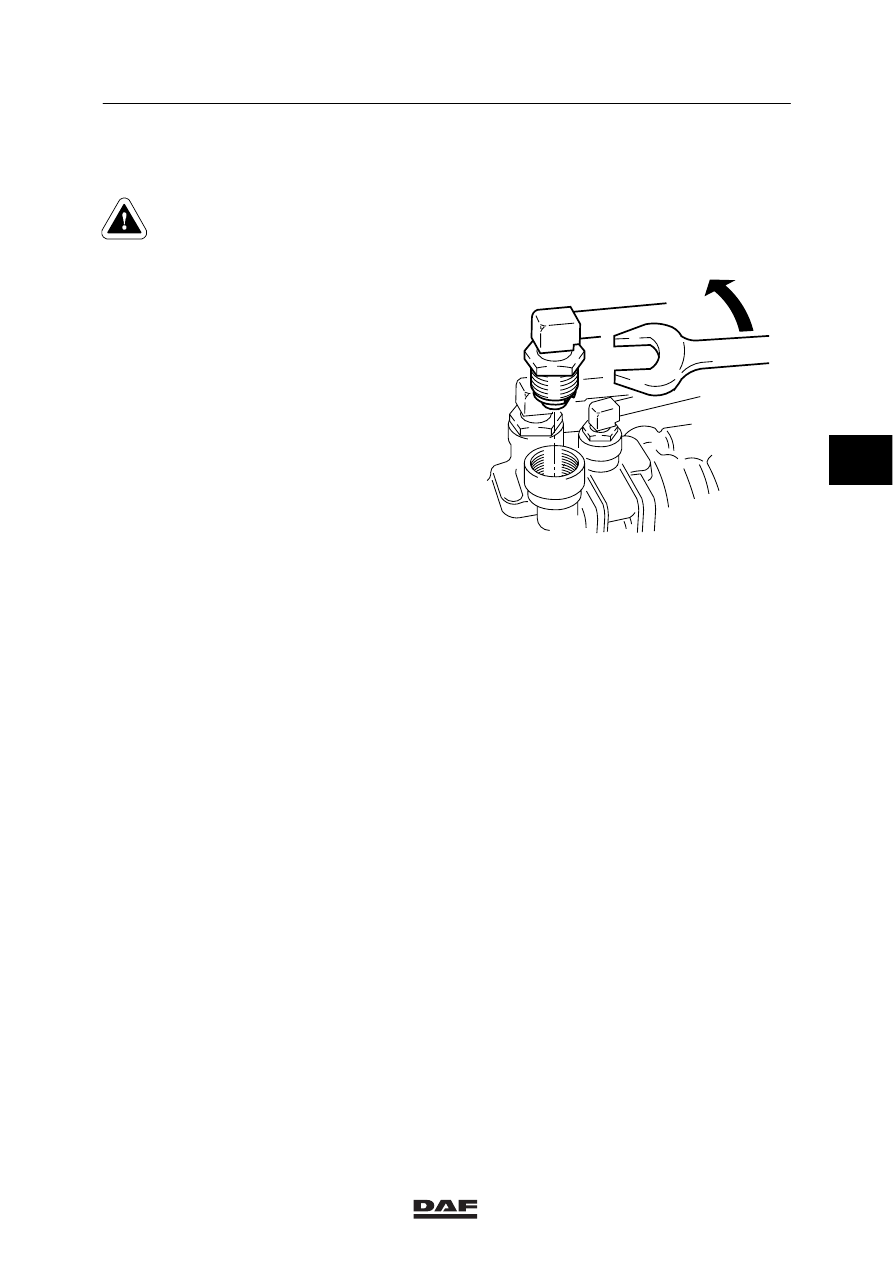
Removing a complete quick-release
coupling from a valve
Be sure to depressurise the
relevant port before removing any
lines and/or quick-release
couplings.
1.
Loosen the socket using an open-end
spanner.
2.
Remove the socket and the hose adapter
as a whole from the valve.
Installing a complete quick-release coupling
in a valve
1.
Check the bore hole for dirt and clean the
bore hole if necessary.
2.
Note:
If the plug is not removed from the socket,
the entire quick-release coupling (plug and
socket) can be reinstalled as a whole. The
socket does not have to be replaced.
Grease the O-ring with brake grease
(DAF no. 1250185).
3.
Tighten the socket to the specified
tightening torque, see main group
“Technical data”.
R600367
4
ǹ 0006

6
BRAKE COMPONENTS
Removal and installation
2-8
Removing the plug from the socket
1.
Remove the entire quick-release coupling
from the valve.
Note:
Make sure not to damage the plug while
removing sleeve, circlips and retaining ring.
2.
Remove the sleeve using the special tool
(DAF no. 1329459).
3.
Remove the retaining ring and the two
circlips using the special tool
(DAF no. 1329549).
4.
Remove the plug from the socket
R600367
R600368
R600369
4
ǹ 0006
6
Removal and installation
BRAKE COMPONENTS
2-9
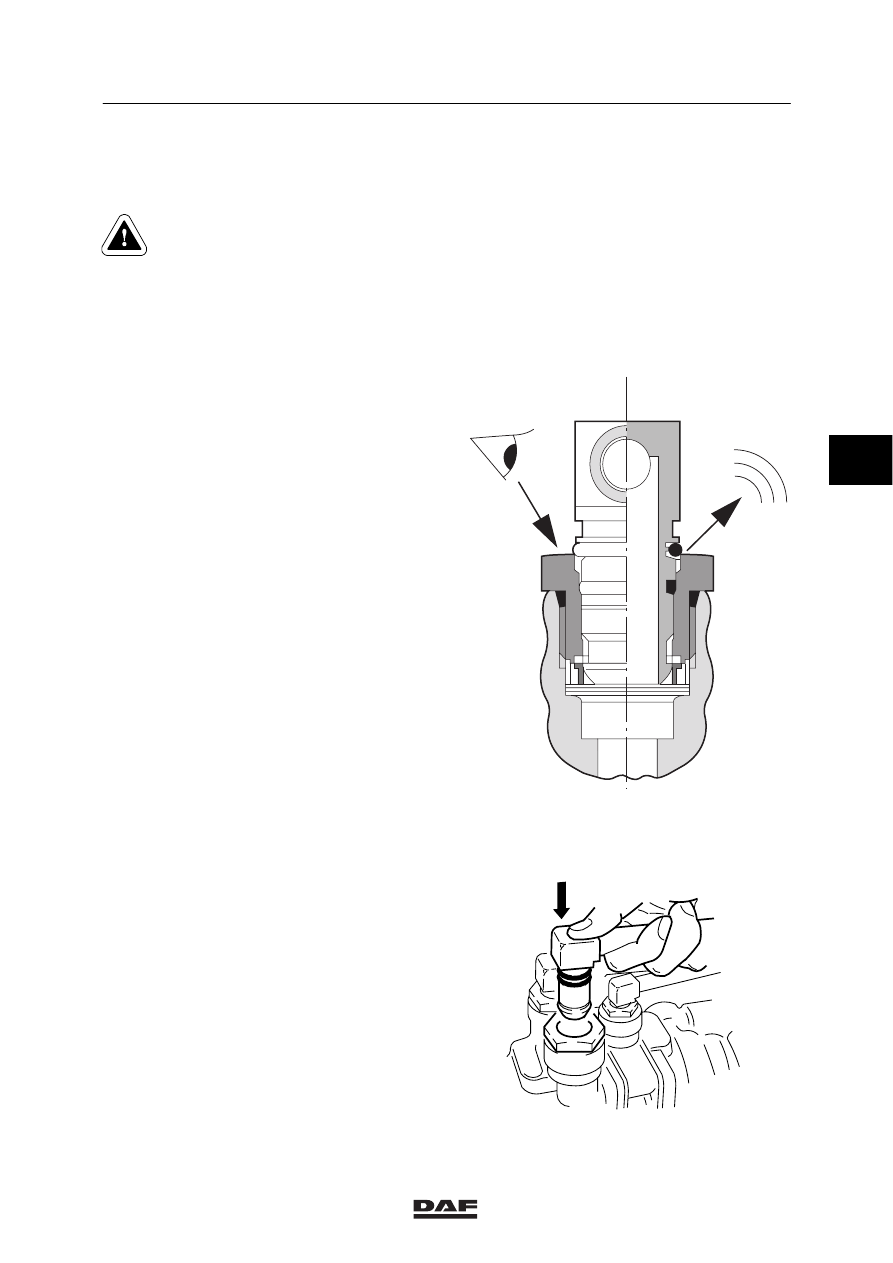
Installing the plug in the socket
1.
Check the bore hole for dirt and clean the
bore hole if necessary.
If the plug is removed from the
socket, the socket must always be
replaced. This is supplied complete
with retaining rings, circlips and
sleeve.
2.
Install the new socket in the valve and
tighten to the specified tightening torque,
see main group “Technical data”.
3.
Check the O-rings of the plug for damage
and replace if necessary.
Note:
If the upper O-ring is still visible, the
connection is not fully locked. Furthermore,
air will audibly escape if pressure is
present.
4.
Install the plug in the socket and check if
the connection is fully locked by pulling it
directly upwards.
R600366
W602006
4
ǹ 0006
6
BRAKE COMPONENTS
Removal and installation
2-10
STANDARD COUPLINGS
Removal of connection pieces with hose
adapter
Cut off the line close to the connection piece.
Remove the section of line attached to the
connection piece by heating, and not by cutting
along its length. The latter could cause damage
to the hose adapter and lead to leakage.
Connecting the connection pieces with the
hose adapter
1.
If a hose adapter has already been fitted on
the end of the line, first cut off this section
of line.
2.
Ensure that the line is long enough.
Replace as necessary.
3.
On no account heat the pipe.
4.
Use a special gripping device to clamp the
pipe (DAF no. 0694829, for line diameters
6, 8, 10 and 12 mm).
5.
Enter the line from the side with the
smallest bore into the gripping device. On
the other side of the grip, there is then
sufficient room to permit expansion of the
line.
6.
The banjo union or nipple can now be
tapped into the pipe with little difficulty using
a plastic mallet.
Leaky line connections
-
If a compression coupling is leaky, the
union nut may only be turned a half turn
tighter, and only once.
-
If the leak has not been corrected, the
connection must be removed and checked
for damage or fouling.
-
If necessary, replace the complete
connection.
-
Leaky banjo unions may not be made extra
tight. Check for damage or fouling. If
necessary, replace the connection.
4
ǹ 0006
Нет комментариевНе стесняйтесь поделиться с нами вашим ценным мнением.
Текст