DAF 95XF. Manual — part 552
EXPLANATORY NOTES ON THE MAINTENANCE ACTIVITIES
Removal and installation
4-24
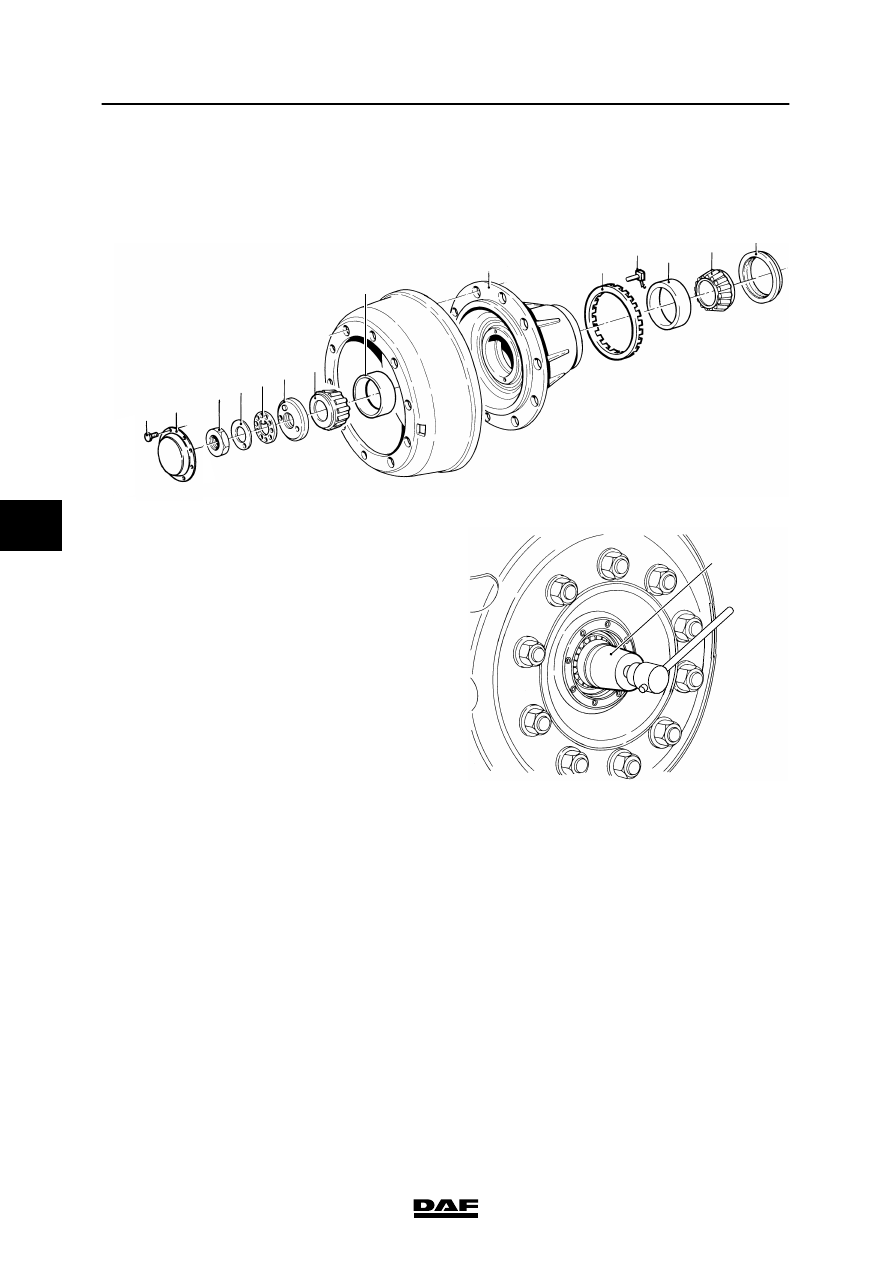
4.16 REMOVAL AND INSTALLATION, WHEEL HUB
FRONT AXLE/LEADING REAR AXLE/TRAILING AXLE 09N075
3 4
5 6
7
8
10
11 12
13
14
9
S7 00 401
2
1
Removing the wheel hub
1.
Jack up the axle until the wheels are clear
from the floor and position suitable stands
under the axle.
2.
Release the brake shoes.
3.
Remove the hub cap (2).
4.
Tap back the locking washer (4) and
remove the lock nut (3) from the axle journal
using the socket spanner (A), special tool
(DAF no. 0535832).
5.
Remove the locking washer (4) and the
circlip (5) from the axle journal.
6.
Position a tyre lift under the wheel.
A
S7 00 084
5
200424
Removal and installation
EXPLANATORY NOTES ON THE MAINTENANCE ACTIVITIES
4-25
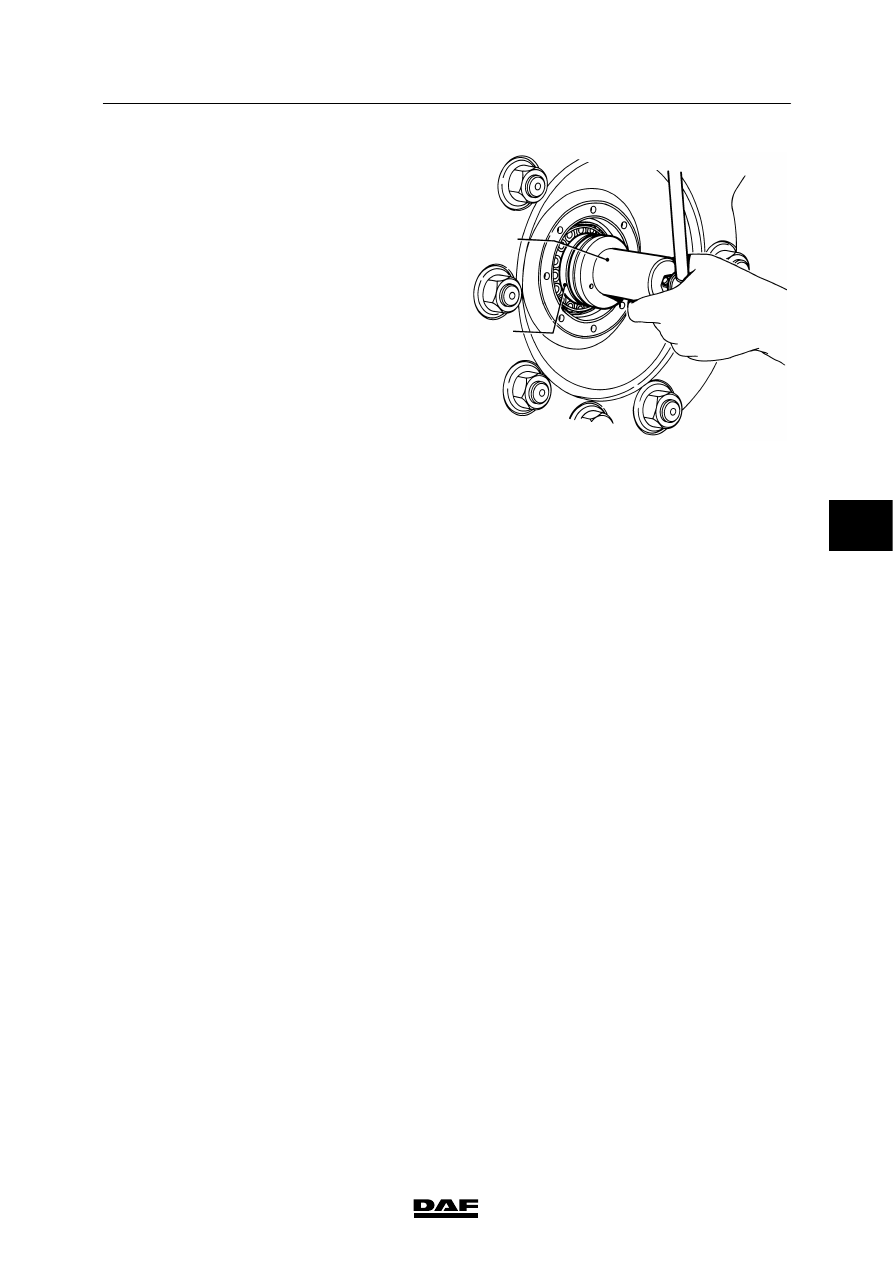
7.
Remove the adjusting nut (6) from the axle
journal using adjusting spanner (A), special
tool (DAF no. 0694783).
8.
Remove the outer wheel bearing (7) from
the hub (8).
Note:
If the bearings are removed from both
wheels, the bearings should be marked.
Each bearing should be reinstalled in its
original hub.
9.
Remove the hub with the wheel from the
axle journal.
Avoid damaging the wheel speed sensor
ring (10.
10. Remove the hub seal (14).
11. Remove the inner wheel bearing (13) from
the hub.
12. Remove the grease from the hub (9) and
clean the hub.
13. Thoroughly clean the bearing cages using a
cleaning liquid.
14. Remove the outer races (8) and (12) of the
wheel bearings, if necessary.
S7 00 404
A
6
5
200424
EXPLANATORY NOTES ON THE MAINTENANCE ACTIVITIES
Removal and installation
4-26
3 4
5 6
7
8
10
11 12
13
14
9
S7 00 401
2
1
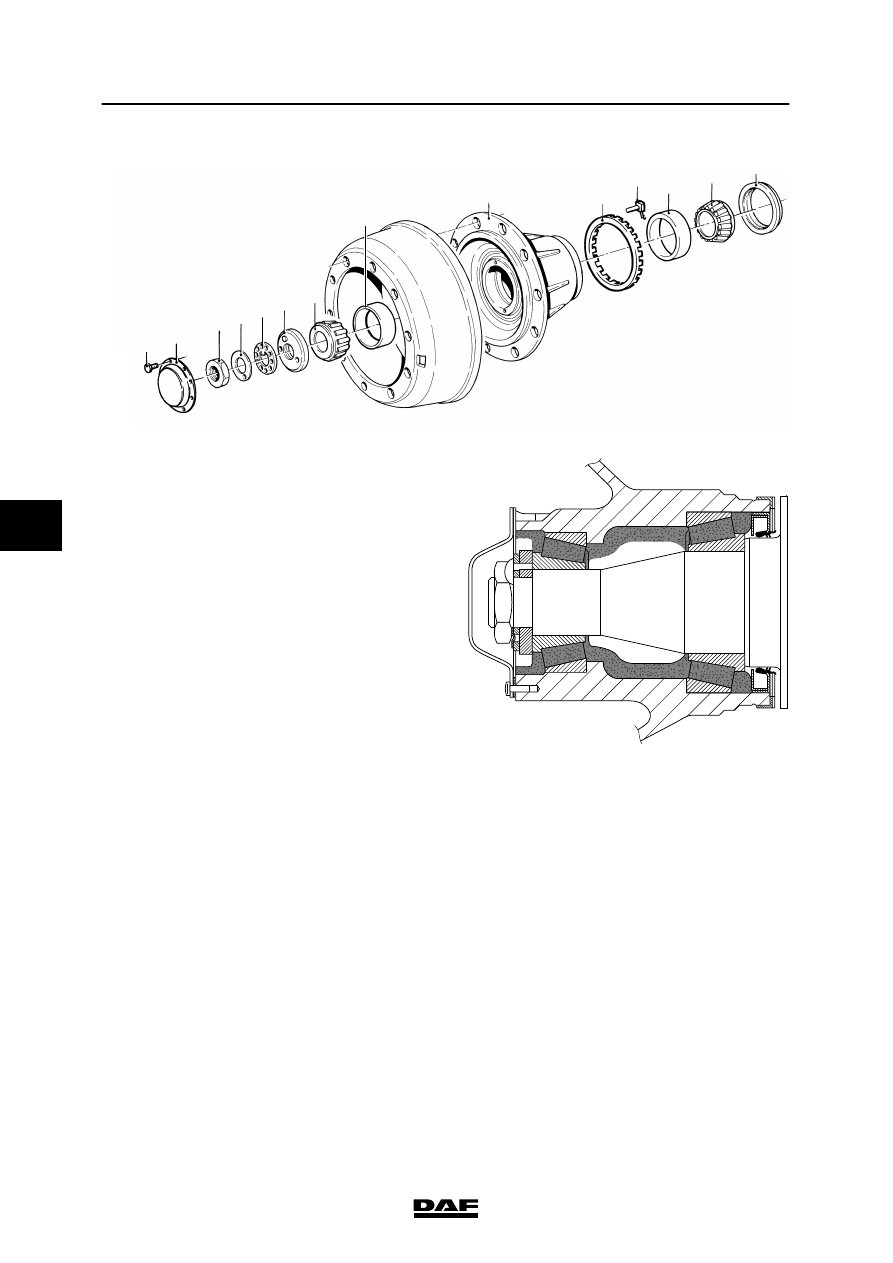
Installing the wheel hub
1.
Check the wheel hub and the wheel
bearings for wear and damage, see
“Inspection and adjustment”.
2.
Fit a new wheel speed sensor ring (10) to
the hub, if necessary.
3.
Fit new wheel bearings into the hub, if
necessary.
4.
Blow-dry the wheel bearings (7) and (13)
using compressed air.
5.
Fill the wheel bearings with the specified
wheel bearing grease.
Also apply a layer of grease to the wheel
bearing circumference.
6.
Fit the wheel bearing (13) into the hub (9).
7.
Fill the inside circumference of the hub with
wheel bearing grease.
8.
Fit a new hub seal (14) in the hub (9).
9.
Apply a little grease to the sealing lips of the
seal (14).
10. Check that the wheel speed sensor (11) is
correctly clamped in the stub axle. Replace
the clamping sleeve of the sensor, if
necessary.
11. Position the wheel in front of the axle
journal using the tyre lift.
Fit the outer wheel bearing (7) into the hub
so that the outer wheel bearing can also
serve as a guide when installing the hub.
S7 00 140
5
200424
Removal and installation
EXPLANATORY NOTES ON THE MAINTENANCE ACTIVITIES
4-27
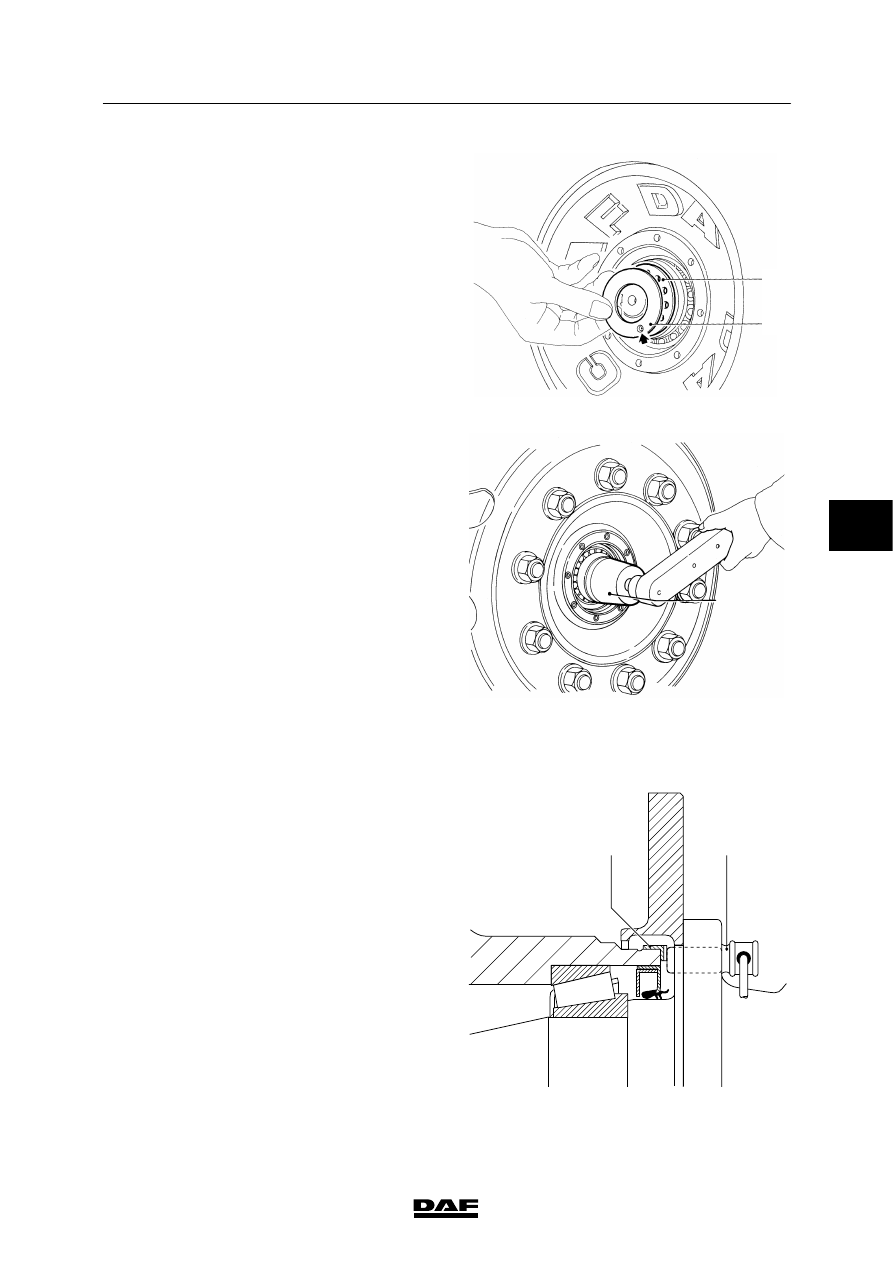
12. Slide the hub over the axle journal. Do not
pry, as the oil seal (14) might be damaged
in the process.
13. Fit the adjusting nut (6) to the axle journal.
14. Adjust the specified wheel bearing play (see
chapter “Inspection and adjustment”) and fit
the circlip (5) to the axle journal.
15. Fit a new locking washer (4) to the axle
journal. The washer cam (see the arrow)
should catch in one of the holes of the
circlip (5).
S7 00 402
5
4
16. Fit the lock nut (3) to the axle journal.
Tighten the lock nut (3) to the specified
tightening torque. See “Technical data”. Use
a socket spanner (A) for this, special tool
(DAF no. 0535832).
17. Secure lock nut (3) by tapping back the
locking washer (4) against the side of the
lock nut.
18. Apply the specified grease to the front of the
outer wheel bearing.
19. Clean the hub (9) sealing surfaces and the
hub cap (2), and make sure they are dry
and free of grease.
20. Apply a locking compound to the hub (9)
sealing face.
21. Fit the hub cap (2). Tighten the bolts (1) to
the specified torque. See “Technical data”.
A
S7 00 087
22. Press the wheel speed sensor (11) up
against the sensor ring (10). While the
vehicle is being driven, the air gap between
the wheel speed sensor (11) and the sensor
ring (10) is adjusted automatically.
23. Adjust the brakes.
S7 00 403
10
11
5
200424
Нет комментариевНе стесняйтесь поделиться с нами вашим ценным мнением.
Текст