DAF 95XF. Manual — part 401
4
XF ENGINE INLET AND EXHAUST SYSTEM
Removal and installation
95
XF series
4-2
2.
Clean the sealing faces.
3.
Apply a layer of Copaslip to the exhaust
manifold studs.
4.
Always use new gaskets during installation.
5.
Install the turbocharger. If necessary turning
the two halves of the housing so that the oil
and air pipes can be connected free of
stress.
6.
Install the oil discharge pipe.
7.
Spray clean engine oil into the oil supply of
the turbocharger, and install the oil supply
pipe.
8.
Install the connector pipe from the
turbocharger and the air inlet pipe to the
intercooler.
9.
Install the exhaust brake.
10. Install the air inlet hose between the
turbocharger and the air filter.
11. Install the heat shields for the turbocharger.
Tighten the fixing bolts to the specified
tightening torque. See main group
“Technical data”.
12. Always check the setting of the wastegate,
see chapter “Inspection and adjustment”.
3
©
0008
4
95
XF series
Removal and installation
XF ENGINE INLET AND EXHAUST SYSTEM
4-3
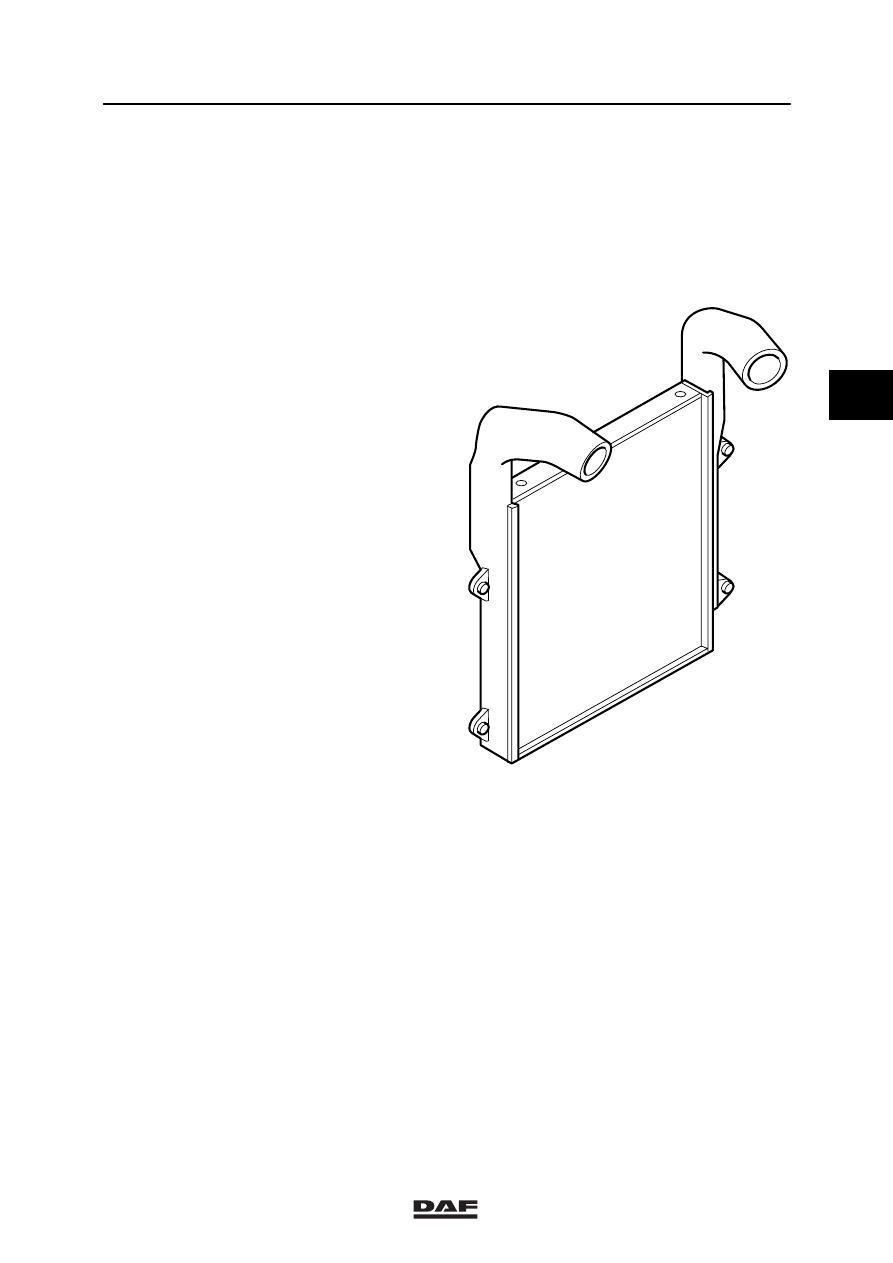
4.2
REMOVAL AND INSTALLATION OF INTERCOOLER
Note:
The removal and installation procedure of the
intercooler allows for the presence of an
airconditioning unit.
If such a unit is not present, the sections
concerned can be skipped.
Removing the intercooler
1.
Remove the lower grille.
2.
Remove the front engine encapsulation.
3.
Remove the engine encapsulation under
the cab.
4.
Disconnect the two coolant pipes and the
air-conditioning pipe from the pipe strip at
the front of the intercooler.
5.
Remove the pipe strip.
6.
Remove the oil dip stick from the intercooler
and put it aside.
7.
Remove the radiator expansion reservoir
and put it aside.
8.
Remove the fixing bolts from the
air-conditioning condenser and pull the
condenser forwards.
9.
Disconnect the other air-conditioning pipes
from the intercooler.
10. Remove the wire mesh underneath the
intercooler.
11. Remove the air-conditioning dryer
underneath the intercooler.
12. Remove the left-hand air inlet hose from the
inlet manifold to the intercooler.
13. Remove the right-hand air inlet hose from
the inlet pipe to the intercooler.
i 400206
3
©
0008
4
XF ENGINE INLET AND EXHAUST SYSTEM
Removal and installation
95
XF series
4-4
14. Remove the air-conditioning compressor
unit and move it, together with the hoses, to
the front of the intercooler.
15. Remove the fixing bolts from the intercooler.
16. Move the intercooler a little to the right to
remove the fixing bolt of the oil filler pipe.
17. Slide the oil filler pipe to the right and put it
aside.
18. Remove the reaction rod from the radiator
to the engine lifting eye.
19. Carefully pull the intercooler up between the
radiator and the condenser.
Installing the intercooler
1.
Carefully lower the intercooler between the
radiator and the condenser.
2.
Slide the oil filler pipe onto the radiator and
install the fixing bolt.
3.
Place the intercooler in its position and
hand-tighten with two fixing bolts.
4.
Install the reaction rod from the radiator to
the engine lifting eye.
5.
Install the air-conditioning compressor with
its pipes.
6.
Install the air-conditioning dryer underneath
the intercooler.
7.
Install the wire mesh underneath the
intercooler.
8.
Install the air-conditioning condenser.
9.
Install the other air-conditioning pipes.
3
©
0008
4
95
XF series
Removal and installation
XF ENGINE INLET AND EXHAUST SYSTEM
4-5
10. Install the other fixing bolts of the
intercooler.
11. Insert the oil dip stick.
12. Install the pipe strip.
13. Install the two coolant pipes and the
air-conditioning pipe onto the pipe strip at
the front of the intercooler.
14. Install the connector pipes between
manifolds and intercooler. Tighten the fixing
bolts to the specified tightening torque. See
main group “Technical data”.
15. Install the expansion reservoir.
16. Install the engine encapsulation under
the cab.
17. Install the front engine encapsulation.
18. Install the lower grille.
3
©
0008
Нет комментариевНе стесняйтесь поделиться с нами вашим ценным мнением.
Текст