DAF 95XF. Manual — part 826
1
EXTERNAL CAB COMPONENTS
Removal and installation
4-34
4.19 REMOVAL AND INSTALLATION, HEADLIGHT LEVELLING CONTROL
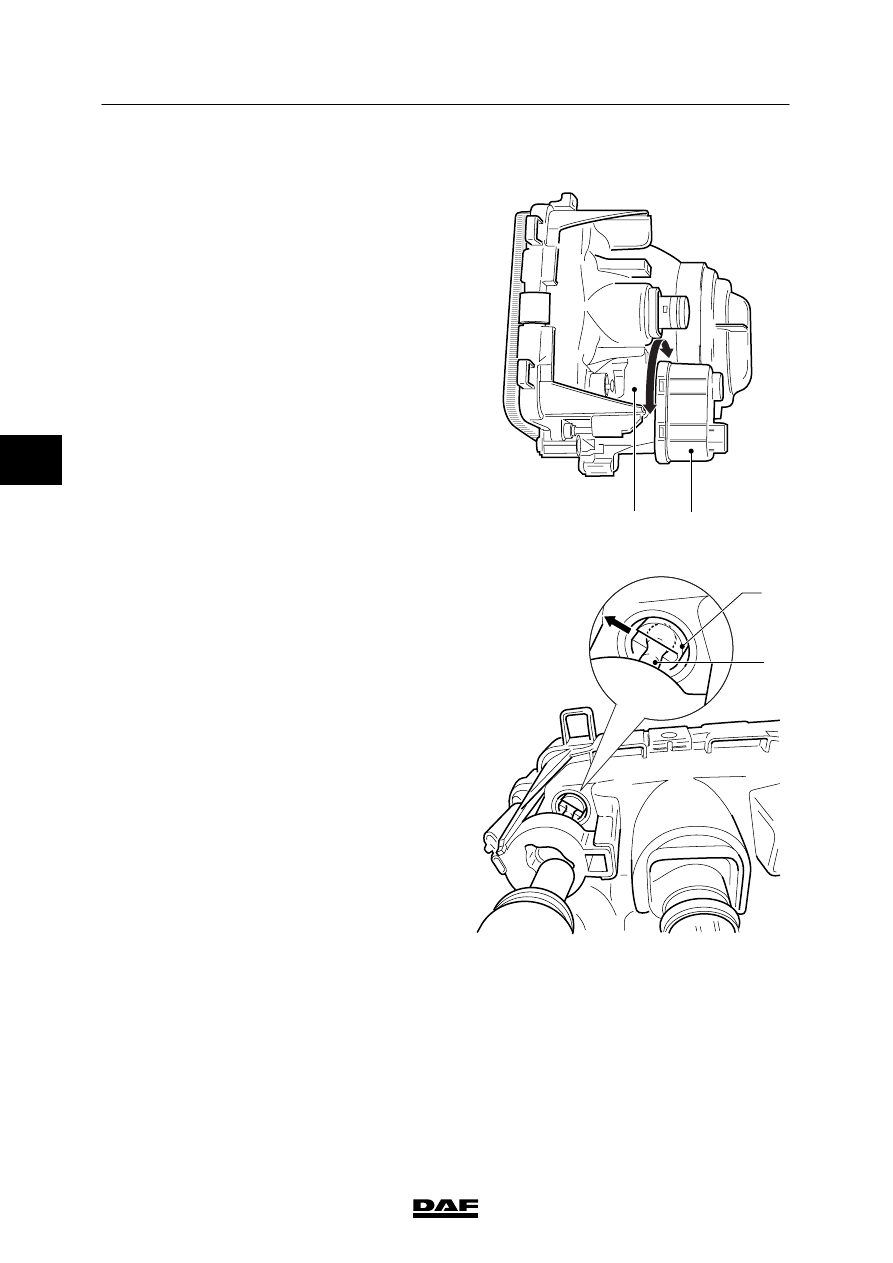
Removing the headlight levelling control
1.
Remove the headlight.
2.
Turn (approximately 1/3 turn) the headlight
levelling (1) out of the white bracket (2) (left
headlight clockwise, right headlight
counterclockwise).
3.
Carefully take the rubber grommet around
the adjusting spindle from the headlight
housing.
2
1
K1 01 489
4.
Remove the adjusting spindle (1) by
pushing it out of the opening in the holder
(2).
5.
Remove the headlight levelling control from
the headlight.
Installing the headlight levelling control
1.
Install the headlight levelling control by
fitting the adjusting spindle in the holder.
2.
Carefully push the rubber grommet in the
opening of the headlight housing. Make
sure that the edge of the rubber grommet
fits snugly in the opening all round. The
purpose of this is to prevent water from
penetrating the headlight.
3.
Turn the headlight levelling control in the
white bracket.
4.
Fit the headlight onto the headlight bracket.
5.
Check the headlight levelling and adjust if
necessary. See ”Inspection and
adjustment”.
2
1
K1 01 488
4
ᓻ 200345
1
Removal and installation
EXTERNAL CAB COMPONENTS
4-35
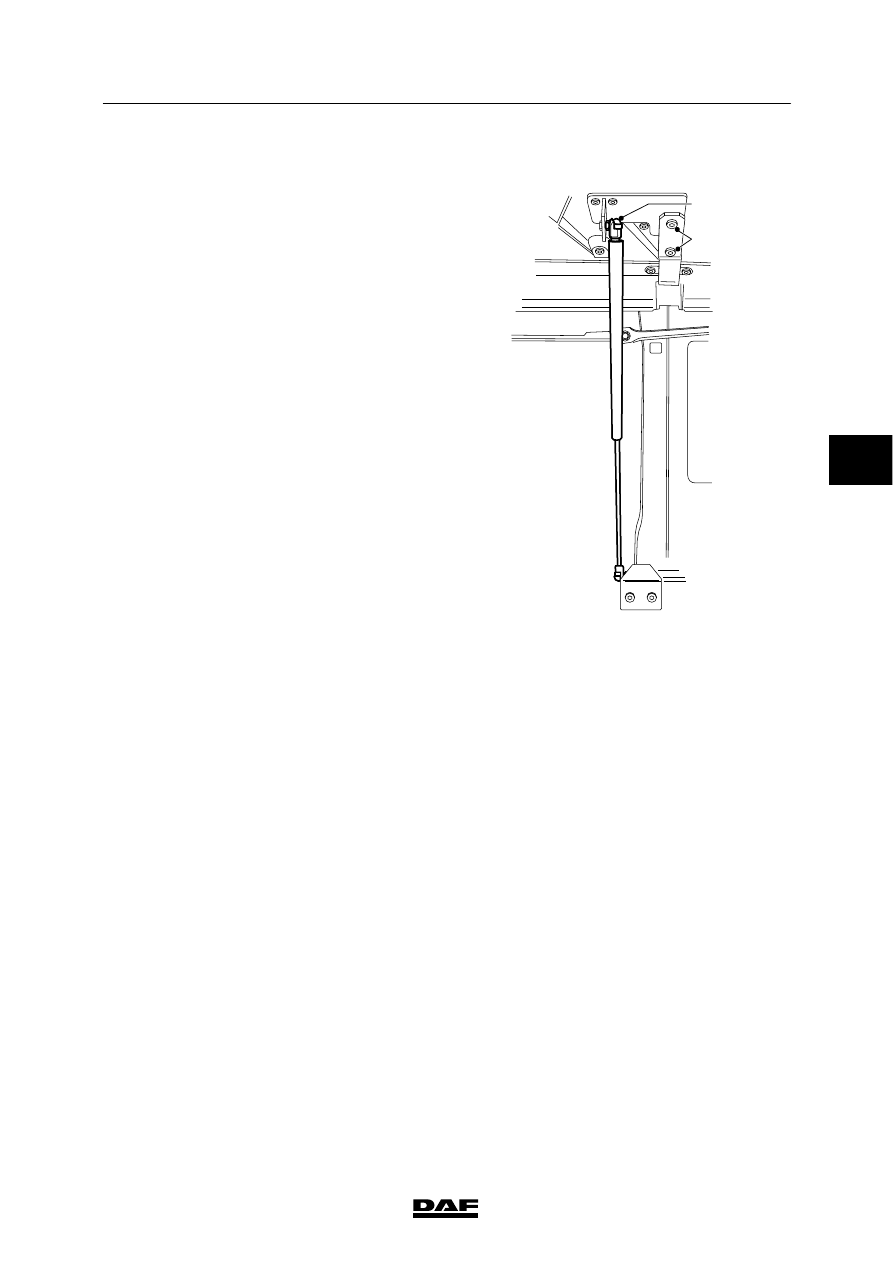
4.20 REMOVAL AND INSTALLATION, CAB GRILLE
Removing the cab grille
1.
Open the cab grille and support it.
2.
Remove the upper gas damper attachment
(1) and remove the gas dampers from the
grille.
3.
Remove the attachment bolts (2) of the
grille hinges.
4.
Remove the cab grille.
Installing the cab grille
1.
Fit the grille and tighten the attachment
bolts (2) of the hinges.
2.
Support the grille in the open position and
install the upper gas damper attachment (1)
to the grille. If applicable, use new split pins.
3.
Close the grille.
K1 01 516
1
2
4
ᓻ 200345
1
EXTERNAL CAB COMPONENTS
Removal and installation
4-36
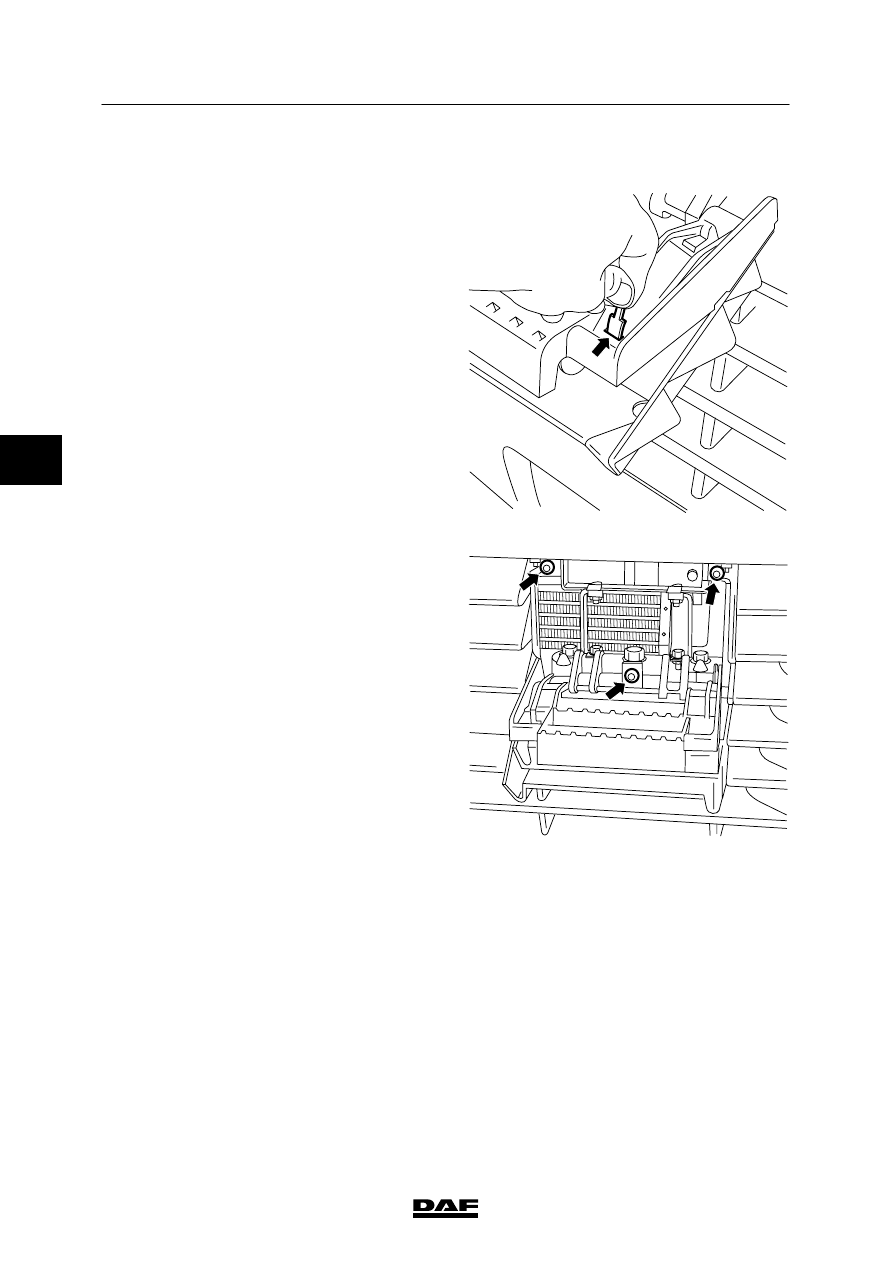
4.21 REMOVAL AND INSTALLATION, LOWER GRILLE
Removing the lower grille
1.
Open the bottom step and push the rubber
attachment strip back through the opening.
2.
Remove the attachment bolts.
3.
Close the bottom step and remove the
lower grille by pulling it upwards from the
attachment points.
K100424
K100425
Installing the lower grille
1.
Close the bottom step.
2.
Install the lower grille. Make sure that the
steps have been folded in and that the grille
is securely fastened against the front by
means of the attachment clips.
3.
Fit the attachment bolts.
4.
Open the steps and pull the rubber
attachment strips through the gaps in the
steps.
4
ᓻ 200345
1
Removal and installation
EXTERNAL CAB COMPONENTS
4-37
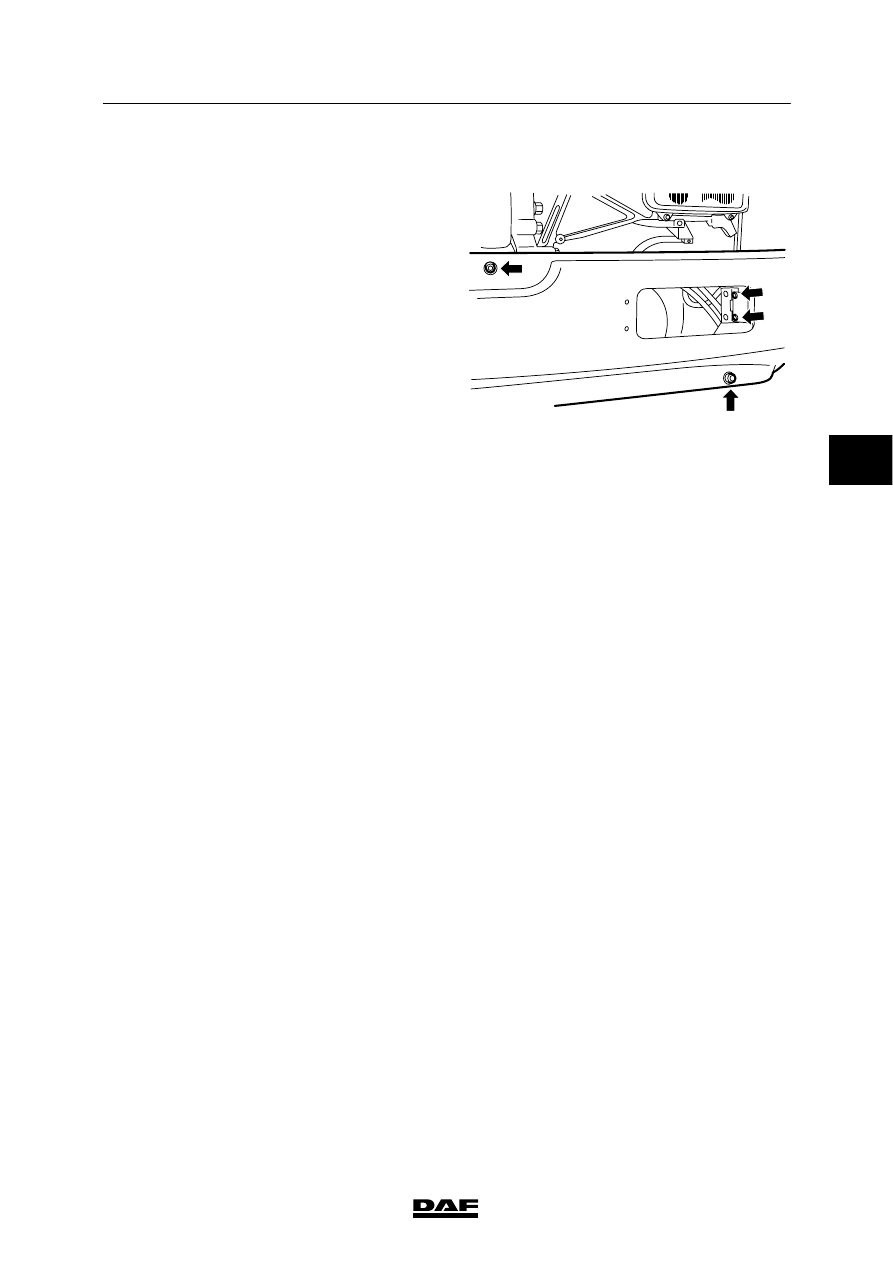
4.22 REMOVAL AND INSTALLATION, STEEL BUMPER
Removing the steel bumper
1.
If fitted, remove the combination lamps or
the covers.
2.
Remove the four attachment bolts (A) on
the inside of the combination lamp
installation opening.
3.
Remove the four attachment bolts (B) on
the front of the bumper.
4.
Remove the bumper.
K100363
A
B
B
Installing the steel bumper
1.
Fit the bumper and hand-tighten the two
socket-head screws on the front of the
bumper.
2.
Fit the four attachment bolts to the inside of
the combination lamp installation opening.
3.
Fit the two remaining attachment bolts.
4.
Make sure that the bumper is properly
aligned with the other parts. Tighten the
bumper attachments.
5.
If applicable, fit the combination lamps or
the covers.
4
ᓻ 200345
Нет комментариевНе стесняйтесь поделиться с нами вашим ценным мнением.
Текст