DAF LF45, LF55 Series. Manual — part 167
©
200505
4-3
Removing and installing
BE ENGINE
ΛΦ45/55 series
2
2
Installing the engine mounts
1.
Tighten the engine mounting attachment
bolts to the specified torque. See "Technical
data".
2.
Fit the viscous fan clutch with the fan.
Tighten the attachment bolts to the specified
torque. See "Technical data".
3.
Fit the connector of electronic unit ECS-DC3.
4.
Fit the oil supply pipe.
5.
Fit the heater hose bracket at the top of the
radiator.
6.
Fit the bracket for the air-conditioning pipes
at the top of the radiator.
7.
Fit the torque rod bracket between the
engine and the radiator.
8.
Fit the air inlet hoses between the engine
and the air cooler.
9.
Fit the coolant hoses between the engine,
radiator and the header tank.
10. Fit the torque rod between the radiator and
the engine.
11. Fill the cooling system. See "Draining and
filling".
12. Connect the battery earth lead.
BE ENGINE
4-4
©
200505
Removing and installing
2
ΛΦ45/55 series
2
4.3 REMOVAL AND INSTALLATION, VALVE COVER
When the engine or parts thereof are
opened, dirt may enter. This may
cause serious damage to the engine.
The engine should therefore be
cleaned thoroughly before it is
opened.
Removing the valve cover
1.
Clean the area around the valve cover.
2.
Remove the banjo bolt and the attachment of
the plastic crankcase breather tube.
3.
Remove the valve cover attachment nuts.
4.
Remove the valve cover.
Installing the valve cover
1.
Clean the sealing surface of the valve sleeve
and the valve cover.
2.
Check the valve cover gasket. If it is not
damaged it may be re-used.
3.
Fit the valve cover gasket to the valve cover.
4.
Fit the valve cover.
5.
Fit the attachment nuts of the valve cover
and tighten them to the specified torque. See
"Technical data".
6.
Fit the plastic crankcase breather tube and
the banjo bolt to the valve cover.
}
©
200505
4-5
Removing and installing
BE ENGINE
ΛΦ45/55 series
2
2
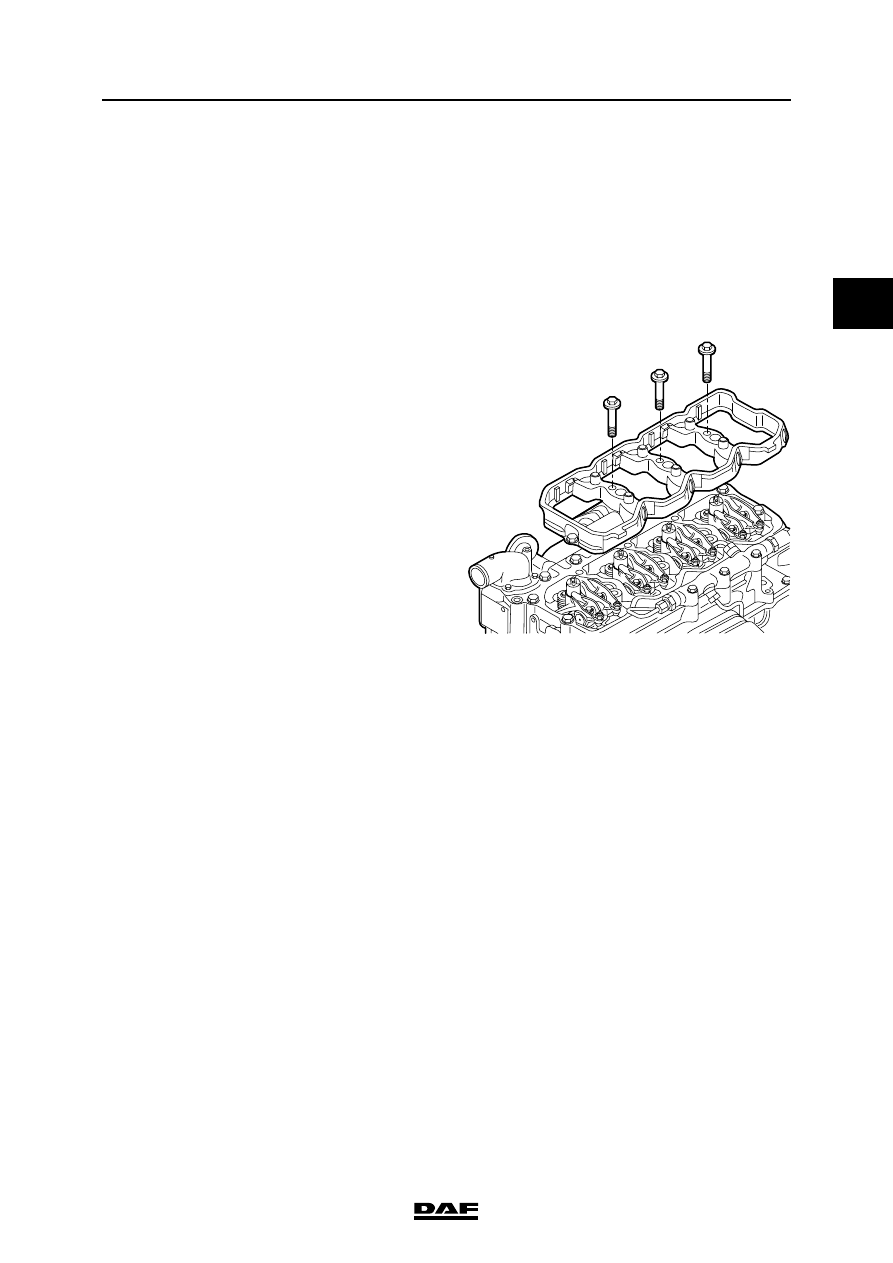
4.4 REMOVAL AND INSTALLATION, VALVE SLEEVE
When the engine or parts thereof are
opened, dirt may enter. This may
cause serious damage to the engine.
The engine should therefore be
cleaned thoroughly before it is
opened.
Removing the valve sleeve
1.
Remove the valve cover.
2.
Detach the feed-through connectors from the
injectors.
3.
Remove the injector wiring from the
injectors.
4.
Remove the attachment bolts from the valve
sleeve.
5.
Remove the valve sleeve with the gasket.
Installing the valve sleeve
1.
Clean the sealing surface of the cylinder
head and valve sleeve.
2.
Check the valve sleeve gasket. If it is
undamaged, it may be re-used. Fit the valve
sleeve gasket onto the valve sleeve.
3.
Fit the valve sleeve.
4.
Tighten the valve sleeve attachment bolts to
the specified torque. See "Technical data".
Tightening the injector wiring to a
higher torque than specified may
cause damage to the injector.
}
M201082
}
BE ENGINE
4-6
©
200505
Removing and installing
2
ΛΦ45/55 series
2
5.
Fit the injector wiring on the injectors and
tighten it to the specified torque. See
"Technical data".
6.
Fit the feed-through connectors of the
injectors.
7.
Fit the valve cover.
Нет комментариевНе стесняйтесь поделиться с нами вашим ценным мнением.
Текст