DAF LF45, LF55 Series. Manual — part 101
1
LF45/55 series
Removal and installation
INTERNAL CAB COMPONENTS
4-11
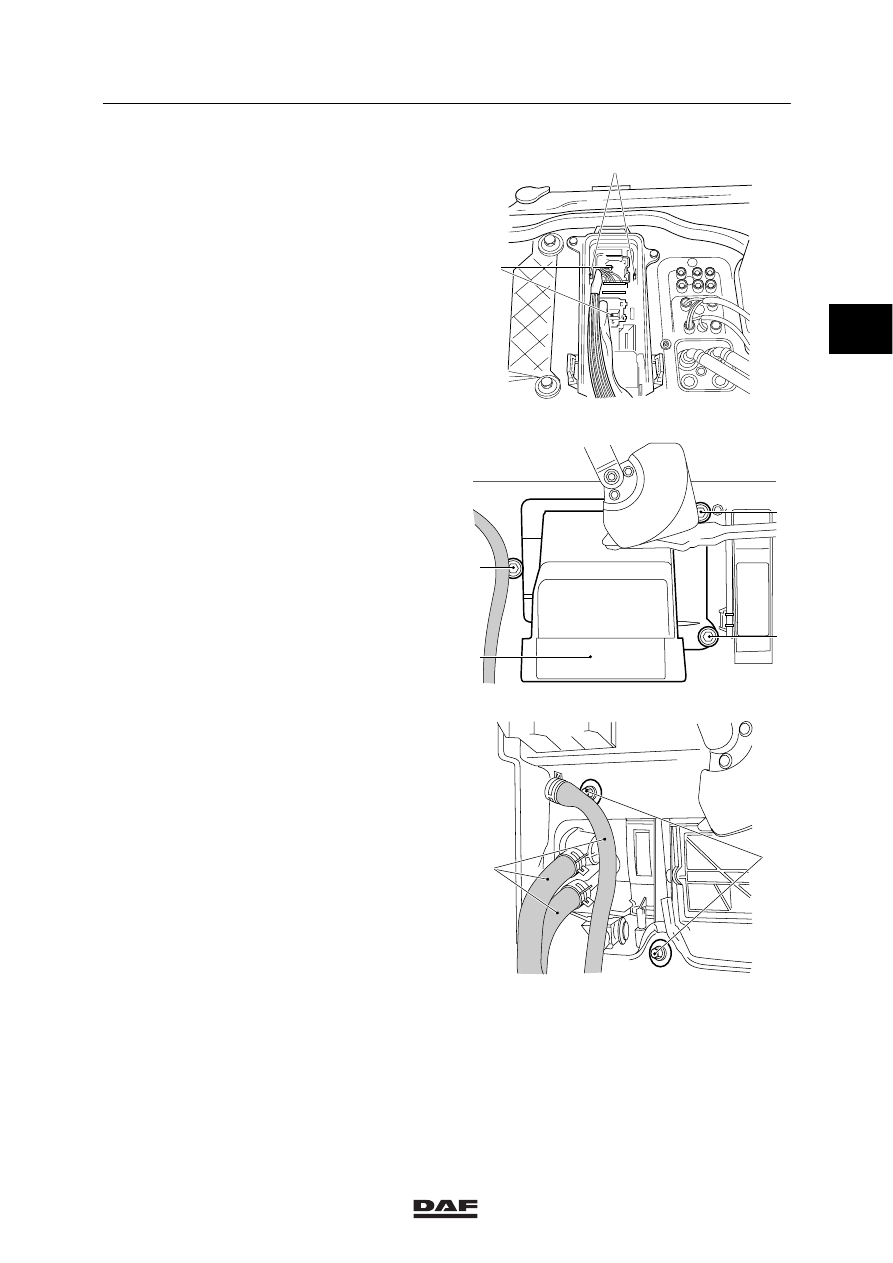
12. Remove the connectors (2).
13. Push the retainers (1) aside and the
connector holder plate inside.
K1 00 990
2
1
14. Remove the attachment bolts (1) from the
filter casing and remove the filter casing (2).
K1 01 194
1
1
1
2
15. Remove the attachment bolts (1).
16. Remove the heater hoses (2) and seal the
heater tubes.
17. Remove the connectors to the left and right
of the steering column.
K1 01 175
1
2
2
ǹ 0210
1
INTERNAL CAB COMPONENTS
Removal and installation
LF45/55 series
4-12
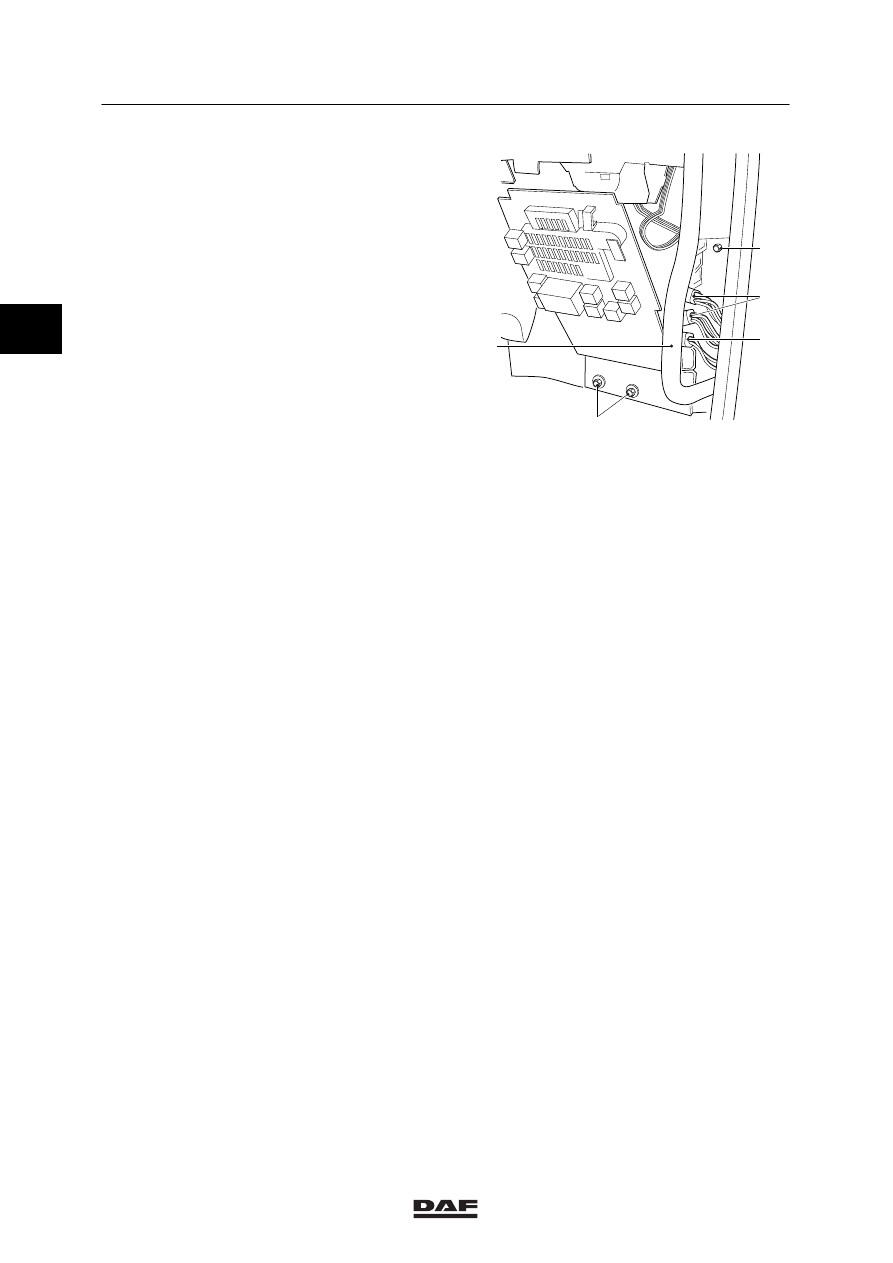
18. Remove the connectors (2) and the earth
connections (3).
19. Remove the attachment bolts on the
underside of the dashboard, left and right.
20. Remove the attachment bolts (4) and (1).
21. Pull the cover plate in the A-pillar out of the
retainer, remove the grip attachment bolt
and remove the grip (5).
22. Remove the floor mats. Remove the
diagnostic and ECAS connectors by taking
the wiring apart and then removing the
attachment bolts. Remove the connectors
from the bracket.
23. Remove the floor plate above the wiring.
24. Remove the seat wiring.
25. Remove the attachment bolts from the
window frame.
26. Remove the attachment bolts on the
underside and remove the complete
dashboard.
K1 00 986
1
2
3
4
5
Fitting the dashboard
1.
Fit the dashboard and secure it in the
window frame using a few attachment bolts.
2.
Fit the seat wiring.
3.
Install the floor plate above the wiring.
4.
Fit the ECAS and diagnostic connectors to
the bracket.
5.
Fit the grip and the cover panel in the
A-pillar.
6.
Fit the connectors in the central box.
7.
Remove the seals from the coolant hoses
and attach the hoses.
8.
Fit the connectors to the left and right of the
steering column.
2
ǹ 0210
1
LF45/55 series
Removal and installation
INTERNAL CAB COMPONENTS
4-13
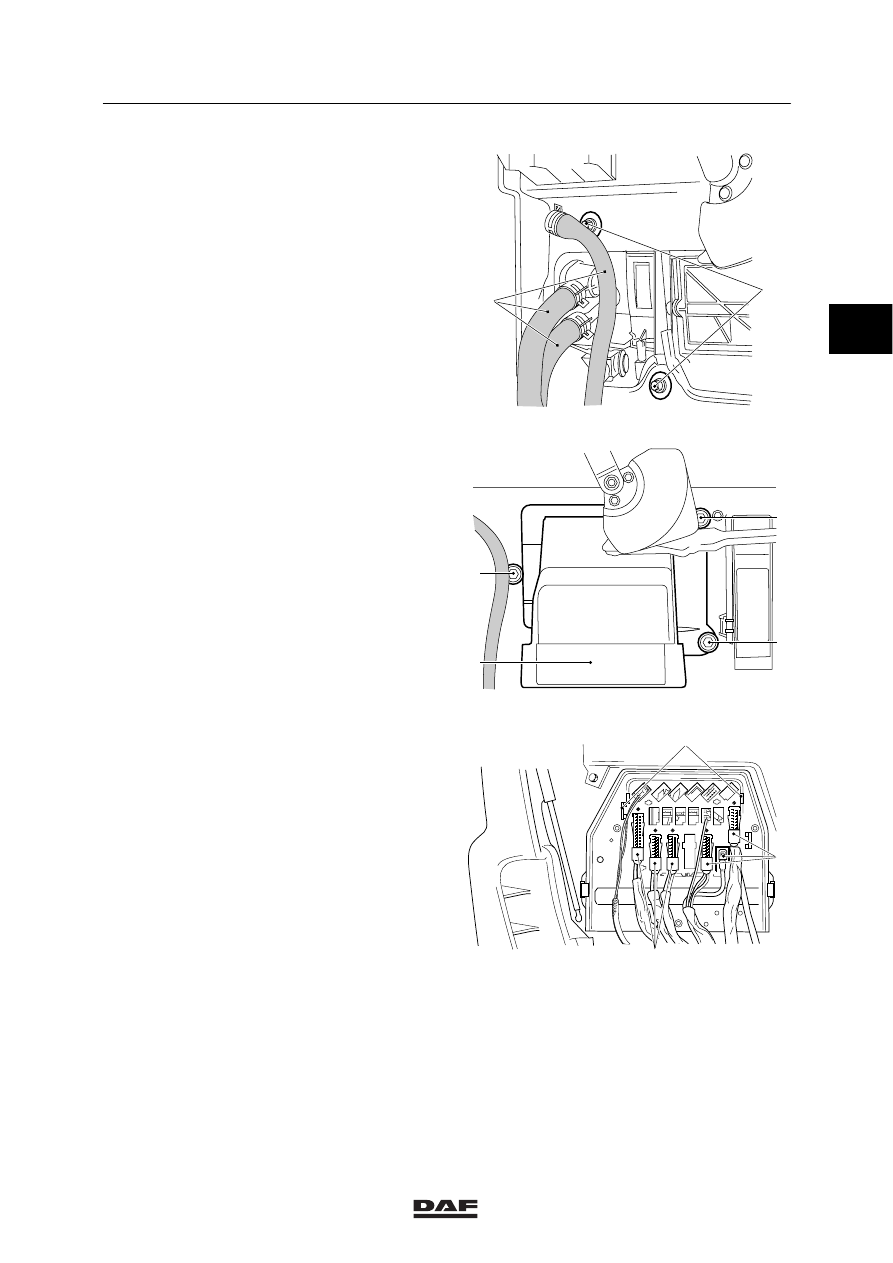
9.
Insert the attachment bolts (1).
10. Fit the heater hoses (2).
K1 01 175
1
2
11. Fit the filter casing (2). Secure the filter
casing using the attachment bolts (1).
K1 01 194
1
1
1
2
12. Fit the plate for the connectors via the
inside and press it into the retainers (2).
13. Fit the connectors (1).
14. Fit the cover plate.
K1 00 994
2
1
1
2
ǹ 0210
1
INTERNAL CAB COMPONENTS
Removal and installation
LF45/55 series
4-14
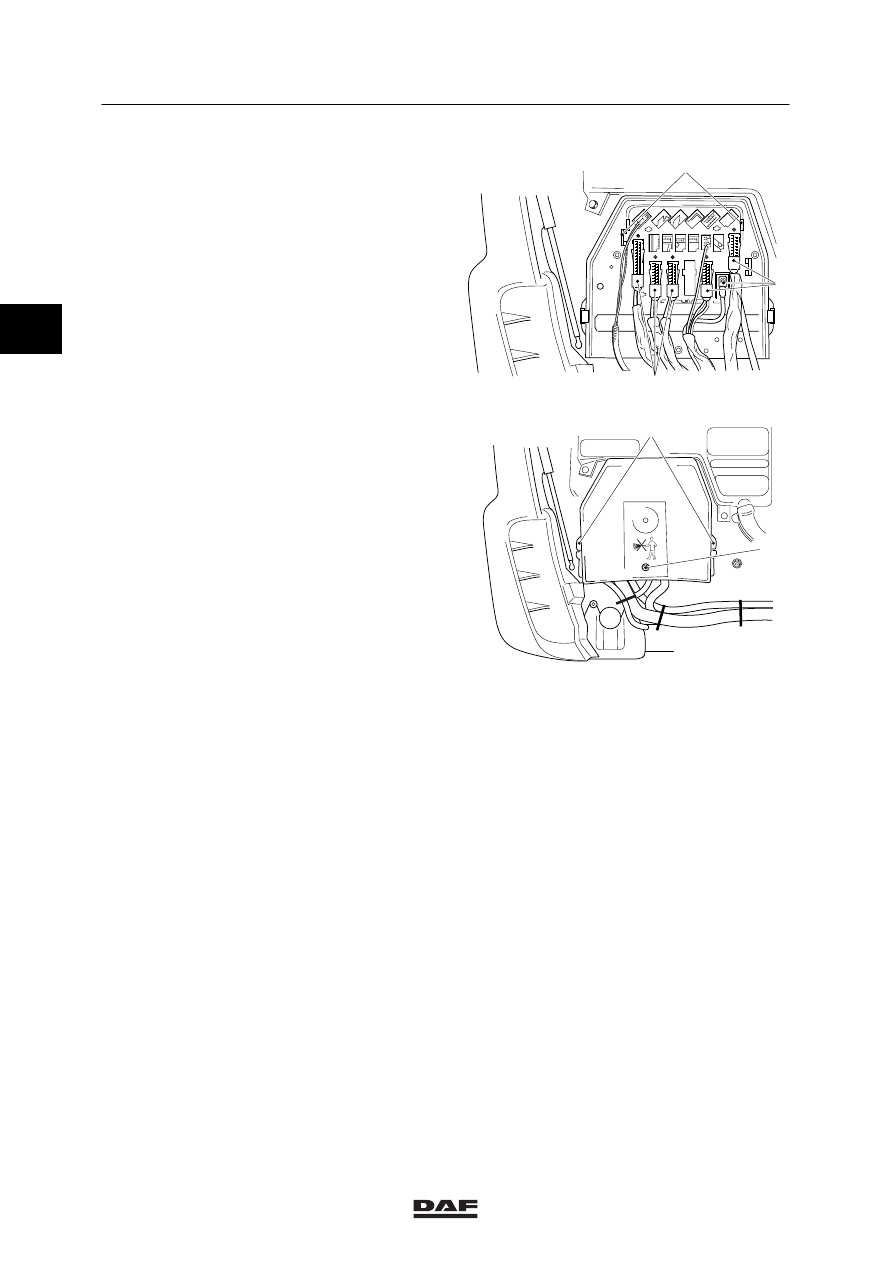
15. Fit the connecting block via the inside and
press it firmly into the retainers (2).
16. Fit the connectors (1) to the connecting
block. Pay attention to the markings on the
components.
K1 00 994
2
1
1
17. Fit the protective cover to the cab lead
through and secure it using the attachment
bolt (1).
K1 00 988
1
2
18. Close the grille.
19. Fit the attachment bolts under the
dashboard to the left and right.
20. Secure the attachment bolts in the window
frame.
21. Fit the dashboard panels on co-driver’s
side.
22. Fit the steering column dashboard panels.
23. Fit the connector of the 12V power supply to
the engine tunnel cover panel.
24. Fit the cover panel to the engine tunnel.
25. Fit the earth lead to the battery terminal.
2
ǹ 0210
Нет комментариевНе стесняйтесь поделиться с нами вашим ценным мнением.
Текст