DAF LF45, LF55 Series. Manual — part 206
©
200505
5-3
Removing and installing
CE ENGINE COOLING SYSTEM
ΛΦ45/55 series
2
6
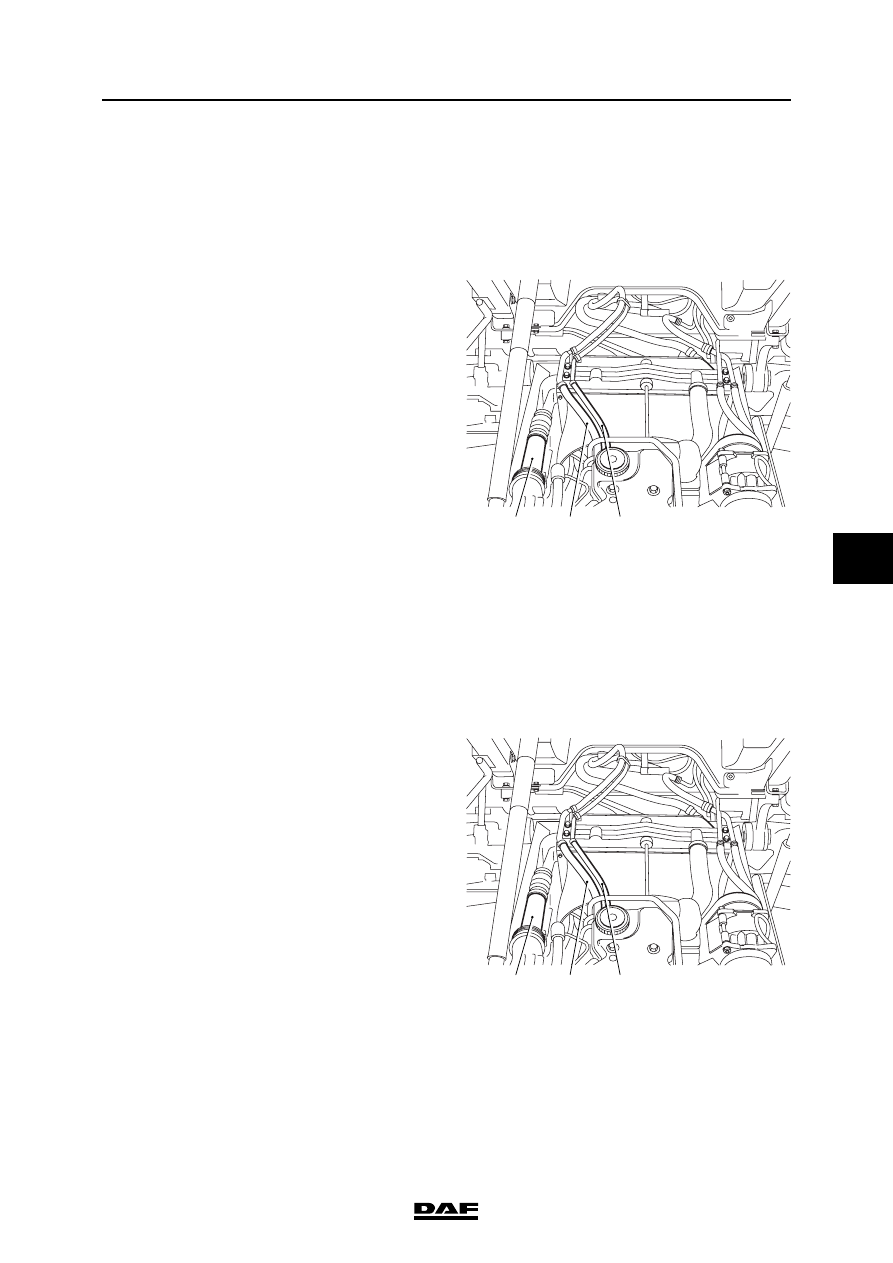
5.3 REMOVAL AND INSTALLATION, VISCOUS FAN CLUTCH
Removing the viscous fan clutch
1.
Drain some of the coolant. See "Draining and
filling".
2.
Remove the air inlet hose with air inlet pipe
between the intercooler and the inlet
manifold (1).
3.
Disconnect the heater hose (2) and bleed
hose (3) on engine side and bend it to the
front.
4.
Remove the attachment nuts from the fan.
5.
Remove the bolts attaching the viscous fan
clutch to the drive flange. Remove the
viscous fan clutch with the fan from the wind
tunnel.
Note:
The viscous fan clutch must always be
stored vertically.
Installing the viscous fan clutch
1.
Place the new viscous fan clutch in the fan.
Position it in the wind tunnel and fit the
viscous fan clutch with the fan onto the drive
flange.
2.
Tighten the attachment nuts of the fan.
3.
Fit the heater hose (2) and bleed hose (3).
4.
Fit the air inlet hose with air inlet pipe
between the intercooler and the inlet
manifold (1).
5.
Fill the cooling system. See "Draining and
filling".
6.
Run the engine and check that all
connections are sealed properly.
2
1
3
M201161
2
1
3
M201161
CE ENGINE COOLING SYSTEM
5-4
©
200505
Removing and installing
6
ΛΦ45/55 series
2
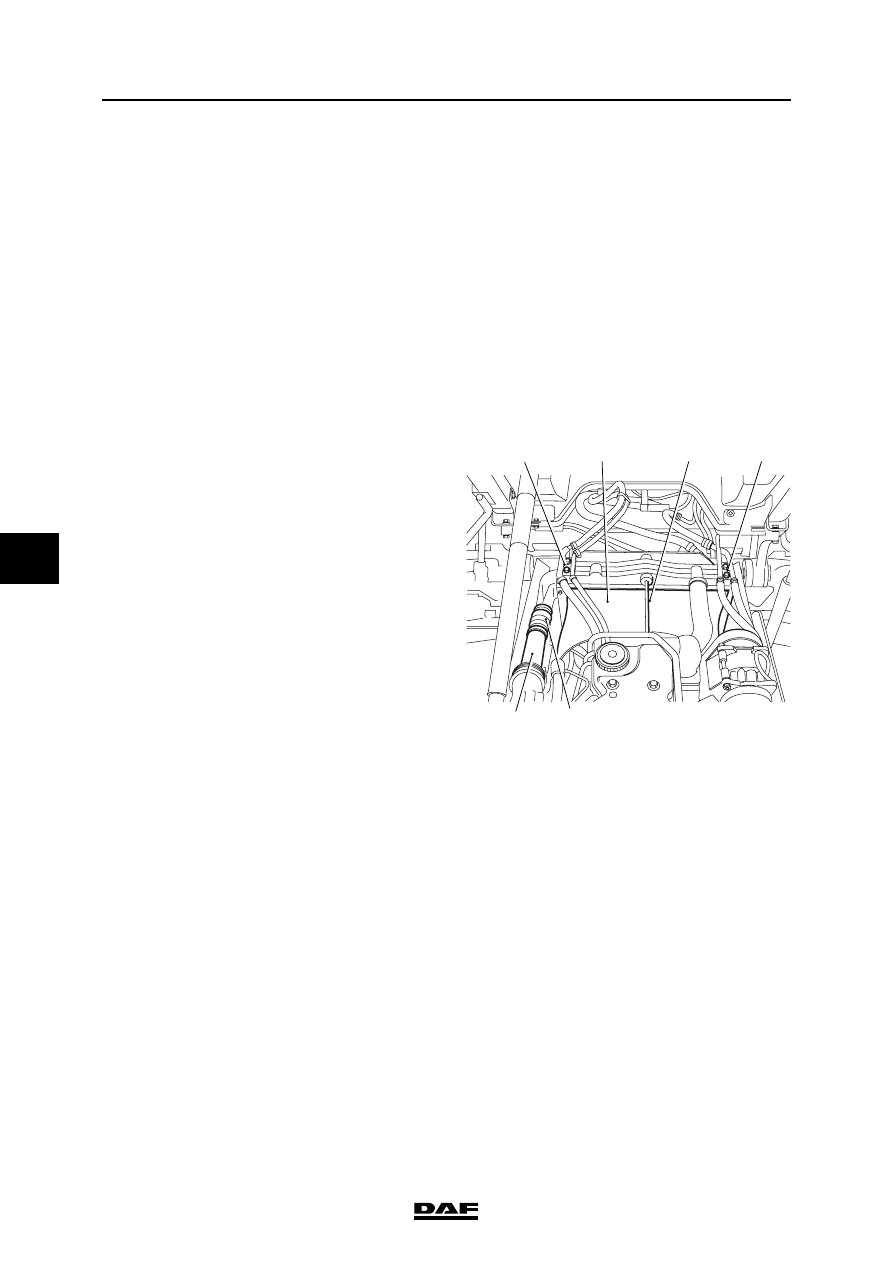
5.4 REMOVAL AND INSTALLATION, RADIATOR
Note:
The removal and installation procedure for the
radiator unit allows for the presence of an air-
conditioning unit.
If such a unit is not present, the relevant sections
can be skipped.
Removal, radiator
1.
Drain the coolant.
2.
Remove the fan.
3.
Remove the coolant hoses from the radiator.
4.
Remove the bracket (1) of the air-
conditioning pipes from the radiator.
5.
Remove the left-hand air inlet hose (2) and
air inlet pipe (3) from the inlet manifold to the
intercooler.
6.
Remove the right-hand connecting hose
from the inlet pipe to the intercooler.
7.
Remove the bracket (4) of the heater and
bleed hoses from the radiator.
8.
Remove the torque rod (5).
9.
Remove the retainer clips from the
condenser brackets.
10. Remove the bolts of the wind tunnel (6) and
remove the wind tunnel.
11. Remove the attachment bolts from the
intercooler and remove the cover plate.
12. Remove the attachment bolts from the
radiator brackets. Remove the radiator and
tilt the condenser slightly to free the air-
conditioning pipes.
2
3
4
6
5
1
M201162

©
200505
5-5
Removing and installing
CE ENGINE COOLING SYSTEM
ΛΦ45/55 series
2
6
Installing the radiator
1.
Fit the radiator in the chassis. Tighten the
attachment nuts to the specified torque. See
"Technical data".
2.
Fit the intercooler onto the radiator and fit the
cover plate.
3.
Install the wind tunnel (6).
4.
Install the torque rod (5).
5.
Suspend the condenser at the bottom in the
brackets and fit the retainer clips.
6.
Fit the fan.
7.
Fit the bracket (4) of the heater and bleed
hoses on the radiator.
8.
Fit the coolant hoses to the radiator
9.
Fit the right-hand air inlet hose from the inlet
pipe to the intercooler.
10. Fit the left-hand air inlet hose (2) and air inlet
pipe (3) from the inlet manifold to the
intercooler.
11. Fit the bracket (1) of the air-conditioning
pipes on the radiator
12. Fill the cooling system. See "Draining and
filling".
13. Run the engine and check that all
connections are sealed properly.
2
3
4
6
5
1
M201162
CE ENGINE COOLING SYSTEM
5-6
©
200505
Removing and installing
6
ΛΦ45/55 series
2
Нет комментариевНе стесняйтесь поделиться с нами вашим ценным мнением.
Текст