Dodge Dakota (ND). Manual — part 130
REMOVAL
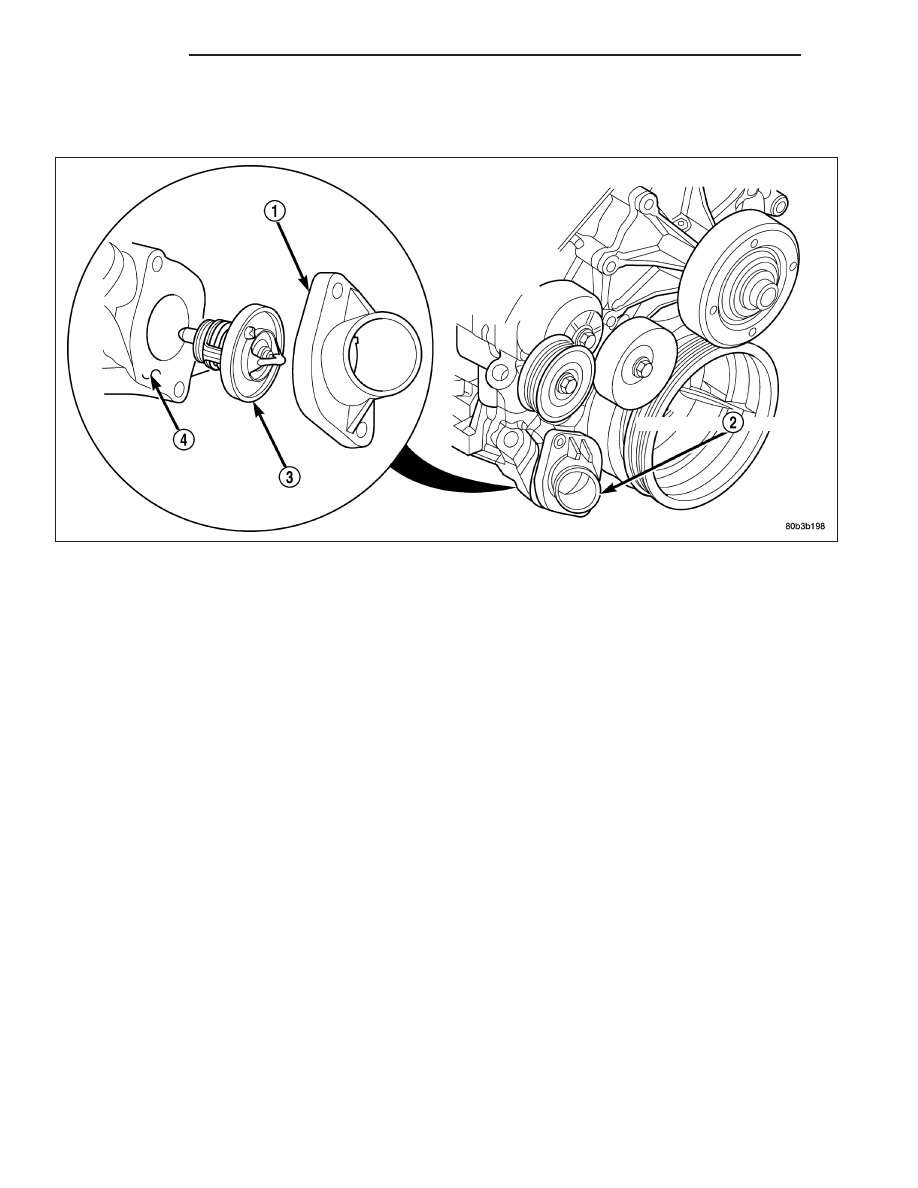
3.7L/4.7L ENGINE
If thermostat is being replaced, be sure that replacement is specified thermostat for vehicle model and engine type.
1. Disconnect negative battery cable at battery.
2. Drain cooling system (Refer to 7 - COOLING - STANDARD PROCEDURE)
3. Raise vehicle on hoist.
4. Remove splash shield.
5. Remove lower radiator hose clamp and lower radiator hose at thermostat housing.
6. Remove thermostat housing mounting bolts , thermostat housing (1) and thermostat (3).
7 - 32
ENGINE
ND

INSTALLATION
3.7L/4.7L ENGINE
1. Clean mating areas of timing chain cover and thermostat housing.
2. Install thermostat (spring side down) into recessed machined groove on timing chain cover.
3. Position thermostat housing on timing chain cover.
4. Install two housing-to-timing chain cover bolts. Tighten bolts to 13 N·m (112 in. lbs.) torque.
CAUTION: Housing must be tightened evenly and thermostat must be centered into recessed groove in
timimg chain cover. If not, it may result in a cracked housing, damaged timing chain cover threads or cool-
ant leaks.
5. Install lower radiator hose on thermostat housing.
6. Install splash shield.
7. Lower vehicle.
8. Fill cooling system (Refer to 7 - COOLING - STANDARD PROCEDURE).
9. Connect negative battery cable to battery.
10. Start and warm the engine. Check for leaks.
ND
ENGINE
7 - 33
RADIATOR
DESCRIPTION
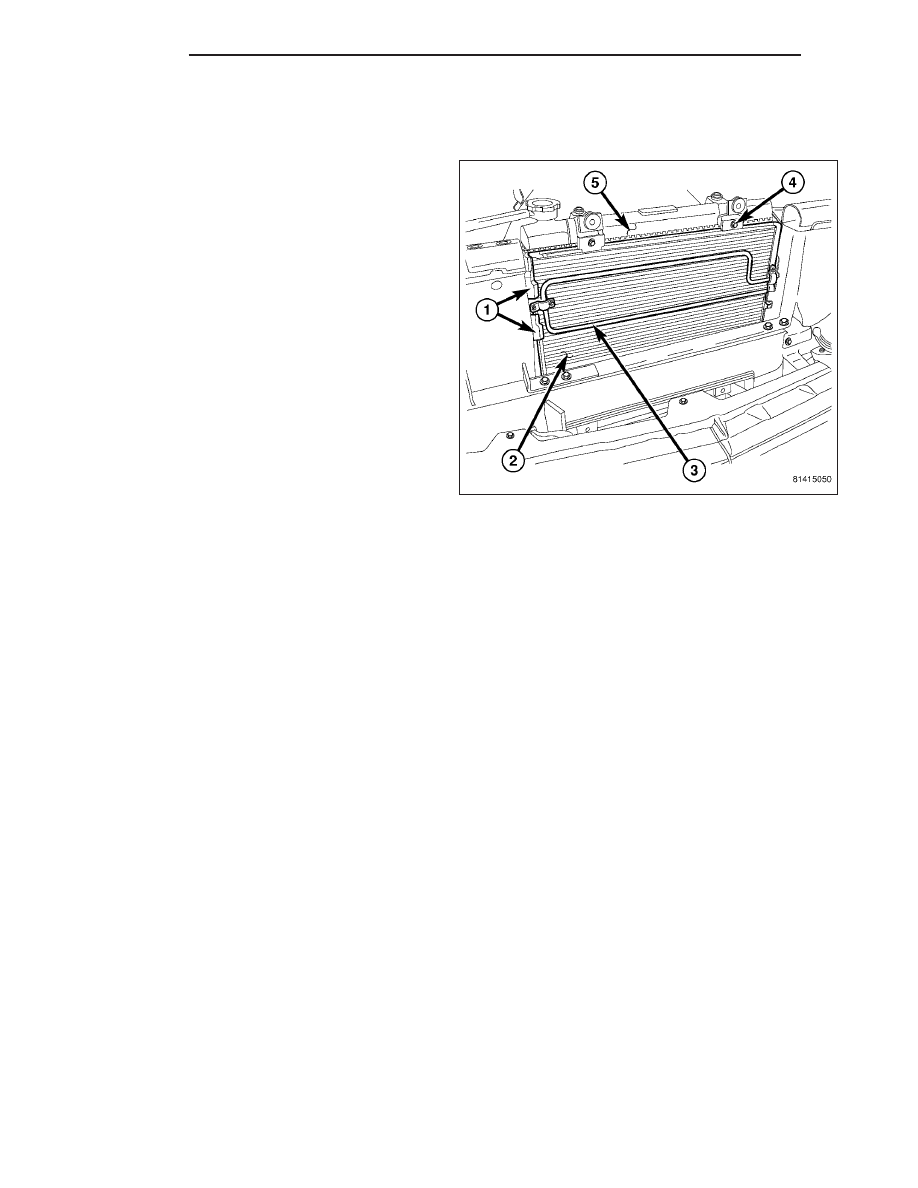
The radiator (1) is a aluminum cross-flow design with
horizontal tubes through the radiator core and vertical
plastic side tanks.
OPERATION
The radiator supplies sufficient heat transfer using the cooling fins interlaced between the horizontal tubes in the
radiator core to cool the engine.
DIAGNOSIS AND TESTING
RADIATOR COOLANT FLOW
Use the following procedure to determine if coolant is flowing through cooling system.
1. Idle engine until operating temperature is reached. If upper radiator hose is warm to the touch, thermostat is
opening and coolant is flowing to radiator.
WARNING: HOT, PRESSURIZED COOLANT CAN CAUSE INJURY BY SCALDING. USING A RAG TO COVER
RADIATOR PRESSURE CAP, OPEN RADIATOR CAP SLOWLY TO FIRST STOP. ALLOW ANY BUILT-UP PRES-
SURE TO VENT TO THE RESERVE/OVERFLOW TANK. AFTER PRESSURE BUILD-UP HAS BEEN RELEASED,
REMOVE CAP FROM FILLER NECK.
2. Drain a small amount of coolant from radiator until ends of radiator tubes are visible through filler neck. Idle
engine at normal operating temperature. If coolant is flowing past exposed tubes, coolant is circulating.
7 - 34
ENGINE
ND

REMOVAL
1. Disconnect battery negative cable.
2. Drain cooling system (Refer to 7 - COOLING -
STANDARD PROCEDURE)
3. Remove pushpins (1) and the upper condenser/ra-
diator seal.
4. Remove upper radiator hose.
5. DIsconnect power steering hoses from power
steering fluid/transmission cooler.
6. Remove overflow tube.
7. Remove radiator fan shroud from the radiator and
position over the radiator fan.
8. Raise vehicle.
ND
ENGINE
7 - 35
Нет комментариевНе стесняйтесь поделиться с нами вашим ценным мнением.
Текст