Dodge Dakota (ND). Manual — part 1159
INSTALLATION
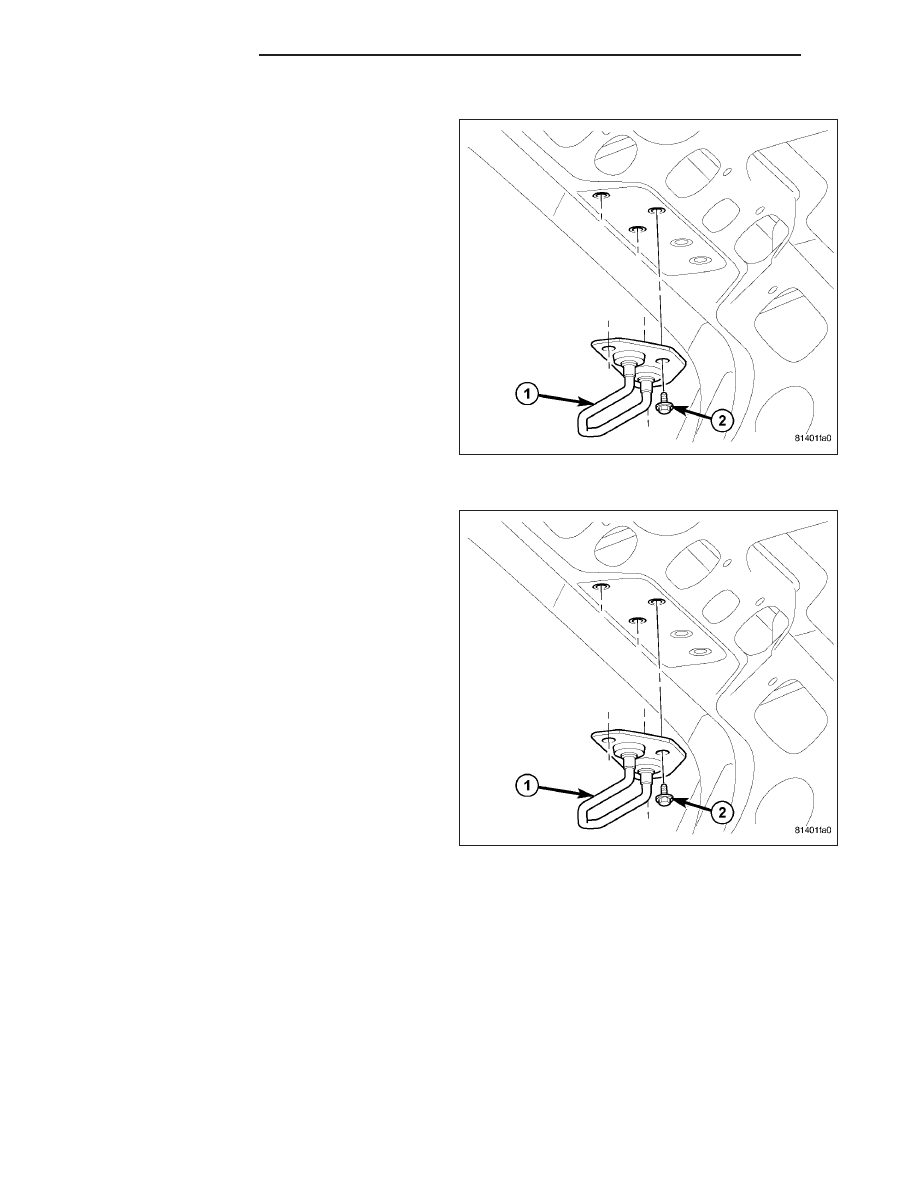
1. Position the door latch striker (1) onto the vehicle
and loosely install the two screws (2).
2. Align the door latch striker using the reference
marks made during the removal procedure and
tighten the screws to 28 N·m (21 ft. lbs.).
3. If necessary, adjust the door latch striker. (Refer to
23 - BODY/DOOR - CARGO/STRIKER-UPPER
LATCH - ADJUSTMENTS)
ADJUSTMENTS
1. Using a grease pencil or equivalent, mark the loca-
tion of the door latch striker (1) on roof rail to aid in
adjustment.
2. Loosen the two bolts (2) that secure the door latch
striker to the roof rail.
3. To adjust the upper front gap and flush measure-
ment, change the position of the door latch striker
and then tighten the two bolts to 28 N·m (21 ft.
lbs.) (Refer to 23 - BODY/BODY STRUCTURE/
GAP AND FLUSH - SPECIFICATIONS).
4. Verify correct door and latch position.
23 - 48
DOOR - CARGO
ND
WATERSHIELD
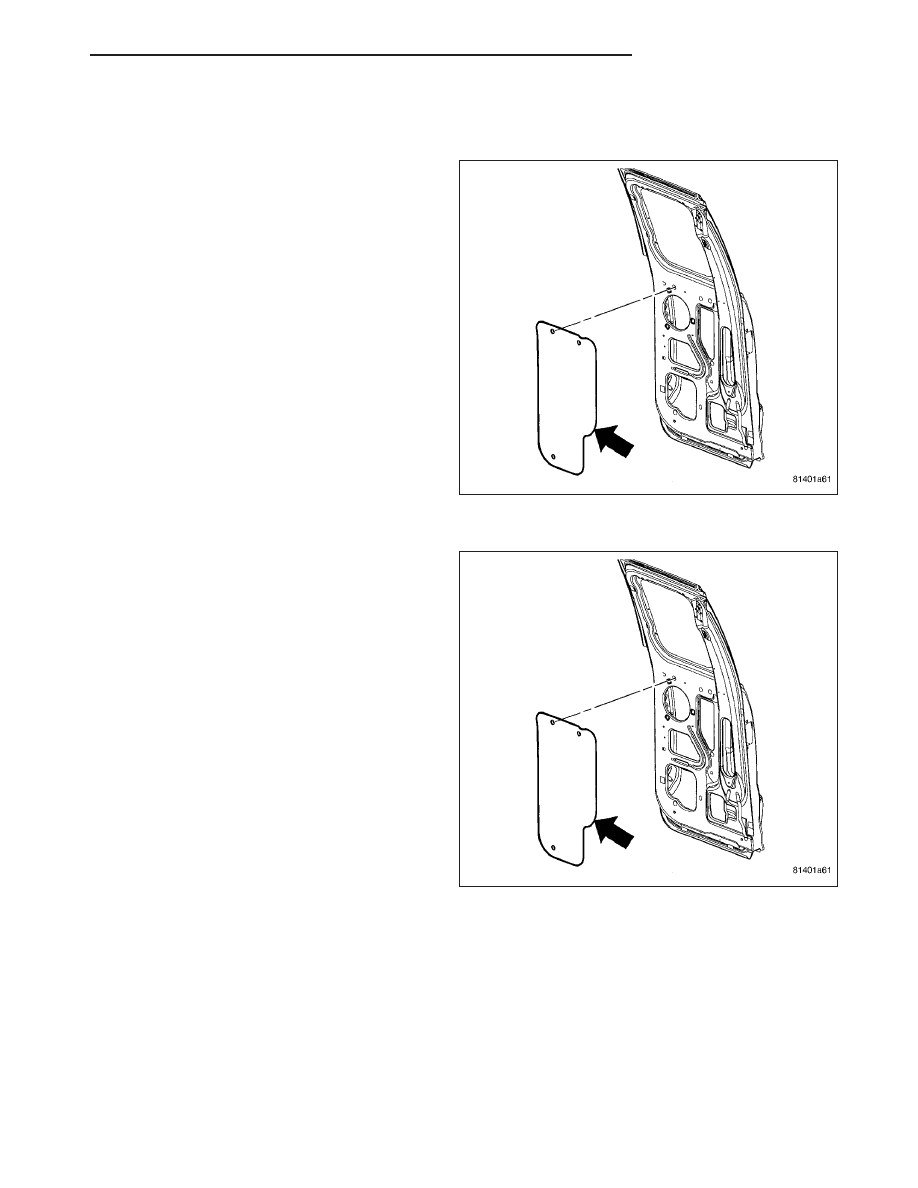
REMOVAL
CAUTION: Do not allow the watershield or adhe-
sive to become contaminated with dirt or other
foreign substances.
Do not damage the watershield during removal
and installation.
If the watershield becomes contaminated or dam-
aged, replace the watershield.
1. Remove the trim panel. (Refer to 23 - BODY/
DOOR - CARGO/PANEL-TRIM - REMOVAL)
2. Separate the watershield from the inner door panel
and remove.
INSTALLATION
CAUTION: Do not allow the watershield or adhe-
sive to become contaminated with dirt or other
foreign substances.
Do not damage the watershield during removal
and installation.
If the watershield becomes contaminated or dam-
aged, replace the watershield.
1. Secure the watershield to the inner door panel.
2. Install the door trim panel. (Refer to 23 - BODY/
DOOR - CARGO/PANEL-TRIM - INSTALLATION)
ND
DOOR - CARGO
23 - 49
DOOR - FRONT
TABLE OF CONTENTS
page
page
CHANNEL-GLASS
. . . . . . . . . . . . . . . . . . . . . . . . . . . . . 50
. . . . . . . . . . . . . . . . . . . . . . . . . 52
CYLINDER-LOCK
. . . . . . . . . . . . . . . . . . . . . . . . . . . . . 53
. . . . . . . . . . . . . . . . . . . . . . . . . 54
DOOR
. . . . . . . . . . . . . . . . . . . . . . . . . . . . . 55
. . . . . . . . . . . . . . . . . . . . . . . . . 55
. . . . . . . . . . . . . . . . . . . . . . . . 55
GLASS
. . . . . . . . . . . . . . . . . . . . . . . . . . . . . 60
. . . . . . . . . . . . . . . . . . . . . . . . . 61
HANDLE-EXTERIOR
. . . . . . . . . . . . . . . . . . . . . . . . . . . . . 62
. . . . . . . . . . . . . . . . . . . . . . . . . 63
HINGE
. . . . . . . . . . . . . . . . . . . . . . . . . . . . . 65
. . . . . . . . . . . . . . . . . . . . . . . . . 65
LATCH
. . . . . . . . . . . . . . . . . . . . . . . . . . . . . 66
. . . . . . . . . . . . . . . . . . . . . . . . . 67
. . . . . . . . . . . . . . . . . . . . . . . . 69
PANEL-TRIM
. . . . . . . . . . . . . . . . . . . . . . . . . . . . . 69
. . . . . . . . . . . . . . . . . . . . . . . . . 71
REGULATOR-WINDOW - MANUAL
. . . . . . . . . . . . . . . . . . . . . . . . . . . . . 72
. . . . . . . . . . . . . . . . . . . . . . . . . 74
REGULATOR-WINDOW - POWER
. . . . . . . . . . . . . . . . . . . . . . . . . . . . . 75
. . . . . . . . . . . . . . . . . . . . . . . . . 76
STRIKER
. . . . . . . . . . . . . . . . . . . . . . . . . . . . . 78
. . . . . . . . . . . . . . . . . . . . . . . . . 80
. . . . . . . . . . . . . . . . . . . . . . . . 83
WATERSHIELD
. . . . . . . . . . . . . . . . . . . . . . . . . . . . . 84
. . . . . . . . . . . . . . . . . . . . . . . . . 85
CHANNEL-GLASS
REMOVAL
1. Remove the watershield. (Refer to 23 - BODY/
DOOR - FRONT/WATERSHIELD - REMOVAL)
23 - 50
DOOR - FRONT
ND
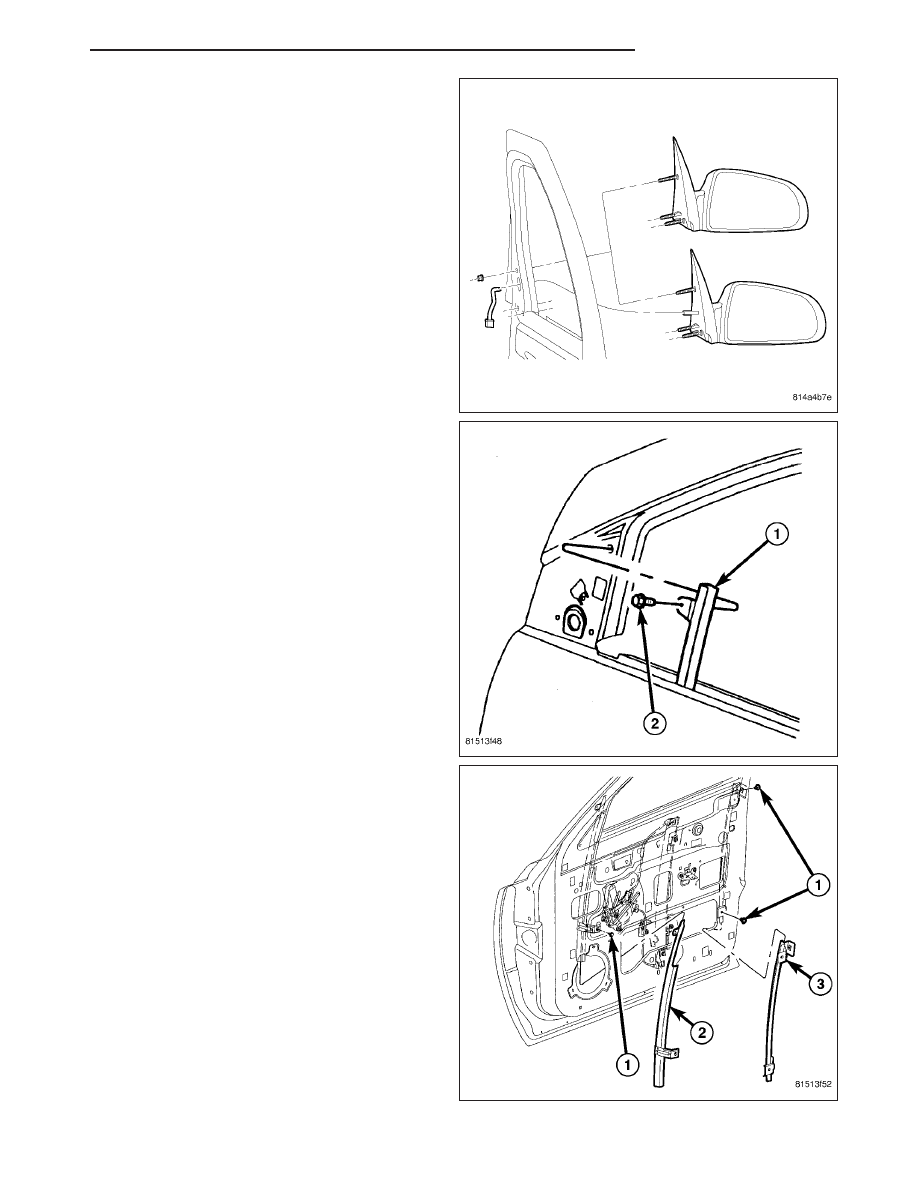
2. Remove the outside mirror. (Refer to 23 - BODY/
EXTERIOR/SIDE VIEW MIRROR - REMOVAL)
3. Remove the upper screw (2) for the front channel
(1) from under the mirror.
4. Remove the remaining screws (1) and remove the
front (2) and rear (3) run channels.
ND
DOOR - FRONT
23 - 51
Нет комментариевНе стесняйтесь поделиться с нами вашим ценным мнением.
Текст