Infiniti FX35 / FX45. Manual — part 187
HOOD
BL-15
< SERVICE INFORMATION >
C
D
E
F
G
H
J
K
L
M
A
B
BL
N
O
P
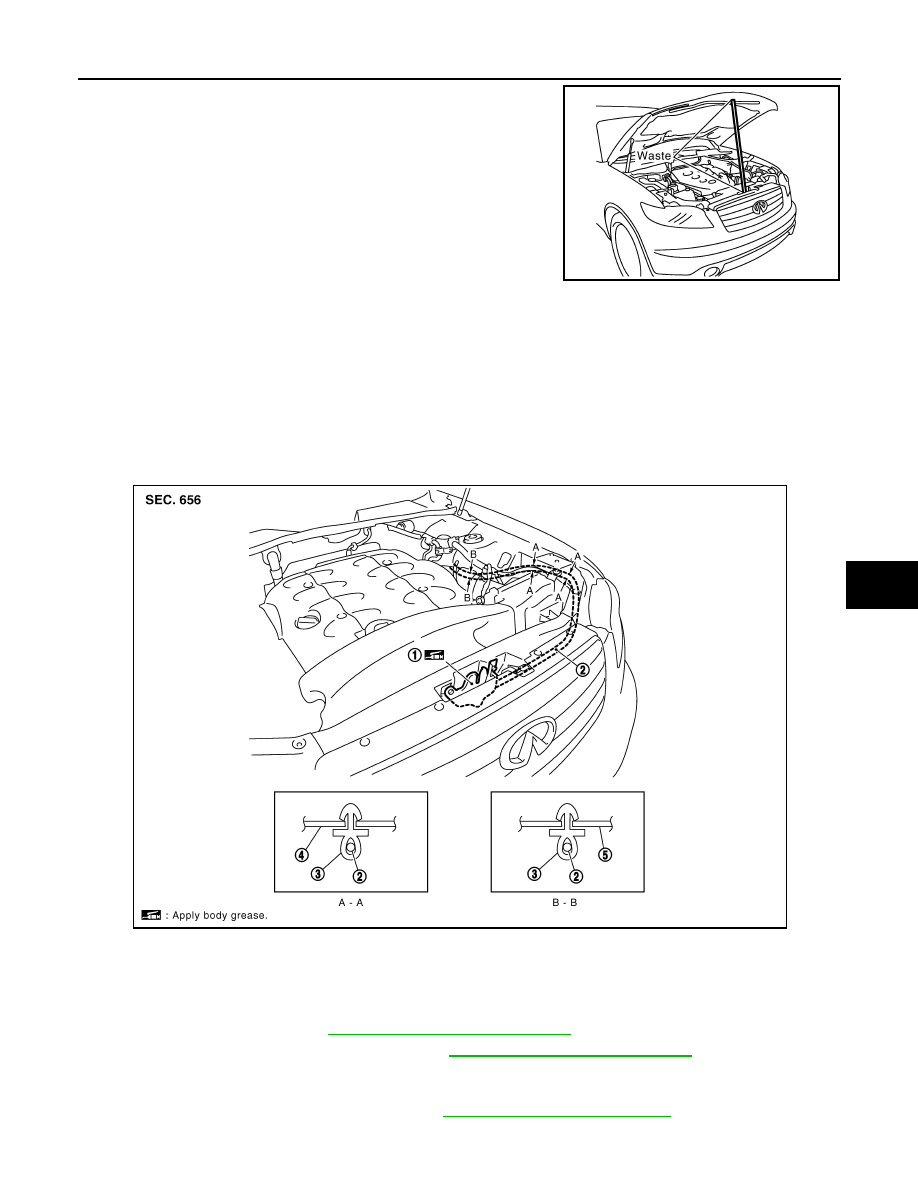
1.
Support the hood striker with a proper material to prevent it from
falling.
WARNING:
Body injury may occur if no supporting rod is holding the
hood open when removing the hood stay.
2.
Remove the hood stays from the stud balls on the body side.
3.
Remove the hinge mounting nuts on the hood to remove the hood assembly.
CAUTION:
Operate with two workers, because of its heavy weight.
INSTALLATION
Install in the reverse order of removal.
Removal and Installation of Hood Lock Control
INFOID:0000000001327785
REMOVAL
1.
Remove the front grill. Refer to
EI-22, "Component Parts Location"
.
2.
Remove the front fender protector (LH). Refer to
EI-24, "Component Parts Location"
.
3.
Disconnect the hood lock cable from the hood lock, and clip it from the radiator core support upper and
hood ledge.
4.
Remove instrument driver lower panel. Refer to
IP-11, "Removal and Installation"
5.
After the bolt of the case with the air cleaner is disconnected, and it is moved, the cable is pulled.
PIIA6058E
1.
Hood lock
2.
Hood lock cable
3.
Clip
4.
Hood ledge upper front (LH)
5.
Dash lower cross member reinforce (LH)
PIIA6017E
BL-16
< SERVICE INFORMATION >
HOOD
6.
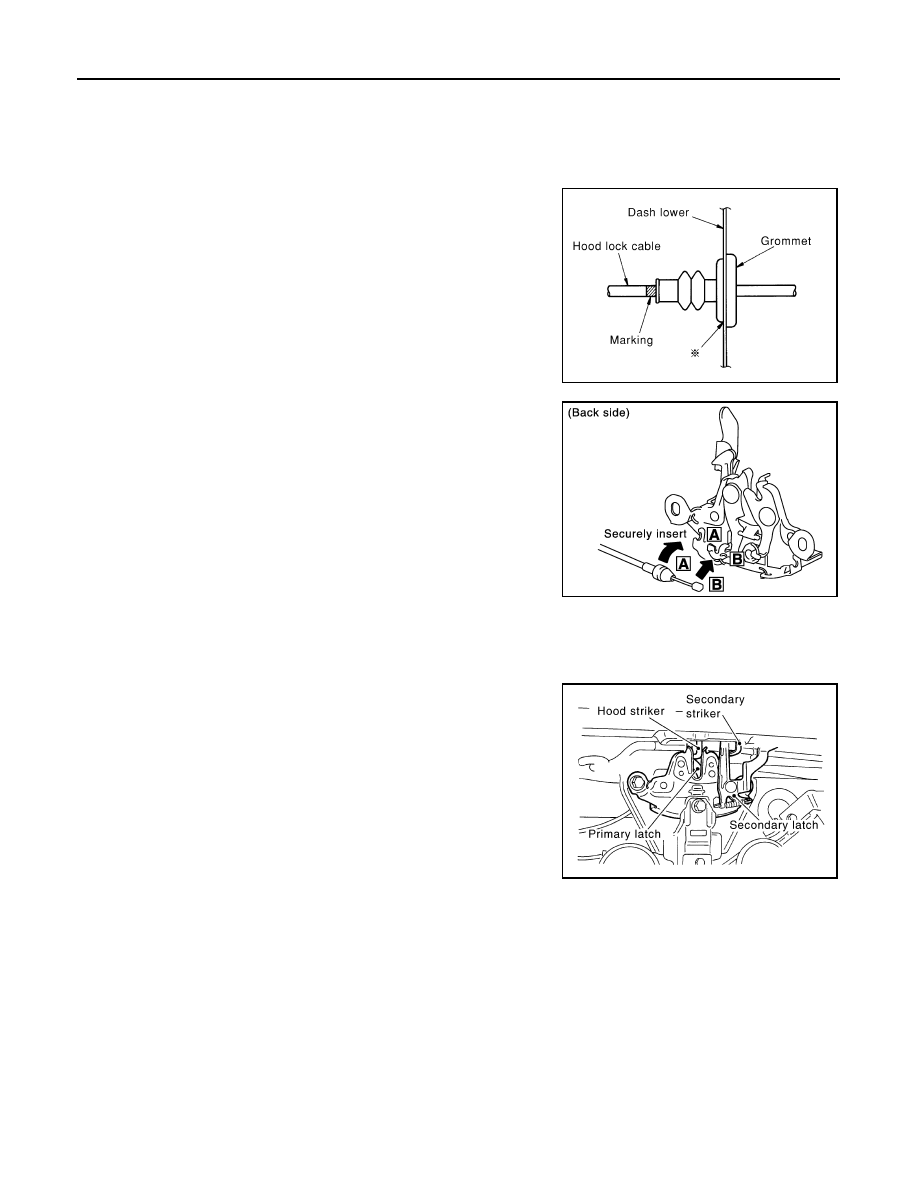
Remove the grommet on the dashboard, and pull the hood lock cable toward the passenger room.
CAUTION:
While pulling, be careful not to damage (peeling) the outside of the hood lock cable.
INSTALLATION
1.
Pull the hood lock cable through the panel hole to the engine room.
Be careful not to bend the cable too much, keeping the radius
100 mm (3.94 in) or more.
2.
Make sure the cable is not offset from the positioning grommet,
and push the grommet into the panel hole securely.
3.
Apply the sealant to the grommet (at * mark) properly.
4.
Install the cable securely to the lock.
5.
After installing, check the hood lock adjustment and hood
opener operation.
Hood Lock Control Inspection
INFOID:0000000001327786
CAUTION:
If the hood lock cable is bent or deformed, replace it.
1.
Make sure that the hood lock secondary latch is properly
engaged with the secondary striker with hood's own weight.
2.
Make sure that the hood lock primary latch is securely engaged
with the hood striker with hood's own weight by dropping it from
approx. 200 mm (7.87 in) height.
CAUTION:
Do not drop hood from a height of 300 mm (11.81 in) or
more.
3.
When pulling hood opener lever gently, make sure that front end of the hood rises by approximately 20
mm (0.79 in) and that hood striker and hood lock primary latch are disengaged. Also make sure that hood
opener returns to the original position.
PIIA0173E
PIIA3552E
PIIB1082E
HOOD
BL-17
< SERVICE INFORMATION >
C
D
E
F
G
H
J
K
L
M
A
B
BL
N
O
P
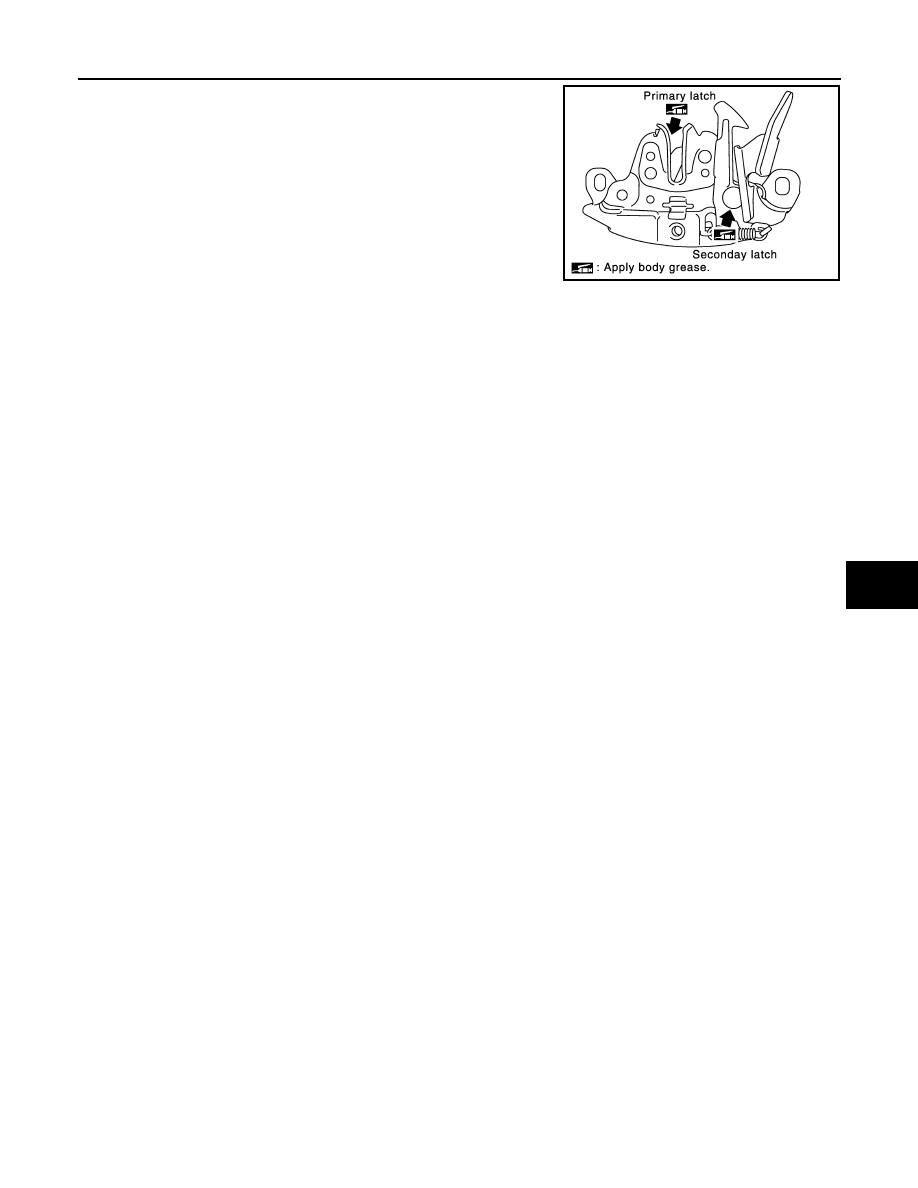
4.
Confirm hood lock is properly lubricated. If necessary, apply
grease at the point shown in the figure.
PIIA3550E
BL-18
< SERVICE INFORMATION >
RADIATOR CORE SUPPORT
RADIATOR CORE SUPPORT
Removal and Installation
INFOID:0000000001327787
REMOVAL
1.
Remove the front fender protector. Refer to
EI-24, "Component Parts Location"
2.
Remove the front bumper. Refer to
EI-14, "Component Parts Location"
.
3.
Remove the ICC. Refer to
4.
LT-30, "Removal and Installation"
.
5.
Remove the washer tank. Refer to
WW-28, "Removal and Installation of Washer Tank"
6.
Remove the resonator. Refer to
.
7.
Remove the power steering oil cooler. Refer to
8.
Remove the ambient sensor. Refer to
ATC-99, "Removal and Installation"
9.
Remove the crash zone sensor. Refer to
SRS-42, "Removal and Installation"
10. Remove the horn connector, cooling fan connector and harness clip.
11. Remove the hood lock and disconnect hood lock control cable. Refer to
BL-15, "Removal and Installation
.
12. Remove the reservoir tank. Refer to
CO-40, "Removal and Installation"
or
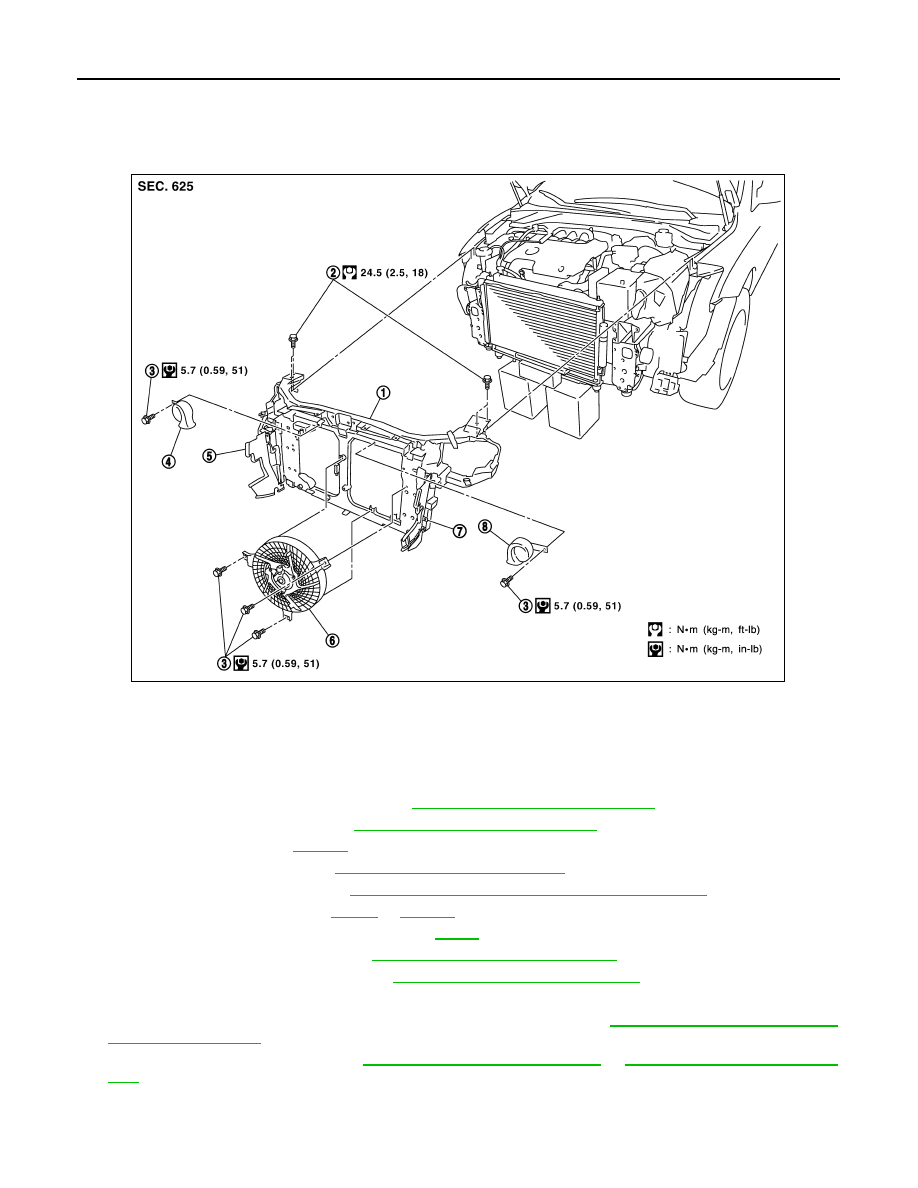
13. Remove mounting blots and remove radiator core support. Remove mounting bolts with power tool.
14. After remove radiator core support, remove the horn, cooling fan.
1. Radiator core support assembly
2.
Bolt
3. Bolt
4. Horn (High)
5.
Air guide (RH)
6. Cooling fan
7. Air guide (LH)
8.
Horn (Low)
PIIA6018E
Нет комментариевНе стесняйтесь поделиться с нами вашим ценным мнением.
Текст