Infiniti FX35, FX50 (S51). Manual — part 939

EM-56
< REMOVAL AND INSTALLATION >
[VQ35HR]
TIMING CHAIN
c.
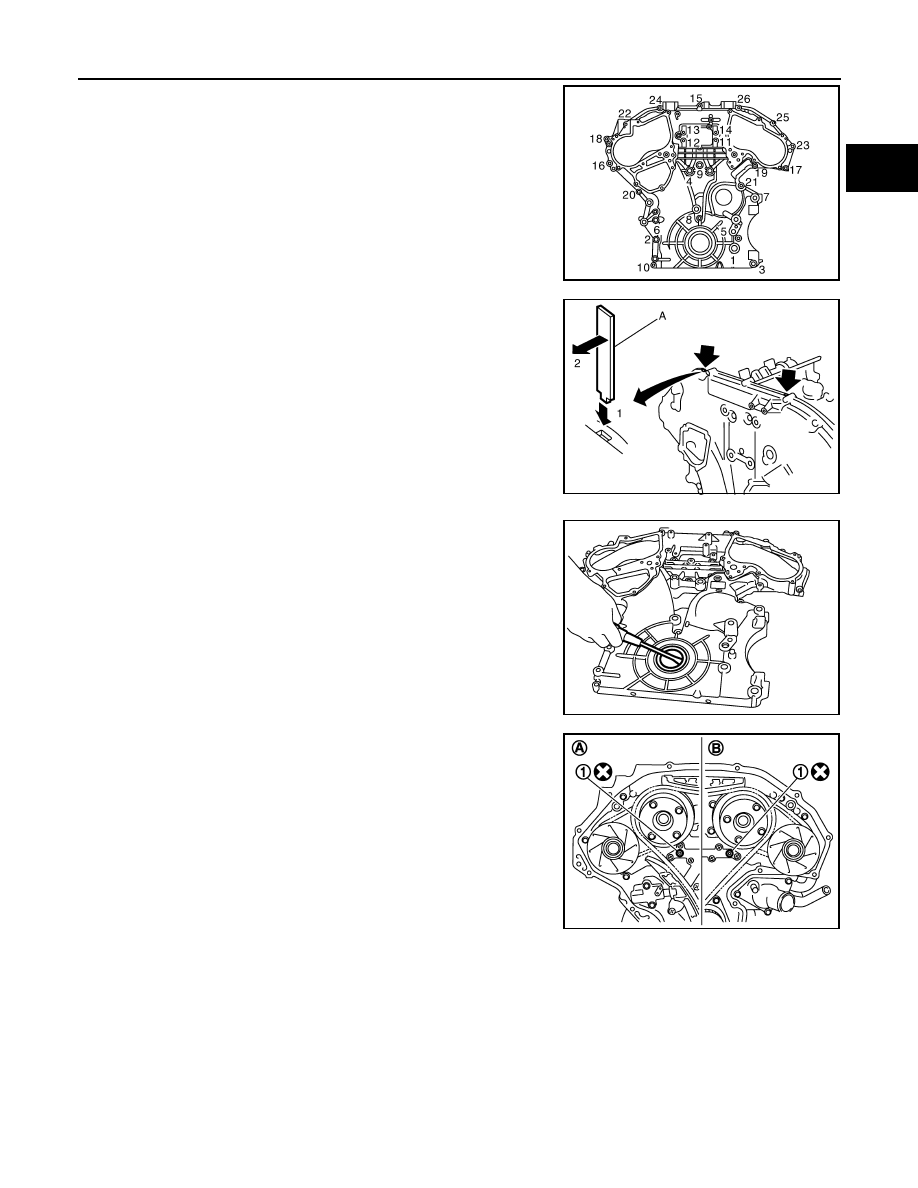
Remove rear cover plate and set the ring gear stopper [SST:
KV10118600 (J-48641)] (A) as shown in the figure.
d.
Loosen crankshaft pulley bolt and rotate bolt seating surface at
10 mm (0.39 in) from its original position.
CAUTION:
Never remove crankshaft pulley bolt as it will be used as a
supporting point for suitable puller.
e.
Place suitable puller tab on holes of crankshaft pulley, and pull
crankshaft pulley through.
CAUTION:
Never put suitable puller tab on crankshaft pulley periphery,
as this will damage internal damper.
26. Remove oil pan (lower). Refer to
27. Loosen two mounting bolts in front of oil pan (upper) with power
tool in reverse order as shown in the figure.
28. Remove front timing chain case as per the following:
1
: Oil pan (upper)
2
: Drive plate
: Vehicle front
JPBIA0408ZZ
1
: Crankshaft pulley
JPBIA1364ZZ
JPBIA1368ZZ
: Engine front
JPBIA0047ZZ
TIMING CHAIN
EM-57
< REMOVAL AND INSTALLATION >
[VQ35HR]
C
D
E
F
G
H
I
J
K
L
M
A
EM
N
P
O
a.
Loosen mounting bolts in reverse order as shown in the figure.
b.
Insert a suitable tool (A) into the notch at the top of front timing
chain case as shown.
c.
Pry off case by moving the suitable tool as shown.
• Use the seal cutter [SST: KV10111100 (J-37228)] to cut liquid
gasket for removal.
CAUTION:
• Never use a screwdriver or something similar.
• After removal, handle front timing chain case carefully so
it does not tilt, cant, or warp under a load.
29. Remove front oil seal from front timing chain case using a suit-
able tool.
• Use a screwdriver for removal.
CAUTION:
Be careful not to damage front timing chain case.
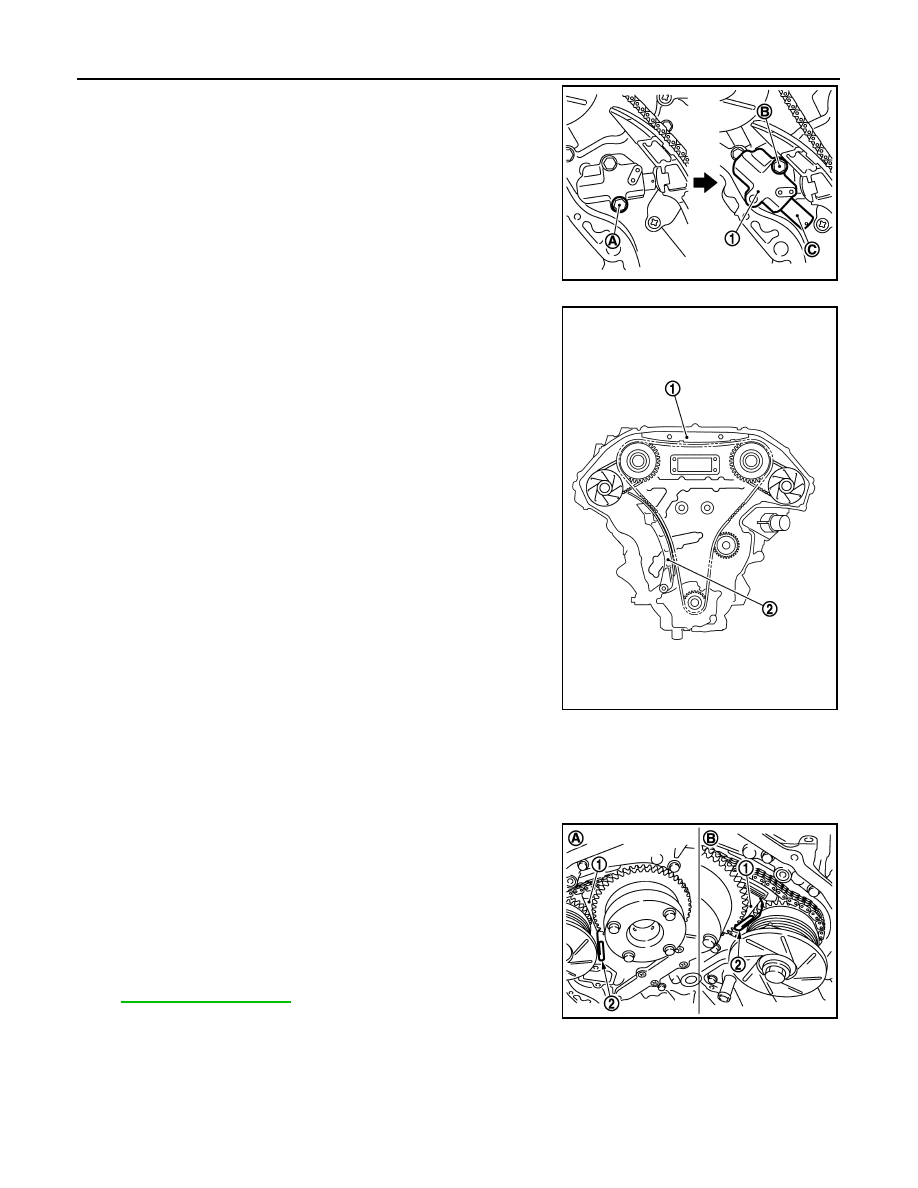
30. Remove O-rings (1) from rear timing chain case.
31. Remove timing chain tensioner (primary) as per the following:
JPBIA0046ZZ
JPBIA0048ZZ
JPBIA0049ZZ
A
: Bank 1
B
: Bank 2
JPBIA0406ZZ
EM-58
< REMOVAL AND INSTALLATION >
[VQ35HR]
TIMING CHAIN
a.
Remove lower mounting bolt (A).
b.
Loosen upper mounting bolt (B) slowly, and then turn timing
chain tensioner (primary) (1) on the upper mounting bolt so that
plunger (C) is fully expanded.
NOTE:
Even if plunger is fully expanded, it is not dropped from the body
of timing chain tensioner (primary).
c.
Remove upper mounting bolt, and then remove timing chain ten-
sioner (primary).
32. Remove internal chain guide (1), and slack guide (2).
33. Remove timing chain (primary) and crankshaft sprocket.
CAUTION:
After removing timing chain tensioner (primary), never turn crankshaft and camshaft separately, or
valves will strike the piston heads.
34. Remove timing chain (secondary) and camshaft sprockets as per the following:
a.
Attach suitable stopper pin (2) to the timing chain tensioners
(secondary) (1).
NOTE:
• Use approximately 0.5 mm (0.02 in) dia. hard metal pin as a
stopper pin.
• For removal of timing chain tensioners (secondary), refer to
. [Removing camshaft bracket (No. 1)
is required.]
b.
Remove camshaft sprocket mounting bolts (INT and EXH).
JPBIA1537ZZ
JPBIA0086ZZ
A
: Bank 1
B
: Bank 2
JPBIA0087ZZ
TIMING CHAIN
EM-59
< REMOVAL AND INSTALLATION >
[VQ35HR]
C
D
E
F
G
H
I
J
K
L
M
A
EM
N
P
O
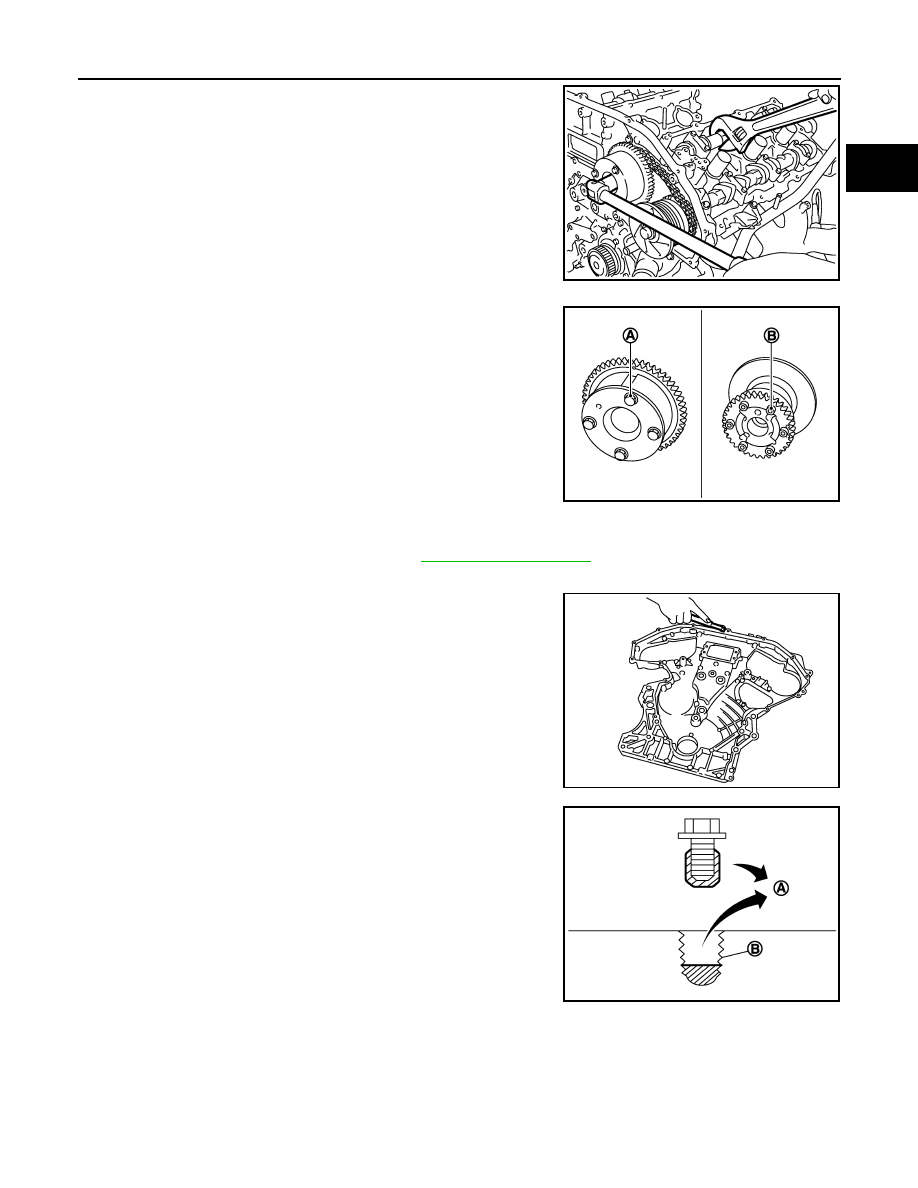
• Secure the hexagonal portion of camshaft using a wrench to
loosen mounting bolts.
c.
Remove timing chain (secondary) together with camshaft
sprockets.
CAUTION:
• Never loosen the mounting bolts with securing anything
other than the camshaft hexagonal portion or with ten-
sioning the timing chain.
• Never disassemble. [Never loosen bolts (A) and (B) as
shown in the figure.]
35. Remove timing chain tensioners (secondary) from cylinder head as per the following, if necessary.
a.
Remove camshaft brackets (No. 1). Refer to
b.
Remove timing chain tensioners (secondary) with a stopper pin attached.
36. Use a scraper to remove all traces of old liquid gasket from front
and rear timing chain cases and oil pan (upper), and liquid gas-
ket mating surfaces.
CAUTION:
Be careful not to allow gasket fragments to enter oil pan.
37. Remove old liquid gasket from bolt hole and thread.
INSTALLATION
NOTE:
The below figure shows the relationship between the matching mark on each timing chain and that on the cor-
responding sprocket, with the components installed.
KBIA4379J
JPBIA0096ZZ
JPBIA0050ZZ
A
: Remove sticking old liquid gasket
B
: Bolt hole
JPBIA0051ZZ
Нет комментариевНе стесняйтесь поделиться с нами вашим ценным мнением.
Текст