Infiniti EX35. Manual — part 1247
REAR SEAT BELT
SB-11
< ON-VEHICLE REPAIR >
C
D
E
F
G
I
J
K
L
M
A
B
SB
N
O
P
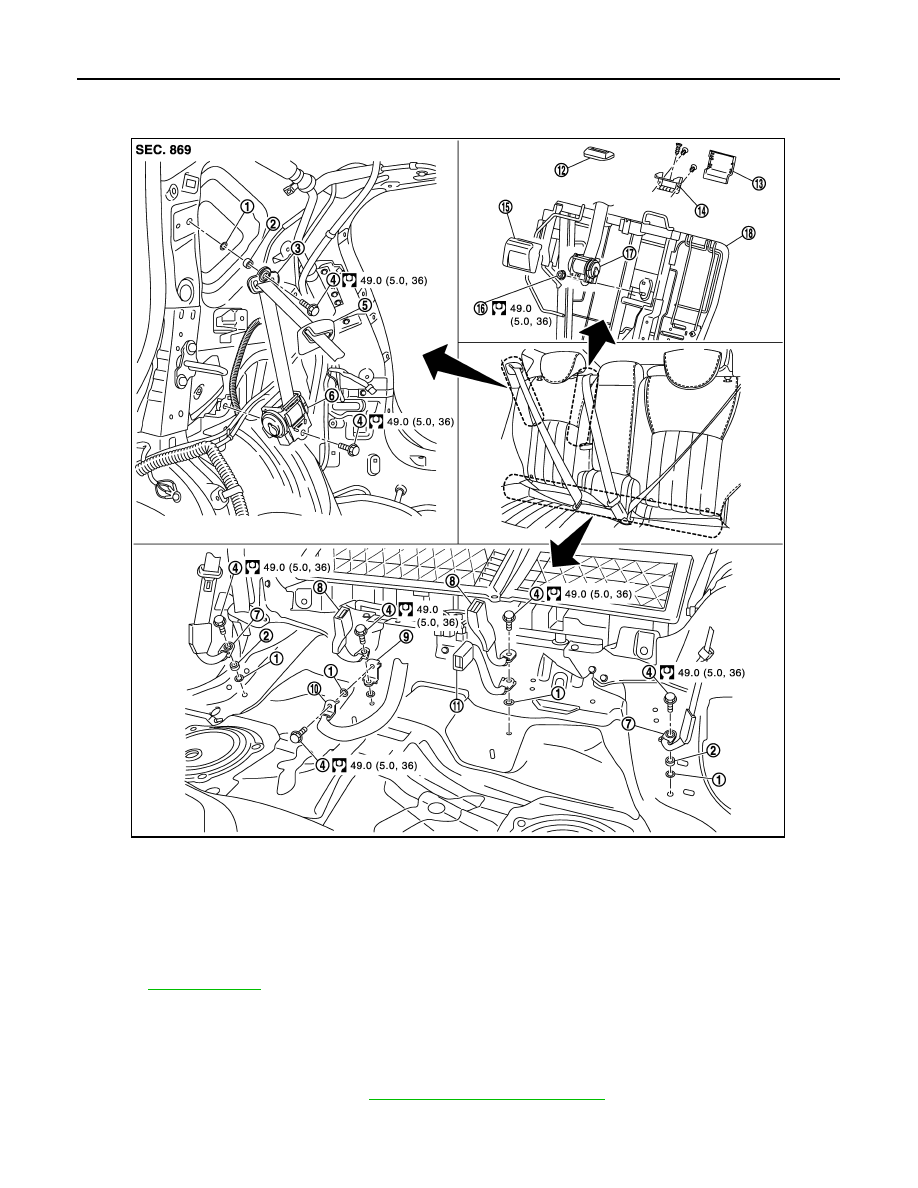
Remove the inner anchor fixing anchor bolt and remove the inner anchor.
3.
Remove the shoulder anchor.
• Remove the luggage side upper and lower finisher. Refer to
INT-20, "Removal and Installation"
.
• Remove the shoulder anchor fixing anchor bolt and remove the shoulder anchor.
4.
Remove the outer seat belt retractor.
• Remove the luggage side upper and lower finisher. Refer to
INT-20, "Removal and Installation"
.
• Remove the fixing anchor bolt and remove the outer seat belt retractor.
5.
Remove the center seat belt retractor.
• Remove the rear seatback. Refer to
SE-99, "Removal and Installation"
.
• Remove the pawls, and then remove seat belt finisher.
• Remove the rear seatback trim and pad. Refer to
SE-101, "Disassembly and Assembly"
.
• Remove the seat belt guide (upper)
• Remove the screws, and then remove seat belt guide (lower)
• Remove the center seat belt retractor cover.
• Remove the fixing anchor nut and remove the center seat belt retractor.
INSTALLATION
Install in the reverse order of removal.
SEAT BELT BUCKLE
SEAT BELT BUCKLE : Inspection
INFOID:0000000003514974
AFTER A COLLISION
WARNING:
Inspect all seat belt assemblies including retractors and attached hardware after any collision.
NISSAN/INFINITI recommends that all seat belt assemblies in use during a collision be replaced
unless the collision was minor and the belts show no damage and continue to operate properly. Fail-
ure to do so could result in serious personal injury in an accident. Seat belt assemblies not in use dur-
ing a collision should also be replaced if either damage or improper operation was noted. Seat belt
pre-tensioners should be replaced even if the seat belts were not in use during a frontal collision in
which the air bags were deployed.
Replace any seat belt assembly (including anchor bolts) if:
• The seat belt was in use at the time of a collision (except for minor collisions and the belts, retractors and
buckles show no damage and continue to operate properly).
• The seat belt was damaged in an accident. (i.e. torn webbing, bent retractor or guide, etc.)
• The seat belt attaching point was damaged in an accident. Inspect the seat belt attaching area for damage
or distortion and repair if necessary before installing a new seat belt assembly.
• Anchor bolts are deformed or worn out.
• The seat belt pre-tensioner should be replaced even if the seat belts were not in use during the collision in
which the air bags are deployed.
PRELIMINARY CHECKS
1.
Check that the seat belt retractor, seat belt anchor and buckle bolts are tightened firmly.
2.
Repeat step above if necessary to check the other seat belts.
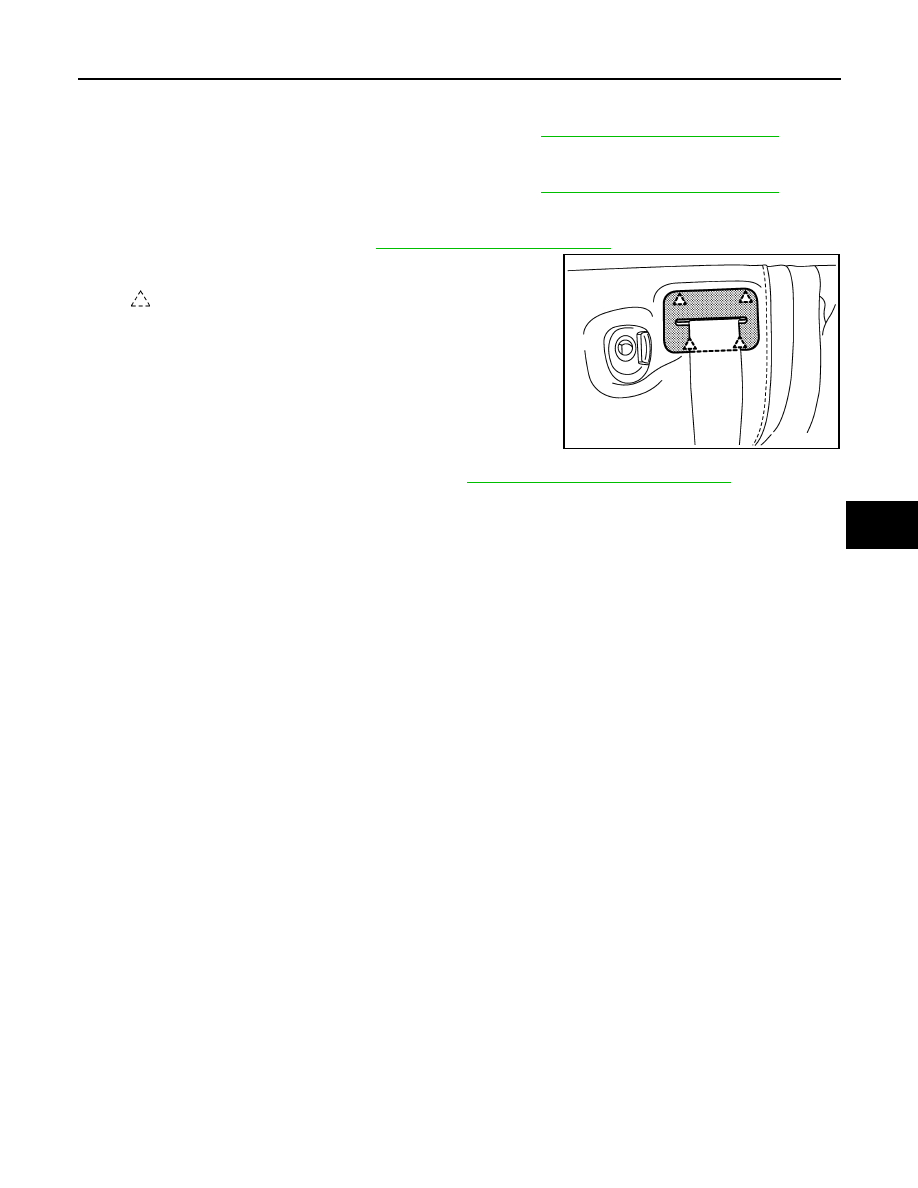
: Pawl
JMHIA0562ZZ
SB-12
< ON-VEHICLE REPAIR >
REAR SEAT BELT
SEAT BELT BUCKLE : Exploded View
INFOID:0000000003528607
SEAT BELT BUCKLE : Removal and Installation
INFOID:0000000003514976
REMOVAL
Remove the center and outer seat belt buckle.
• Remove the rear seat cushion. Refer to
SE-99, "Removal and Installation"
• Remove the fixing anchor bolts of the center and outer seat belt buckle.
1.
Retaining washer
2.
Spacer
3.
Shoulder anchor
4.
Anchor bolt
5.
Rear seat belt escutcheon
6.
Outer seat belt retractor
7.
Outer anchor
8.
Outer seat belt buckle
9.
Inner anchor bracket
10. Inner anchor
11.
Center seat belt buckle
12. Seat belt finisher
13. Seat belt guide (upper)
14. Seat belt guide (lower)
15. Center seat belt retractor cover
16. Anchor nut
17. Center seat belt retractor
18. Seat back frame
Refer to
for symbols in the figure.
JMHIA0560GB
REAR SEAT BELT
SB-13
< ON-VEHICLE REPAIR >
C
D
E
F
G
I
J
K
L
M
A
B
SB
N
O
P
INSTALLATION
Install in the reverse order of removal.
SB-14
< ON-VEHICLE REPAIR >
LATCH SYSTEM FOR CHILDREN
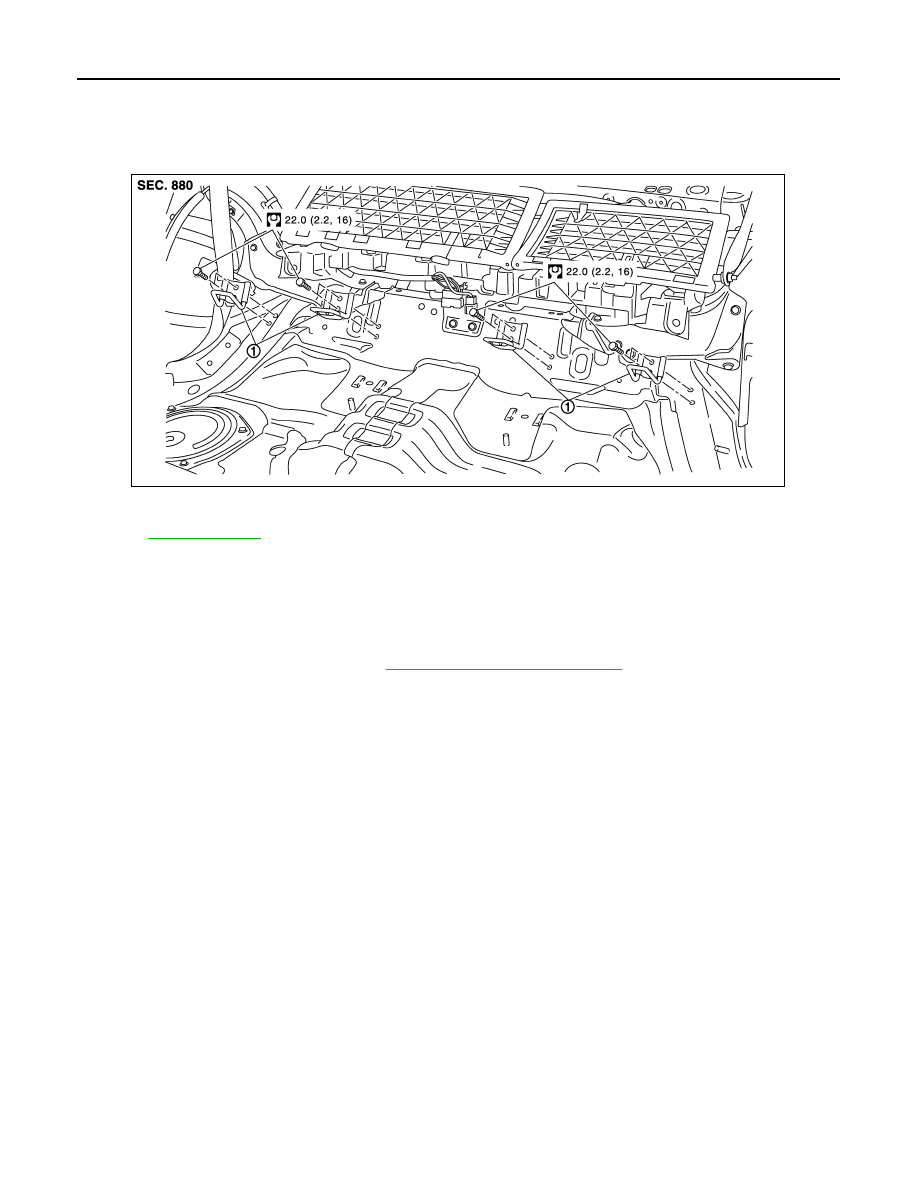
LATCH SYSTEM FOR CHILDREN
Exploded View
INFOID:0000000003134266
Removal and Installation
INFOID:0000000003134267
REMOVAL
CAUTION:
Replace anchor bolts if they are deformed or worn out.
1.
Remove the rear seat cushion. Refer to
SE-99, "Removal and Installation"
2.
Remove LATCH (Lower Anchor and Tether for Children) system.
INSTALLATION
Install in the reverse order of removal.
1.
LATCH system
Refer to
for symbols in the figure.
JMHIA0563GB
Нет комментариевНе стесняйтесь поделиться с нами вашим ценным мнением.
Текст