Infiniti EX35. Manual — part 523
DLN-42
< PREPARATION >
[TRANSFER: ETX13B]
PREPARATION
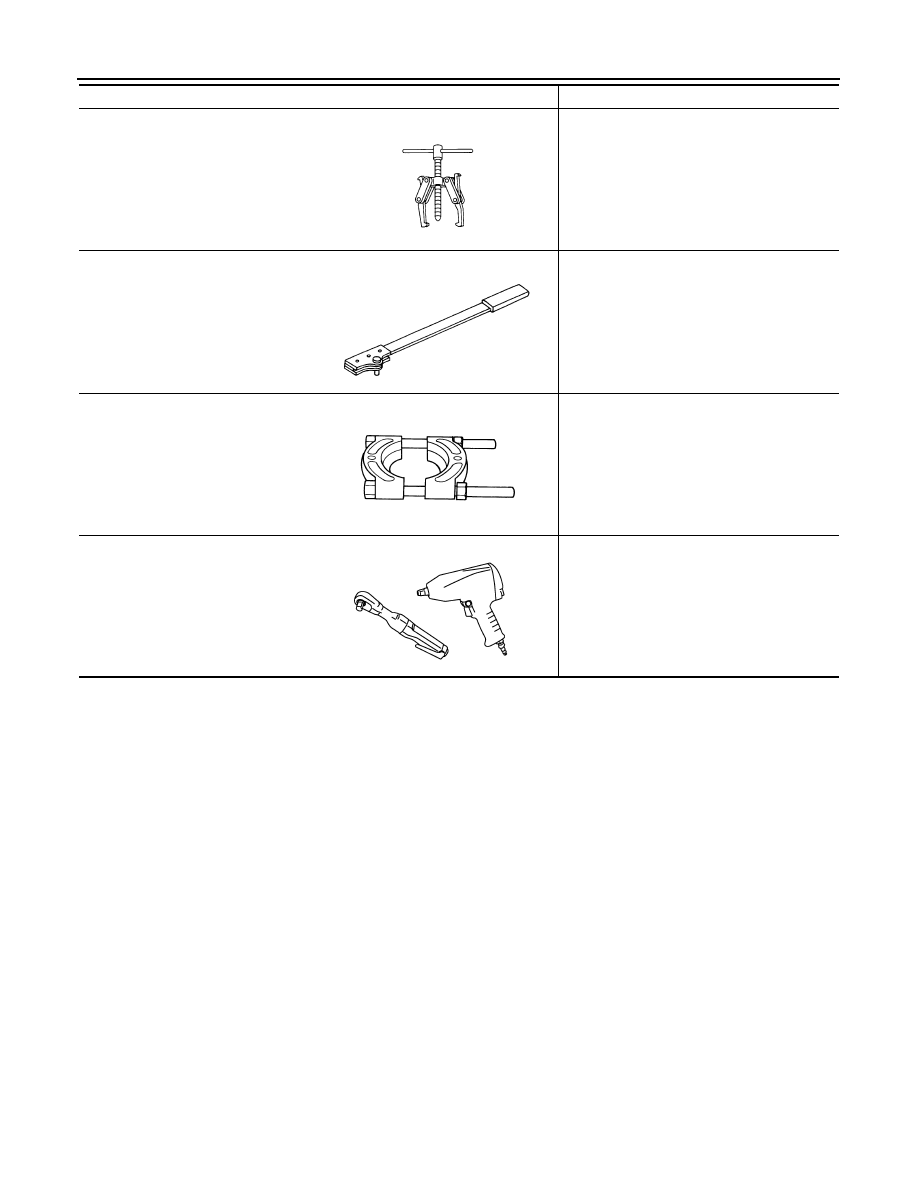
Tool name
Description
Puller
Removing companion flange
Flange wrench
Removing and installing self-lock nut
Puller
• Removing front drive shaft front bearing
• Removing front drive shaft rear bearing
Power tool
Loosening bolts and nuts
NT077
NT771
ZZB0823D
PBIC0190E
TRANSFER FLUID
DLN-43
< ON-VEHICLE MAINTENANCE >
[TRANSFER: ETX13B]
C
E
F
G
H
I
J
K
L
M
A
B
DLN
N
O
P
ON-VEHICLE MAINTENANCE
TRANSFER FLUID
Inspection
INFOID:0000000003135716
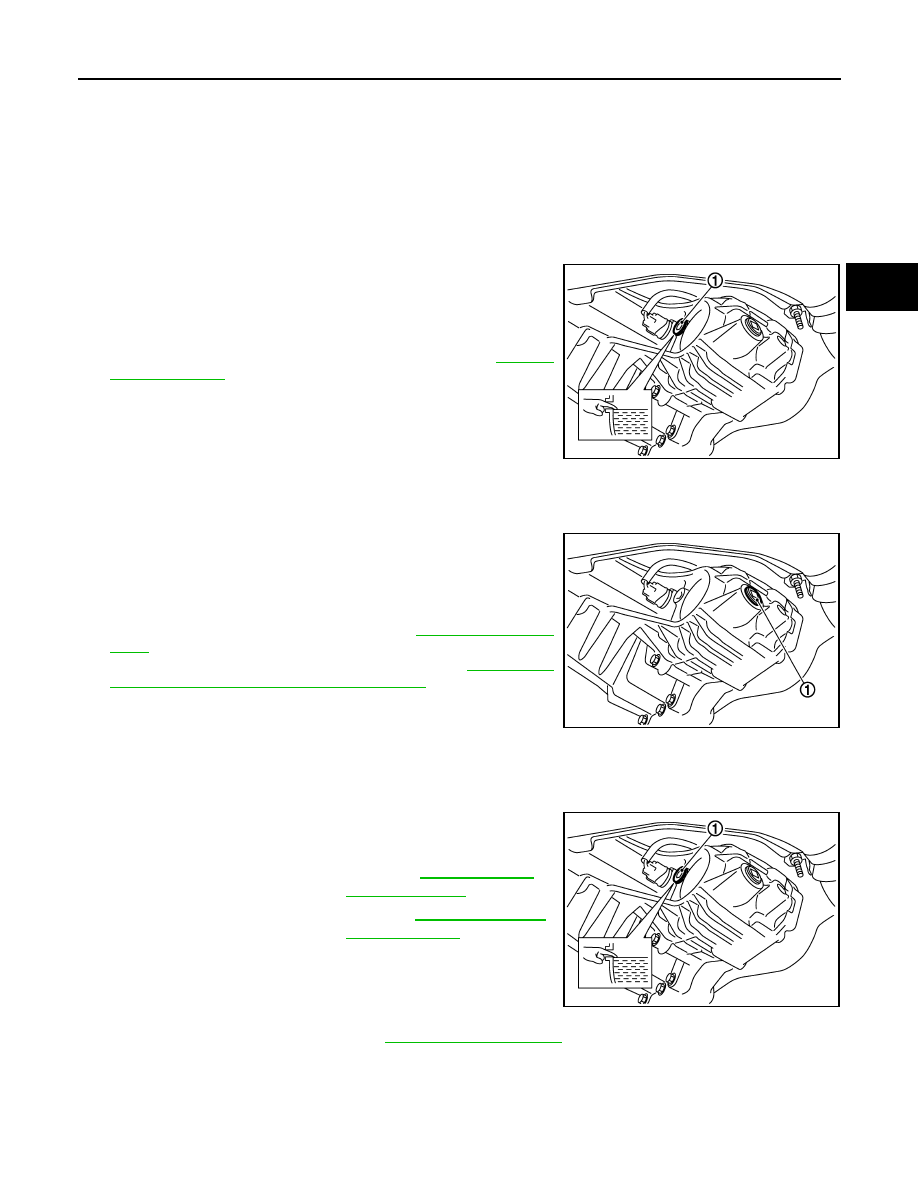
FLUID LEAKAGE
Check transfer surrounding area (oil seal, drain plug, and filler plug etc.) for fluid leakage.
FLUID LEVEL
1.
Remove filler plug (1) and gasket. Then check that fluid is filled
up from mounting hole for the filler plug.
CAUTION:
Never start engine while checking fluid level.
2.
Before installing filler plug, set a new gasket. Install filler plug on
transfer and tighten to the specified torque. Refer to
CAUTION:
Never reuse gasket.
Draining
INFOID:0000000003135717
1.
Run the vehicle to warm up the transfer unit sufficiently.
2.
Stop the engine, and remove the drain plug (1) to drain the
transfer fluid.
CAUTION:
When draining fluid, protect exhaust tube flange with cover.
3.
Apply sealant to drain plug. Install drain plug on transfer and
tighten to the specified torque. Refer to
.
Use Genuine Silicone RTV or equivalent. Refer to
ommended Chemical Products and Sealants"
CAUTION:
Remove old sealant adhering to mounting surfaces. Also
remove any moisture, oil, or foreign material adhering to
application and mounting surfaces.
Refilling
INFOID:0000000003135718
1.
Remove filler plug (1) and gasket. Then fill fluid up to mounting
hole for the filler plug.
CAUTION:
Carefully fill the fluid. (Fill up for approximately 3 minutes.)
2.
Leave the vehicle for 3 minutes, and check the fluid level again.
3.
Set a new gasket onto filler plug and install it on transfer and
tighten to the specified torque. Refer to
.
CAUTION:
Never reuse gasket.
JSDIA0096ZZ
JSDIA0095ZZ
Fluid and viscosity
: Refer to
.
Fluid capacity
: Refer to
.
JSDIA0096ZZ
DLN-44
< ON-VEHICLE REPAIR >
[TRANSFER: ETX13B]
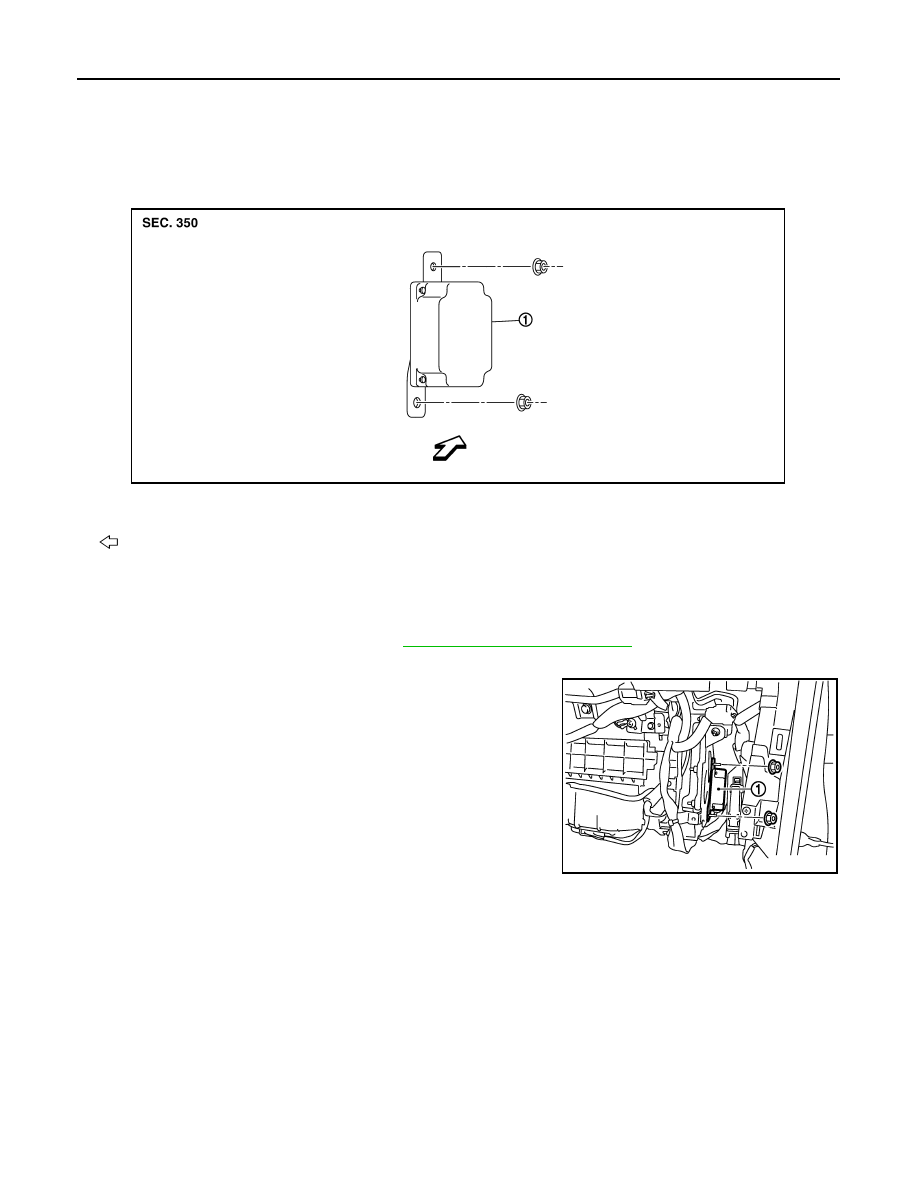
AWD CONTROL UNIT
ON-VEHICLE REPAIR
AWD CONTROL UNIT
Exploded View
INFOID:0000000003135719
Removal and Installation
INFOID:0000000003135720
REMOVAL
1.
Remove the glove box assembly. Refer to
IP-12, "Removal and Installation"
2.
Disconnect AWD control unit harness connector.
3.
Remove AWD control unit (1) mounting nuts.
4.
Remove AWD control unit.
INSTALLATION
Install in the reverse order of removal.
1.
AWD control unit
: Vehicle front
JSDIA0050ZZ
JSDIA0051ZZ
FRONT OIL SEAL
DLN-45
< ON-VEHICLE REPAIR >
[TRANSFER: ETX13B]
C
E
F
G
H
I
J
K
L
M
A
B
DLN
N
O
P
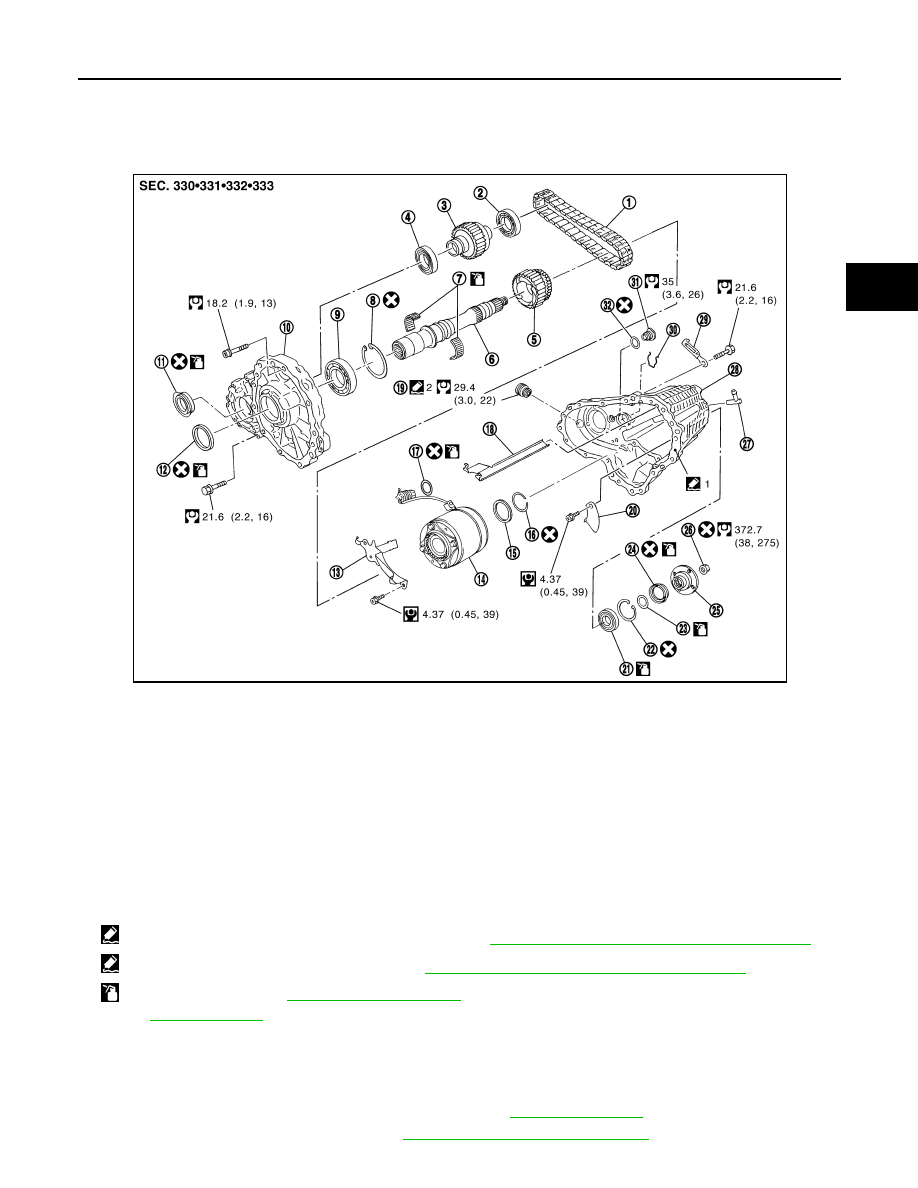
FRONT OIL SEAL
Exploded View
INFOID:0000000003135721
Removal and Installation
INFOID:0000000003135722
REMOVAL
1.
Remove the drain plug to drain the transfer fluid. Refer to
2.
Remove the front propeller shaft. Refer to
DLN-75, "Removal and Installation"
1.
Drive chain
2.
Front drive shaft rear bearing
3.
Front drive shaft
4.
Front drive shaft front bearing
5.
Sprocket
6.
Mainshaft
7.
Needle bearing
8.
Snap ring
9.
Mainshaft bearing
10. Front case
11.
Front oil seal
12. Mainshaft oil seal
13. Oil cover
14. Electric controlled coupling
15. Spacer
16. Snap ring
17. O-ring
18. Oil gutter
19. Drain plug
20. Baffle plate
21. Rear bearing
22. Snap ring
23. Spacer
24. Rear oil seal
25. Companion flange
26. Self-lock nut
27. Breather tube
28. Rear case
29. Harness bracket
30. Retainer
31. Filler plug
32. Gasket
1: Apply Genuine Anaerobic Liquid Gasket or equivalent. Refer to
GI-15, "Recommended Chemical Products and Sealants"
2: Apply Genuine Silicone RTV or equivalent. Refer to
GI-15, "Recommended Chemical Products and Sealants"
: Apply transfer fluid. Refer to
MA-10, "Fluids and Lubricants"
Refer to
for symbols not described above.
JPDIE0057GB
Нет комментариевНе стесняйтесь поделиться с нами вашим ценным мнением.
Текст