Chrysler Le Baron, Dodge Dynasty, Plymouth Acclaim. Manual — part 117
OUTPUT SHAFT REPAIR
Transfer shaft should be removed for repair of
out put shaft. Planetary gear sets must be re-
moved to accurately check output shaft bearing
turning torque.
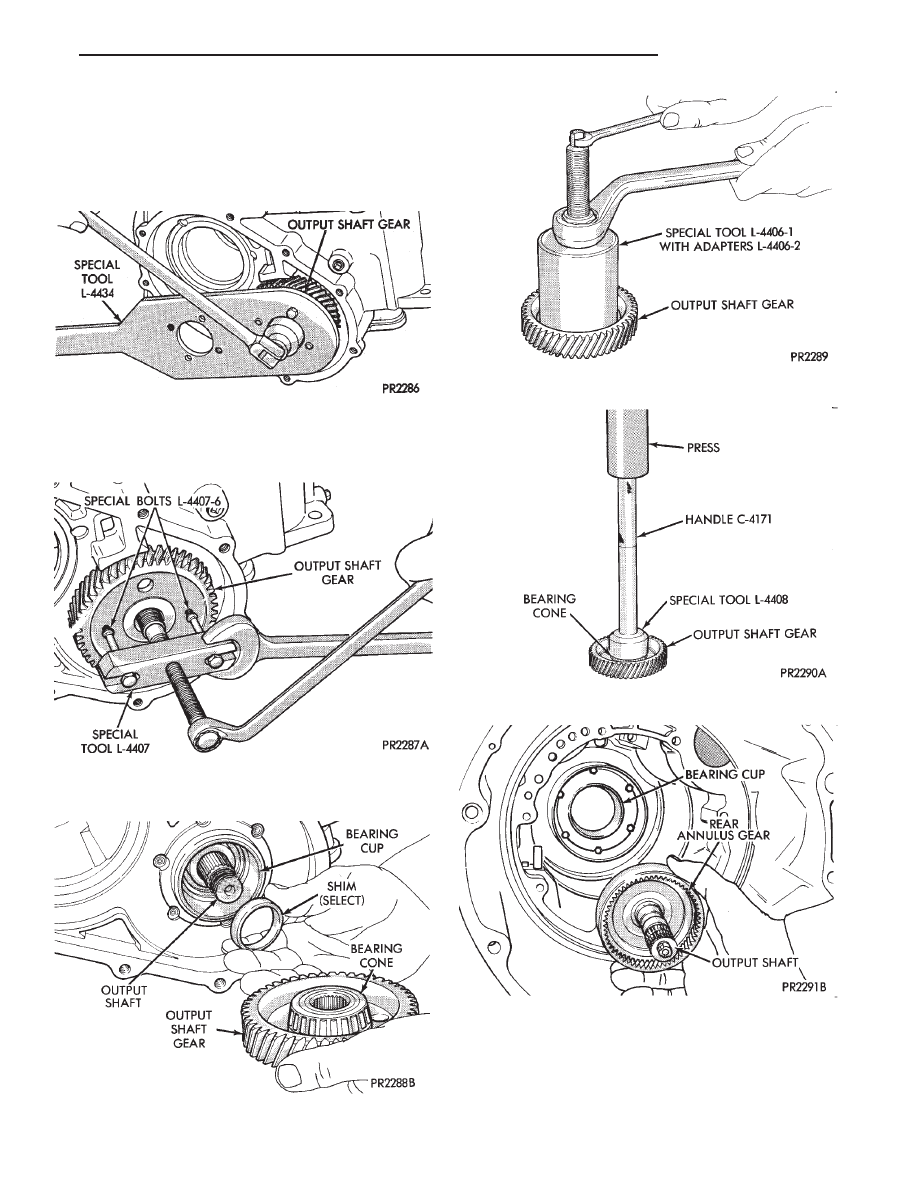
Fig. 1 Remove Output Shaft Retaining Nut and
Washer
Fig. 2 Remove Output Shaft Gear
Fig. 3 Output Shaft Gear and Select Shim
Fig. 4 Remove Output Shaft Gear Bearing Cone
Fig. 5 Install Output Shaft Gear Bearing Cone
Fig. 6 Remove Output Shaft and Rear Annulus Gear
Assembly
Ä
TRANSAXLE
21 - 73
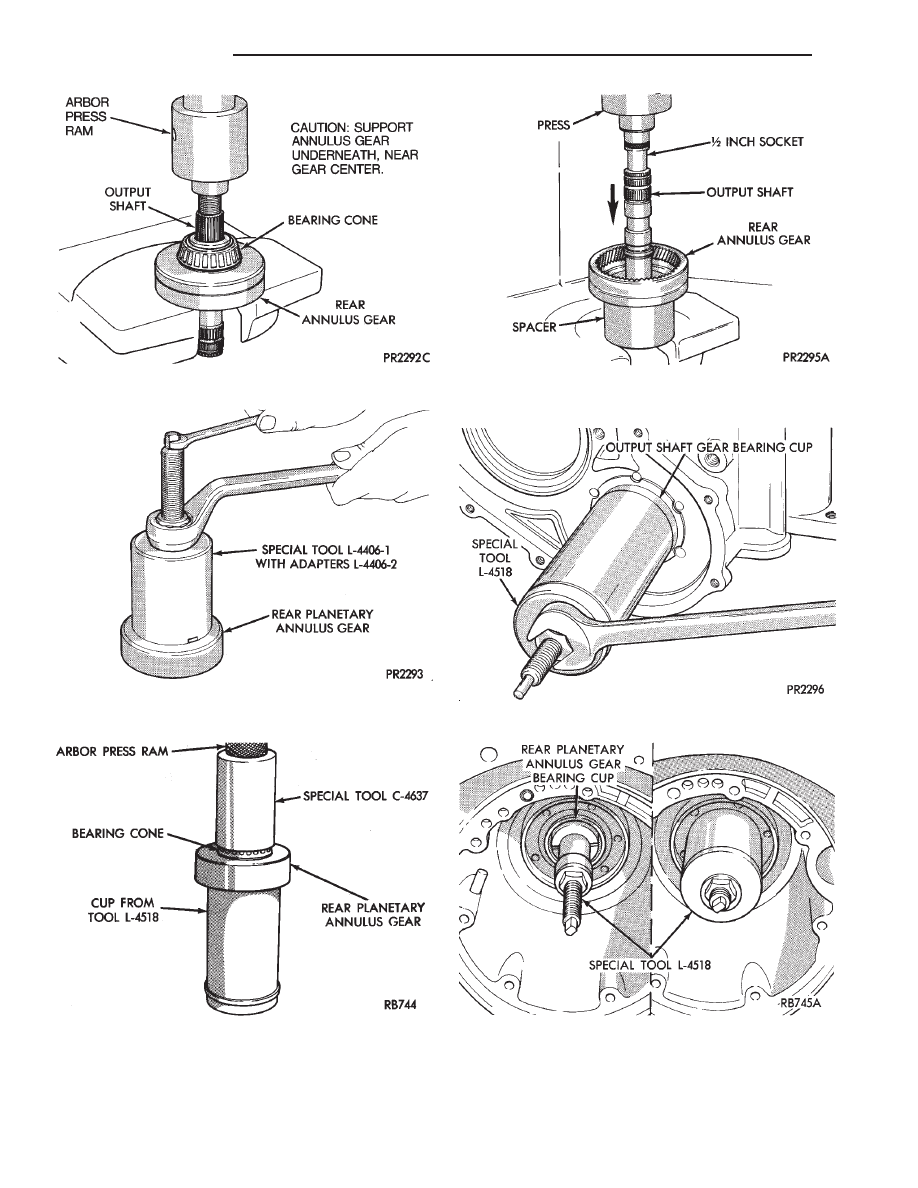
Fig. 7 Remove Output Shaft
Fig. 8 Remove Rear Planetary Annulus Gear
Bearing Cone
Fig. 9 Install Rear Planetary Annulus Gear Bearing
Cone
Fig. 10 Install Output Shaft into Rear Planetary
Annulus Gear
Fig. 11 Remove Output Shaft Gear Bearing Cup
Fig. 12 Remove Rear Planetary Annulus Gear
Bearing Cup
21 - 74
TRANSAXLE
Ä
DETERMINING SHIM THICKNESS
Shim thickness need only be determined if any of
the following parts are replaced:
• Transaxle case
• Output shaft
• Rear planetary annulus gear
• Output shaft gear
• Rear annulus and output shaft gear bearing cones
• Overrunning clutch race cups.
Refer to Bearing Adjustment Procedure at the
rear of this section, to determine proper shim thickness
for correct bearing
8preload’ and turning torque.
Check output shaft bearings turning torque, us-
ing an inch-pound torque wrench. If turning
torque is 3 to 8 inch-pounds, the proper shim has
been installed.
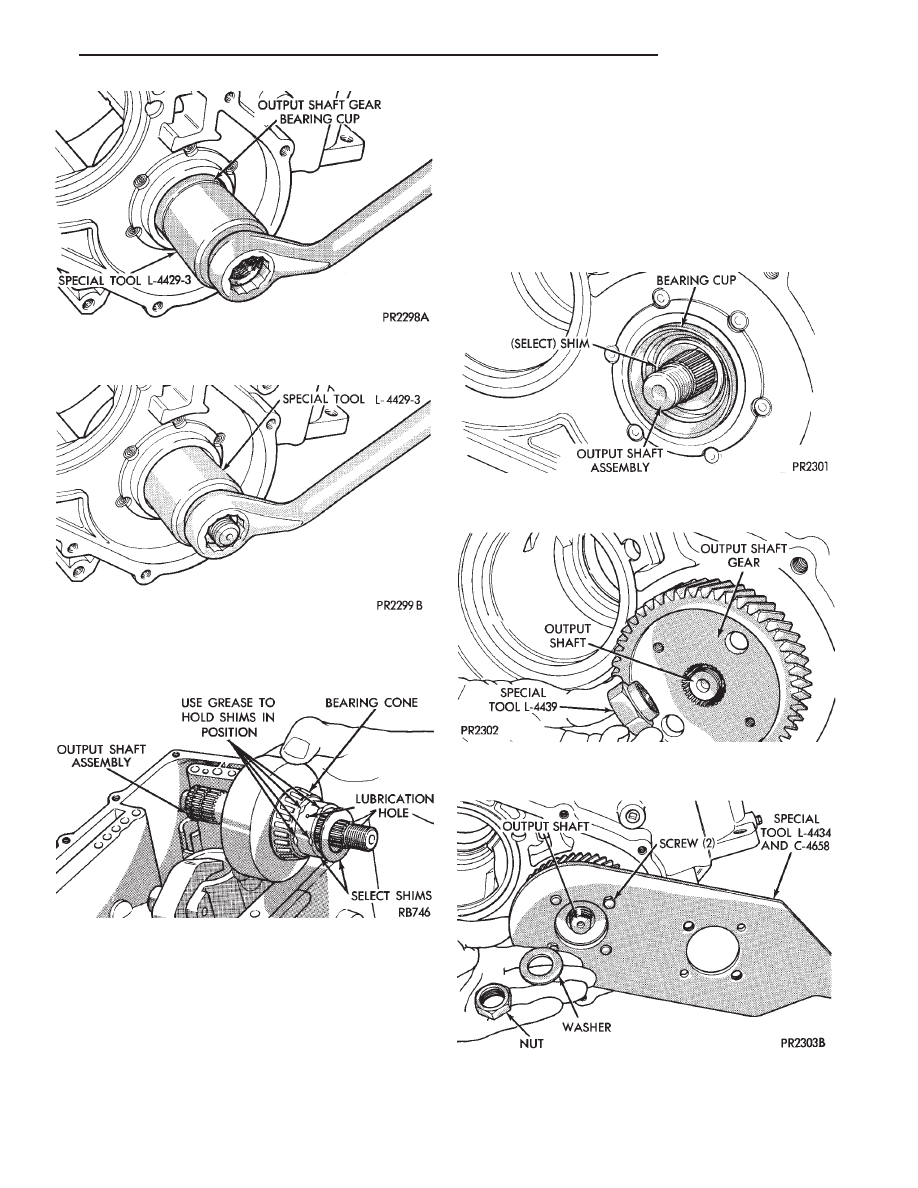
Fig. 15 Install Output Shaft Assembly
Fig. 16 Output Shaft and Select Shims in Position
Fig. 17 Start Output Shaft Gear onto Output Shaft
Fig. 18 Holding Output Shaft Gear
Fig. 14 Install Rear Planetary Annulus Gear Bearing
Cup
Fig. 13 Install Output Shaft Gear Bearing Cup
Ä
TRANSAXLE
21 - 75
DIFFERENTIAL REPAIR
The transfer shaft should be removed for dif-
ferential repair and bearing turning torque
checking.
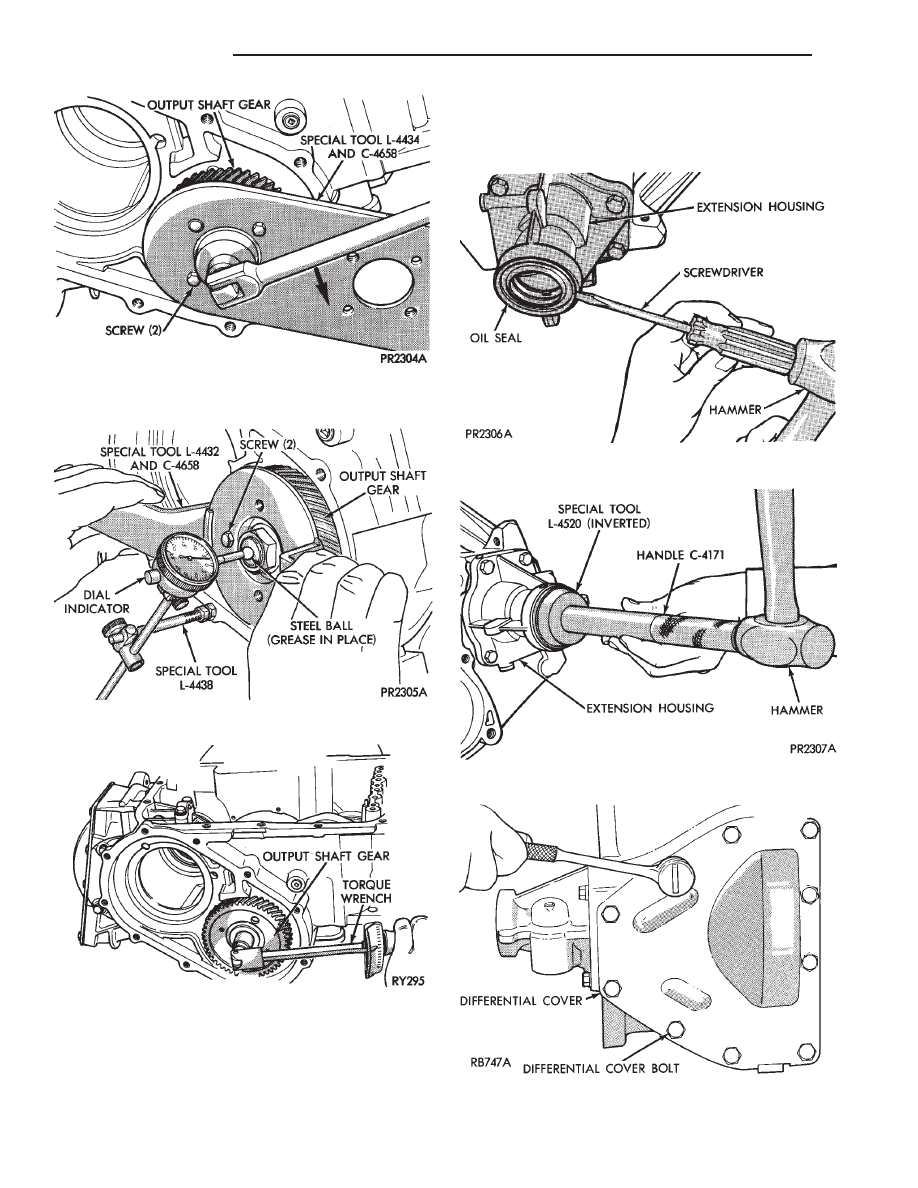
Fig. 19 Tighten Output Shaft Retaining Nut to 271
N
I
m (200 ft. lbs.)
Fig. 20 Checking Output Shaft End Play
Fig. 21 Checking Bearings Turning Torque
Fig. 1 Remove Extension Seal
Fig. 2 Install New Seal into Extension
Fig. 3 Differential Cover Bolts
21 - 76
TRANSAXLE
Ä
Нет комментариевНе стесняйтесь поделиться с нами вашим ценным мнением.
Текст