SsangYong Korando II (1996-2006 year). Manual — part 129
1F2 -- 96 M161 ENGINE CONTROLS
DAEWOO MY_2000
YAA1F550
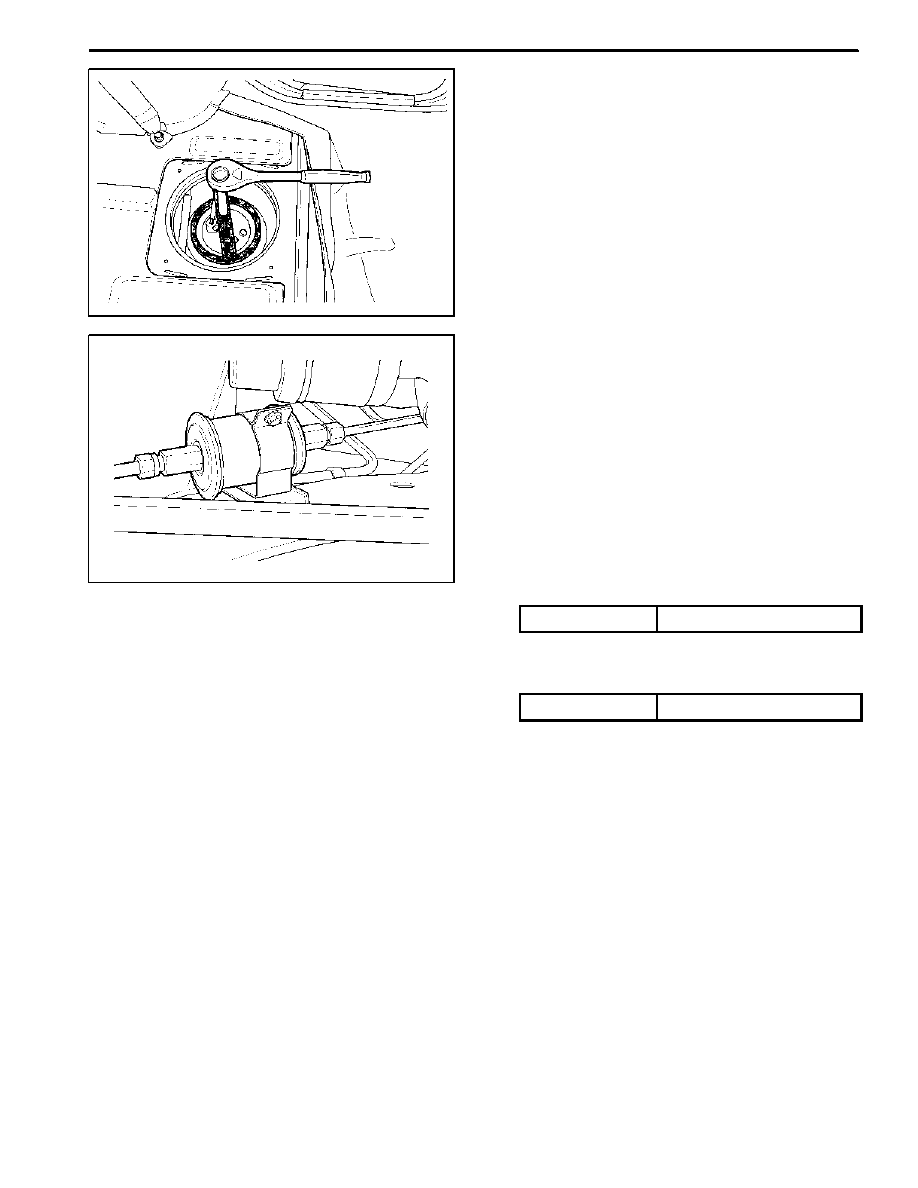
8. Using the fuel tank cap wrench 661 589 00 46 00,
remove the locking cap.
9. Remove the pump from the fuel tank.
Notice: Check the condition of the seal and replace if
necessary. Drain the fuel before removing the pump.
10. Perform an operational check of the fuel pump.
11. Installation should follow the removal procedure in
the reverse order.
YAA1F190
FUEL FILTER
Removal and Installation Procedure
1. Disconnect the negative battery cable.
Caution: The fuel system is under pressure. To
avoid fuel spillage and the risk of personal injury or
fire, it is necessary to relieve the fuel system pres-
sure before disconnecting the fuel lines.
2. Relieve the fuel system pressure. Refer to “Dis-
charging the Pressure in Fuel System” in this sec-
tion.
3. Disconnect the fuel lines from the fuel filter.
Installation Notice
Tightening Torque
28 NSm (21 lb-ft)
4. Remove the fuel filter mounting bracket bolt .
Installation Notice
Tightening Torque
6 NSm (53 lb-in)
Notice: Place the fuel pump pad. There may be a corro-
sion due to the contact between the fuel filter and the
bracket.
5. Remove the fuel filter.
6. Install the fuel filter.
7. Perform a leak test of the fuel filter.
8. Installation should follow the removal procedure in
the reverse order.
M161 ENGINE CONTROLS 1F2 -- 97
DAEWOO MY_2000
KAA1F370
FUEL TANK
Removal and Installation Procedure
Caution: The fuel system is under pressure. To
avoid fuel spillage and the risk of personal injury or
fire, it is necessary to relieve the fuel system pres-
sure before disconnecting the fuel lines.
1. Relieve the fuel pressure. Refer to “Discharging the
Pressure in Fuel System” in this section.
2. Disconnect the negative battery cable.
3. Drain the fuel tank.
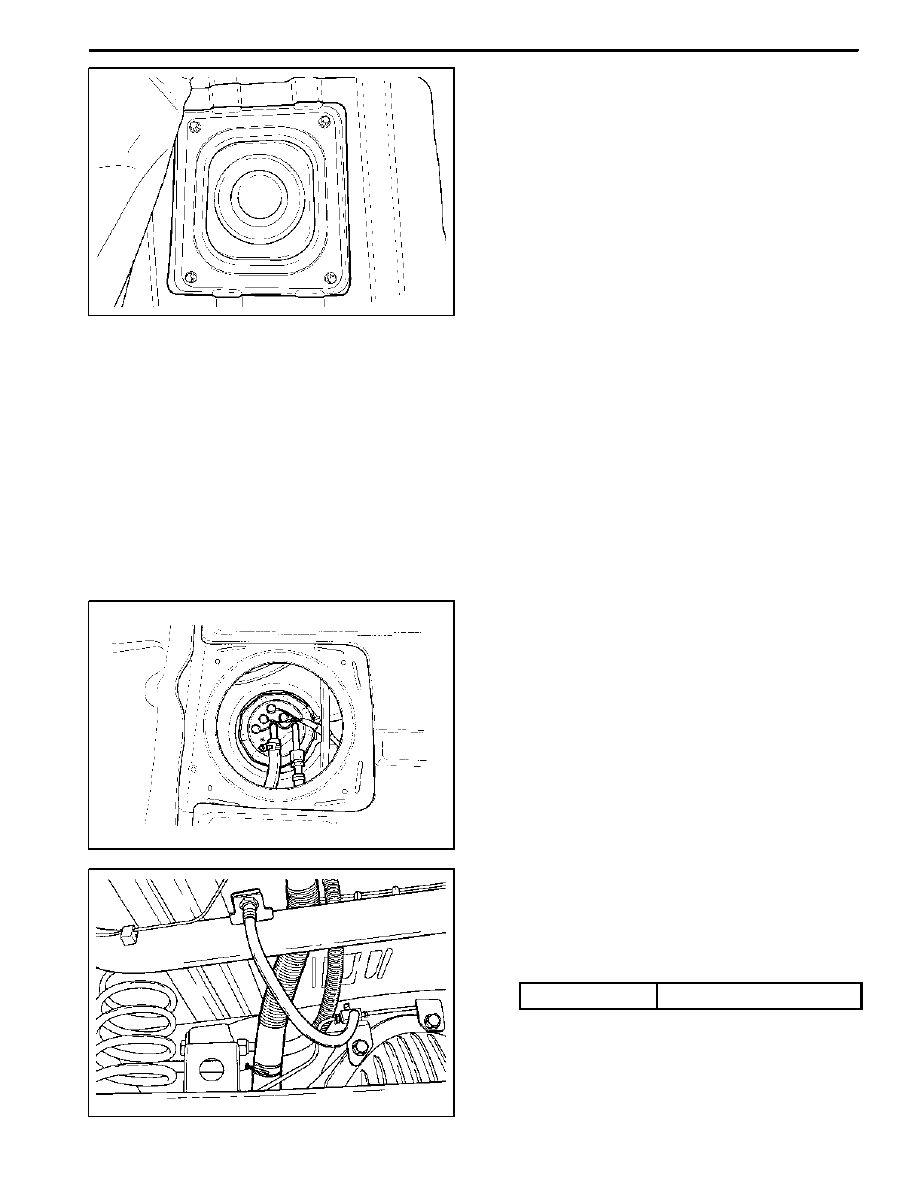
4. Put aside the floor carpet to remove the fuel pump
access cover.
5. Remove the fuel pump access cover.
YAA1F170
6. Disconnect the return line.
7. Disconnect the supply line.
8. Disconnect the fuel tank-to-canister hose from the
fuel tank.
9. Disconnect the fuel pump wiring connector.
KAB1F370
10. Disconnect the fuel filler hose and air vent hose from
the fuel tank.
11. Support the fuel tank.
12. Remove the fuel tank retaining nuts.
Installation Notice
Tightening Torque
38 NSm (28 lb-ft)
13. Carefully lower the fuel tank.
1F2 -- 98 M161 ENGINE CONTROLS
DAEWOO MY_2000
YAA1F180
14. Turn the roll over valves counterclockwise at an
angle of 90 degrees.
15. Turn the lock ring counterclockwise.
16. Remove and discard the gasket.
17. Installation should follow the removal procedure in
the reverse order.
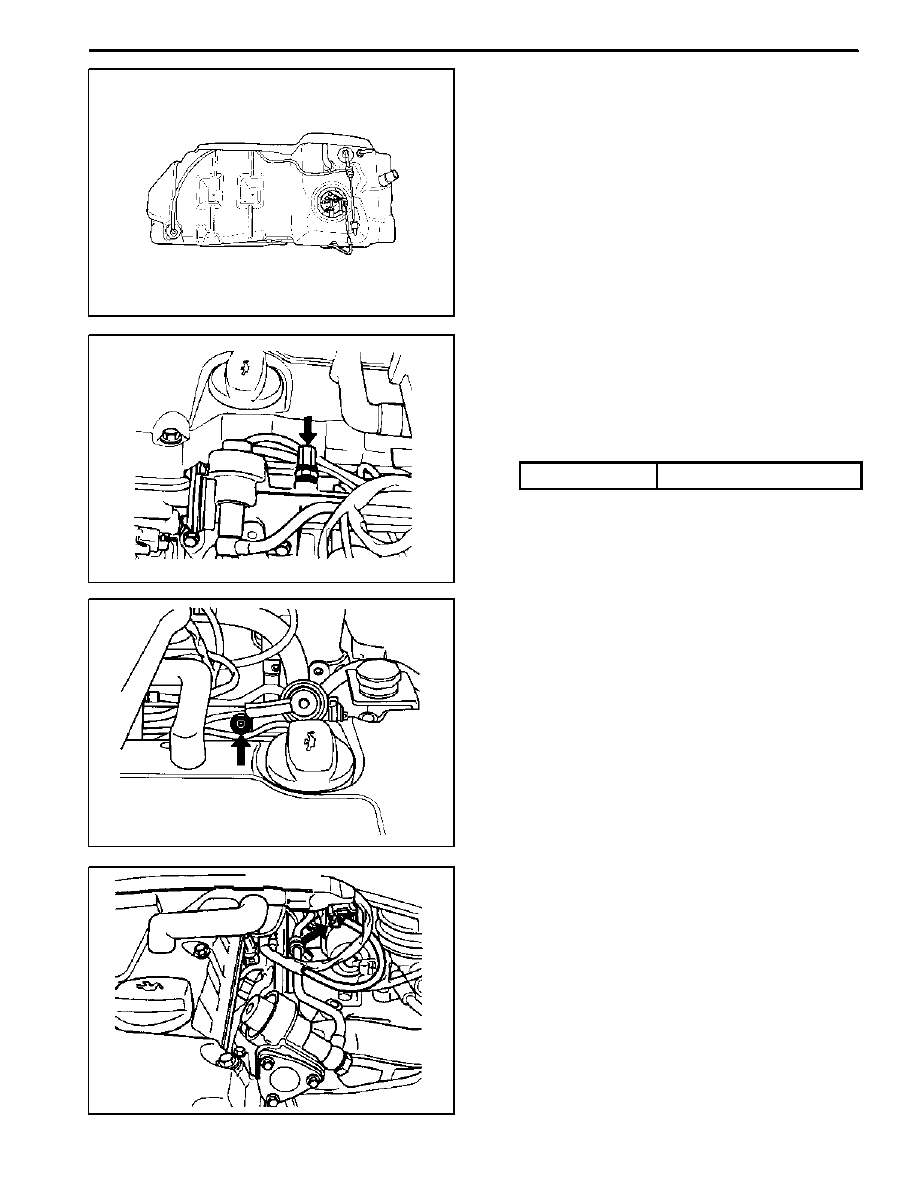
YAA1F700
FUEL PRESSURE REGULATOR
Removal and Installation Procedure
1. Disconnect the negative battery cable.
2. Remove the fuel pressure test connector.
Installation Notice
Tightening Torque
25 NSm (18 Ib-ft)
YAA1F720
Caution: The fuel system is under pressure. To
avoid fuel spillage and the risk of personal injury or
fire, it is necessary to relieve the fuel system pres-
sure before disconnecting the fuel lines.
3. Relieve the fuel pressure in fuel supply system by
pressing the service valve.
YAA1F730
4. Disconnect the vacuum hose.
5. Disconnect the circlip and remove the fuel pressure
regulator.
6. Apply the oil to O-ring lightly and then replace it.
7. Perform a leak test of the fuel pressure regulator
with the engine off and the ignition on.
8. Installation should follow the removal procedure in
the reverse order.
M161 ENGINE CONTROLS 1F2 -- 99
DAEWOO MY_2000
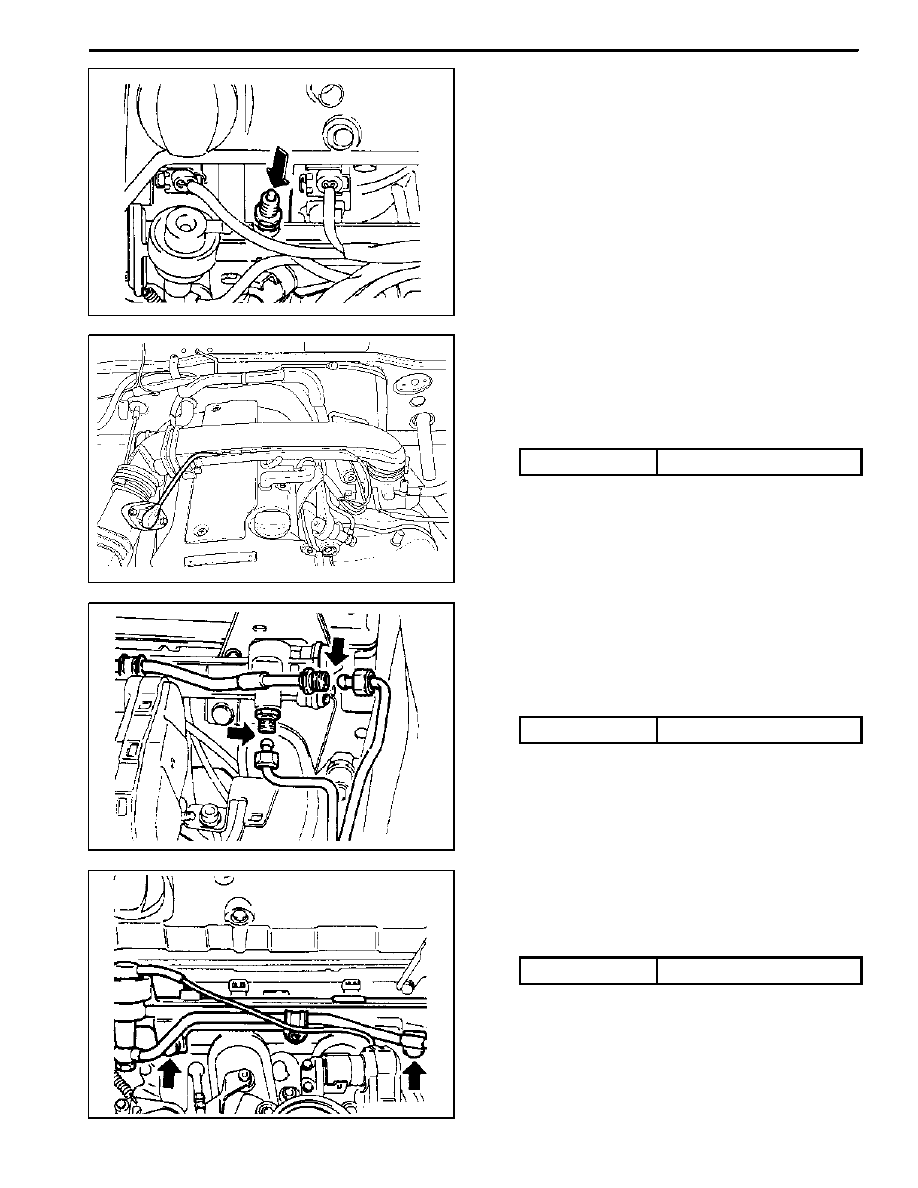
YAA1F710
FUEL RAIL AND INJECTORS
Removal and Installation Procedure
Caution: The fuel system is under pressure. To
avoid fuel spillage and the risk of personal injury or
fire, it is necessary to relieve the fuel system pres-
sure before disconnecting the fuel lines.
1. Discharge the fuel pressure from the fuel pressure
test connector.
2. Disconnect the negative battery cable.
3. Disconnect the vacuum hose from the fuel pressure
regulator.
YAA1F740
4. Remove the cable guide.
5. Disconnect the Hot Film Air Mass (HFM) sensor
connector.
6. Remove the intake air duct mounting bolts.
Installation Notice
Tightening Torque
9 NSm (80 Ib-in)
7. Remove the intake air duct clamps.
8. Remove the intake air duct.
YAA1F750
9. Remove the fuel return and supply line.
Notice: For removal, cover around parts with cloths not
to be stained by fuel. In case of checking the injector
only, do not remove the fuel return and supply line.
Installation Notice
Tightening Torque
23 NSm (17 Ib-ft)
10. Remove the six injector connectors.
YAA1F760
11. Remove the two left and two right bolts and one cen-
ter bolt of the fuel rail assembly from the intake man-
ifold.
Installation Notice
Tightening Torque
25 NSm (18 Ib-ft)
Нет комментариевНе стесняйтесь поделиться с нами вашим ценным мнением.
Текст