SsangYong Korando II (1996-2006 year). Manual — part 460
BODY FRONT END 9R-3
SSANGYONG MY2002
8
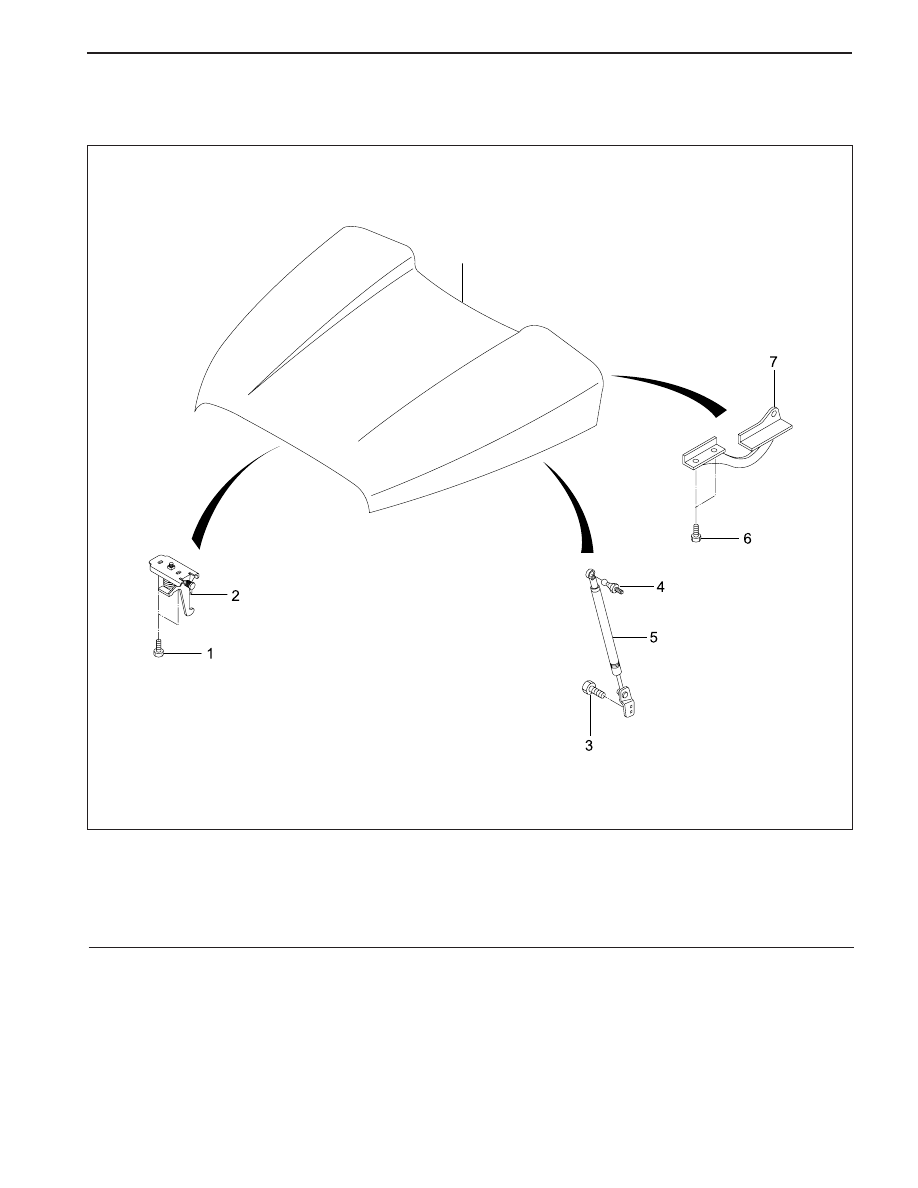
COMPONENTS LOCATOR
BODY FRONT END
KAA9R010
1 Bolt
2 Hood Striker Safety Assembly
3 Bolt
4 Mounting Ball Stud
5 Hood Lifter Assembly
6 Bolt
7 Hood Hinge Assembly
8 Hood
SSANGYONG MY2002
9R-4 BODY FRONT END
ON-VEHICLE SERVICE
UNIT REPAIR
LUBRICATION
The hood hinges and the locking mechanisms require
periodic lubrication for proper operation. Refer to
Section 0B, General Information for the specific types
and intervals of lubrication.
FASTENERS
Notice: Dissimilar metals in direct contact with each
other may corrode rapidly. Make sure to use the correct
fasteners to prevent premature corrosion.
Many aluminum components are used on current
models. Aluminum in contact with steel may corrode
rapidly if it is not protected by special finishes or
isolators.
The fasteners used have a special finish which provides
adequate protection from corrosion. These special
fasteners differ in color to easily identify them from
the standard metric fasteners, which are medium blue
in color.
When replacing fasteners, avoid substituting otherwise
similar fasteners in the same location.
ANTICORROSION MATERIALS
To provide rust resistance, anticorrosion materials have
been applied to the interior surfaces of most of most
of the metal panels. When servicing these panels,
properly recoat them with a service-type anticorrosion
material if any of the original material has been
disturbed.
REPAIR INSTRUCTIONS
BODY FRONT END 9R-5
SSANGYONG MY2002
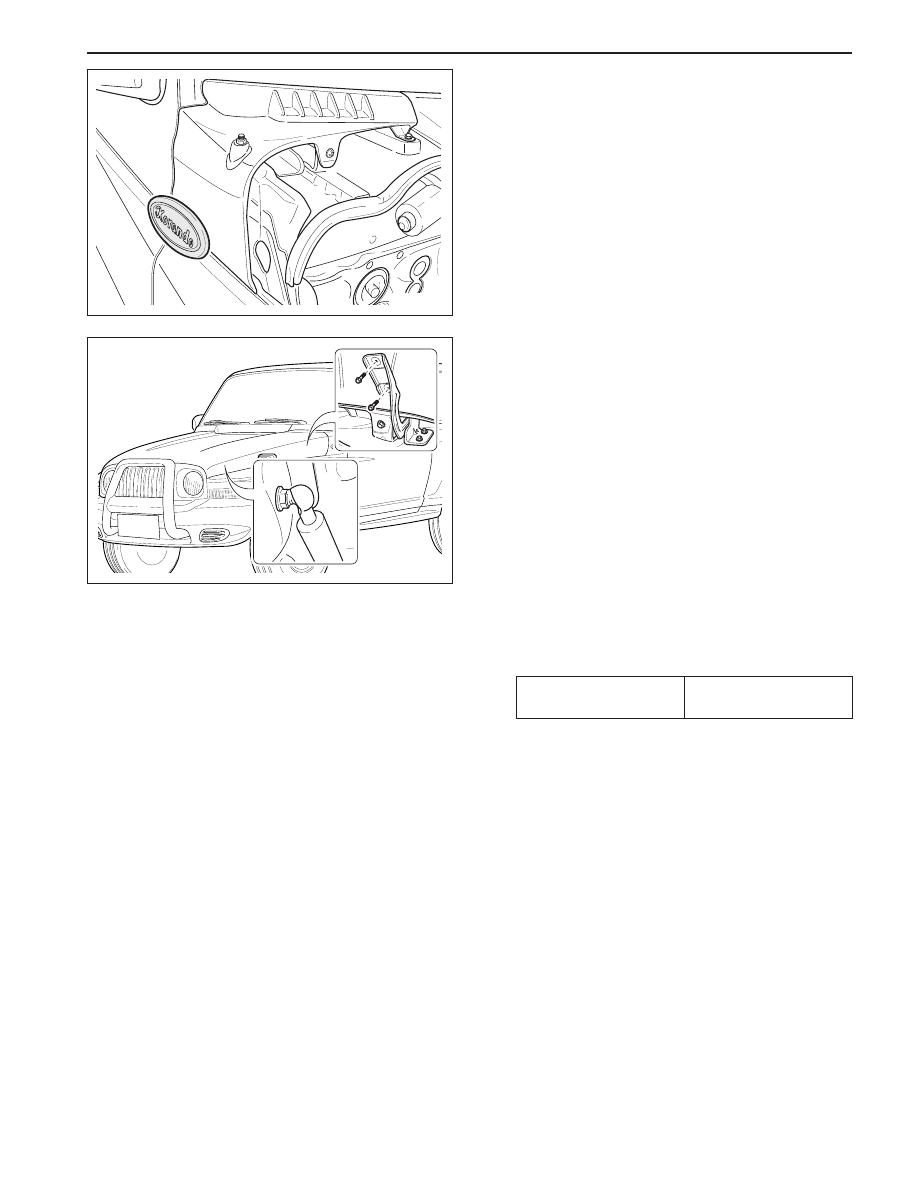
COWL VENT GRILLE
Removal and Installation Procedure
1. Open the hood.
2. Remove the wiper arms. Refer to Section 9D,
Wipers/Washer System.
3. Remove the cowl vent grille with the screws.
4. Installation should follow the removal procedure
in the reverse order.
KAA9R020
KAA9R030
HOOD
Removal and Installation Procedure
Important: Install protective coverings over the fenders
and the windshield to prevent damage to the paint,
the glass, and the moldings when removing and
installing the hood.
1. Open the hood.
2. Mark the position of the hinge to the hood to aid
in alignment during installation.
3. Remove the washer hoses from the hood.
4. Remove the hood gas spring. Refer to “Hood Gas
Spring” in this section.
5. Remove the bolts retaining the hood to both of
the hinges.
Installation Notice
•
Dissimilar metals in direct contact with each
other may corrode rapidly. Make sure to use
the correct fasteners to prevent premature
corrosion.
6. With the aid of another technician, remove the hood
from the hinges.
7. Installation should follow the removal procedure
in the reverse order.
Tightening Torque
7.84 - 11.76 N•m
(5.78 - 8.68 lb-ft)
SSANGYONG MY2002
9R-6 BODY FRONT END
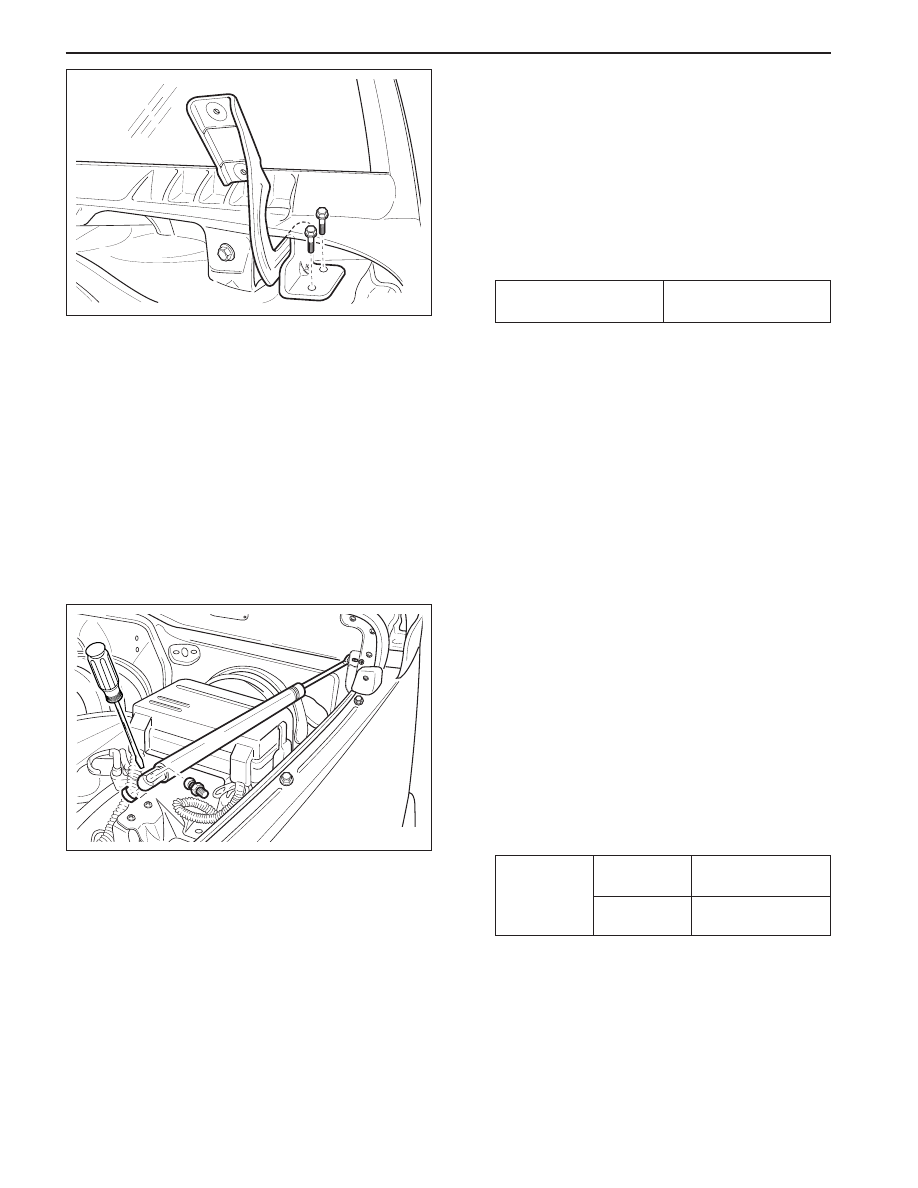
HOOD HINGES
Removal and Installation Procedure
1. Remove the hood. Refer to “Hood” in this section.
2. Remove the cowl vent grille. Refer to “Cowl Vent
Grille” in this section.
3. Remove the side cowl vent panel Refer to “Side
Cowl Vent Panel” in this section.
4. Remove the bolts and the hood hinges
Installation Notice
•
Dissimilar metals in direct contact with each
other may corrode rapidly. Make sure to use
the correct fasteners to prevent premature
corrosion.
5. Installation should follow the removal procedure
in the reverse order.
KAA9R040
HOOD GAS SPRING
Removal and Installation Procedure
1. Open the hood.
2. Remove the wiper arms. Refer to Section 9D,
Wipers/Washer System.
3. Remove the cowl vent grille with the screws.
4. Remove gas spring fix bolt and pull up the gas
spring from the ball stud by spreding the retainer
with screw driver.
5. Remove ball stud from hood. (or not)
Installation Notice
6. Installation should follow the removal procedure
in the reverse order.
KAA9R050
Tightening Torque
12.74 - 25.48 N•m
(9.4 - 18.8 lb-ft)
Tightening
Torque
9 - 11 N•m
(6.63 - 8.11 lb-ft)
16 - 23 N•m
(11.8 - 16.96 lb-ft)
Spring fix
bolt
Ball stud
bolt
Нет комментариевНе стесняйтесь поделиться с нами вашим ценным мнением.
Текст