SsangYong Korando II (1996-2006 year). Manual — part 392
SSANGYONG MY2002
7D-12 FATC-HAVC
1
2
3
4
Fault Safety Function
FATC airconditioner system not only performs self-
diagnosis but also has safety function against faults if
there is open or short in the incar sensor, ambient
sensor, water temperature sensor and temperature door
potentiometer.
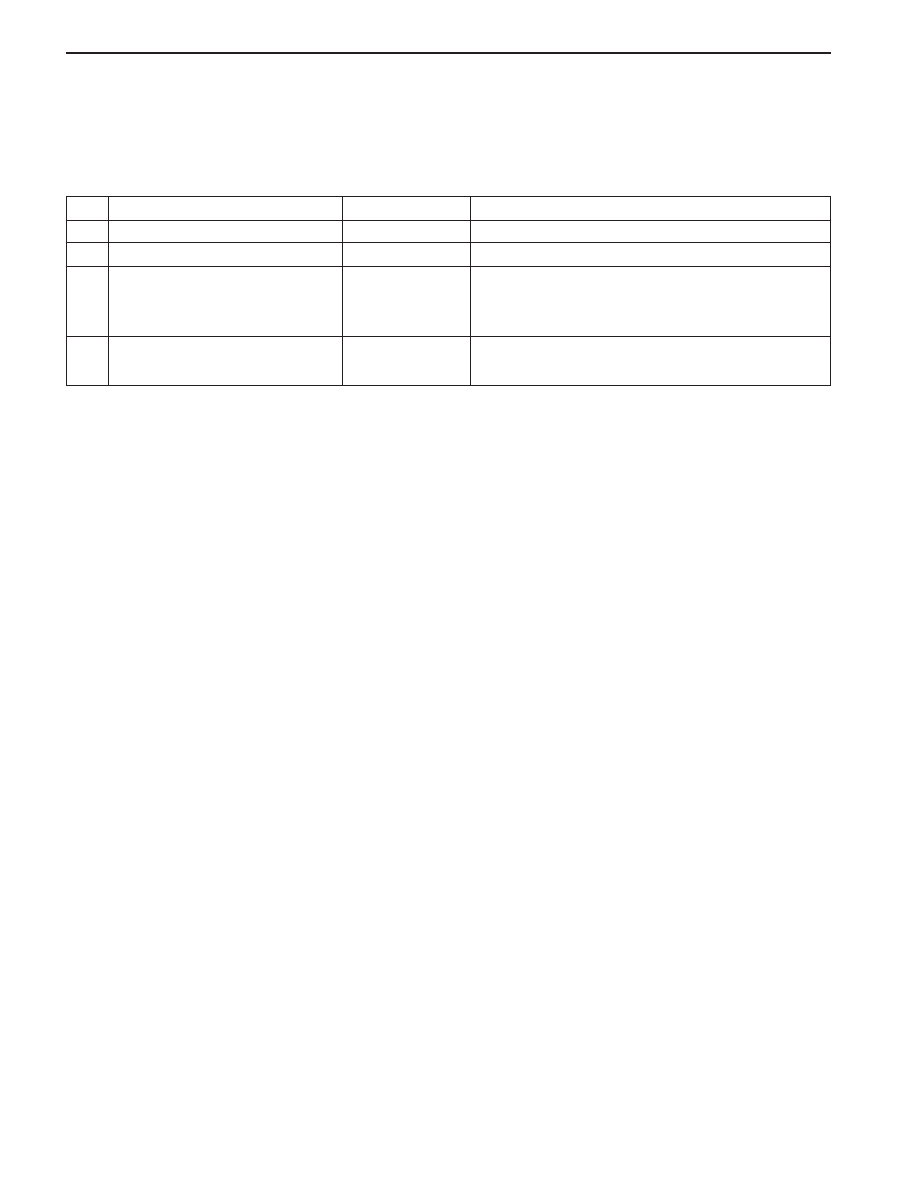
NO.
Item
Defects
Fault safety function
Incar sensor
Ambient sensor
Water temperature sensor
Temperature door potentiometer
Open or short
Open or short
Open or short
Open or short
Control When substituted 25°C
Control When substituted 20°C
Perform heating maneuver control function under
refrigeration maneuver control entering conditions
and release after 10 minutes.
Set temperature 17 - 24.5°C : max. COLD position
Set temperature 25 - 32°C : max. HOT position
FATC-HAVC 7D-13
SSANGYONG MY2002
MAINTENANCE AND REPAIR
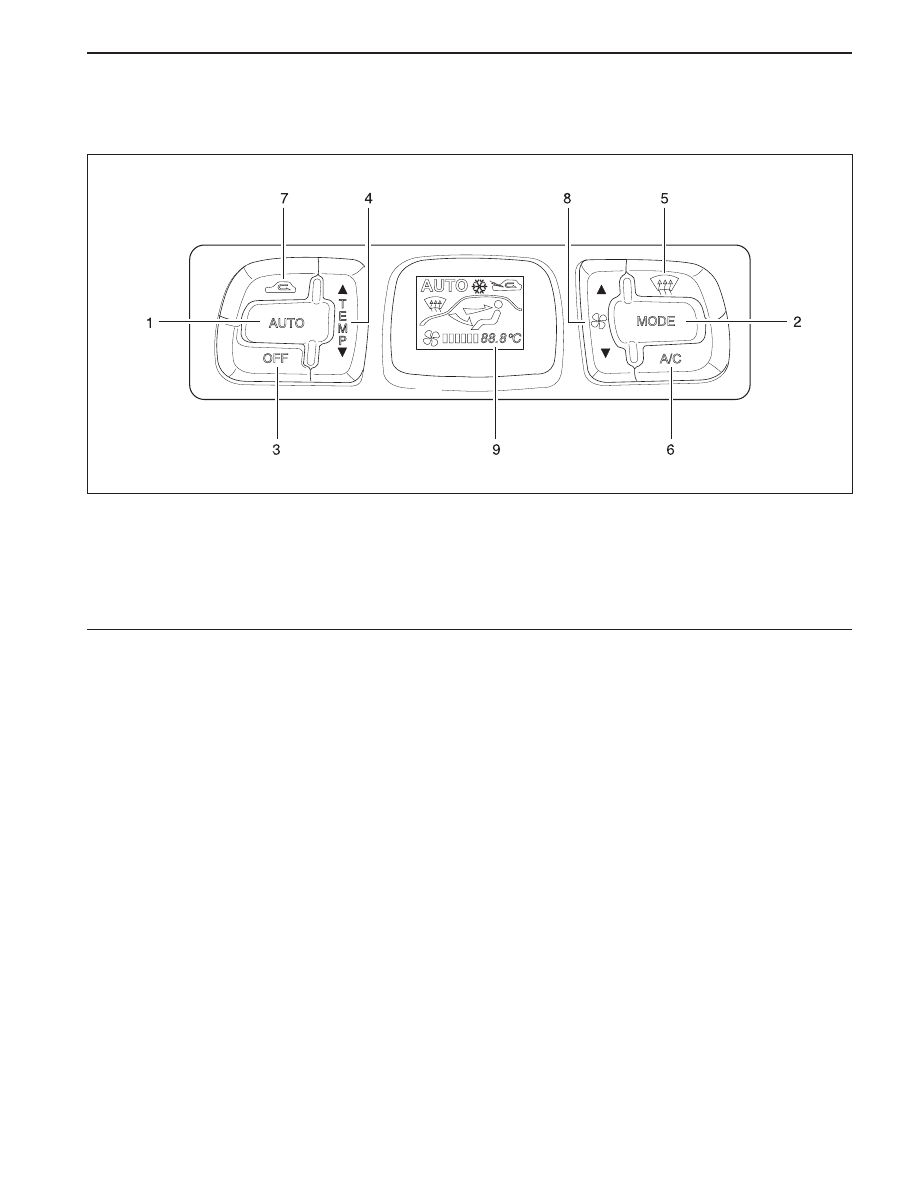
FATC CONTROL PANEL
KAA7D070
1 AUTO Switch
2 MODE Switch
3 OFF Switch
4 Temperature UP/DOWN Switch
5 Defrost Switch
6 Airconditioner Switch
7 Fresh/Recirculation Switch
8 Blower Switch (UP/DOWN)
9 VFD (Vacuum Fluorescent Display)
SSANGYONG MY2002
7D-14 FATC-HAVC
Rheostat
Tail lamp
Battery (+)
Power TR (B)
Power TR (C)
Temperature actuator (CCW)
IG2
Ground
Airconditioner switch ground
HI speed relay
Photo sensor (+)
Photo sensor (-)
Temperature actuator F/B
Temperature actuator (CW)
IG2
Ground
Connection circuit
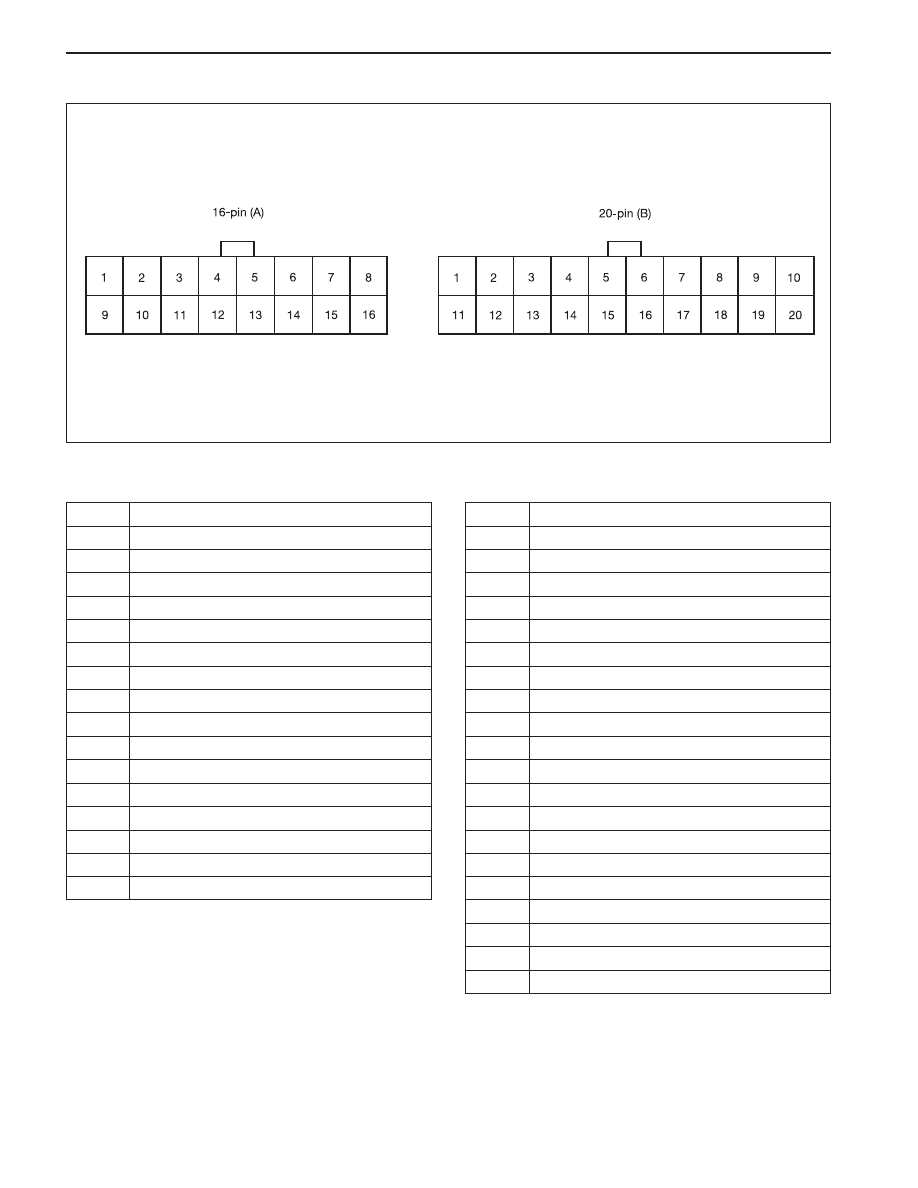
Pin Number and Connection Circuit
KAA7D080
Pin No.
1
2
3
4
5
6
7
8
9
10
11
12
13
14
15
16
Connector A
Connector B
Incar sensor (+)
Ambient sensor (+)
Coolant sensor (+)
Sensor voltage 5V
Sensor ground
Intake (ambient)
Intake (incar)
-
-
-
VENT
B/L
FLR
MIX
DEF
-
-
-
-
-
Connection circuit
Pin No.
1
2
3
4
5
6
7
8
9
10
11
12
13
14
15
16
17
18
19
20
FATC-HAVC 7D-15
SSANGYONG MY2002
E
F
80
100
4
60 8
10
KAA7D090
KAA7D100
KAA7D110
KAA7D120
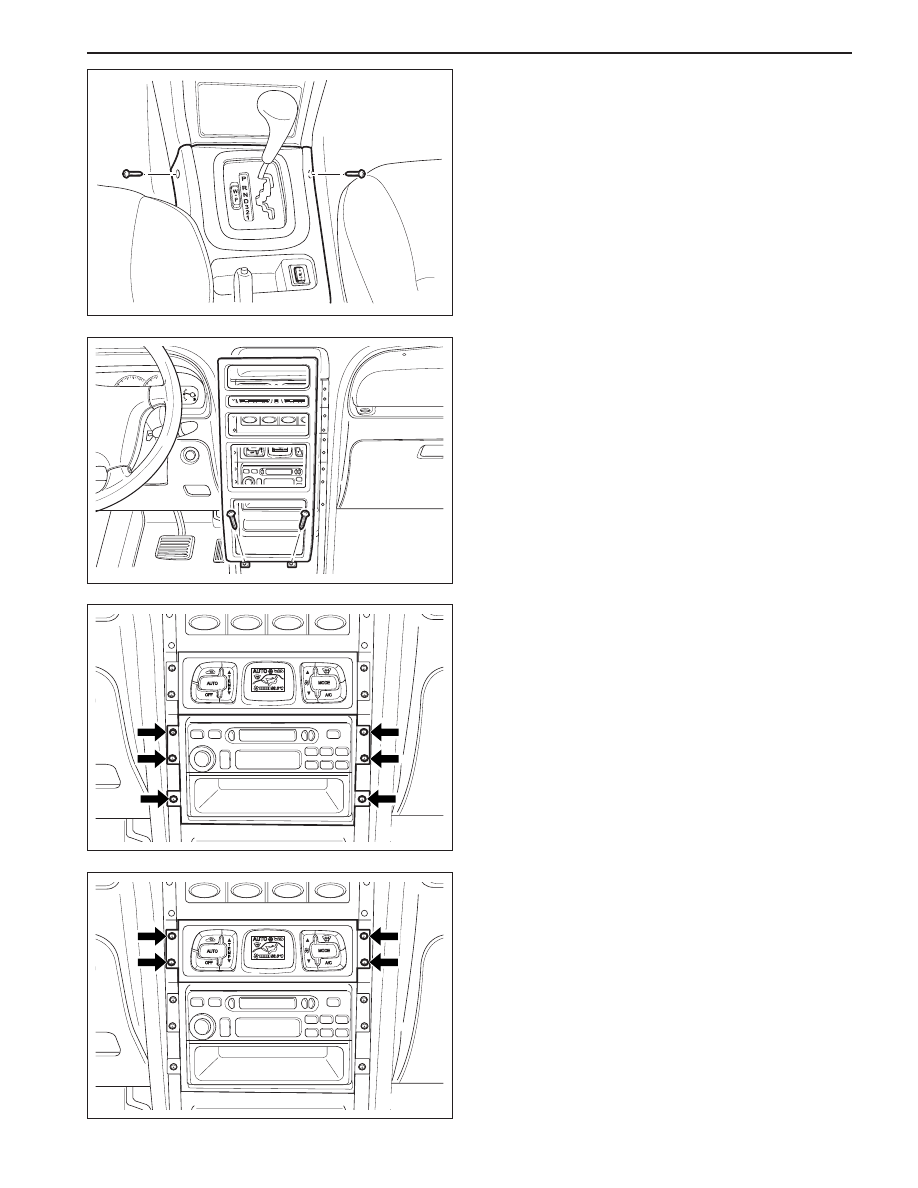
Removal & Installation Procedure
1. Turn the ignition switch to OFF position.
2. Remove two screws on the cover of shift lever box.
3. Unscrew the screw from the center panel, pull out
each switches and remove the center panel.
4. Unscrew the 6 screws and remove the audio control
panel assembly.
5. U n s c r e w t h e 4 s c r e w s a n d r e m o v e t h e
airconditioner control panel assembly.
6. Installation should follow the removal procedure
in the reverse order.
Нет комментариевНе стесняйтесь поделиться с нами вашим ценным мнением.
Текст