SsangYong Korando II (1996-2006 year). Manual — part 156

OM600 ENGINE MECHANICAL 1B3 -- 73
DAEWOO MY_2000
5. Coat a little oil on the sealing lip of new radial seal
and contacting surface.
Notice
Don’t use grease.
6. Insert the new radial seal (4) onto the oil seal as-
sembler (7).
Notice
The sealing lip of the repair radial seal is offset to the
inside by 3mm to ensure that it does not run in any
groove which the standard radial seal may have left
on the crankshaft flange.
A Standard Radial Seal
B Repair Radial Seal
7. Install the outer oil seal assembler on he seal and by
tightening the bolts, press the radial seal into the
end cover as far as the stop.
Notice
The seal must be positioned exactly at right angles
in the end cover to ensure that it provides a proper
seal.
Oil Seal Assembler 601 589 03 43 00

1B3 -- 74 OM600 ENGINE MECHANICAL
DAEWOO MY_2000
VIBRATION DAMPER AND HUB
Preceding Work :
Removal of the cooling fan
Removal of poly V--belt
1 Bolt
10N∙m (89 lb-in)
. . . . . . . . . . . . . . . . . . . . .
2 Cooling Fan Belt Pulley
3 Socket Bolt
23N∙m (17 lb-ft)
. . . . . . . . . . . . . . . .
4 Crankshaft Belt Pulley
5 Vibration Damper
6 Bolt
200N∙m (148 lb-ft) + 90_
. . . . . . . . . . . . . .
7 Washer
8 Straight Pin
9 Hub
10 Oil Pan
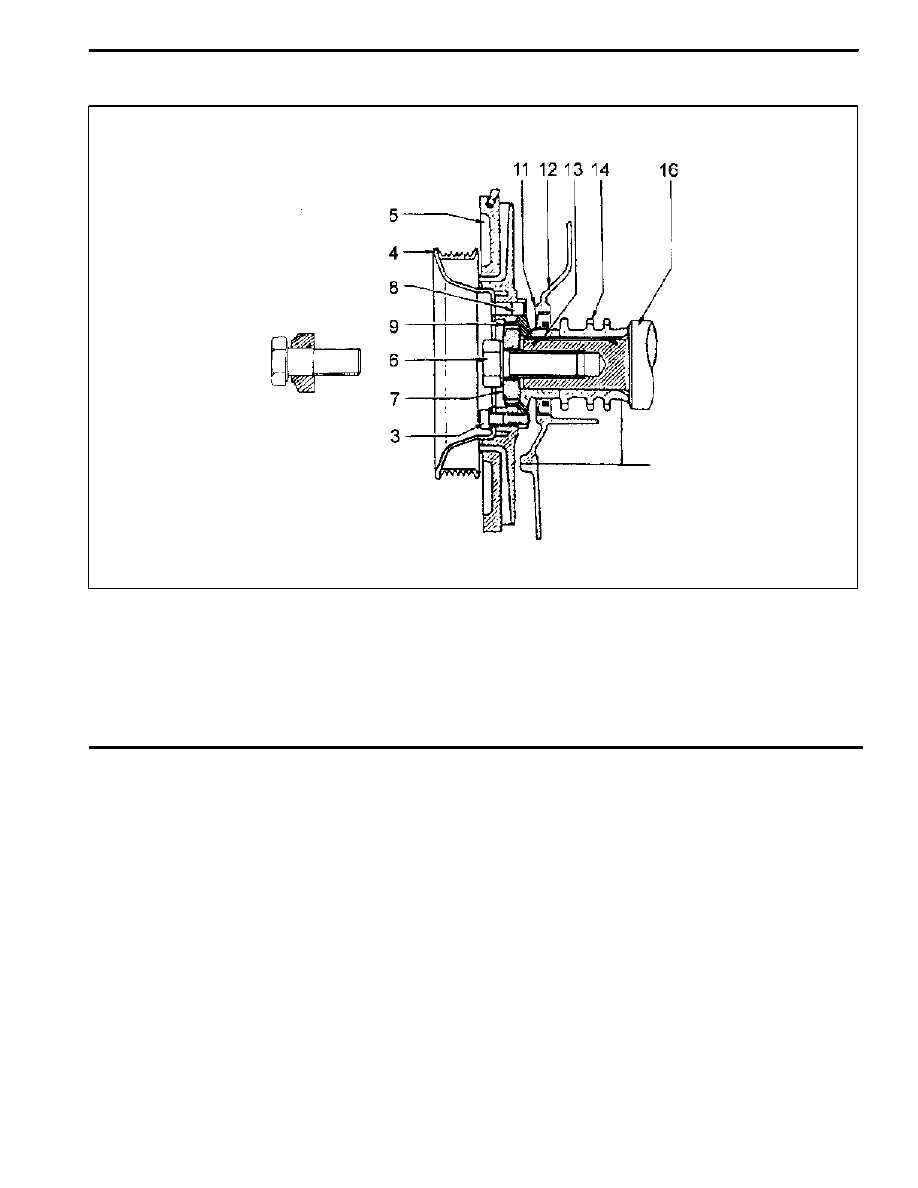
OM600 ENGINE MECHANICAL 1B3 -- 75
DAEWOO MY_2000
Sectional View
3 Socket Bolt
4 Crankshaft Belt Pulley
5 Vibration Damper
6 Bolt
7 Washer
8 Straight Pin
9 Hub
11 Radial Seal
12 Timing Gear Case Cover
13 Key
14 Crankshaft Sprocket
16 Crankshaft
Notice
The mounting position of vibration damper is fixed by
straight pin (8).
Tools Required
602 589 00 40 00 Engine Lock
103 589 00 30 00 Puller
1B3 -- 76 OM600 ENGINE MECHANICAL
DAEWOO MY_2000
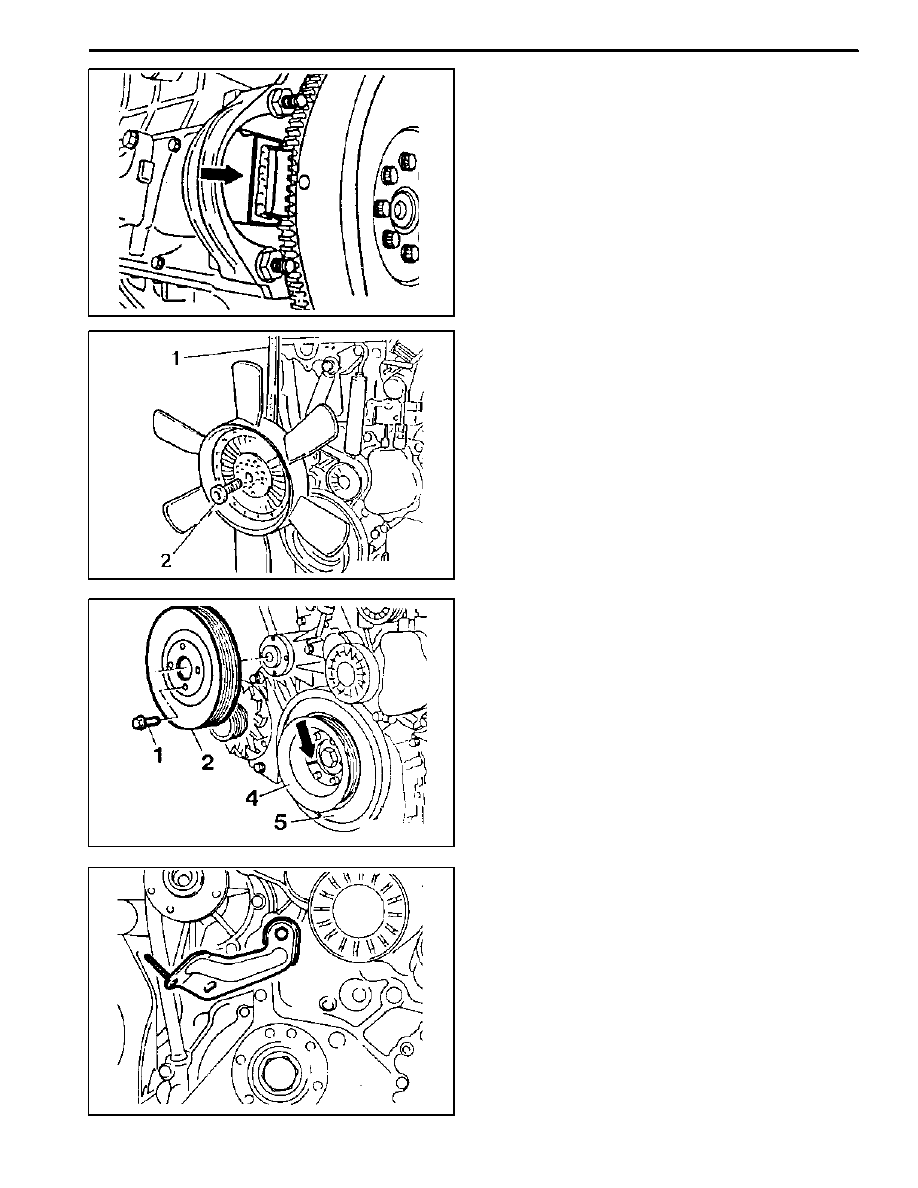
Removal Procedure
1. Remove the starter motor and install the engine lock
into the wheel ring gear.
Engine Lock 602 589 00 40 00
2. Remove the poly V--belt.
3. Remove the cooling fan.
Notice
Keep the fan in vertical position.
4. Remove the cooling fan belt pulley (2).
5. Place alignment marks (arrow) on the vibration
damper (5) and crankshaft belt pulley (4).
6. Remove the timing sensor bracket.
Notice
Remove if necessary.
Нет комментариевНе стесняйтесь поделиться с нами вашим ценным мнением.
Текст