SsangYong Korando II (1996-2006 year). Manual — part 184
OM600 ENGINE MECHANICAL 1B3 -- 185
DAEWOO MY_2000
Removal & Installation Procedure
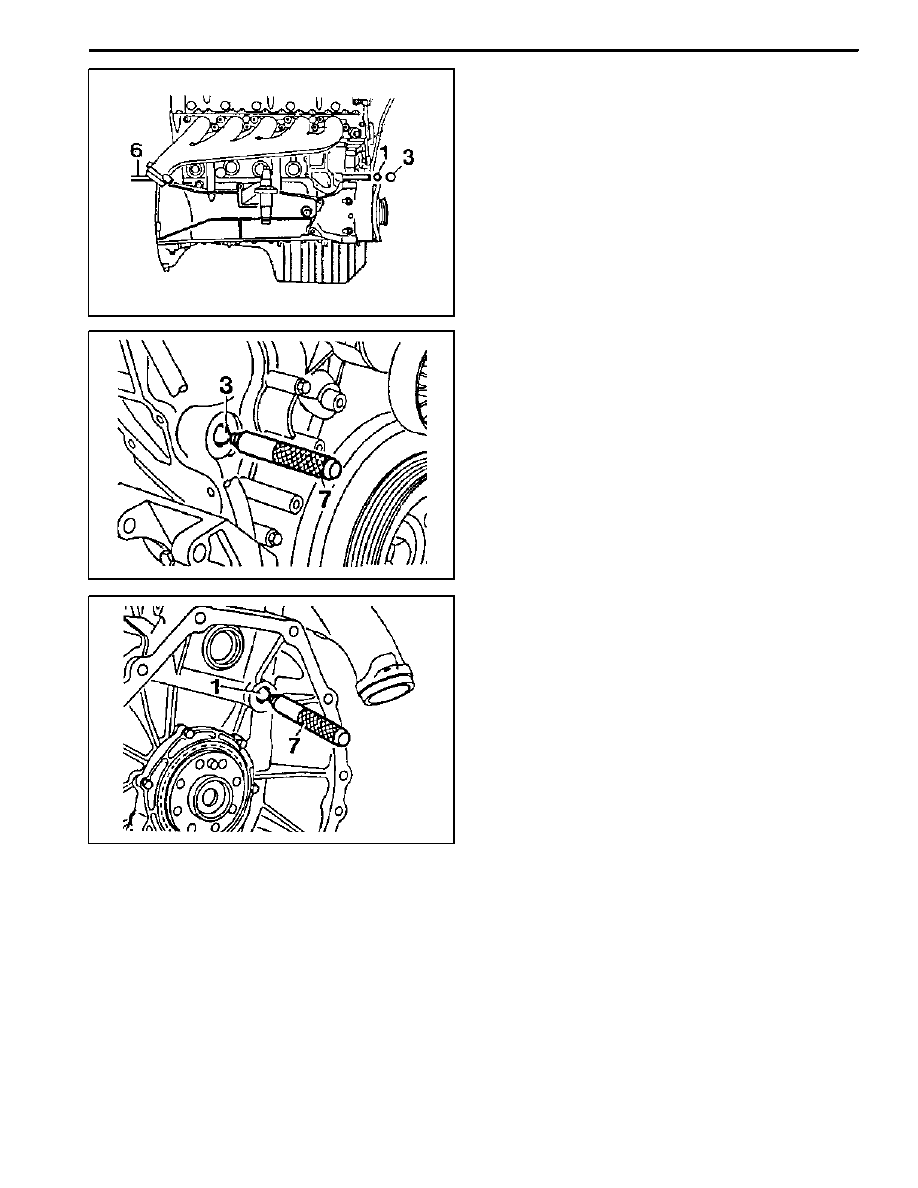
1. Remove the timing case cover.
2. By inserting a round bar (6) approx. 0.7m from the
back to the front side through the oil gallery, knock
out the steel balls (1,3).
Notice
Be careful not to damage the bores of the steel
balls.
6 Shop--made tool
3. Thoroughly clean the bores of steel balls.
4. Place the steel ball (3) onto the drift (7) with a little
grease and position to the bore and then tap until the
drift stops.
Drift 601 589 08 15 00
5. Place the steel ball (1) onto the drift (7) with a little
grease and position to the bore and then tap until the
drift stops.
Drift 601 589 08 1500
6. Warm up the engine and check the oil for leaks.
1B3 -- 186 OM600 ENGINE MECHANICAL
DAEWOO MY_2000
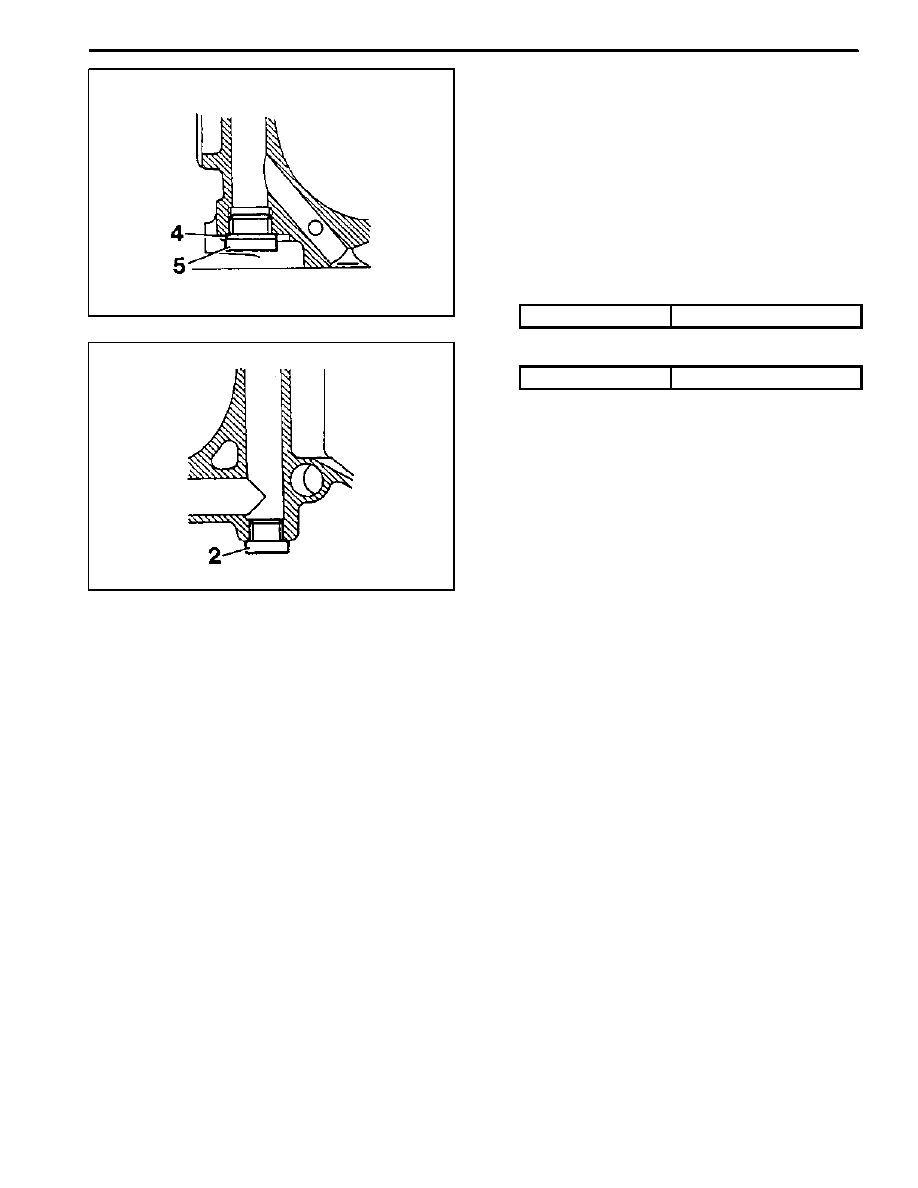
Installation of Screw Plug
Notice
If steel ball leaks again, install the screw plug.
1. Remove the steel ball.
2. Tap thread into the bores of the oil gallery.
Notice
Front bore : M18′ 1.5, depth 10mm
Rear bore : M16′ 1.5, depth 14mm
3. Thoroughly clean the oil gallery.
4. Tighten the front plug (5) with seal (4).
Tightening Torque
50 N∙m (37 lb-ft)
5. Apply Loctite 241 and then tighten the rear plug (2).
Tightening Torque
50 N∙m (37 lb-ft)

OM600 ENGINE MECHANICAL 1B3 -- 187
DAEWOO MY_2000
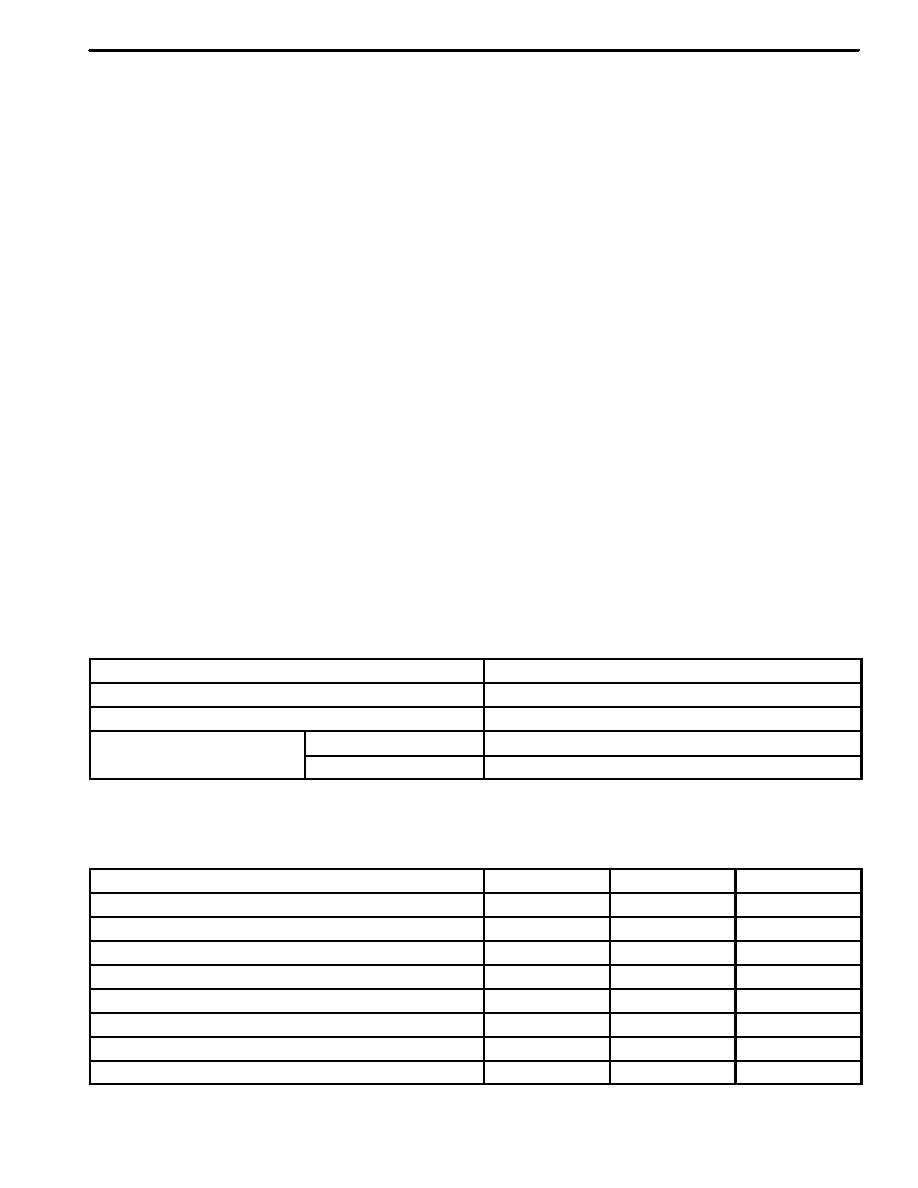
CYLINDER BORE MEASUREMENT
a
Longitudinal Direction
b
Transverse Direction
c, d, e. Measuring Point
1
Crankcase Contacting Surface
2
TDC of 1st Piston Ring
4
BDC of Ring
Service Data
Code letter ’A’
89.000 -- 89.006mm
Standard size
Code letter ’X’
89.006 -- 89.012mm
Standard size
Code letter ’B’
89.012 -- 89.018mm
Wear limit in direction of travel and in transverse direction
Max. 0.20mm
Wear limit in direction of travel and in transverse direction
When new
0.01mm
Permissible deviation of cylinder shape
Wear limit
0.05mm
Honing angle
50_ ± 10_
DAEWOO MY_2000
SECTION 1D3
OM600 ENGINE COOLING
Caution: Disconnect the negative battery cable before removing or installing any electrical unit or when a
tool or equipment could easily come in contact with exposed electrical terminals. Disconnecting this cable
will help prevent personal injury and damage to the vehicle. The ignition must also be in LOCK unless other-
wise noted.
TABLE OF CONTENTS
Specifications
1D3--1
. . . . . . . . . . . . . . . . . . . . . . . . . . . .
General Specifications
1D3--1
. . . . . . . . . . . . . . . . . . . .
Fastener Tightening Specifications
1D3--1
. . . . . . . . . .
Diagnosis
1D3--2
. . . . . . . . . . . . . . . . . . . . . . . . . . . . . . . . .
Cooling Circulation
1D3--2
. . . . . . . . . . . . . . . . . . . . . . . .
Thermostat Operation
1D3--3
. . . . . . . . . . . . . . . . . . . .
Cooling System Leakage Test
1D3--4
. . . . . . . . . . . . . .
Maintenance and Repair
1D3--5
. . . . . . . . . . . . . . . . . . .
On--Vehicle Service
1D3--5
. . . . . . . . . . . . . . . . . . . . . . . . .
Drain and Filling of Coolant
1D3--5
. . . . . . . . . . . . . . . .
Water Pump
1D3--6
. . . . . . . . . . . . . . . . . . . . . . . . . . . . .
Water Pump Housing
1D3--8
. . . . . . . . . . . . . . . . . . . . .
Cooling Fan Clutch
1D3--10
. . . . . . . . . . . . . . . . . . . . . .
Radiator
1D3--12
. . . . . . . . . . . . . . . . . . . . . . . . . . . . . . . .
Cooling Sub--System
1D3--14
. . . . . . . . . . . . . . . . . . . . .
Thermostat
1D3--16
. . . . . . . . . . . . . . . . . . . . . . . . . . . . .
SPECIFICATIONS
GENERAL SPECIFICATIONS
Application
Description
Coolant
ALUTEC P--78
Mixing Ratio (Water: anticorrosion)
50 : 50
Capacity
662LA
10.5L -- 11L
p
y
661LA
9.5L -- 10L
FASTENER TIGHTENING SPECIFICATIONS
Application
NSm
Lb--Ft
Lb-In
Water Pump Bolt
10
--
89
Belt Pulley Bolt
10
--
89
Water Pump Housing Return Pipe Bolt
10
--
89
Thermostat Bolt
10
--
89
Cooling Fan Clutch Socket Bolt (Center)
45
33
--
Cooling Fan Clutch Socket Bolt (Side)
10
--
89
Radiator Bolt
3 -- 7
--
27 -- 62
Coolant Sub--tank Bolt
3 -- 7
--
27 -- 62
Нет комментариевНе стесняйтесь поделиться с нами вашим ценным мнением.
Текст