SsangYong Korando II (1996-2006 year). Manual — part 443

SSANGYONG MY2002
9I-2 WATERLEAKS
Description
SPECIFICATIONS
RECOMMENDED MATERIALS FOR WATERLEAK REPAIRS
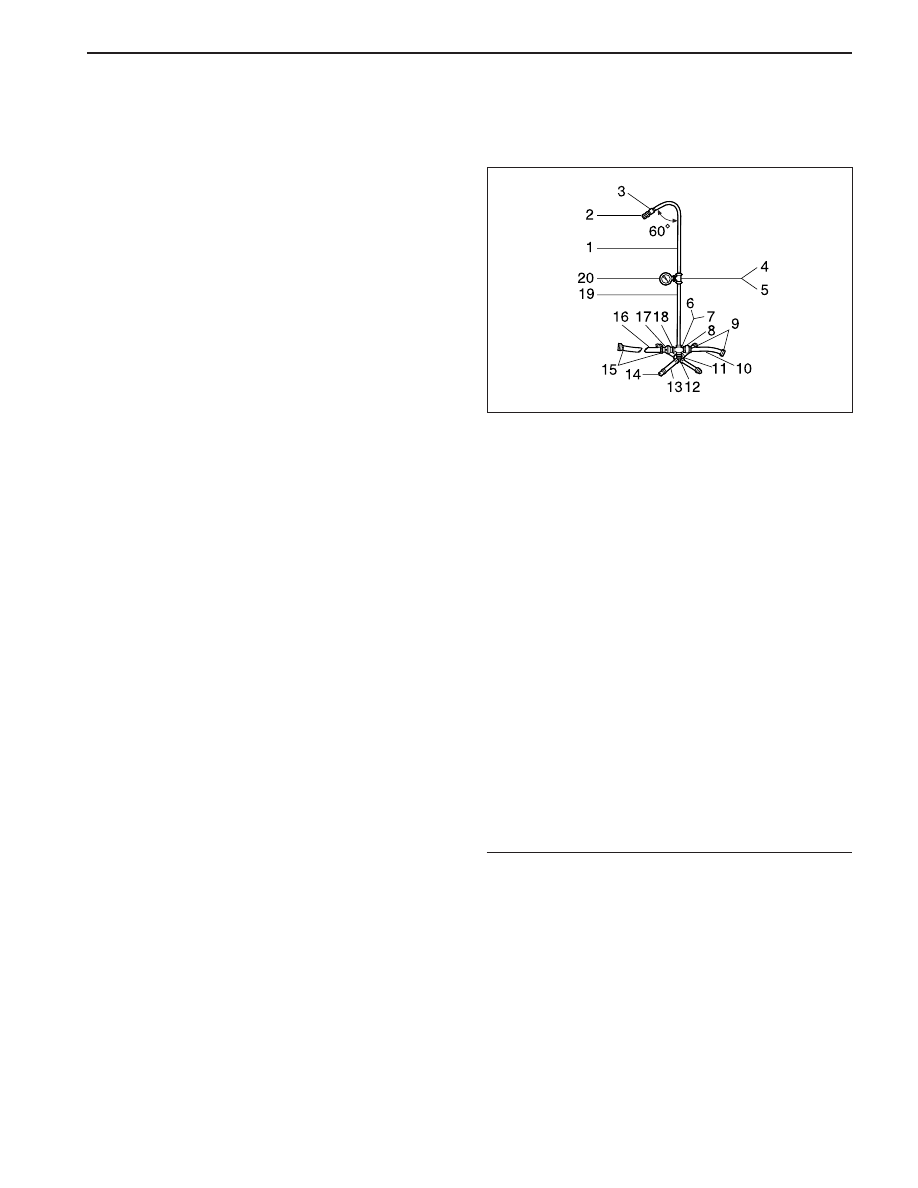
WATERTEST STAND SPECIFICATIONS
Windshield, back window
Metal joints
Ventilation ducts
Small cracks and pin holes
Large holes
Weatherstrips
Bolts, studs, and screws
Leak Areas
Repair Materials
Urethane adhesive, caulking kit, or the equivalent
Brushable seam sealer which can be painted
3M
TM
Auto Bedding and Glazing Compound or the
equivalent
3M
TM
Drip-Check Sealer or the equivalent
3M
TM
Automotive Joint and Seam Sealer
3M
TM
08011 Weatherstrip Adhesive or the equivalent
Strip caulk
Nozzle Type
Nozzle Height
Volume of Flow
Pressure
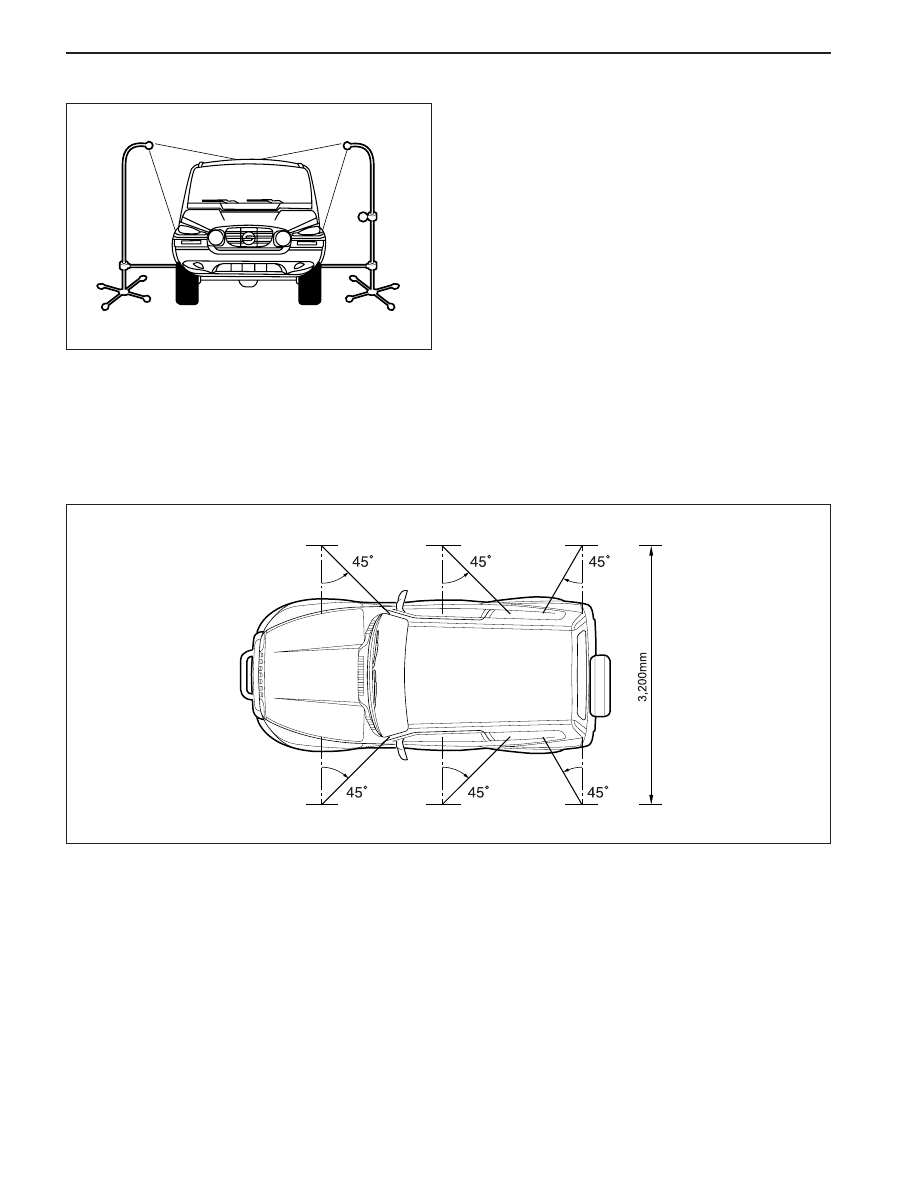
Windshield and A-Pillar Test Stand Position
B-Pillar Test Stand Position
Back Window and Rear Deck Lid Test Stand
Position
Application
Full jet spray nozzle #1/2 GG-25 or equivalent with a 60 °
included angle
Approximately 1,600 mm (63.0 in.) from the floor
14 L (3.7 gal) per minute
155 kPa (22.5 psi) measured at the nozzle
Approximately 30° down, 45° toward the rear, and aimed
at the corner of the windshield
Approximately 30° down, 45° toward the rear, and aimed
at the center of the rear door
Approximately 30° down, 30° toward the front and aimed
approximately 610 mm (24.0 in.) from the corner of the
back window
WATERLEAKS 9I-3
SSANGYONG MY2002
DIAGNOSIS
WATERLEAK DIAGNOSIS
The repair of waterleaks in the body requires proper
testing and diagnosis. Repair waterleaks by adjusting
the misaligned parts and using the proper repair materi-
als. First, determine what conditions cause the leak.
For example, the leak may occur only when the vehicle
is parked on an incline, or water may appear only in
the spare tire compartment. Second, test the area for
the source of the leak using the following testing
methods. If the general leak area is found, determine
the exact entry point of the leak by using a water hose
or an air hose. If the general leak area is not obvious,
use the watertest stands to determine the area of the
leak. It may be necessary to remove some interior trim
panels or some parts in order to locate the leaks.
Important: It is necessary to find the origin of all the
leaks before making any repairs. Random repairs may
stop the leak only temporarily and may make future
repairs more difficult. Continue localized testing in the
general area in order to ensure that all leaks are found.
1 1/2-inch by 36-inch Pipe
2 Full-jet Spray Nozzle #1/2 GG-25 or Equivalent .
Nozzle Height at 1,600 mm to the Floor
3 1/2-inch Coupling
4 1/2-inch by 1/2-inch by 1/4-inch Reducing T
(Right Only)
5 1/2-inch Coupling (Left Only)
6 1/2-inch Cross (Right Only)
7 1/2-inch Tee (Left Only)
8 1/2-inch Pipe-to-Hose Nipple (Right Only)
9 5/8-inch Female Hose Coupling
10 5/8-inch Input Hose (2 Feet Long, Right Only)
11 1/2-inch Close Nipple
12 1/2-inch Cross with Weld-on 1/2-inch Cap
13 1/2-inch by 12-inch Nipple
14 1/2-inch Cap
15 5/8-inch Female Hose Coupling
16 5/8-inch Cross Hose (12 Feet Long)
17 5/8-inch Hose Quick Connect
18 1/2-inch Pipe-to-Hose Nipple
19 1/2-inch by 30-inch Pipe (Straight)
20 1/4-inch Water Pressure Gauge (Right Only)
KAA9I010
Generalized Testing
1. Set up the watertest stands.
SSANGYONG MY2002
9I-4 WATERLEAKS
3. Perform the watertest stand leak test. Refer to
“Watertest Stand Specifications” in this section.
4. If the local water pressure does not allow the
required water pressure of 155 kPa (22.5 psi),
move both stands closer to the vehicle so that
the water sprayoverlaps.
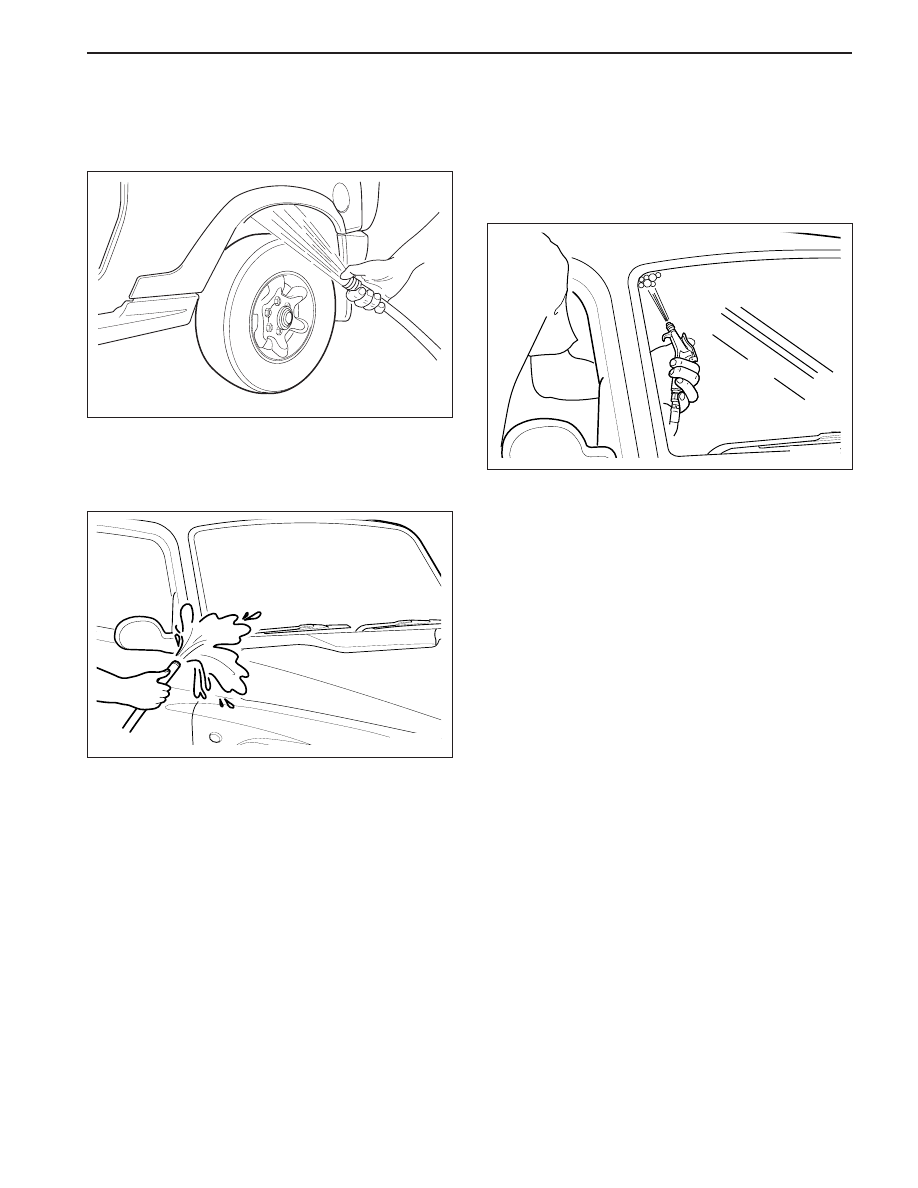
Localized Testing (Spot Test)
1. Do localized testing with a water hose or an air
hose.
2. Begin testing by spraying the air or the water at
the base of the suspected leak area. Continue
spraying the air or the water upward until the leak
is found.
KAA9I030
KAA9I020
2. Set up the watertest stand leak test.
WATERLEAKS 9I-5
SSANGYONG MY2002
Water Hose Test
1. Place another person inside the vehicle in order
to detect the location of the leak.
2. Use a water hose without a nozzle.
KAA9I040
KAA9I050
KAA9I060
Air Hose Test
1. Apply soapy water to the outside of the vehicle in
the suspected leak area.
2. Blow air from inside the vehicle. The air pressure
should not exceed 205 kPa (29.7 psi).
3. Determine the location of the leaks from the
bubbles formed in the soapy water.
3. Begin spraying the water at the base of the
suspected leak area. Continue spraying the water
upward until the leak is found.
Нет комментариевНе стесняйтесь поделиться с нами вашим ценным мнением.
Текст