SsangYong Musso. Manual — part 510

5D1-24 TRANSFER CASE (PART TIME 4408)
Description
Repair
Description
Repair
Corner chip
at drive face
Edge chip
at drive face
Corner chip
at coast face
Side edge chip
at drive face
Chip within
contact pattern
Chip completely
through tooth
TRANSFER CASE (PART TIME 4408) 5D1-25
Electric Shift Cam Parts
1. Insert the spacer into torsion spring.
2. Insert the end of the shift shaft into the spacer smoothly.
100
Electric Shift Cam
101
Torsion Spring
102
Spacer
103
Shift Shaft
Assembly Procedure
General Information
1. Use special tools during assembly of oil seals and bearings.
2. Lubricate bearings, oil seals and bushings before assembly.
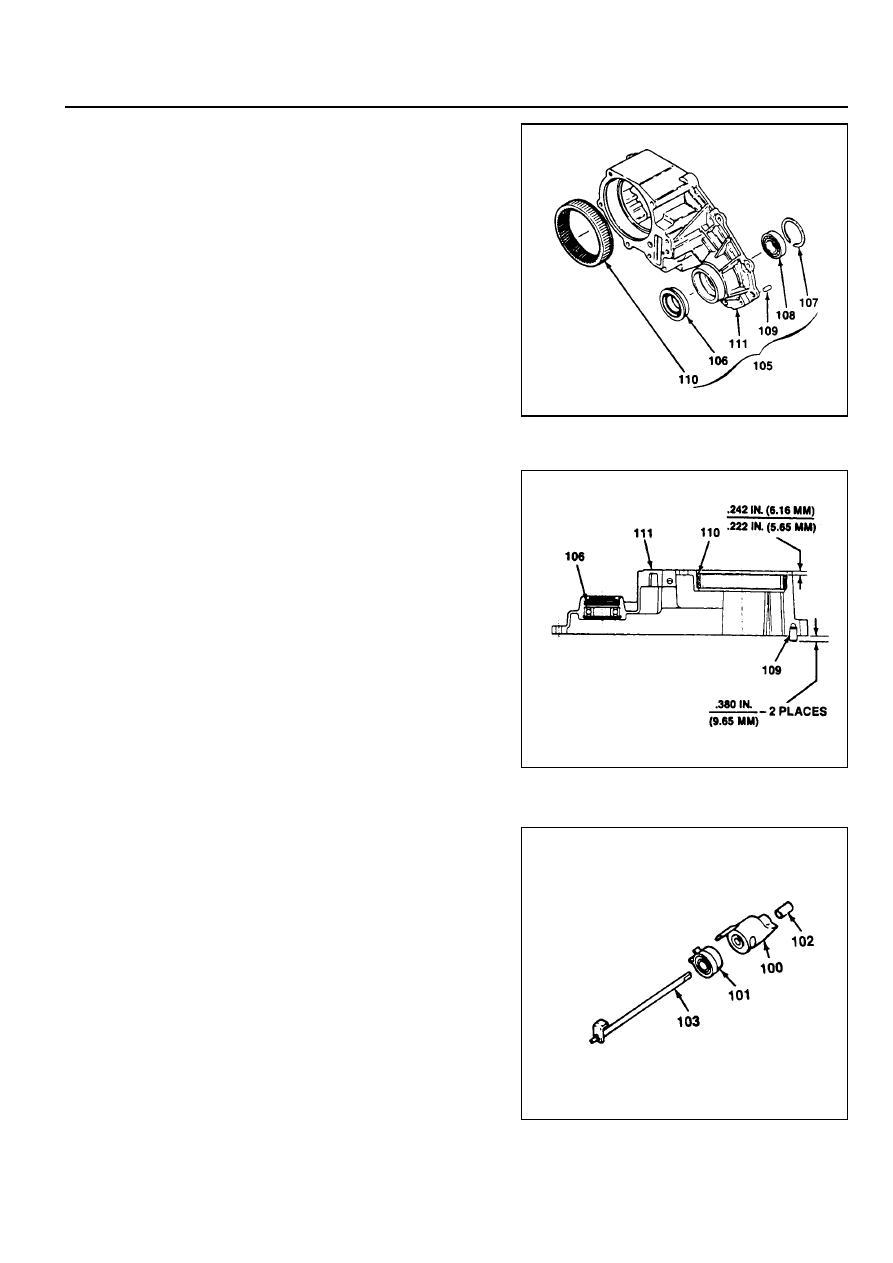
105
Case Assembly
106
Oil Seal
107
Retaining Ring
108
Ball Bearing
109
Pin
110
Ring Gear
111
Case
106
Oil Seal
109
Pin
110
Ring Gear
111
Case
Transfer Case
1. If the ring gear was removed, align the outer diameter of
the new replaced ring gear with transfer case and assemble
it.
2. Insert the pin.
3. Insert the ball bearing to the case and install the retaining
ring.
4. Install the new oil seal by pressing into the case.
5. Make sure that all parts are correctly and firmly installed
into the case.
5D1-26 TRANSFER CASE (PART TIME 4408)
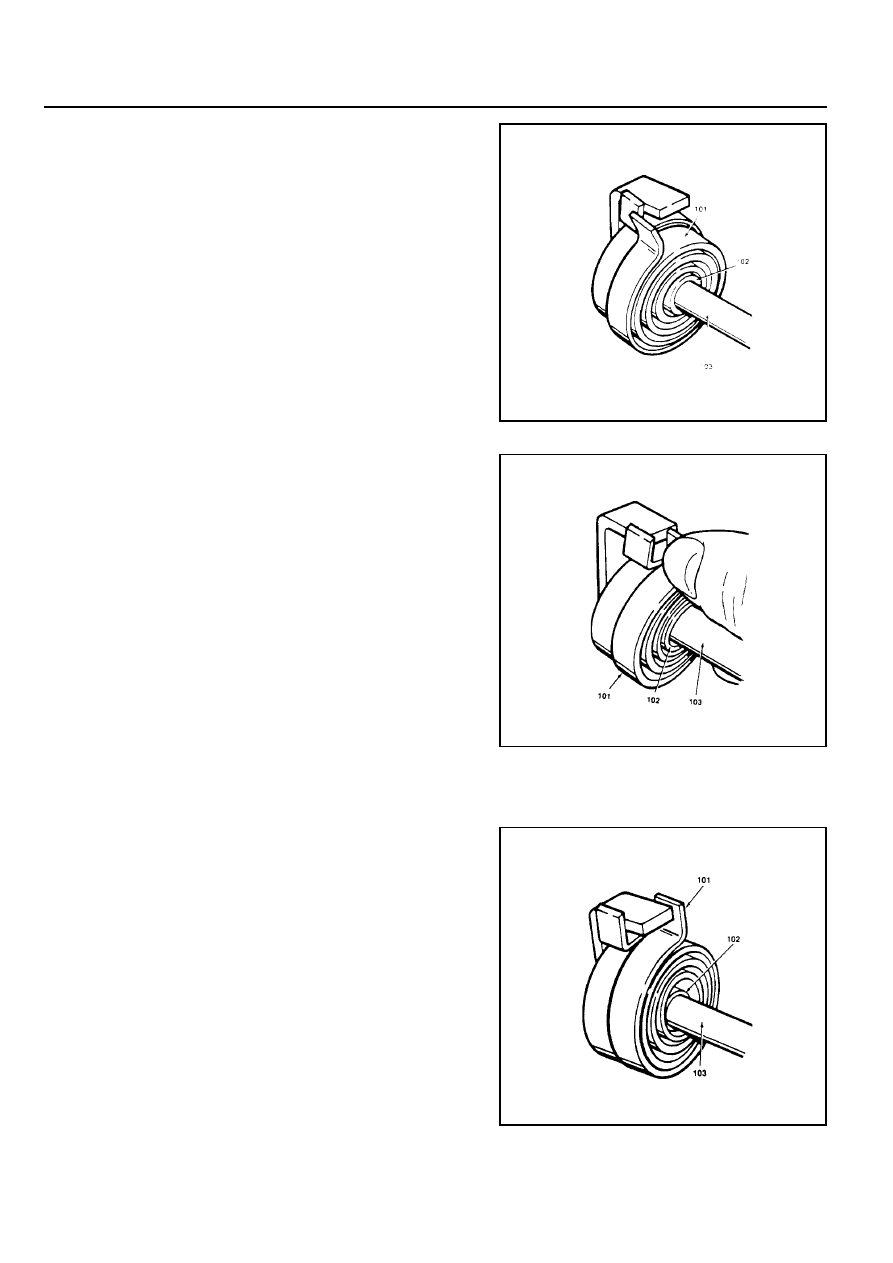
101
Torsion Spring
102
Spacer
103
Shift Shaft
3. Slide the torsion spring and spacer to the left of the shift
shaft and position the end of the first spring to fix on the
drive tang.
4. Push the end of the second spring to right and fix it on the
drive tang.
101
Torsion Spring
102
Spacer
103
Shift Shaft
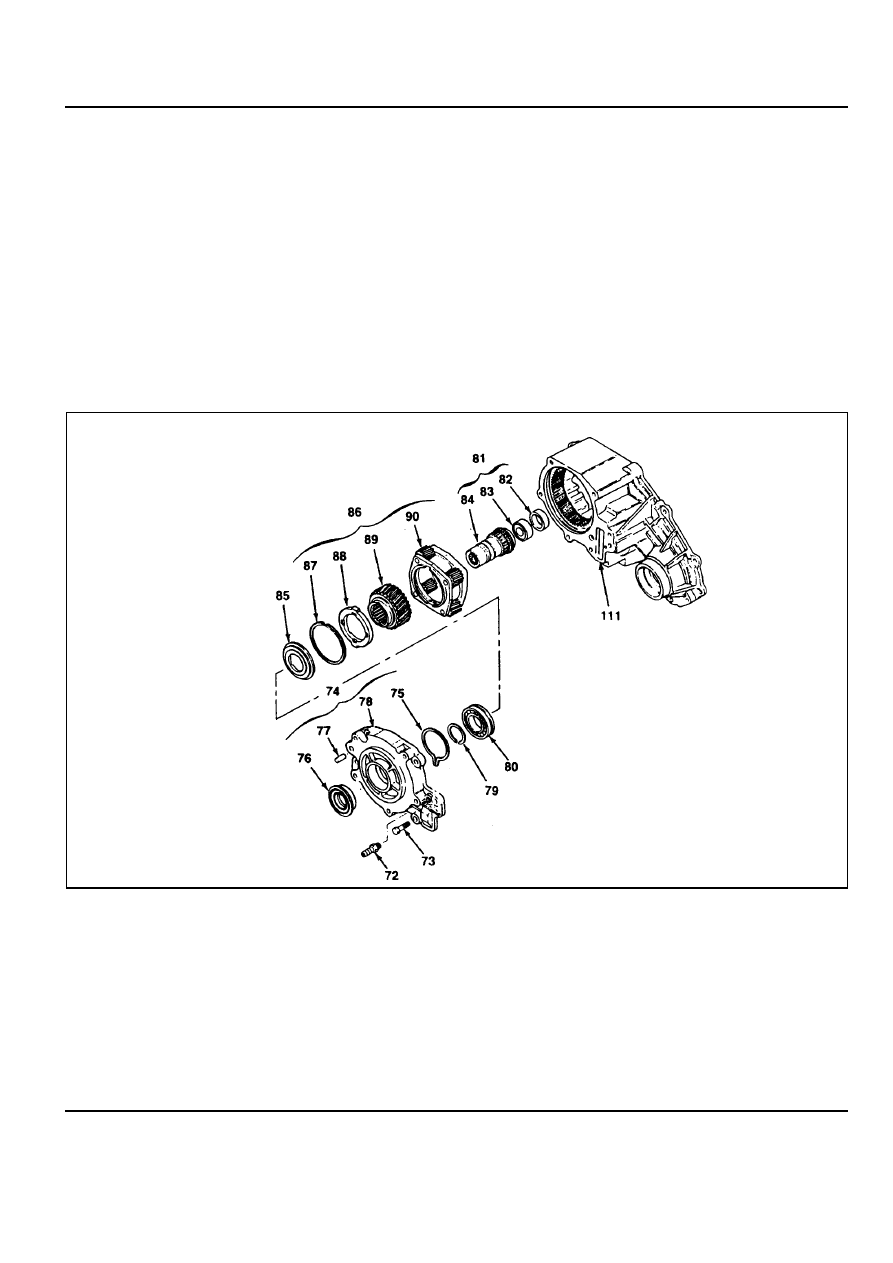
5. Push the torsion spring and spacer together back them
completely.
6. Slide the electric shift cam onto the shift shaft.
7. Install the electric shift cam assembly into the transfer case
after installation of the shift fork.
101
Torsion spring
102
Spacer
103
Shift Shaft
TRANSFER CASE (PART TIME 4408) 5D1-27
Adapter, Input Shaft and Carrier
72 Breather
73 Bolt
74 Adapter Assembly
75 Snap Ring
76 Oil Seal
77 Spiral Pin
78 Front Adapter
79 Retaining Ring
80 Bearing
81 Input Shaft Assembly
1. Place the planet carrier assembly on work bench to be the
retaining ring mounting groove upward.
2. Install the sun gear with the hub end up into the planet
carrier assembly and rotate the sun gear to make sure that
gears are fully engaged.
3. Align the tabs and install the thrust plate into the planet
carrier assembly.
4. Install the retaining ring to the planet carrier assembly.
5. Press the needle bearing into the input shaft and press the
new sleeve bearing into the input shaft assembly.
82 Sleeve Bearing
83 Needle Bearing
84 Input Shaft
85 Thrust Washer
86 Carrier Gear Assembly
87 Retaining Ring
88 Thrust Plate
89 Sun Gear
90 Planet Carrier Assembly
111 Case
Нет комментариевНе стесняйтесь поделиться с нами вашим ценным мнением.
Текст