SsangYong Musso. Manual — part 478

AUTOMATIC TRANSMISSION 5A-89
Forward Clutch Cylinder
To remove the forward clutch cylinder, refer to figure 8.4,
proceed as follows.
1. Place the assembly in a horizontal position.
2. Remove the thrust bearing and adjustment shims from the
input shaft.
3. Remove the circlip from the front of the clutch cylinder and
remove the input shaft.
4. Remove the overdrive shaft and the C1 clutch hub assembly
from the clutch cylinder.
5. Remove the C1 clutch plates from the cylinder.
6. Remove the circlip retaining the C3 clutch hub in the rear of
the clutch cylinder and remove the hub.
7. Remove the C2/C4 clutch hub assembly and remove the
thrust bearing from the C4 hub.
8. Remove the C2 clutch plates.
9. Invert the clutch cylinder and remove the C4 clutch sleeve,
clutch plates and the two wave washers. The 3-4 one way
clutch is located between the C2 and C4 clutch hubs, and
the hubs may be separated by rotating one hub clockwise
and withdrawing it from the other.
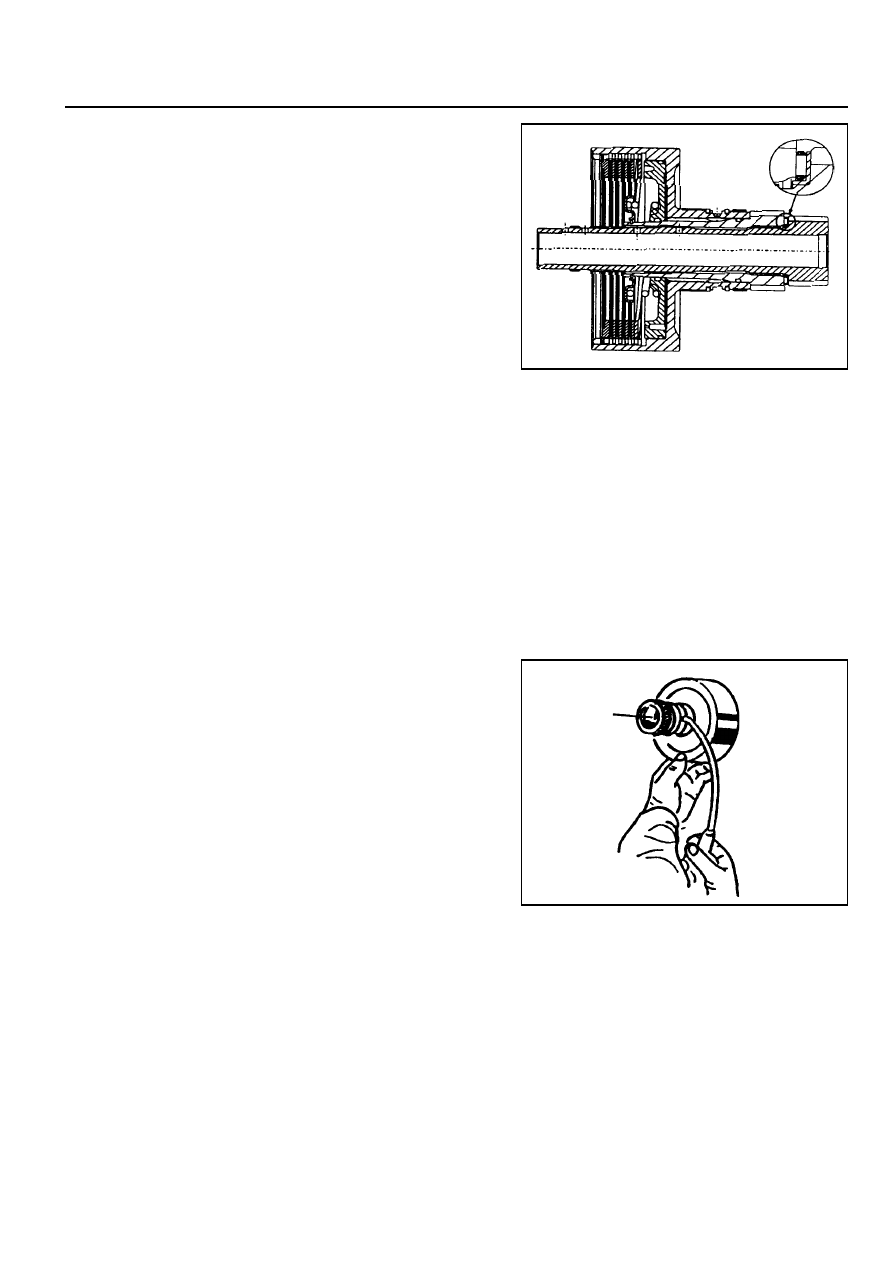
Figure 8.4 - Forward Clutch Cylinder Assembly
5A-90 AUTOMATIC TRANSMISSION
10. Remove the thrust block from the C4 clutch cylinder hub.
Notice
Make sure that the spring keeper is not caught in the circlip
groove, and that all the spring pressure is released, before
removing the tool.
11. Mount the clutch cylinder on tool No.0555-331899 with
the C2/C4 end uppermost and compress the piston return
spring. Remove the spring retaining circlip. Release the
tool and remove the circlip, keeper and spring.
12. Invert the clutch cylinder on the compressor tool and
remove the C1 clutch piston return spring in a similar
manner.
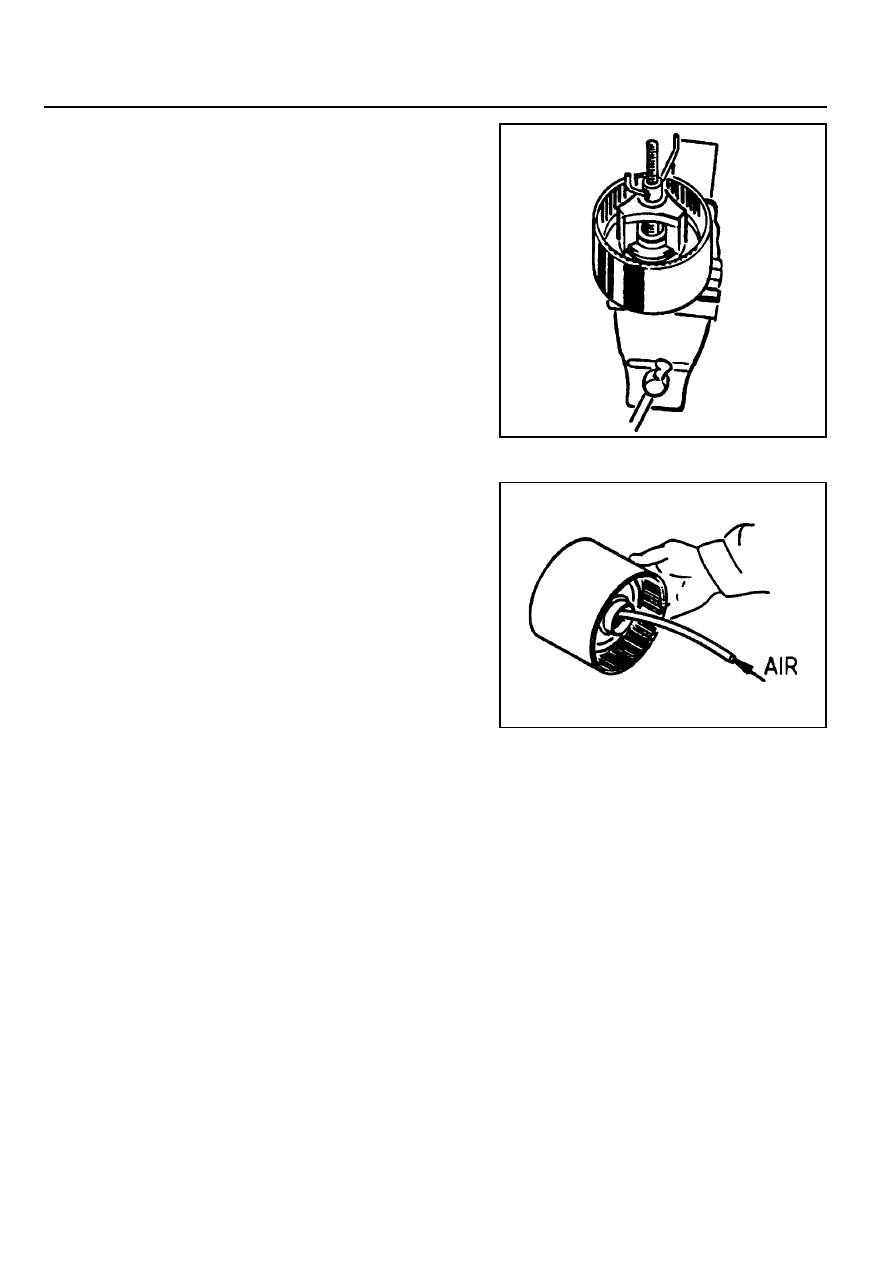
13. To remove the clutch pistons from the clutch cylinder, apply
air pressure to the apply ports in the bore of the cylinder.
AUTOMATIC TRANSMISSION 5A-91
C3 Clutch Cylinder
To remove the C3 clutch cylinder, proceed as follows:
1. Remove the forward sun gear and thrust bearing from the
C3 clutch cylinder.
2. Remove the nylon thrust bearing, bearing support, needle
thrust bearing and thrust block from the clutch cylinder hub.
3. Mount the clutch assembly on tool No.0555-331899 and
compress the piston return spring.
Remove the circlip and release the spring.
Notice
Make sure that the spring keeper has not been caught in
the circlip groove, and that all spring pressure has been
released, before removing the tool.
4. Remove the tool, circlip, keeper and spring.
5. Remove the sealing rings from the C3 clutch cylinder.
6. Remove the clutch plate retaining circlip and remove the
clutch plates.
7. To remove the clutch piston from the clutch cylinder, apply
air pressure to the port between the iron sealing rings on
the bearing journals of the cylinder.
8. Remove the reverse sun gear from the cylinder.

5A-92 AUTOMATIC TRANSMISSION
Planet Carrier and Centre Support
To remove the planet carrier and centre support, proceed as
follows.
1. Separate the planet carrier and centre support from the
output shaft. Remove the thrust bearings from the output
shaft and the planet carrier.
2. Separate the centre support from the planet carrier by
rotating it anti-clockwise.
3. Lift the one way clutch from the planet carrier.
4. Remove the circlip retaining the one way clutch outer race
in the planet carrier and remove the race.
5. Remove the one way clutch retainer from the planet carrier.
Pump
Note that the following valves are housed in the pump cover:
!
Solenoid 7
!
C1 bias valve
!
Converter clutch control valve
!
Converter clutch regulator valve
!
Primary regulator valve
To remove the pump, proceed as follows.
1. Remove the wiring loom retainer plate and remove
solenoid 7 with a T30 Torx bit.
2. Remove the five washer head bolts from the cover plate
using a multi-point 8 mm socket.
3. Remove the five Torx head screws from the cover plate
(Torx bit No. 30). Note that the odd screw holds the pump
body to the pump body cover.
Notice
Do not strike the converter support tube to loosen the
pump body.
4. Separate the pump body from the pump cover.
5. Lift the cover plate from the cover.
6. Remove the two ball check valves and one spring from
the pump cover.
Notice
Some of the valves and plugs are preloaded by springs
and may unexpectedly fall out of the cover when the pins
are removed.
7. Depress the plug inward and remove the retaining pin for
each of the four valves.
8. Remove the four valves, plugs and springs.
9. Remove the pump gears from the pump body.
10. Remove the lip seal from the front of the pump body.
Нет комментариевНе стесняйтесь поделиться с нами вашим ценным мнением.
Текст