SsangYong Musso. Manual — part 31
9Q-4 ROOF
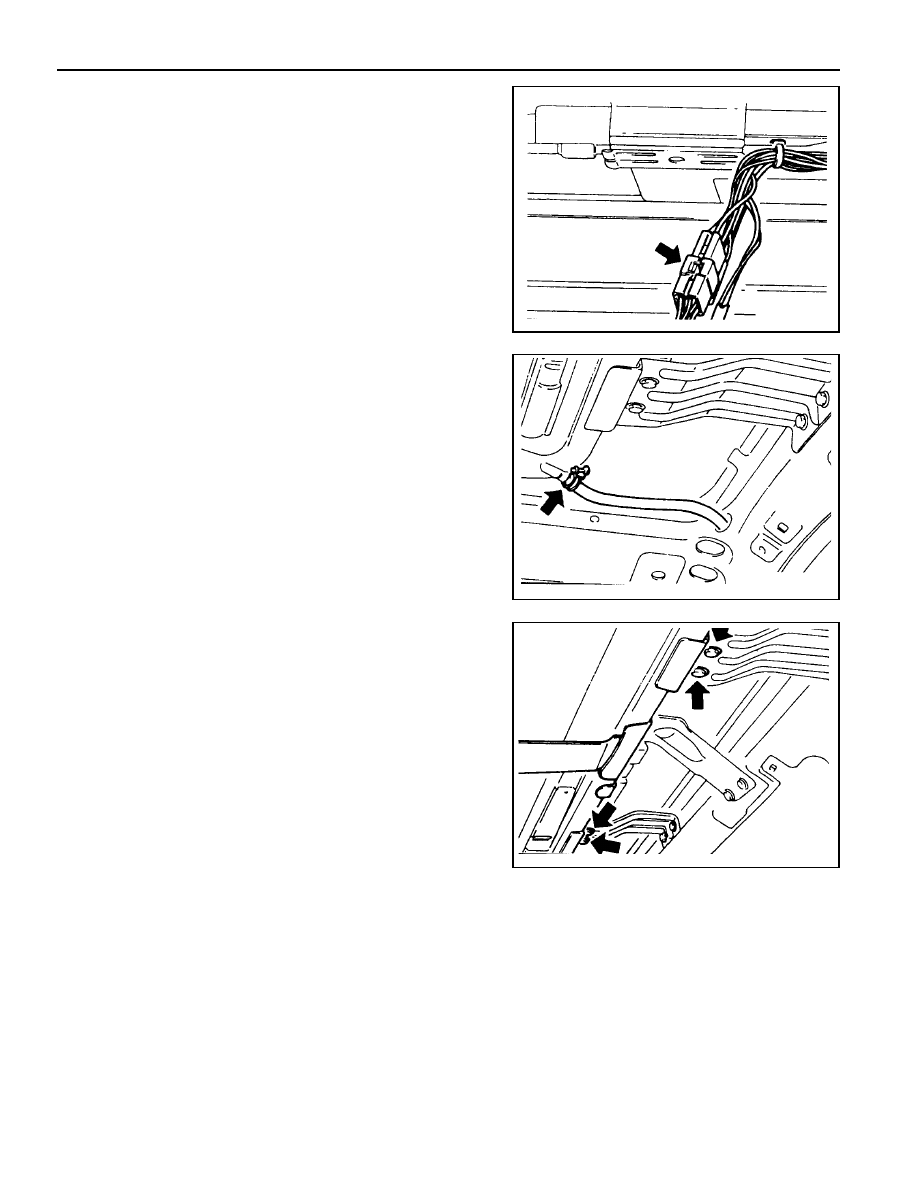
Removal & Installation Procedure
1. Disconnect the connector and remove the sun roof module
assembly.
2. Disconnect the front and rear drain hose.
3. Unscrew the sun roof mounting bracket bolts(arrows) and
remove the inner sliding and sun roof assembly
SECTION 9R
BODY FRONT END
TABLE OF CONTENTS
Maintenance and Repair . . . . . . . . . . . . . . . 9R-2
On-Vehicle Service . . . . . . . . . . . . . . . . . . . . . . 9R-2
Hood . . . . . . . . . . . . . . . . . . . . . . . . . . . . . . . . 9R-2
Fender . . . . . . . . . . . . . . . . . . . . . . . . . . . . . . 9R-5
9R-2 BODY FRONT END
MAINTENANCE AND REPAIR
ON-VEHICLE SERVICE
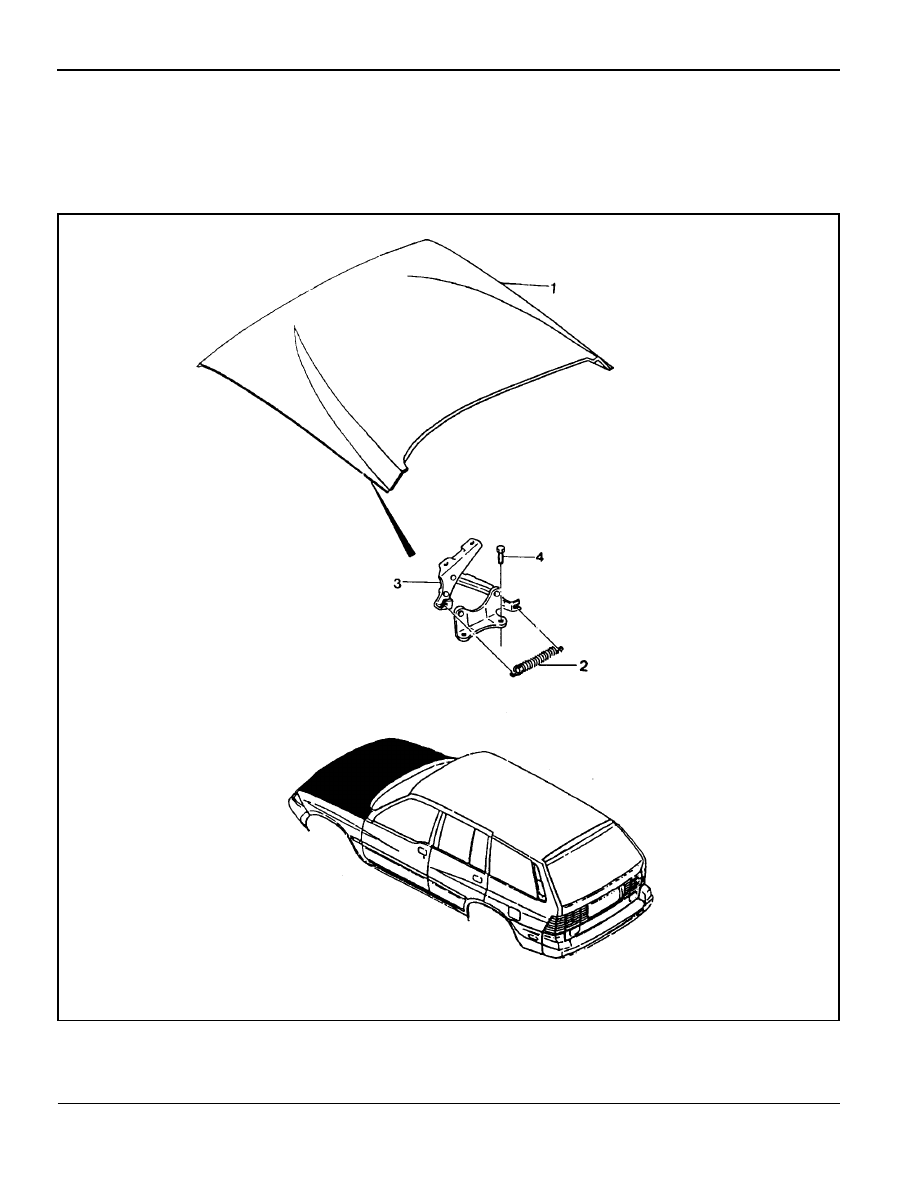
HOOD
1 Hood
2 Sping
3 Hood Hinge Assembly
4 Bolt
BODY FRONT END 9R-3
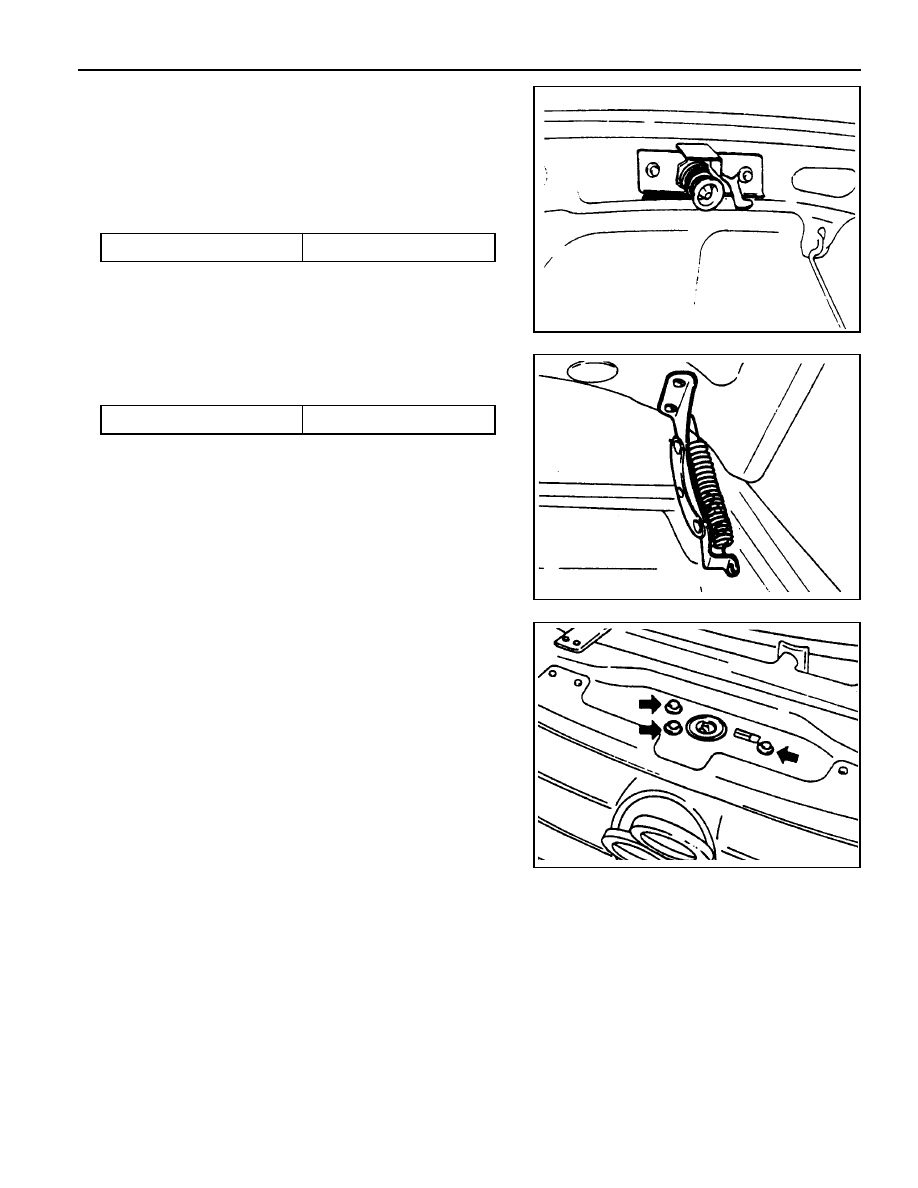
Removal & Installation Procedure
1. Remove the hood striker assembly.
Notice
When installing, tighten the bolt after setting the hole
between wratch and hood striker assembly.
Installation Notice
Tightening Toque
8 - 11 Nm
2. Remove the hood Mounting bolt and hood lifter assembly.
Installation Notice
3. Remove the hood lock, hood relese from the clip.
4. Remove the cable holder screw.
5. Pull the cable nut toward driver side.
6. Installation should follow the removal procedure in the
reverse order.
Tightening Toque
14 - 26 Nm
Нет комментариевНе стесняйтесь поделиться с нами вашим ценным мнением.
Текст