SsangYong Musso. Manual — part 26
9L-10 GLASS AND MIRRORS
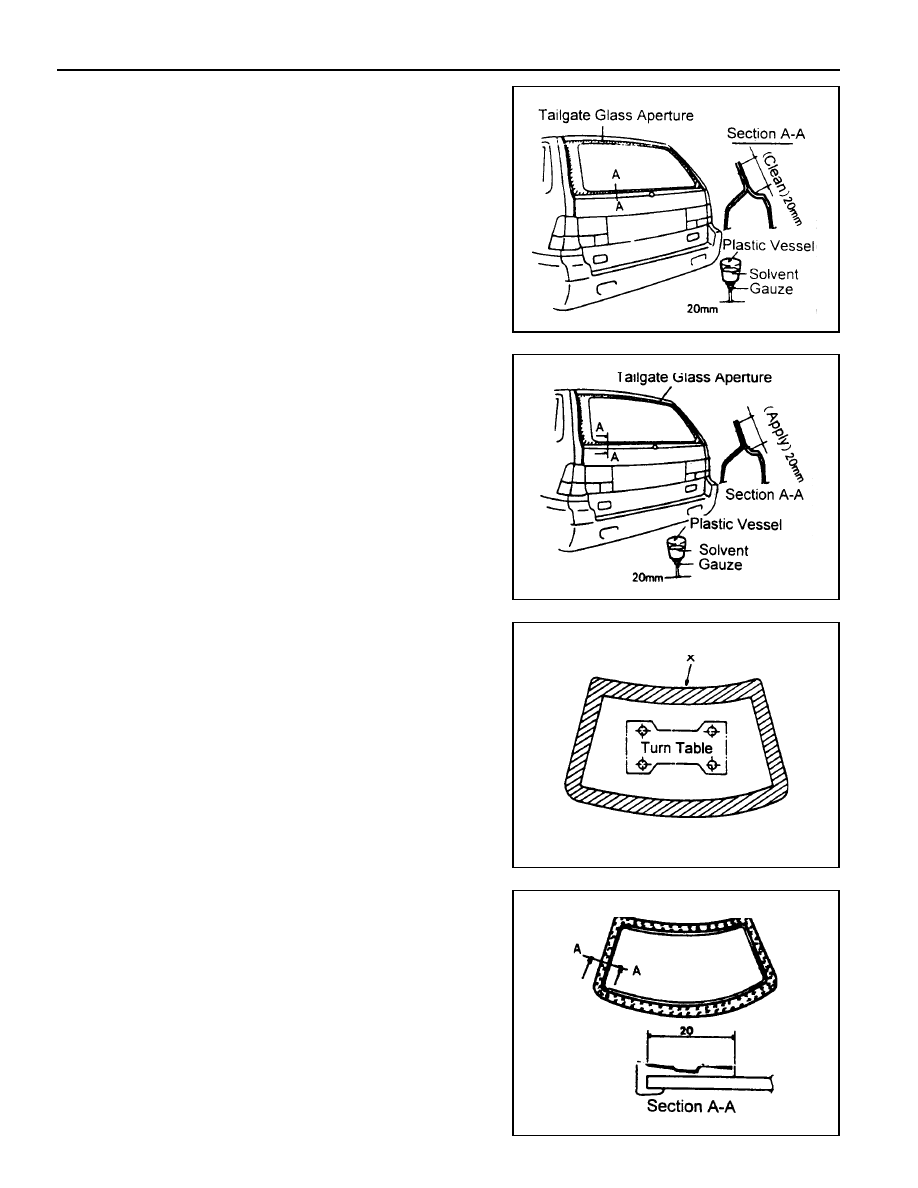
Installation of Tailgate Glass
1. Clean the tailgate flange.
!
Do not reuse a gauze over 20 times.
!
Saturate the gauze in solvent (Isoprophyl alcohol).
!
Keep the cleaned surface to be cleaned.
!
Apply body primer to the cleaned and dry flange.
- If flange is oiled or contaminated, primer can not be
applied.
2. Apply primer after cleaning of tailgate flange.
!
Keep primers in a refrigerator(-2
°
C - +5
°
C).
!
Use sufficiently mixed primer in a mixer over 10 minutes.
!
Apply primer within 2 hours after opening.
!
Do not apply primers which is over its druation.
!
Apply evenly to the flange.
!
Duration : 3 minutes - 8 hours (reapply after 8 hours).
!
If primer is applied to the body, clean off immediately
with solvent.
!
Be careful not to contaminate other parts.
3. Clean the tailgate galss.
!
Clean the glass keeping 15mm from the edge of glass.
!
Do not reuse a gauze over 20 times.
!
Saturate the gauze in solvent(Isoprophyl alcohol).
!
Do not touch the cleaned galss surface.
!
Apply glass primer to the cleaned and dry glass surface.
If glass is oiled or contaminated, primer can not be
applied.
4. Apply primer to the tailgate glass.
!
Use sufficiently mixed primer in a mixer over 10 minutes.
!
Be careful not to contaminate other parts due to over
application.
!
Duration : 1 minute - 24 hours(reapply after 24 hours).
!
Never use the primer containing deposits or floating
materials.
!
Do not use primers which is over its duration.
!
Do not reuse a gauze over 20 times.
!
Apply evenly to glass.
GLASS AND MIRRORS 9L-11
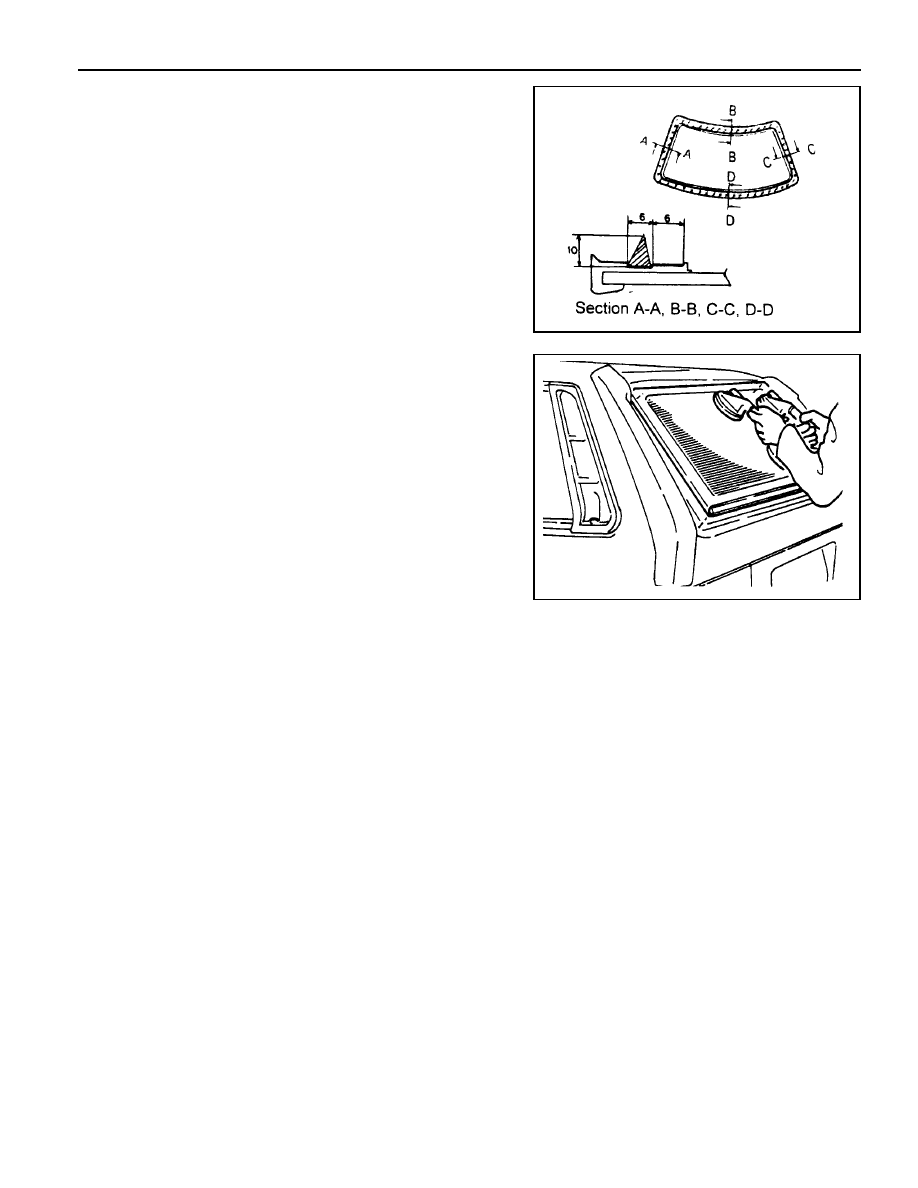
5. Apply sealant to the glass.
!
Turn over the glass and apply sealant.
!
Uneven application of sealant may cause water leakage
after installation of glass.
!
Do not touch the glass moldings and dam rubber while
applying sealant.
6. Using suction holders, install the tailgate glass within
5minutes after application of sealant.
!
Fix the glass with adhesive tape.
!
Apply sealant additionally between the quarter outer
panel and tailgate glass moldings.
9L-12 GLASS AND MIRRORS
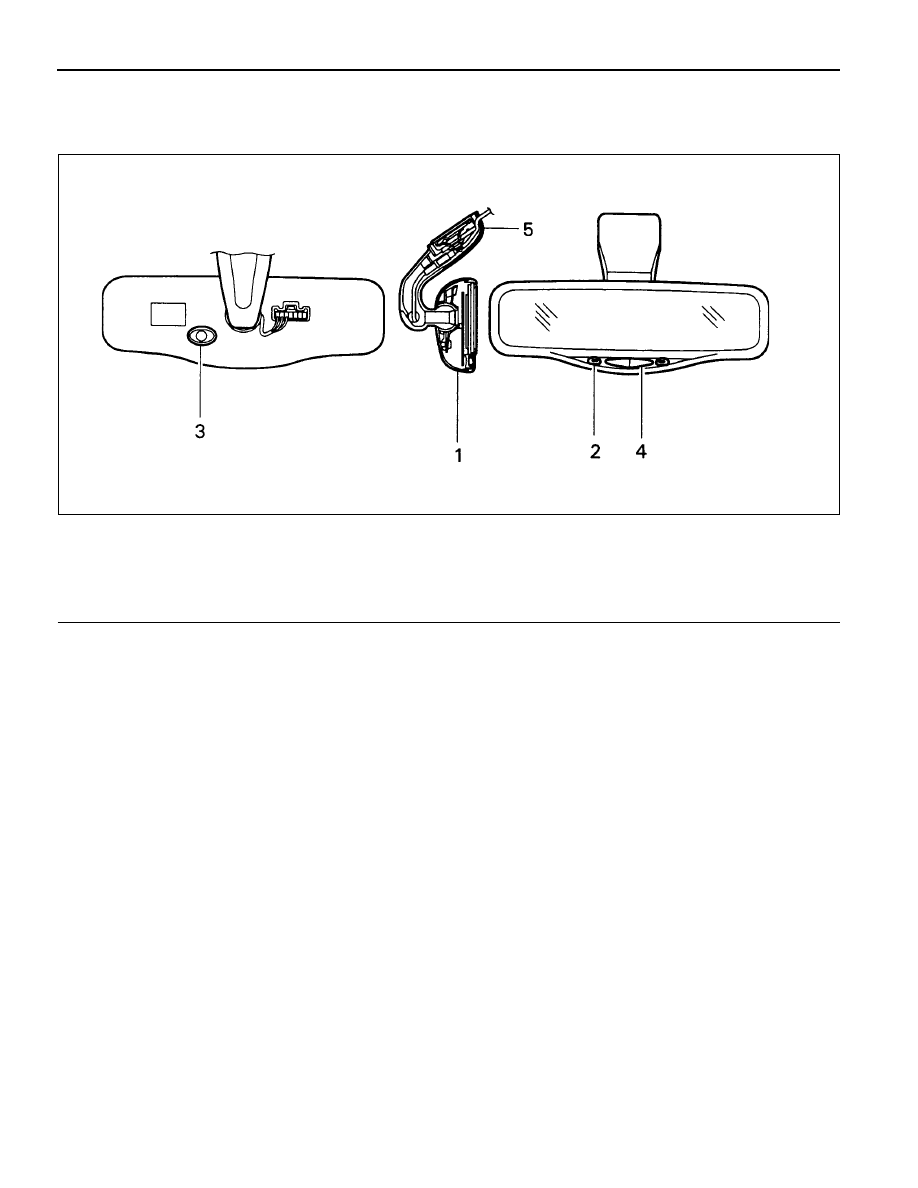
1 Auto Dimming Room Mirror Assembly
2 Sensor (Front)
3 Sensor (Rear)
AUTO DIMMING ROOM MIRROR
Layout
4 Switch
5 Cover
6 Lamp

GLASS AND MIRRORS 9L-13
Check & Service
If reflection ratio is not adjusted automatically during night
driving when AUTO switch is pressed, check each connectors
for proper connection and power flow to the auto dimming room
mirror using multi tester.
1. Yellow (Connected to back-up lamp)
2. Blue (Ground)
3. White (Power)
Voltage Rating
Operating Current
Over Current
DV 12V
1 A
3 A
Function
When ignition switch is turned ON, green lamp on auto dimming
mirror will turn in and glare reflection ratio will be automatically
adjusted. By positioning AUTO switch to ON, 2Sensors will
automatically adjust refection ratio after sensing rear and
surrounding brightness to reduce driver’s eye fatigue during
driving though tunnel or in night.
When OFF switch is pressed, the lamp goes out and it will be
operated as a normal rear view mirror and shift lever is
positioned in reverse, the auto dimming function will be
automatically OFF.
Specifications
Нет комментариевНе стесняйтесь поделиться с нами вашим ценным мнением.
Текст