Isuzu D-Max / Isuzu Rodeo (TFR/TFS). Manual — part 673

7A1 – 192 AUTOMATIC TRANSMISSION (4L30-E)
REASSEMBLY
4. Piston
1) The lip of the seals must point toward the front of
the transmission. Lubricate the lip seal with
transmission fluid.
2) Install piston assembly into the third clutch drum.
Use installer to protect the outer seal during
installation.
Third clutch piston installer: 5-8840-2260-0
(J-23084)
3. Springs
2. Spring Seat
1. Retaining Ring
1) Place retaining ring onto spring seat.
2) Compress the piston springs, using the piston
spring compressor.
NOTE:
Do not over-stress the springs and seat. Do not let
the spring seat catch in the ring groove. This may
cause damage to the spring seat.
3) Install spring seat retaining ring.
4) Remove the piston spring compressor.
Spring compressor: 5-8840-0501-0 (J-23075)
Adapter: 5-8840-2259-0 (J-23075-12)
AUTOMATIC TRANSMISSION (4L30-E) 7A1 – 193
SPRAG UNIT
DISASSEMBLY
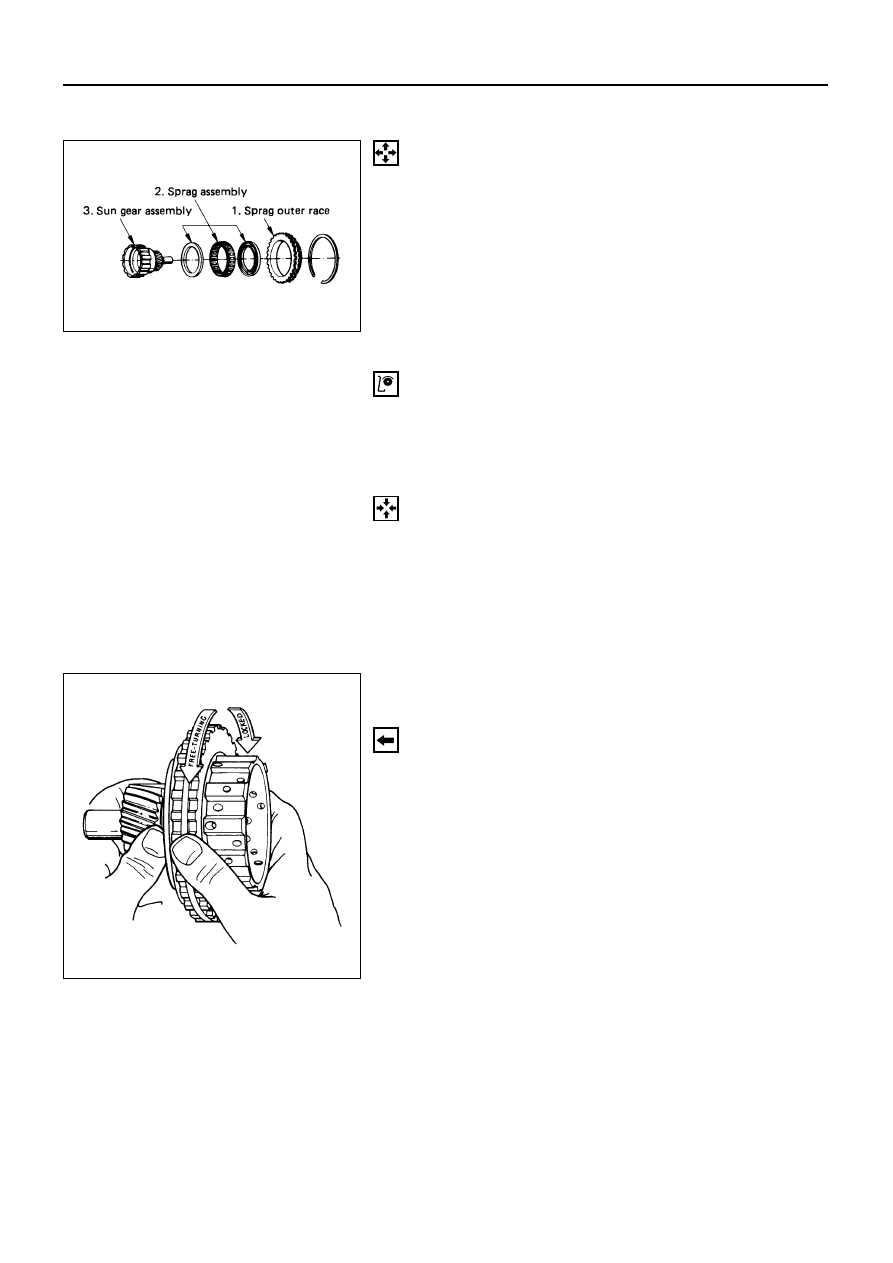
1. Sprag Outer Race
2. Sprag Assembly
Remove sprag outer race and sprag assembly from
third clutch hub and sun gear assembly.
3. Sun Gear Assembly
INSPECTION AND REPAIR
Visual check
If any damage, deformation or local wear is found in a sun
gear, sprag assembly or sprag outer race, replace it.
REASSEMBLY
3. Sun Gear Assembly
2. Sprag Assembly
Install sprag assembly onto the sun gear.
NOTE:
Flared shoulder of the sprag cage faces the sun gear.
This procedure must be followed exactly to be sure
that the sprag assembly is installed properly.
1. Sprag Outer Race
1) Install outer sprag race assembly over the sprag
cage assembly.
2) Place third clutch hub and sun gear assembly on a
flat surface, sun gear facing up. Place sprag outer
race and sprag assembly over the sun gear
assembly, push down and turn the input sun
counterclockwise at the same time.
NOTE:
Check correct rotation by holding the sun gear in
your left hand and turning the outer race. The outer
sprag race should turn freely towards you and lock
turning away from you.
7A1 – 194 AUTOMATIC TRANSMISSION (4L30-E)
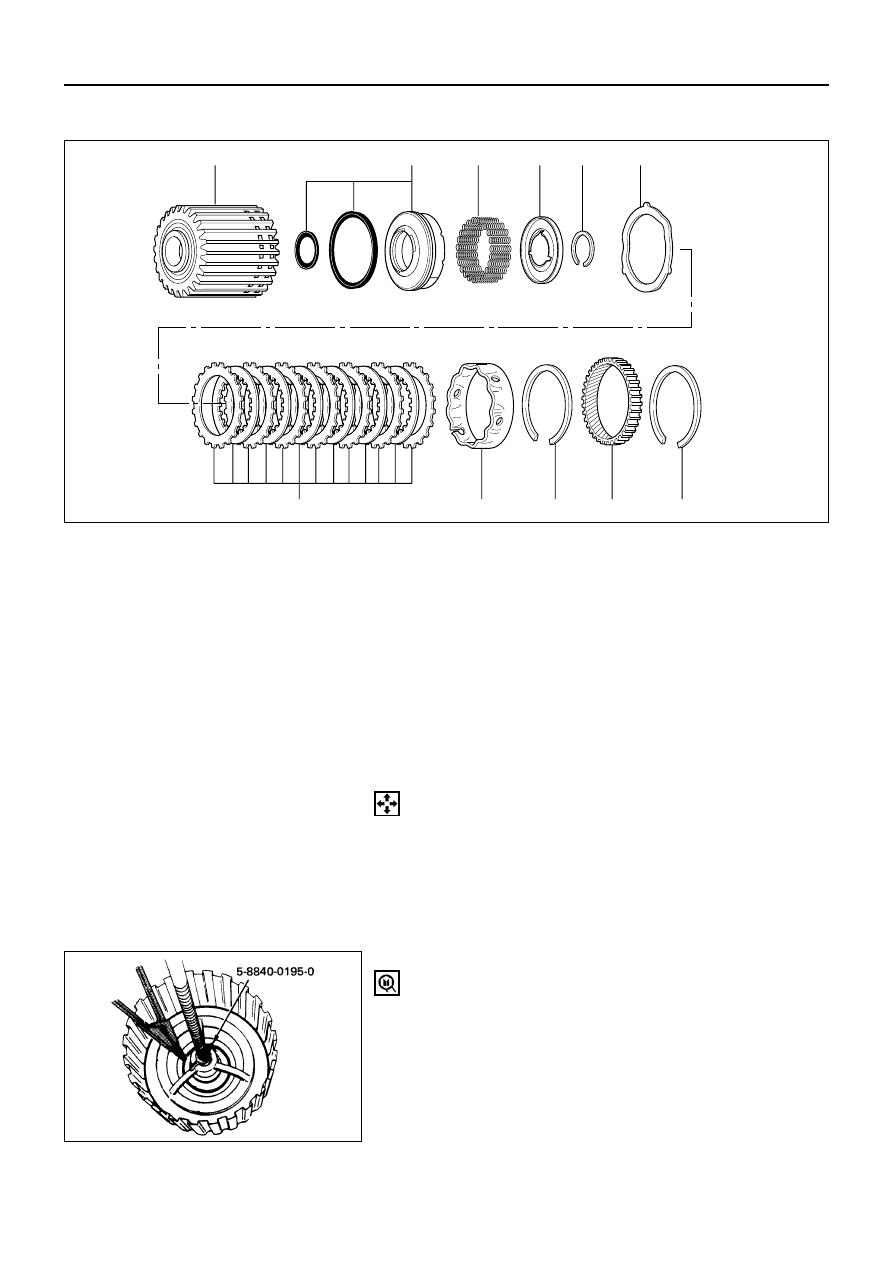
Disassembly Steps
1. Retaining ring
2. Ring gear
3. Retaining ring
4. Spacer
5. Clutch plates
6. Waved washer
7. Retaining ring
8. Spring seat
9. Springs
10. Piston
11. Second clutch drum
Removal Steps
To reassemble, follow the disassembly steps
in the reverse order.
11
5
4
3
2
1
10
9
8
7
6
SECOND CLUTCH
DISASSEMBLY
1. Retaining Ring
2. Ring Gear
3. Retaining Ring
4. Spacer
5. Clutch Plates
6. Waved Washer
7. Retaining Ring
Compress the spring seat.
Compressor: 5-8840-0195-0 (J-23327)
247RW001
★; Repair kit
AUTOMATIC TRANSMISSION (4L30-E) 7A1 – 195
8. Spring Seat
9. Springs
10. Piston
11. Second Clutch Drum
INSPECTION AND REPAIR
Visual check
If any damage, deformation or local wear is found in a
retaining ring, ring gear, spacer, clutch plates, piston
seals, return spring or spring seat, replace it.
Operation check
Shake piston and listen for check ball movement.
Movement indicates proper check ball operation. Replace
piston if check ball is missing or falls out.
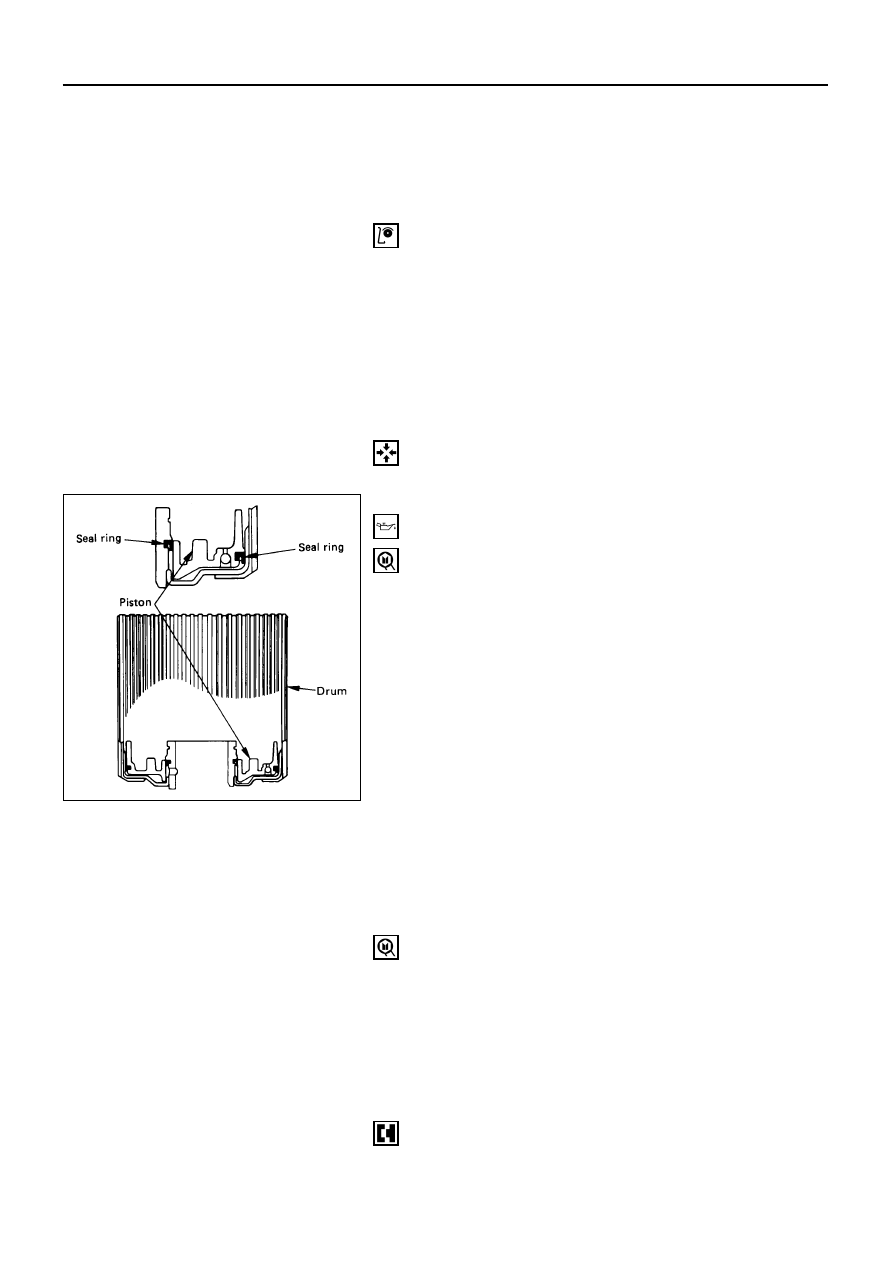
REASSEMBLY
11. Second Clutch Drum
10. Piston
Install piston assembly into the second clutch drum.
Lubricate the lip seal with liberal amounts of
transmission fluid. Use the installer to protect the
outer piston lip seal.
NOTE:
Lip of the seals point toward front of transmission.
Second clutch piston installer: 5-8840-2261-0
(J-23080-A)
9. Springs
8. Spring Seat
7. Retaining Ring
1) Install twenty-two piston springs and spring seat
on the second clutch piston. Place retaining ring
onto spring seat.
2) Use the compressor to compress the piston
springs.
Compressor: 5-8840-0195-0 (J-23327)
NOTE:
Do not let spring seat catch in ring groove.
6. Waved Plate
5. Clutch Plates
Install clutch plates. Start with a steel plate and
alternate with lined plates.
Align second clutch inner tangs.
Нет комментариевНе стесняйтесь поделиться с нами вашим ценным мнением.
Текст