Isuzu D-Max / Isuzu Rodeo (TFR/TFS). Manual — part 1813

MSG MODEL (2WD) 7B-29
REASSEMBLY
MAJOR COMPONENT
INTERNAL PARTS
Reassembly steps
1. Top & main gear shaft assembly
2. Counter gear shaft assembly
3. Rev. and 5th gear assembly
4. Shift fork assembly & interlock pin
5. Detent assembly

7B-30 MSG MODEL (2WD)
MINOR COMPONENTS
TOP GEAR SHAFT, MAINSHAFT GEAR AND COUNTER GEAR
Reassembly Steps
1. Mainshaft
! 2. Needle bearing
! 3. 2nd gear
4. 2nd block ring
! 5. 1st-2nd synchronizer assembly
6. 1st block ring
! 7. Needle bearing collar
! 8. Needle bearing
! 9. 1st gear
!10. 1st gear thrust washer
!11. Mainshaft ball bearing
!12. Needle bearing
!13. 3rd gear
14. 3rd block ring
!15. 3rd-4th synchronizer assembly
!16. Mainshaft snap ring
17. Needle bearing
18. 4th block ring
!19. Top gear shaft
!20. Ball bearing
21. Top gear shaft snap ring
22. Counter gear
23. Front ball bearing
24. Bearing snap ring
!25. Rear ball bearing
MSG MODEL (2WD) 7B-31
Important Operations
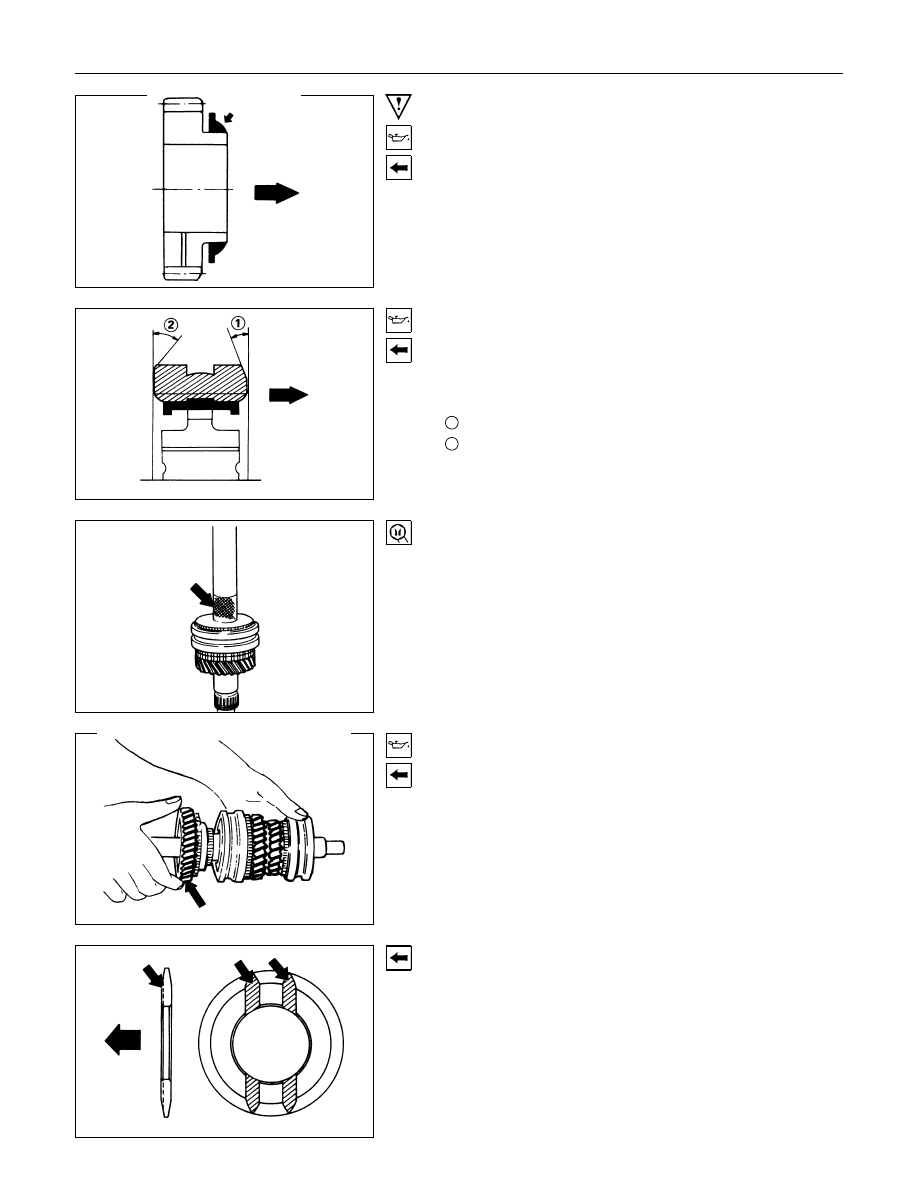
2. Needle Bearing
3. 2nd Gear
1) Apply the engine oil to the 2nd needle bearing and the 2nd
gear.
2) Install the needle bearing and the 2nd gear to the
mainshaft.
The dog teeth of the 2nd gear must be facing the rear side
of the transmission.
5. 1st-2nd Synchronizer Assembly
1) Apply the engine oil to the clutch hub spline.
2) Install the synchronizer assembly to the mainshaft.
The outside sleeve heavy chamfering must be facing the
rear of the transmission.
1
Chamfer Angle = 30
°
2
Chamfer Angle = 45
°
7. Needle Bearing Collar
Use a bench press and the collar installer to install the needle
bearing collar.
Collar Installer : 5-8840-0178-0 (J-33851)
8. Needle Bearing
9. 1st Gear
1) Apply the engine oil to the 1st needle bearing and the 1st
gear.
2) Install the needle bearing and the gear to the mainshaft.
The dog teeth of the 1st gear must be facing the front side
of the transmission.
10.1st Gear Thrust Washer
Install the thrust washer to the mainshaft.
The thrust washer oil groove must be facing the 1st gear side.
7B-32 MSG MODEL (2WD)
11.Mainshaft Ball Bearing
1) Apply the engine oil to the ball bearing inside circumference.
2) Use a bench press and the bearing installer to install the
bearing.
The bearing snap ring groove must be facing the front of the
transmission.
Bearing Installer : 5-8840-0015-0 (J-22912-01)
12.Needle Bearing
13.3rd Gear
1) Apply the engine oil to the 3rd needle bearing and the 3rd
gear.
2) Install the needle bearing and the gear to the mainshaft.
The dog teeth of the 3rd gear must, be facing the front side
of the transmission.
15.3rd-4th Synchronizer Assembly
1) Apply the recommended lubricating oil to the clutch hub
spline.
2) Install the synchronizer assembly to the mainshaft.
The sleeve light chamfering
1
and the clutch hub heavy
boss
2
must be facing the rear of the transmission.
16.Mainshaft Snap Ring
1) Select the snap ring which will provide the minimum
clearance between the mainshaft and the snap ring.
There are four snap ring sizes available.
The snap rings are numbered to indicate their thickness.
Mainshaft and Snap Ring Clearance
mm(in)
Standard
0 - 0.05 (0.002)
Snap Ring Availability
mm(in)
Thickness
Identification Number
1.50 (0.059)
1
1.55 (0.061)
2
1.60 (0.063)
3
1.65 (0.065)
4
2) Use a pair of snap ring pliers to install the snap ring to the
mainshaft.
Нет комментариевНе стесняйтесь поделиться с нами вашим ценным мнением.
Текст