Isuzu Rodeo UE. Manual — part 61
DIFFERENTIAL (REAR)
4A2–9
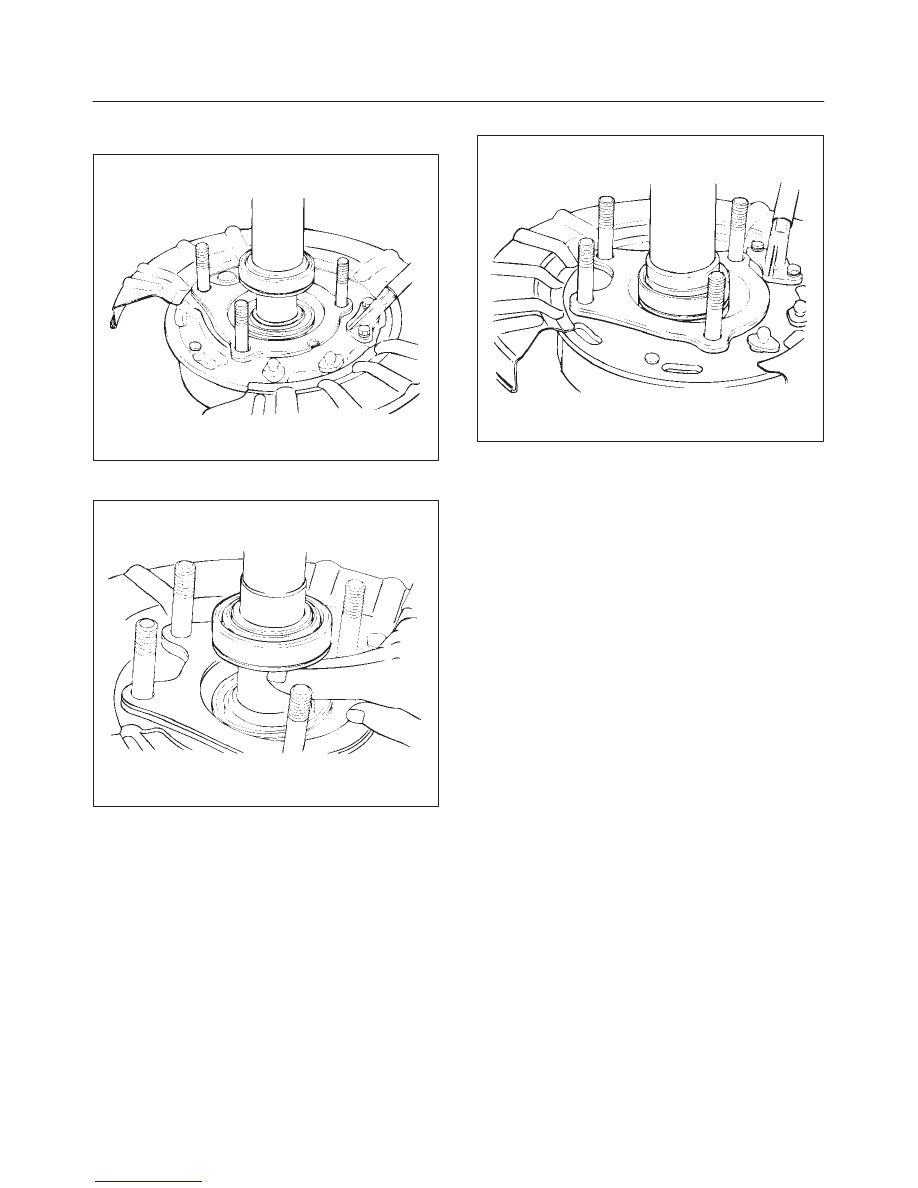
3. Install oil seal. Note direction.
4. Install bearing assembly, using installer and press.
420RS030
NOTE: Install bearing with cup towards inboard side.
420RS031
5. Install retainer ring, using installer and press.
420RS033
6. Install snap ring.
7. Install axle shaft assembly into housing.
8. Install bolts, lockwashers, and nuts.
Tighten the retainer nuts to the specified torque.
Torque : 75 N·m (55 lb ft)
4A2–10
DIFFERNTIAL (REAR)
Pinion Oil Seal
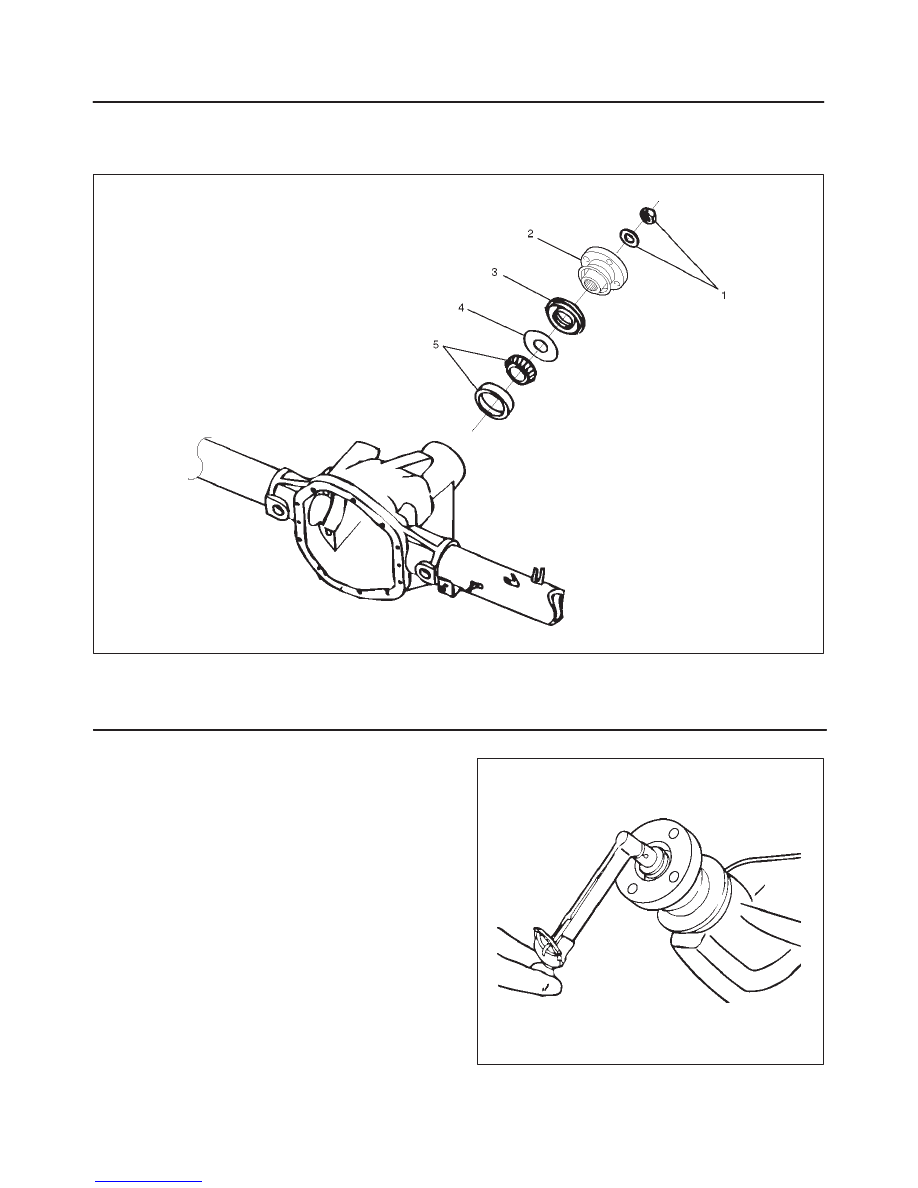
Pinion Oil Seal and Associated Parts
420RW013
Legend
(1) Flange Nut and Washer
(2) Flange
(3) Oil Seal
(4) Outer Oil Seal Slinger
(5) Outer Pinion Bearing (Cup and Cone)
Removal
1. Remove the rear propeller shaft. Refer to Rear
Propeller Shaft in this section.
2. Drain the rear axle oil.
3. Check and record preload with an inch pound torque
wrench. This will give combined pinion bearing, seal,
carrier bearing, axle bearing and seal preload.
425RW018
DIFFERENTIAL (REAR)
4A2–11
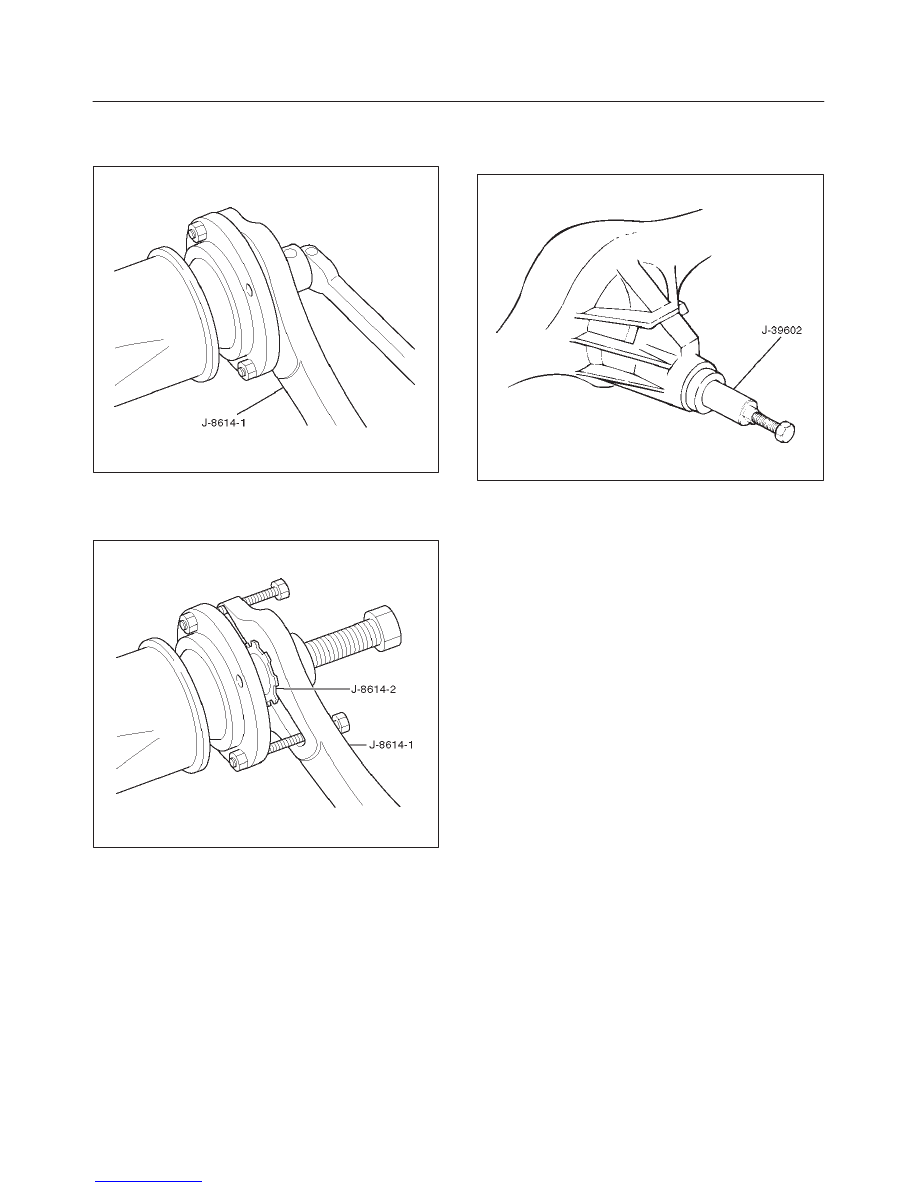
4. Remove flange nut and washer by using pinion flange
holder J–8614–01 after raising up its staked parts
completely.
425RW037
5. Remove flange by using SST J–8614–1
∼
3.
f
Have a suitable container in place to catch
lubricant.
425RW038
6. Remove oil seal.
7. Remove pinion oil seal slinger.
8. Remove outer bearing by using remover J–39602.
425RS090
9. Remove collapsible spacer.
Inspection and Repair
Make necessary correction or parts replacement if wear,
damage, corrosion or any other abnormal condition are
found through inspection.
Check the following parts.
1. Seal surface of the flange.
2. Cage bore for burns.
Installation
1. Install collapsible spacer, discard the used collapsible
spacer and install a new one.
2. Install outer bearing.
4A2–12
DIFFERNTIAL (REAR)
NOTE: Do not drive in, but just temporarily set in the outer
bearing by hand, which should be indirectly pressed in
finally by tightening the flange nut.
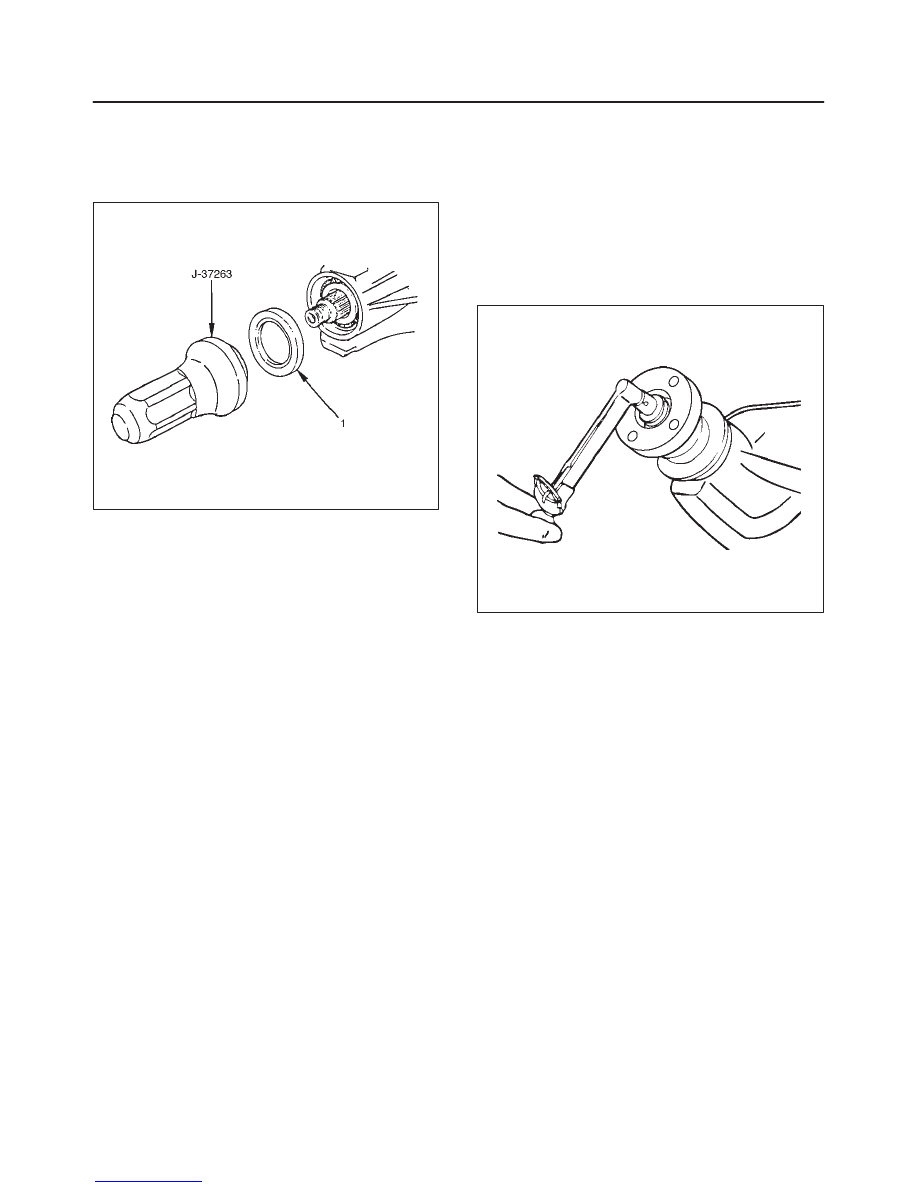
3. By using the seal installer J–37263, install a new oil
seal (1) that has grease on seal lip.
425RS004
4. Install flange.
5. The pinion washer and a new nut while holding the
pinion flange with J–8614–01.
f
Tighten the nut until the pinion end play is just taken
up. Rotate the pinion while tightening the nut to seat
the bearings. Once there is not end play in the
pinion, the preload torque should be checked.
f
Remove J–8614–01. Using an inch-pound torque
wrench, check to make sure the pinion preload is
equal to or slightly over the reading recorded during
removal.
425RW018
6. Install propeller shaft to the frange.
7. Install bolt and nut. Tighten the bolt and nut to the
specified torque.
Torque: 63 N·m (46 lb ft)
Нет комментариевНе стесняйтесь поделиться с нами вашим ценным мнением.
Текст