Isuzu KB P190. Manual — part 82
3C-8 FRONT SUSPENSION
Service Precaution
WARNING: THIS VEHICLE HAS A SUPPLEMENTAL
RESTRAINT SYSTEM (SRS). REFER TO THE SRS
COMPONENT AND WIRING LOCATION VIEW IN
ORDER TO DETERMINE WHETHER YOU ARE
PERFORMING SERVICE ON OR NEAR THE SRS
COMPONENTS OR THE SRS WIRING. WHEN YOU
ARE PERFORMING SERVICE ON OR NEAR THE
SRS COMPONENTS OR THE SRS WIRING, REFER
TO THE SRS SERVICE INFORMATION. FAILURE TO
FOLLOW WARNINGS COULD RESULT IN
POSSIBLE AIR BAG DEPLOYMENT, PERSONAL
INJURY, OR OTHERWISE UNNEEDED SRS SYSTEM
REPAIRS.
CAUTION: Always use the correct fastener in the
proper location. When you replace a fastener, use
ONLY the exact part number for that application.
ISUZU/GM will indicate those fasteners that require
replacement after removal. ISUZU/GM will also
indicate the fasteners that require thread lockers or
thread sealant. UNLESS OTHERWISE SPECIFIED,
do not use supplemental coatings (paints, greases,
or other corrosion inhibitors) on threaded fasteners
or fastener joint interfaces. Generally, such
coatings adversely affect the fastener torque and
the joint clamping force, and may damage the
fastener. When you install fasteners, use the
correct tightening sequence and specifications.
Following these instructions can help you avoid
damage to parts and systems.
FRONT SUSPENSION 3C-9
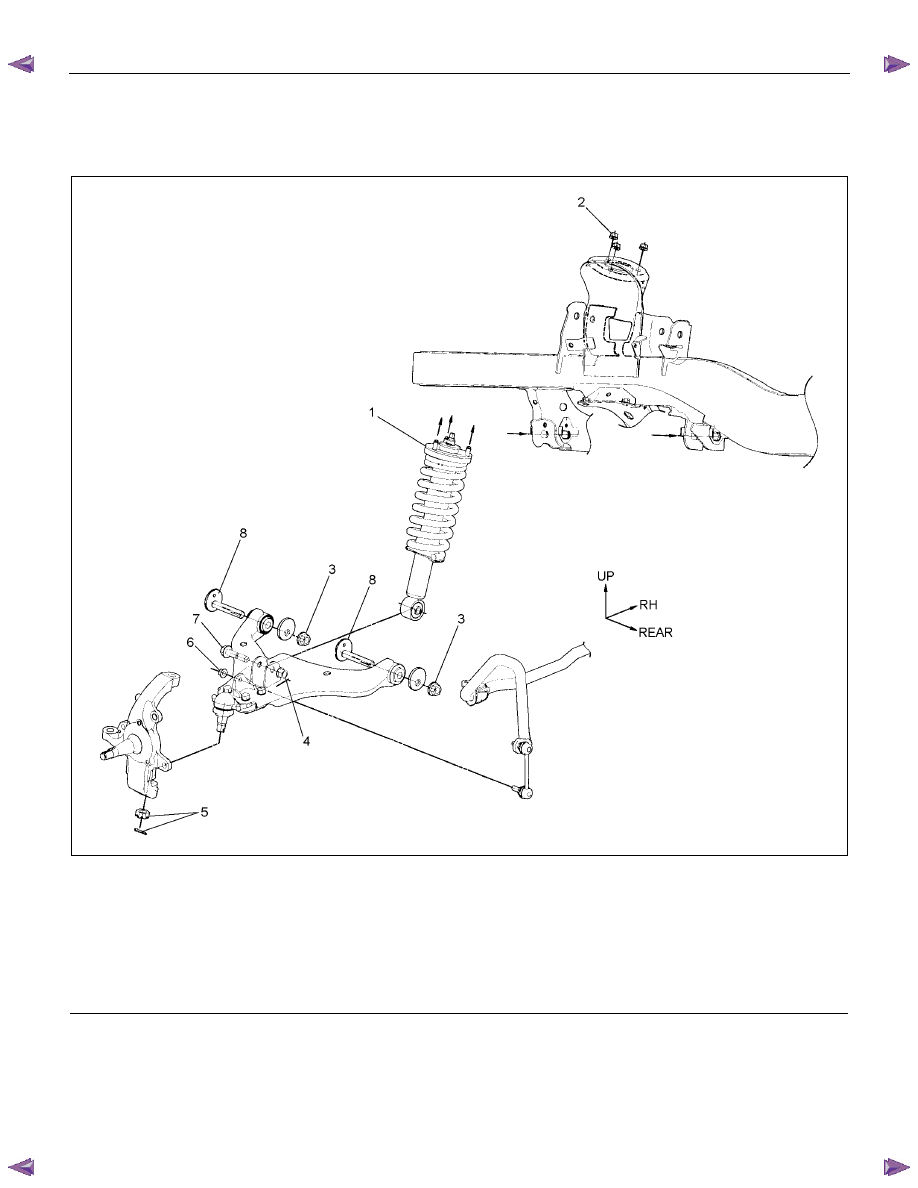
Shock Absorber
Shock Absorber and Associated Parts
RTW440LF001201
Legend
(1) Shock Absorber ASM with coil
(2) Shock Absorber Nut
(3) Lower Control Arm Nut
(4) Shock Absorber Nut
(5) Lower Ball Joint Nut and Cotter Pin
(6) Link Nut
(7) Shock Absorber Bolt
(8) Cam bolt
3C-10 FRONT SUSPENSION
Removal
1. Raise the vehicle and support it with suitable
safety stands.
2. Remove wheel and tire assembly. Refer to Wheel
Replacement in this section.
3. Remove link nut.
CAUTION: Be careful not to damage the ball joint
boot.
4. Support lower control arm with a jack.
5. Remove the shock absorber bolt and nut.
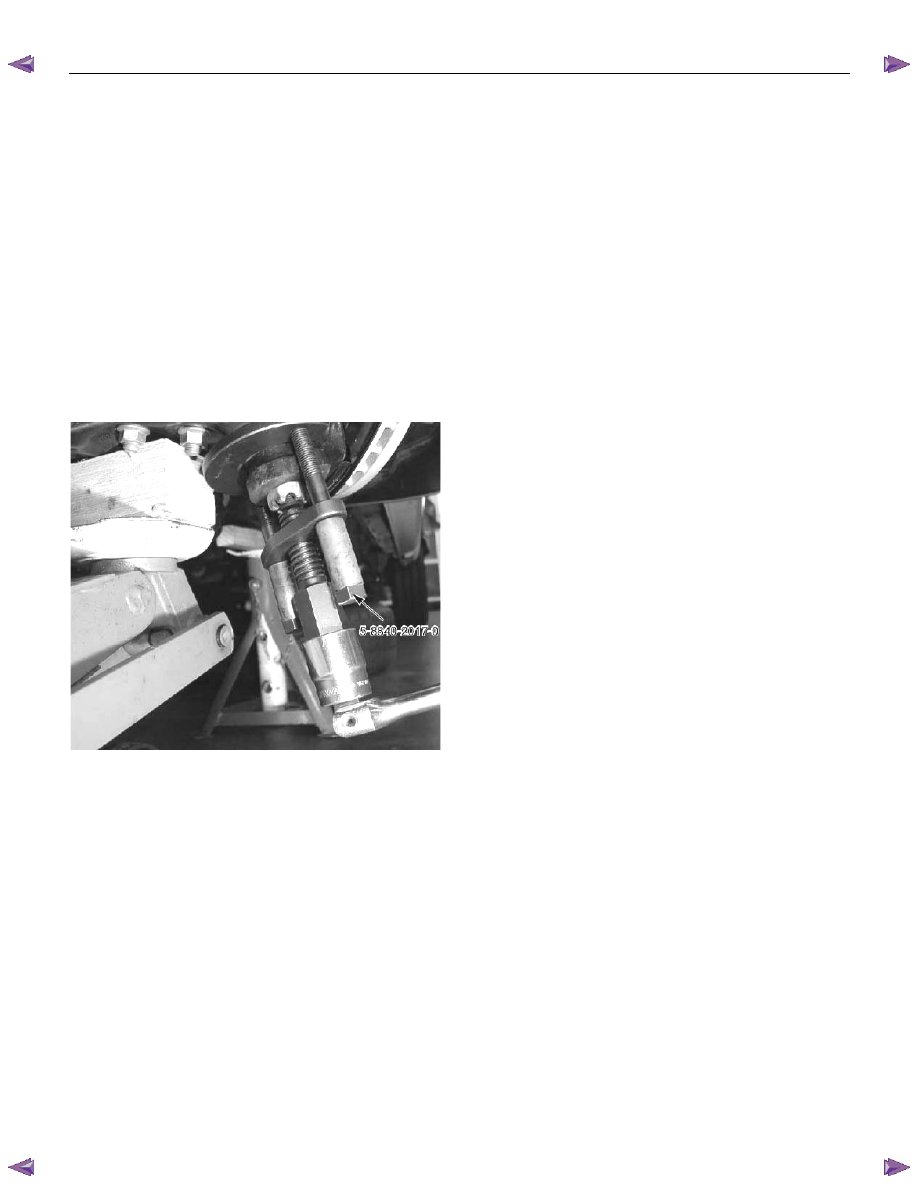
6. Remove lower ball joint nut and cotter pin, then
use remover 5-8840-2017-0 to remove the lower
ball joint from the knuckle.
P1010003
7. Apply the setting marks to the front and rear cam
bolt and crossmember, then loosen nut, and cam
bolt.
8. Remove the shock absorber nut.
9. Remove the shock absorber asm.
FRONT SUSPENSION 3C-11
Installation
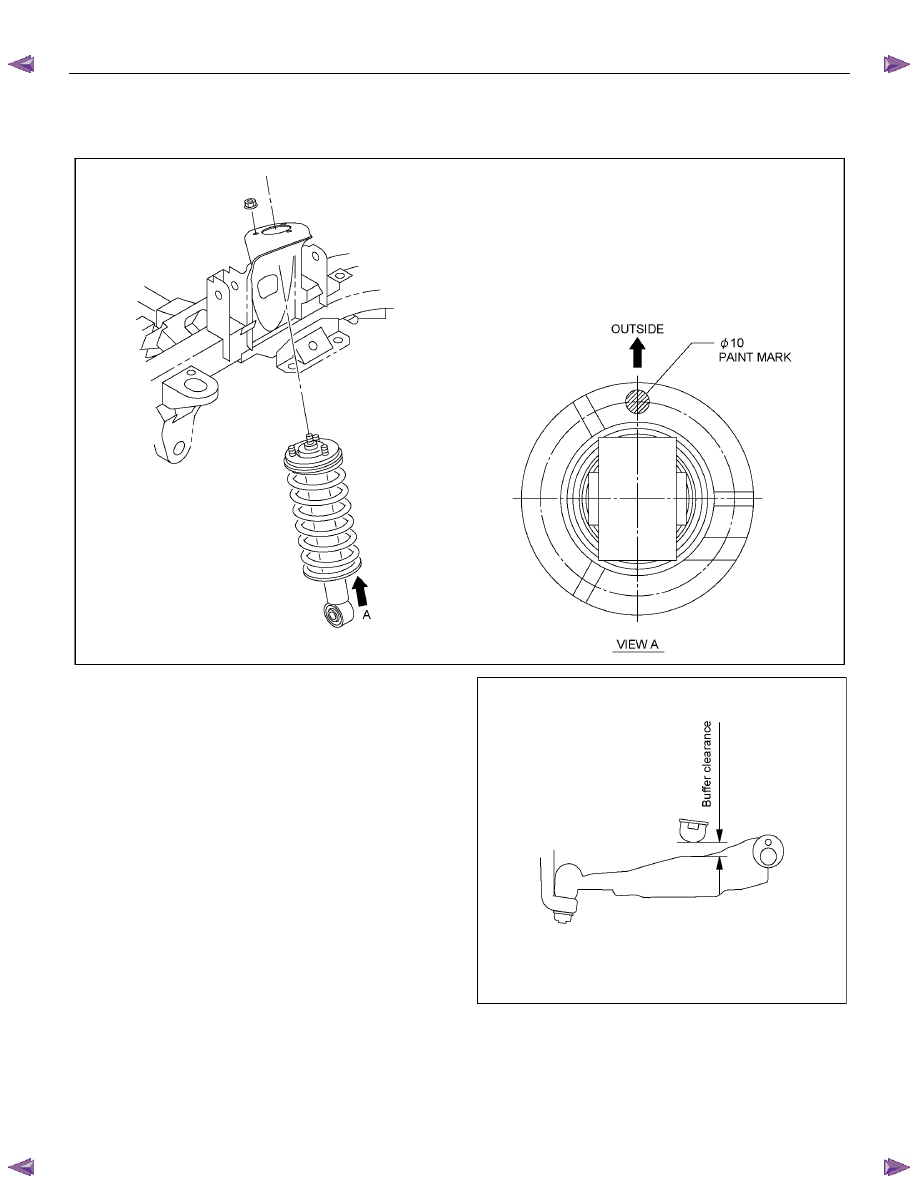
1. Install shock absorber.
RTW340MF000801
NOTE: Paint mark to be on outer side after assembly to
vehicle.
2. Install shock absorber nut, then tighten it to the
specified torque.
Torque: 55 N
⋅⋅⋅⋅m (5.6 kgf⋅⋅⋅⋅m/41lb⋅ft)
3. Install shock absorber bolt and nut, and then
tighten to the specified torque.
Buffer clearance: 25.9 mm (1.02 in)
Torque: 137 N
⋅⋅⋅⋅m (14.0 kgf⋅⋅⋅⋅m/101 lb⋅ft)
NOTE: Apply oil to the thread.
NOTE: Tighten the bolt and nut with the parts in the
position shown in the illustration below.
RTW53ASH000201
Нет комментариевНе стесняйтесь поделиться с нами вашим ценным мнением.
Текст