Isuzu KB P190. Manual — part 789
Engine Cooling – V6 Engine
Page 6B1–21
Calibrating the Tester
The coolant tester calibration is checked at manufacture. If however, the calibration check detailed in Step 1 of this
method shows that the instrument is not reading correctly, then conduct the following recalibration procedure:
1
Remove the sealant covering the adjustment screw on the underneath of the tester.
2
With a distilled water sample on the measuring surface, carefully adjust the screw until a zero reading is obtained.
N O T E
DO NOT completely remove the screw.
3
After recalibration, reseal the screw with a small amount of silicone sealant.
Method 2 – Hydrometer
1
The cooling system should be at or close to ambient
temperature.
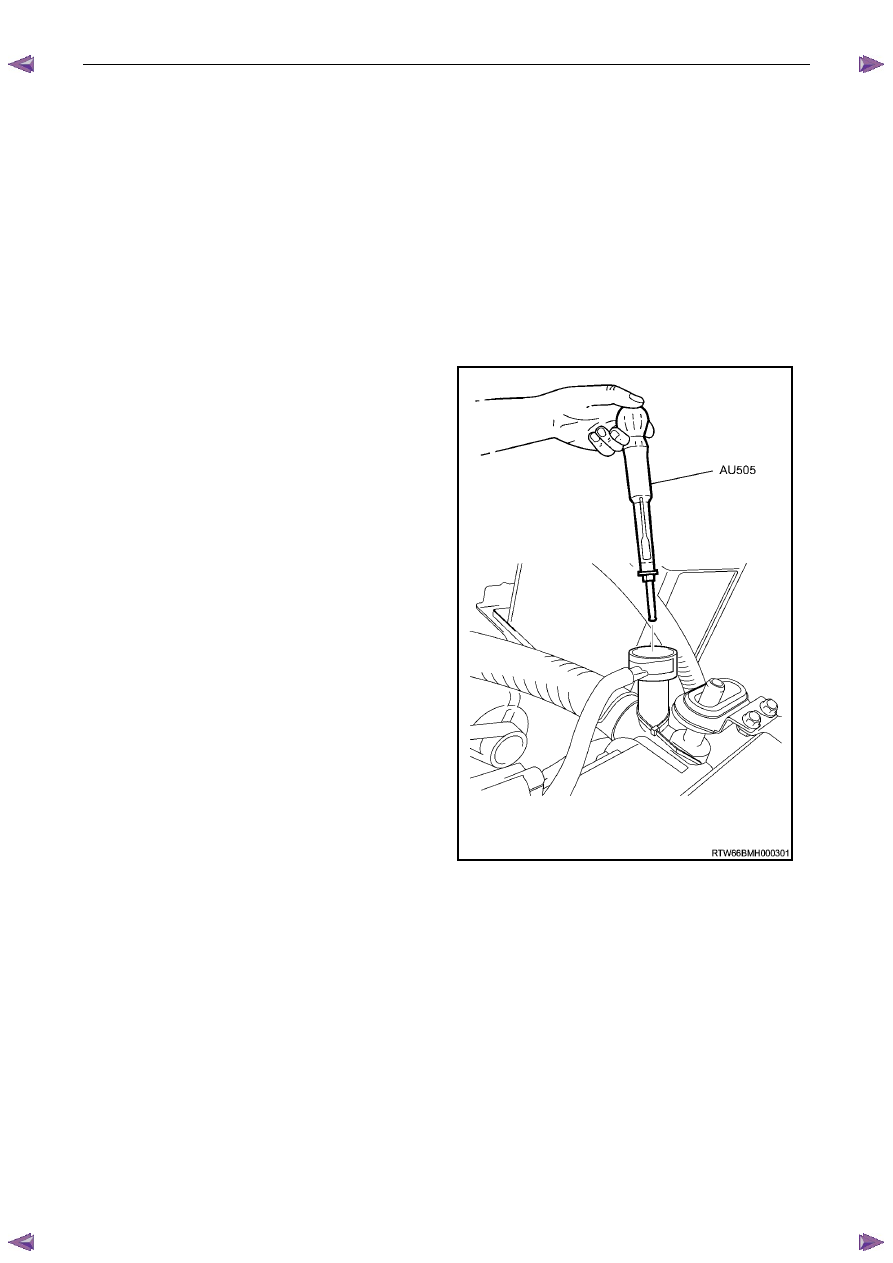
2
Carefully remove the coolant filler cap from the
coolant outlet housing and, while holding the rubber
bulb squeezed, insert nozzle of coolant tester
hydrometer, Tool No. AU505 into coolant. Releasing
the rubber bulb will then draw sufficient coolant into
the tester to float hydrometer bulb freely.
3
Hold tester at eye level and read scale on
hydrometer bulb at coolant level.
The reading shows the percentage of ethylene
glycol antifreeze contained in the engine coolant.
4
The hydrometer reading should show 50% if the
coolant concentration is correct.
•
If a reading of less than 50% is achieved, the
cooling system requires topping up with either
DEX-COOL® long-life coolant or its equivalent,
known as Extended Life Anti-freeze Coolant
conforming to GM specification 6277M.
•
Refer to the Coolant Concentration table
shown for the previous method to determine
how much coolant additive of either type is
required to be added to the cooling system to
bring the coolant to the specified
concentration.
Figure 6B1 – 18
5
Drain sufficient quantity of coolant from cooling system to allow top-up with coolant additive, then add the required
amount of the correct additive. Install coolant filler cap to the coolant outlet housing.
6
Start and run the engine until normal operating temperature is reached. This will allow the added coolant to be
distributed throughout the engine cooling system.
Engine Cooling – V6 Engine
Page 6B1–22
3.3
Draining and Filling Cooling System
Draining
Refer to 3.1 Service Notes in this Section, for
important safety items.
1
Allow engine to cool to ambient temperature (less than 50
° C), and then remove the coolant filler cap (located near
the brake booster assembly).
Disconnection of the battery affects certain
vehicle electronic systems. Refer to 1.1
WARNING, CAUTION and NOTES, before
removing the ground lead.
2
Disconnect the battery ground lead. Refer to 6D1– 3 Battery – V6.
3
Drain the coolant from the system via the radiator drain tap on the lower RHS of the radiator below the lower hose
outlet. Attach a suitable piece of rubber tubing to the tap outlet to help direct the flow of the coolant into a suitable
container (capacity at least 12 litres).
Filling
During any service operation that requires the cooling system to be partly or completely drained, the following
instructions must be followed when refilling the cooling system, to ensure that all air is bleed from system.
• Refer to 3.1 Service Notes in this Section,
for important safety items.
• Before opening the radiator bleed screw,
the cooling system must first be
completely depressurised with the engine
coolant filler cap removed.
Do not mix different types of anti-freeze or
corrosion inhibitors, as they may be
incompatible. Always check which coolant is
to be added to the particular vehicle being
serviced. If a different type has been used in
the cooling system (or is added accidentally),
flush the system with clean water. Refer to 3.4
Cleaning Cooling System in this Section.
N O T E
Ensure that the radiator drain tap located at the
bottom of right-hand side radiator tank is closed
before proceeding.
Engine Cooling – V6 Engine
Page 6B1–23
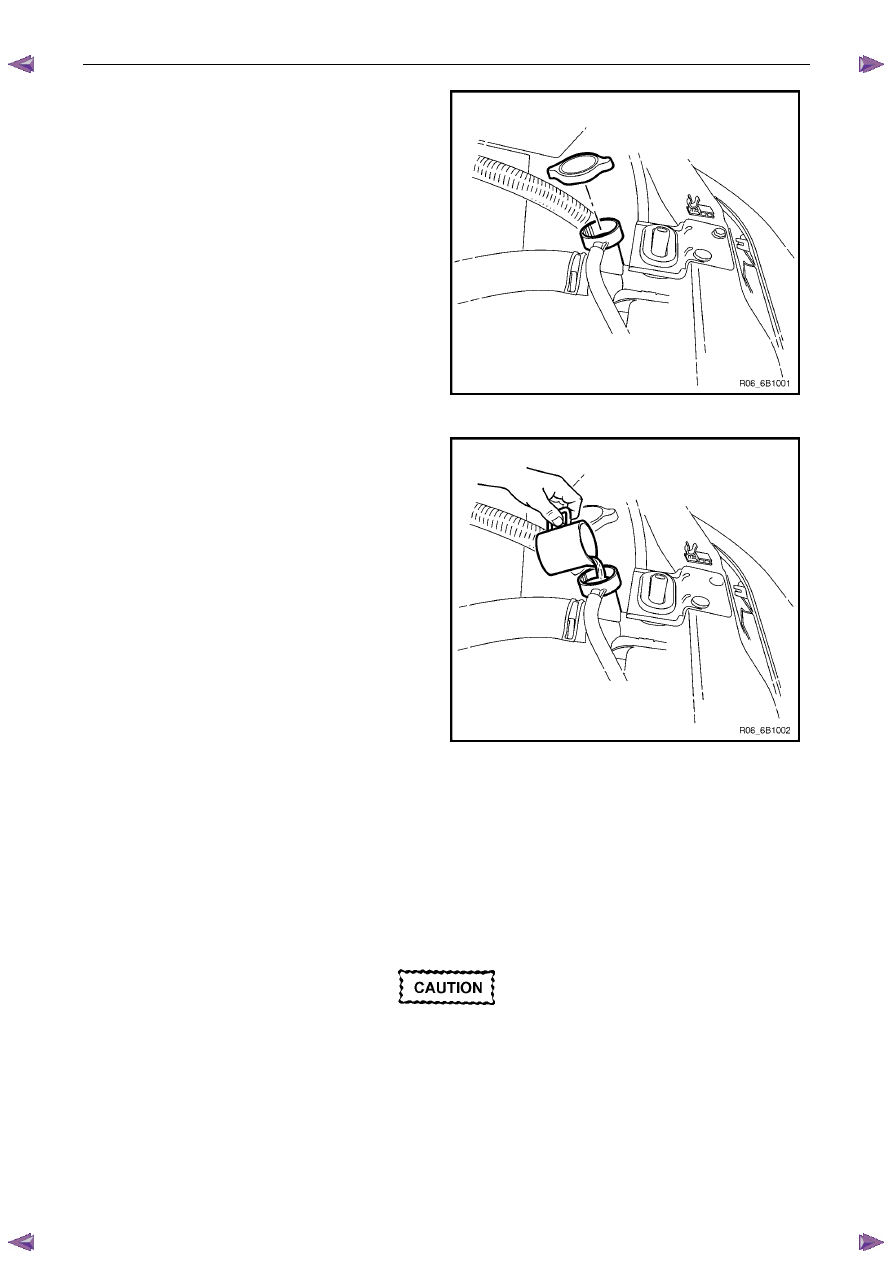
1
With the engine off, remove the coolant filler cap on
the coolant outlet housing, located at the front left-
hand side of the engine.
Figure 6B1 – 19
2
If filling a completely empty cooling system for
automatic transmission models, mix 5 litres of clean
water with 5 litres of the recommended coolant or
5.2 litres of each for manual transmission models.
3
Add coolant via the engine coolant filler neck on the
coolant outlet housing.
N O T E
Do not replace the coolant filler cap before
starting the engine (in step 6). Leaving the filler
cap off allows the engine to warm up without
pressurising.
4
Reconnect battery ground lead. Refer to 6D1 – 3
Battery – V6.
5
Start the engine and set the HVAC controls to:
•
Full hot
•
Low fan
Figure 6B1 – 20
6
Run the engine at approximately 2,000 rpm to warm up the engine.
7
Wait until the radiator fan switches on.
8
When the radiator fan has switched on, let the engine rpm drop back to idle.
9
Turn the engine off when the radiator fan switches off.
10
Top up the coolant until full.
11
Replace the coolant filler cap.
Do not loosen or remove the radiator filler cap
when the coolant temperature is high. Steam
or boiling coolant will gush out and you may
be burnt. To open the radiator filler cap, cover
the filler cap with a thick cloth when the
coolant has cooled, release the pressure by
slowly turning the filler cap, and remove the
cap.
Engine Cooling – V6 Engine
Page 6B1–24
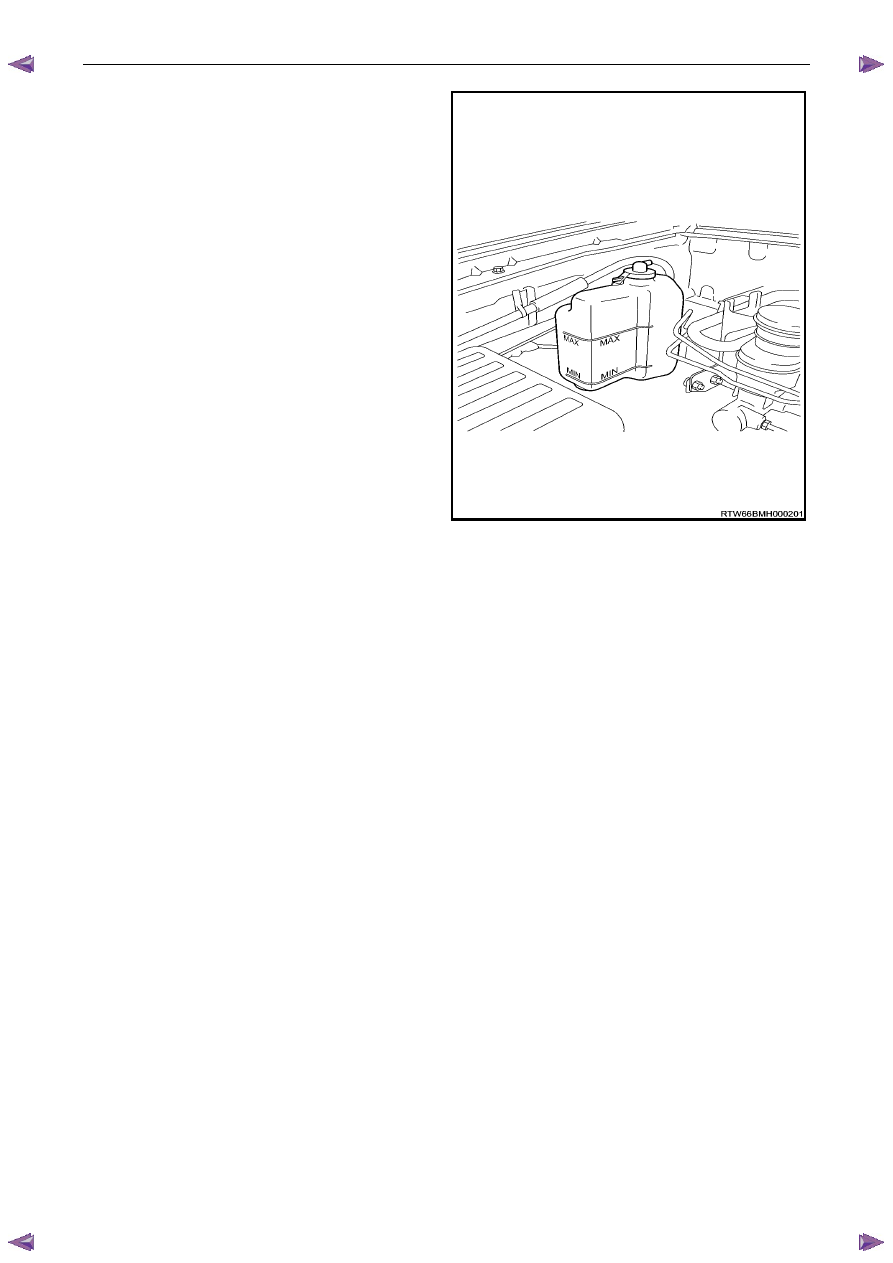
12
Open the coolant reservoir tank cap.
13
Top up the radiator coolant recovery reservoir to the
MAX line.
14
Reinstall the coolant recovery reservoir cap.
N O T E
This condition only applies when the cooling
system is first being filled after a major loss of
coolant. The level of coolant in the reservoir
will then drop, once the engine is started and
normal operating temperature is reached. The
coolant level should then be maintained at the
correct level (between the MAX and MIN
Lines).
Figure 6B1 – 21
Нет комментариевНе стесняйтесь поделиться с нами вашим ценным мнением.
Текст