Isuzu KB P190. Manual — part 739
Engine Mechanical – V6
Page 6A1–179
Page 6A1–179
27
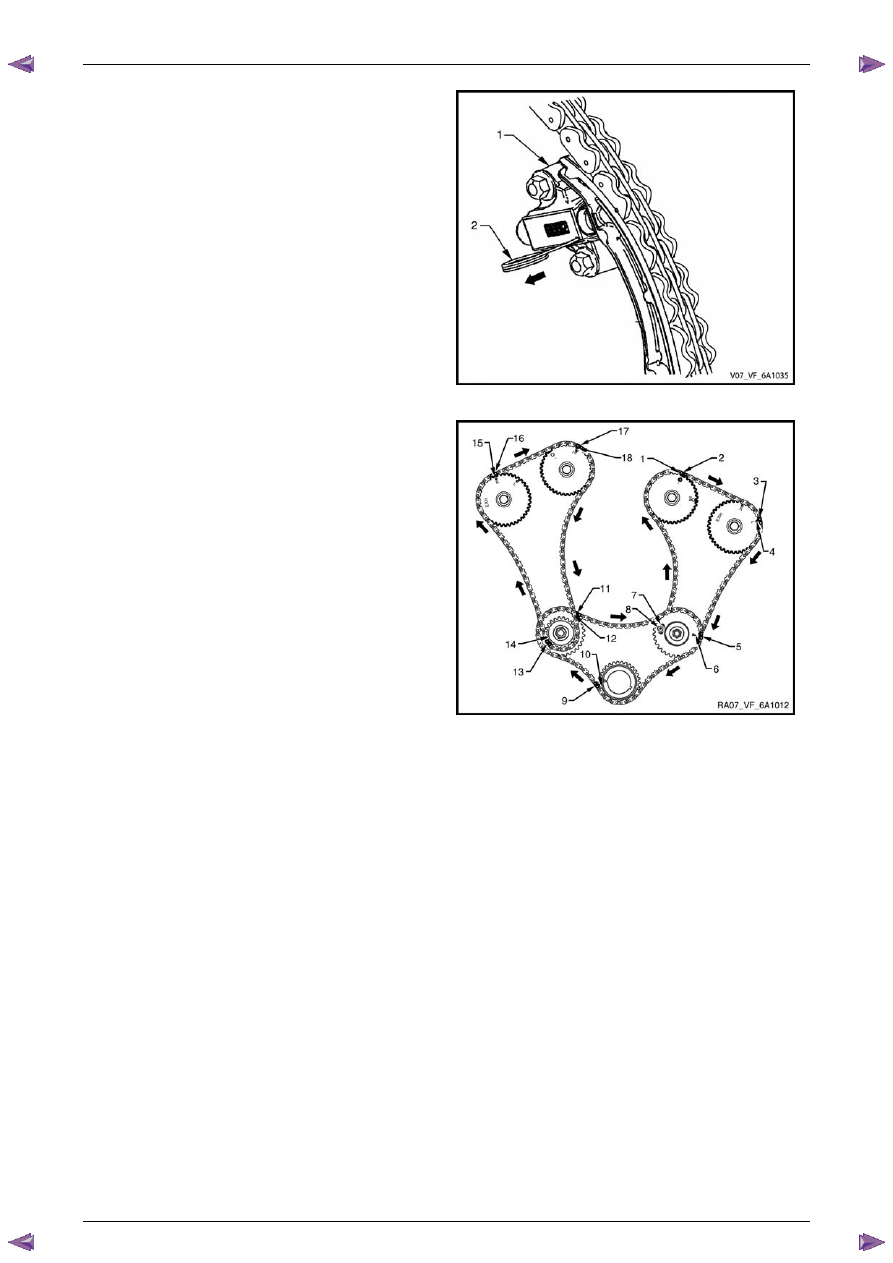
Release the right-hand timing chain tensioner (1) by
pulling out Tool No. EN 46112 (2) and unlocking the
tensioner plunger.
Figure 6A1 – 284
28
Verify all primary and secondary timing chain timing
mark alignments (1 to 18).
29
Remove Tool No. EN 46105–1 and EN 46105-2 from
the left and right-hand cylinder head camshafts.
30
Reinstall the spark plugs. Refer to
Section 6C1-3
Engine Management – V6 – Service Operations
.
31
Reinstall the engine front cover assembly, refer to
3.15 Front Cover Assembly
.
Figure 6A1 – 285
Engine Mechanical – V6
Page 6A1–180
Page 6A1–180
3.17 Oil Pump Assembly
Remove
N O T E
Do not remove the left-hand bank idler sprocket.
1
Remove the primary timing chain and crankshaft sprocket, refer to
3.16 Timing Chains, Tensioners, Shoes and
Guides
.
2
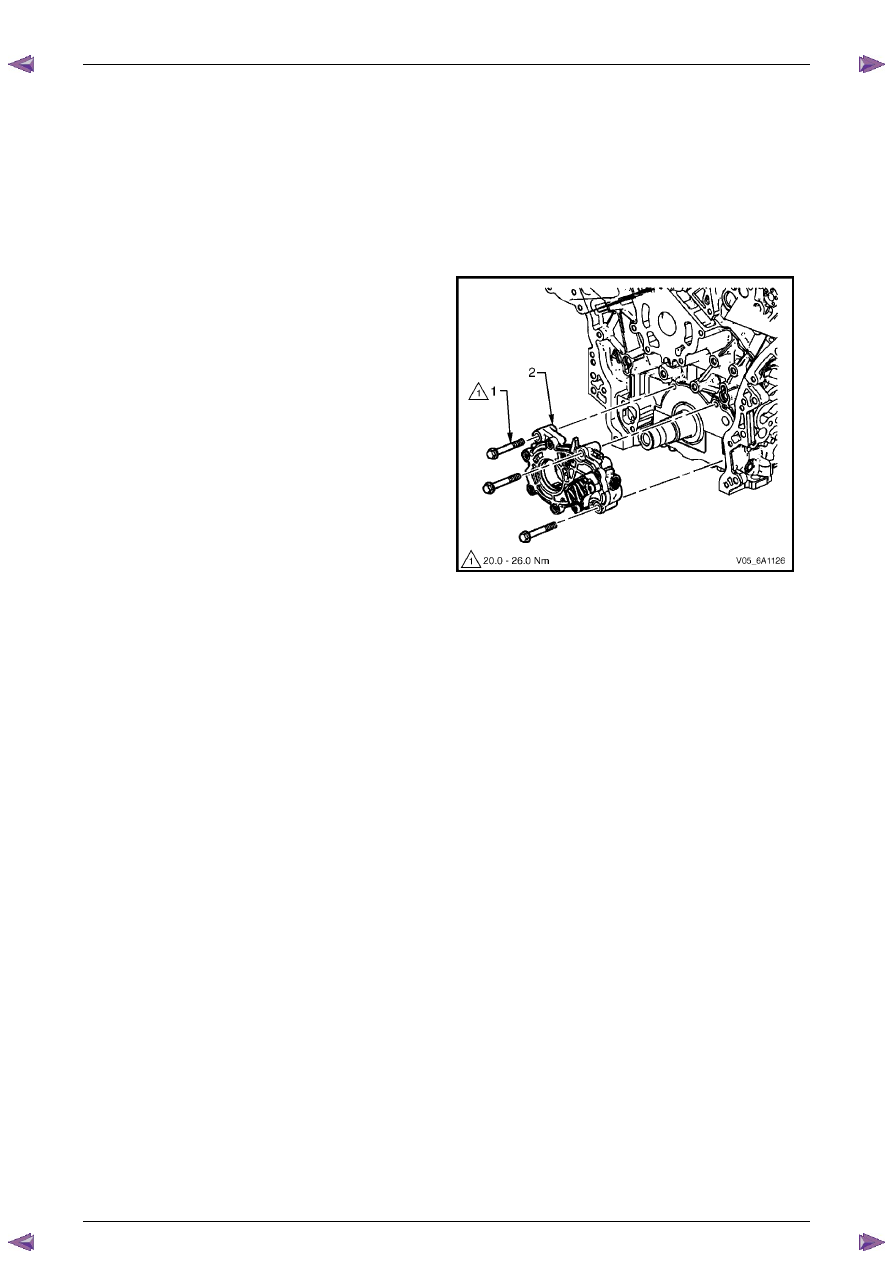
Remove the three bolts (1) attaching the oil pump (2).
3
Remove the oil pump assembly.
Figure 6A1 – 286
Engine Mechanical – V6
Page 6A1–181
Page 6A1–181
Disassemble
CAUTION
There are no serviceable components within
the oil pump. Disassemble the pump only to
diagnose an oil related concern. A
disassembled oil pump must not be reused: it
must be replaced.
1
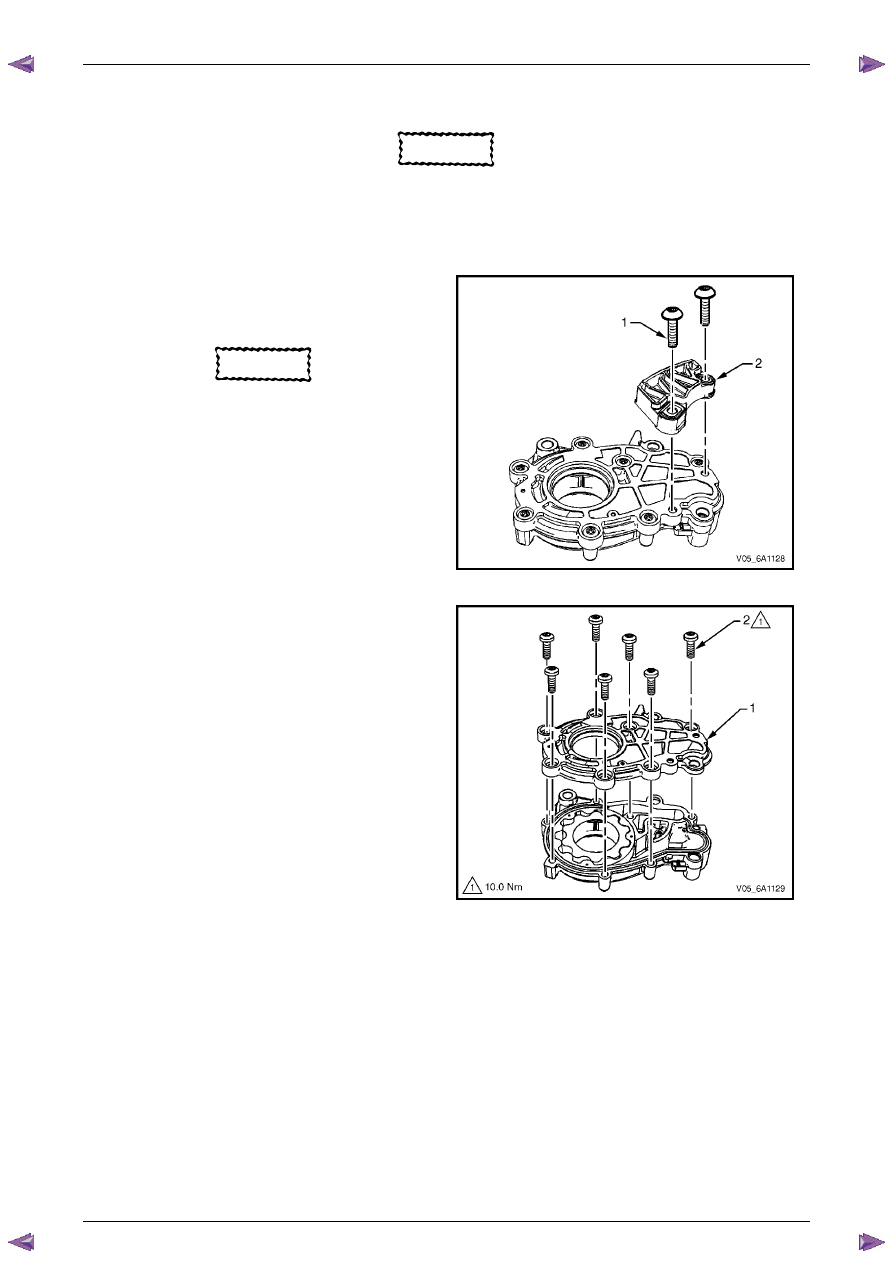
Remove the two bolts (1) attaching the primary timing
chain lower guide (2) and remove the guide.
CAUTION
The primary timing chain lower guide is not
serviced separately and is part of the oil
pump assembly. If it is removed from the
pump assembly, the guide and the pump
must be replaced.
Figure 6A1 – 287
2
Remove the seven bolts (2) attaching the oil pump
cover to the oil pump housing (1) and remove the
cover from the housing.
Figure 6A1 – 288
Engine Mechanical – V6
Page 6A1–182
Page 6A1–182
3
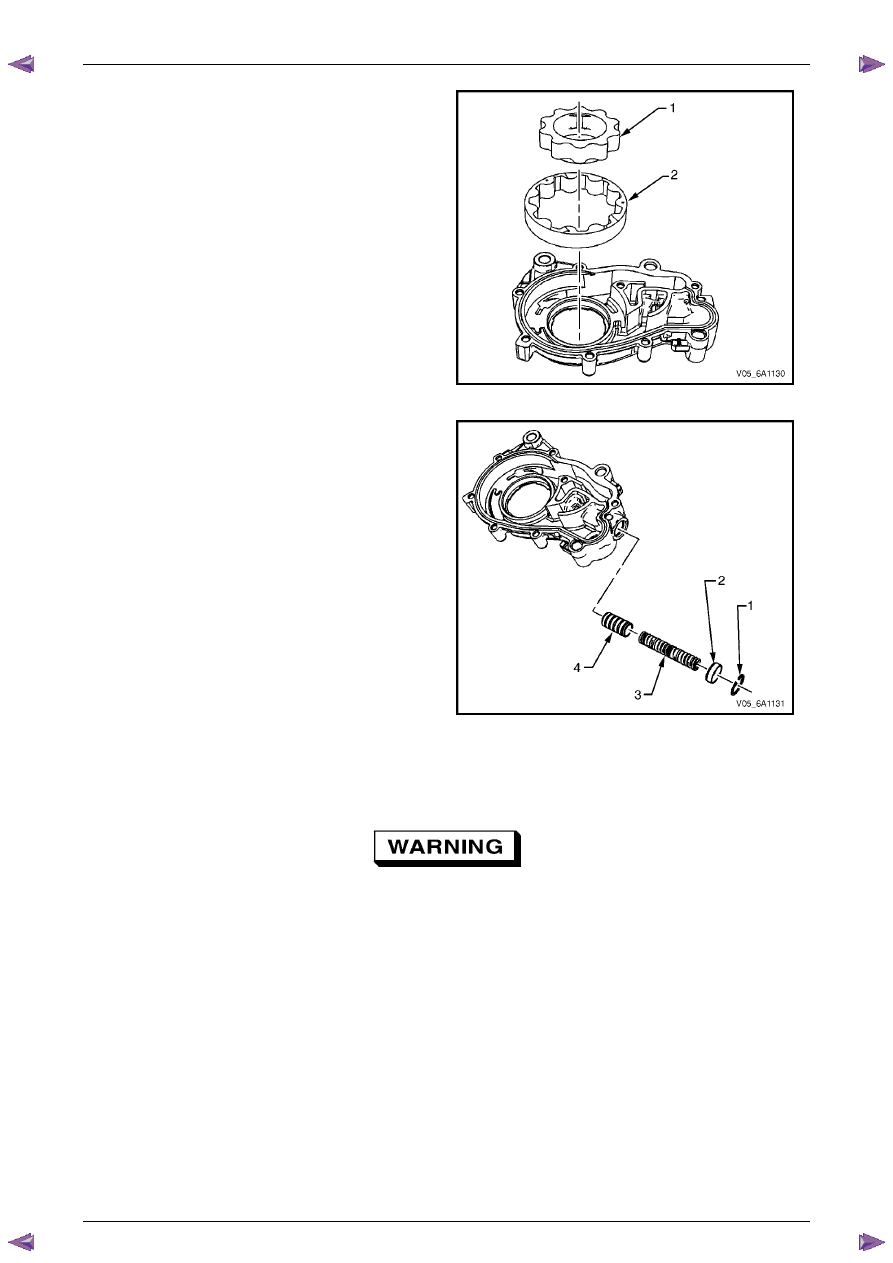
Remove the inner gerotor ring (1).
4
Remove the outer gerotor ring (2).
Figure 6A1 – 289
5
Remove the clip (1), retaining the oil relief valve cap
(2).
6
Remove the cap, spring (3) and plunger (4) from the
oil pump housing.
Figure 6A1 – 290
Clean
1
Clean the oil pump components with non-corrosive solvent.
Safety glasses must be worn when using
compressed air.
2
Dry the oil pump components with compressed air.
Нет комментариевНе стесняйтесь поделиться с нами вашим ценным мнением.
Текст