Isuzu KB P190. Manual — part 1450
10-42 CAB
REMOVAL AND INSTALLATION
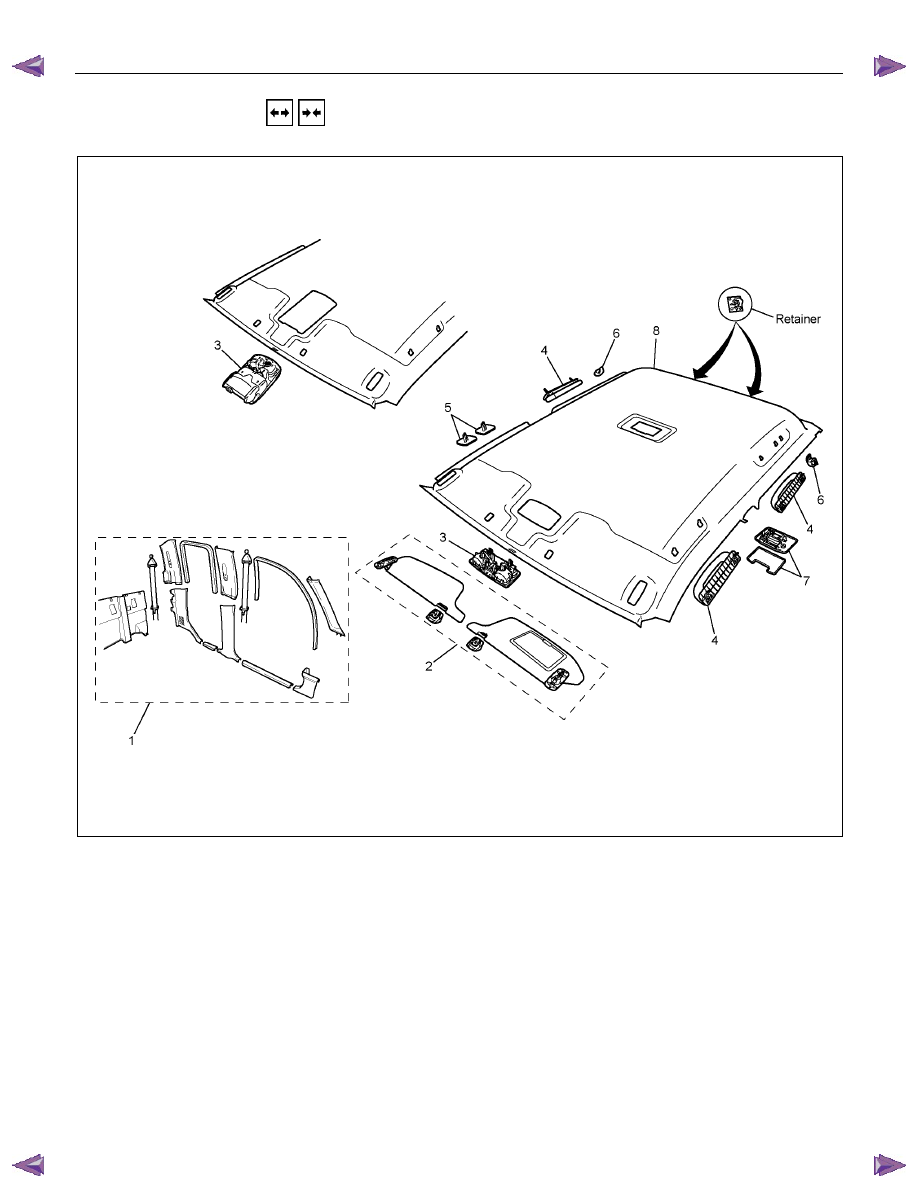
This illustration is based on RHD model
RTW6A0LF000301
Crew Cab Model
Removal Steps
▲ 1. Interior trim panels
▲ 2. Sun visor/Sun visor holder
▲ 3. Spot light/Over head console
▲ 4. Assist grip
5. Hole cover
▲ 6. Coat hook
▲ 7. Dome light
▲ 8. Headlining
Installation Steps
8.
Headlining
7. Dome light
6. Coat hook
5. Hole cover
4. Assist grip
3. Spot light/Over head console
2. Sun visor/Sun visor holder
1. Interior trim panels
CAB 10-43
Important Operations - Removal
1. Interior Trim Panels
• Refer to Interior Trim Panels in this section.
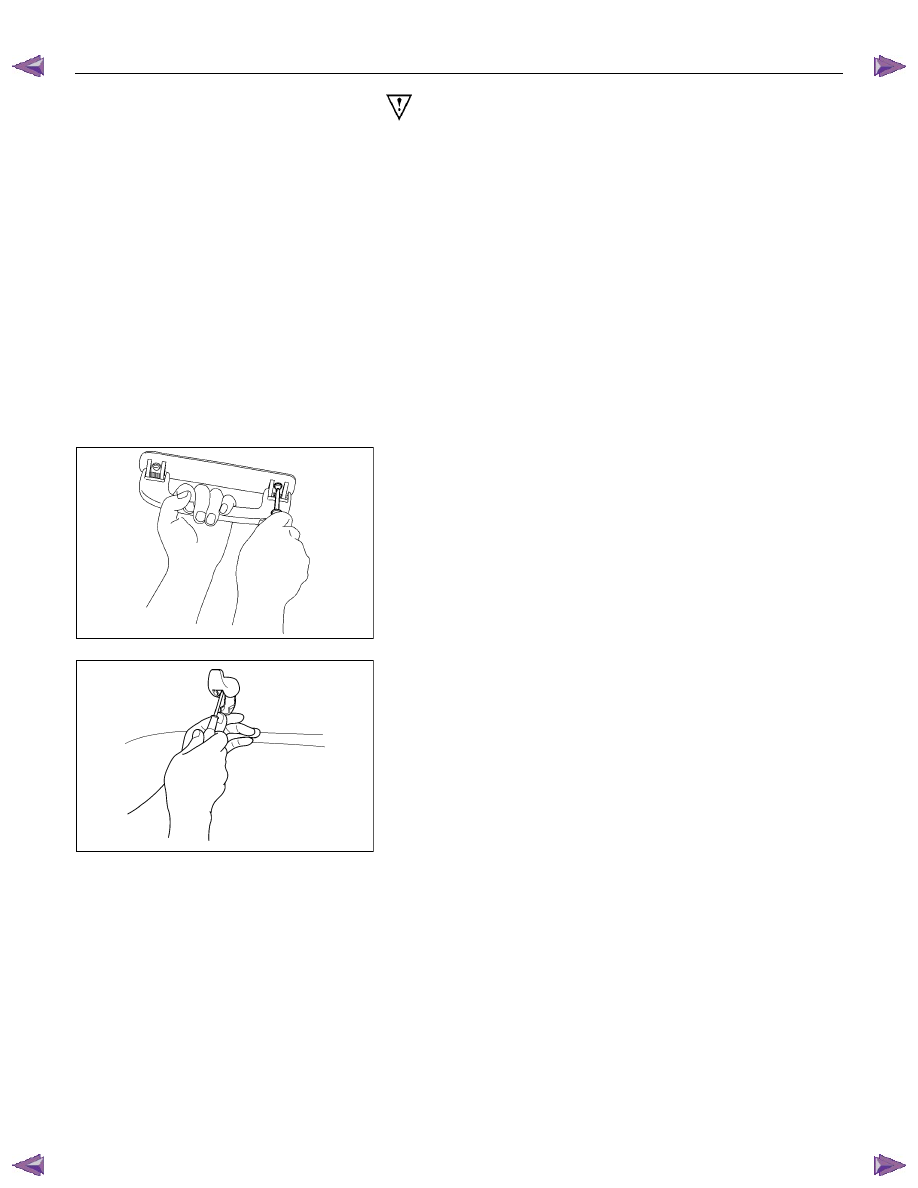
2. Sun visor/Sun visor Holder
1) Remove the 2 screws fixing the sun visor.
2) Remove the screw fixing the sun visor holder.
3. Spot Light/Over Head Console
• Refer to section 8 Spot Light.
• Refer to section 8 Over Head Console.
RUW5A0SH003401
4. Assist Grip
• Remove the 2 fixing screws.
RUW5A0SH003501
6. Coat Hook
• Open the cover and remove the fixing screw.
7. Dome Light
• Refer to Section 8 Dome Light.
10-44 CAB
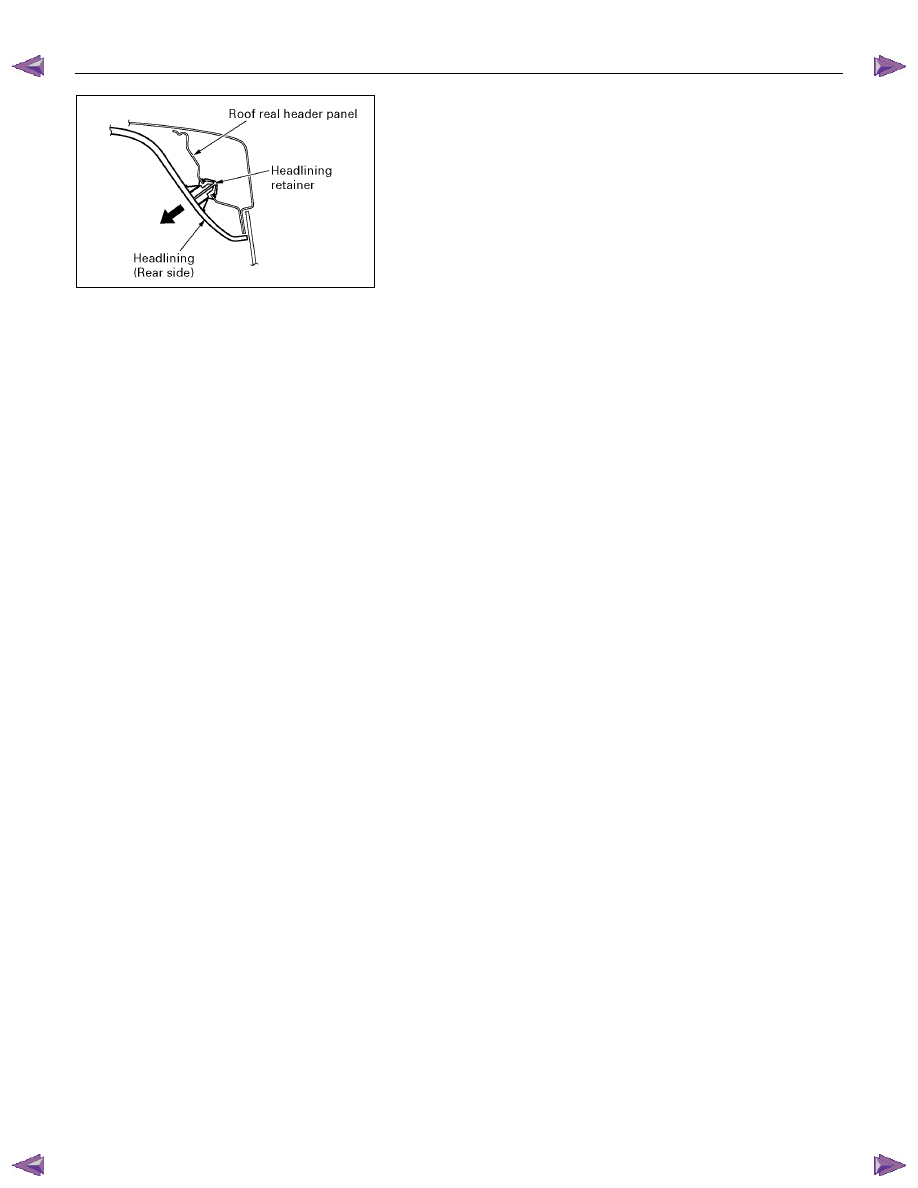
8. Headlining
• Pull out the headlining with the retainer from the roof
rear header panel in the direction shown in the
illustration.
Note :
Removal steps (2-7) can be removed from the headlining
in any order.
CAB 10-45
INTERIOR TRIM PANELS
REMOVAL AND INSTALLATION
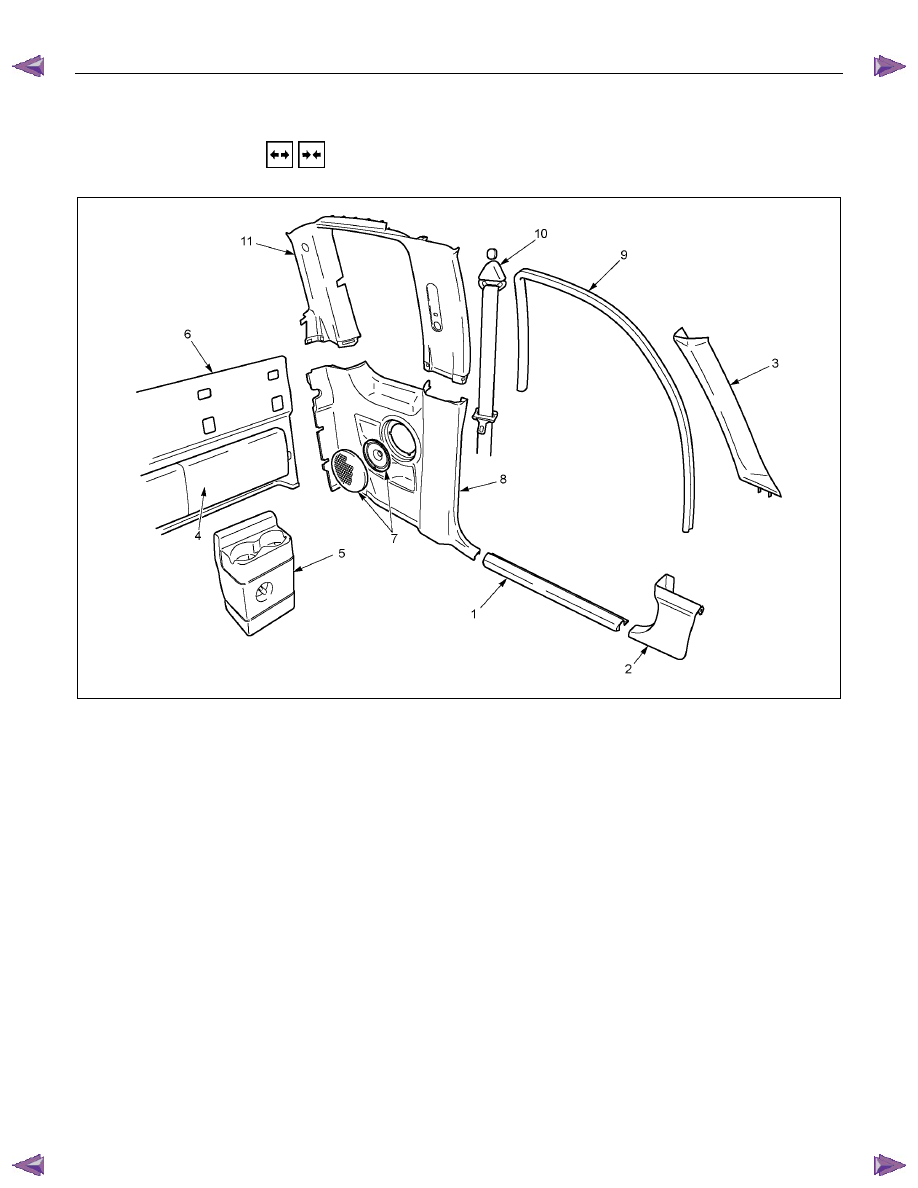
RTW3A0MF001301
Extend Cab Model
Removal Steps
1. Sill plate
2. Dash side trim cover
▲ 3. Front pillar trim cover
▲ 4. Rear upper cushion
5. Jack cover
▲ 6. Rear end trim cover
▲ 7. Rear speaker grille/Rear speaker
▲ 8. Body side rear lower trim cover
9. Door finisher
▲10. Tongue side seat belt
▲11. Body side rear upper trim cover
Installation Steps
11. Body side rear upper trim cover
▲10. Tongue side seat belt
9. Door finisher
8. Body side rear lower trim cover
7. Rear speaker grille/Rear speaker
▲ 6. Rear end trim cover
5. Jack cover
4. Rear upper cushion
3. Front pillar trim assembly
2. Dash side trim cover
1. Sill plate
Нет комментариевНе стесняйтесь поделиться с нами вашим ценным мнением.
Текст