Isuzu KB P190. Manual — part 709
Engine Mechanical – V6
Page 6A1–59
Page 6A1–59
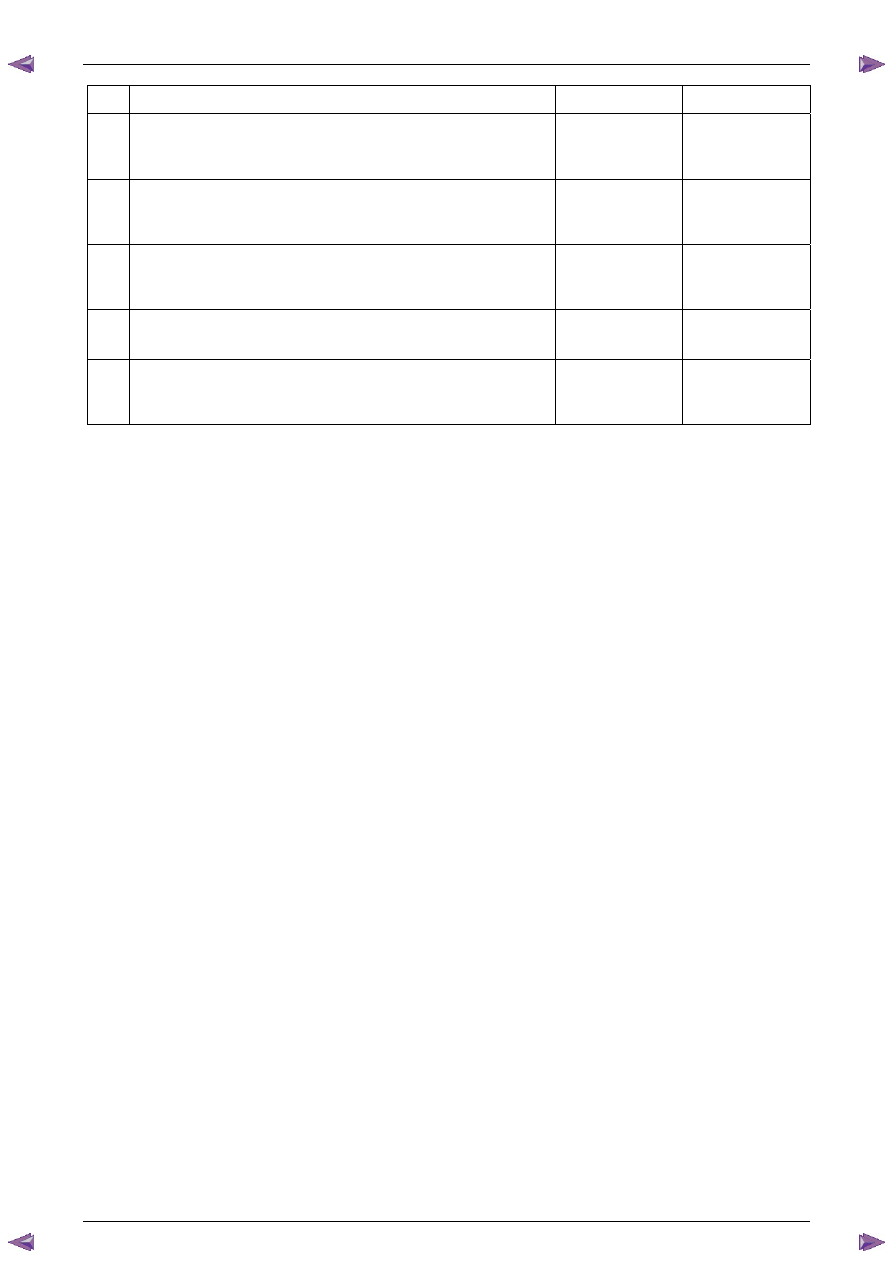
Step Action
Yes
No
4
Inspect the accessory drive belt for damage, separation or sections of
missing ribs.
Did you find any damaged, separated or missing ribs?
Go to Step 7
Go to Step 5
5
Inspect the accessory drive belt for severe pilling (exceeding 33% of
the belt groove depth).
Did you find sever pilling?
Go to Step 6
Go to Step 5
6
Clean the drive belt using a suitable wire brush and reinstall to the
engine, refer to 3.5 Accessory Drive Belt.
Did you complete the repairs?
Go to Step 8
—
7
Install a new accessory drive belt, refer to 3.5 Accessory Drive Belt.
Did you replace the accessory drive belt?
Go to Step 8
—
8
If required, reinstall the accessory drive belt and operate the system to
confirm the repair.
Did you correct the rumbling noise?
Accessory drive
system OK
Refer to Diagnostic
Aids in this Section
Engine Mechanical – V6
Page 6A1–60
Page 6A1–60
Drive Belt Vibration
Definition
Accessory drive belt vibration can be defined as a drive belt that jumps, shakes or rattles. Accessory drive belt vibration
is usually indicated by one of the following:
•
the vibration is engine speed related, or
•
the vibration is sensitive to accessory drive system load.
Diagnostic Aids
The accessory drive components such as the A/C compressor or generator can have an affect on engine vibration.
To aid in locating which component is causing the vibration, vary the load to each accessory drive component in turn and
note the effect it has on the vibration if any.
Test Description
The numbers below refer to steps in the diagnostic table.
2
Confirms the symptom exists at the time of diagnosis. Other vehicle components may be causing the noise.
3
Confirms the accessory drive belt is the cause of the noise. Drive belt rumbling is often confused with an internal
engine noise due to the similarity in the description. Removing the drive belt and operating the engine briefly will
confirm whether or not the noise is related to the drive belt.
CAUTION
When running the engine with the accessory
drive belt removed, the coolant pump will not
be operating and the engine may overheat if
left unsupervised even for a short period.
N O T E
There may also be a number of DTCs set when
running the engine with the accessory drive belt
removed.
4
The drive belt may cause a vibration. Inspecting the drive belt is considerably easier while the drive belt is
removed.
6
Inspecting the fasteners can eliminate the possibility that an incorrect fastener has been installed.
8
This step should only be performed if the coolant pump is driven by the drive belt. Inspect the coolant pump for a
bent shaft. Also inspect the coolant pump bearings for smooth operation and excessive play. Compare the coolant
pump with a known good pump.
9
Accessory drive component brackets that are bent, cracked or loose may put extra strain on the accessory
component causing it to vibrate.
Diagnostic Table
Step Action
Yes
No
1
Did you review the information provided in 2.2 Symptoms, and
perform the required inspections.
Go to Step 2
Go to
2.2 Symptoms
2
Confirm the customer complaint. Is there a rumbling noise?
Go to Step 3
Refer to Diagnostic
Aids in this Section
3
1
Remove the drive belt, refer to 3.5 Accessory Drive Belt.
2
Operate the engine for no more than 40 seconds.
Does the vibration noise still exist?
Accessory drive
system OK.
Go to 4.2
Symptoms, and
restart the diagnosis
Go to Step 4
4
Inspect the accessory drive belt for damage, wear, debris build-up or
sections of missing ribs.
Did you find any damage, wear, debris build-up or missing ribs?
Go to Step 5
Go to Step 6
5
Install a new accessory drive belt, refer to 3.5 Accessory Drive Belt.
Did you replace the accessory drive belt?
Go to Step 10
—
Engine Mechanical – V6
Page 6A1–61
Page 6A1–61
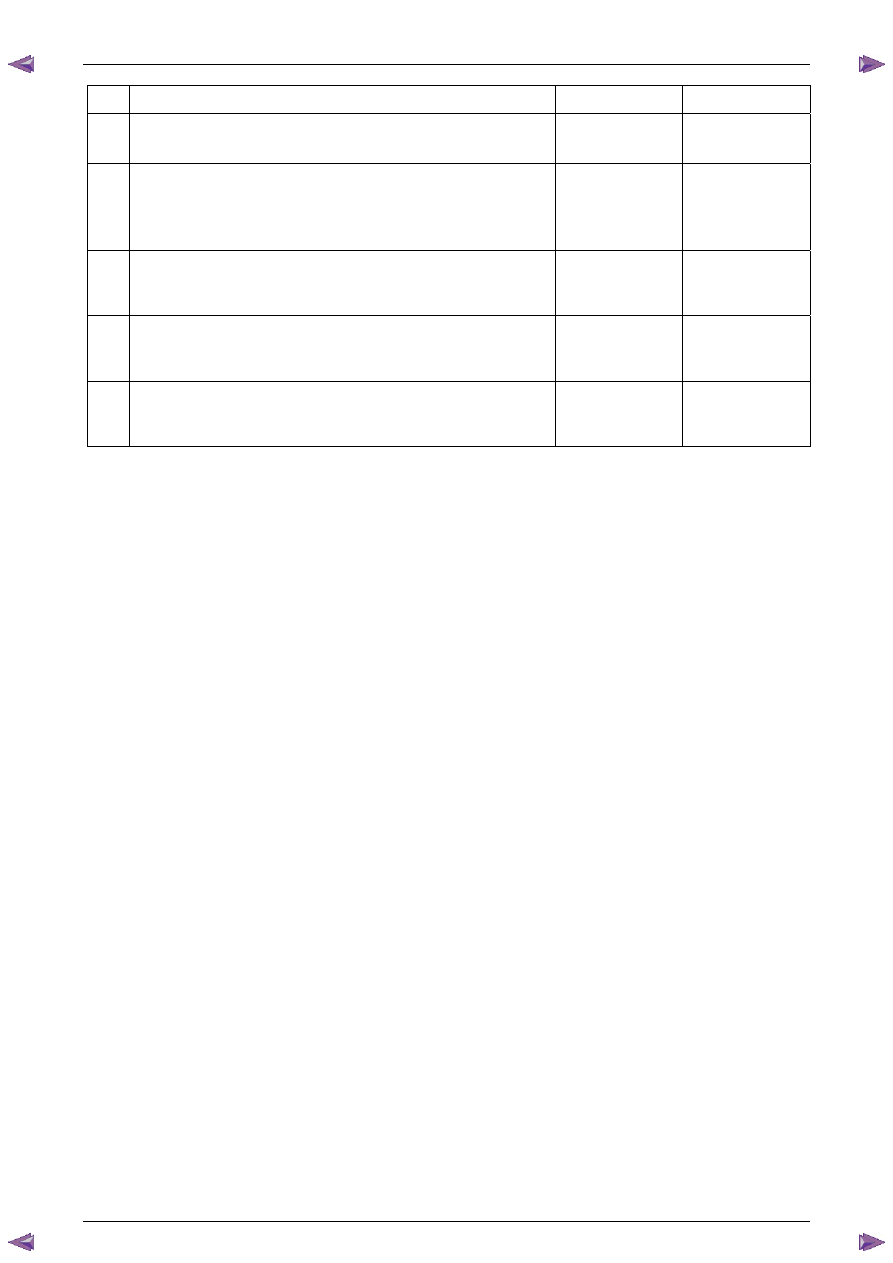
Step Action
Yes
No
6
Inspect for incorrect, loose, missing or damaged fasteners.
Did you find any incorrect, loose, missing or damaged fasteners?
Go to Step 7
Go to Step 8
7
Tighten any loose fasteners to the correct torque specification, refer to
6 Torque Wrench Specifications.
Replace any incorrect or missing fasteners.
Did you complete the repairs?
Go to Step 10
—
8
Inspect the coolant pump for a bent shaft, refer to 6B1 Engine Cooling
– V6.
Did you find and repair a bent coolant pump shaft?
Go to Step 10
Go to Step 9
9
Inspect for bent, cracked or damaged accessory drive component
mounting brackets.
Did you find and repair any bent brackets?
Go to Step 10
Refer to Diagnostic
Aids in this Section
10 If required, reinstall the accessory drive belt and operate the system to
confirm the repair.
Did you correct the vibration?
Accessory drive
system OK
Refer to Diagnostic
Aids in this Section
Engine Mechanical – V6
Page 6A1–62
Page 6A1–62
Drive Belt Falls Off
Definition
The drive belt falls off during normal operation or does not ride correctly on the accessory drive pulleys.
Diagnostic Aids
If the accessory drive belt repeatedly falls off the drive pulleys, this is most likely due to pulley misalignment.
An extra load that is quickly applied and released by an accessory drive component (e.g. A/C compressor) may cause
the accessory drive belt to fall off. In this circumstance, confirm the fault by operating the accessory drive components in
turn, noting which one caused the belt to fall off.
Lack of drive belt tension may also cause the belt to fall off the pulleys. Low drive belt tension could be caused by one of
the following:
•
an incorrect drive belt length,
•
a faulty drive belt tensioner, or
•
a stretched or faulty drive belt.
Test Description
The numbers below refer to steps in the diagnostic table.
2
Confirms the condition of the drive belt. Damage may have occurred to the drive belt when it first fell off or it may
have been damaged which caused the belt to fall off.
4
Misalignment of the pulleys may be caused by:
•
the incorrect installation or mounting of an accessory drive component,
•
the incorrect installation of an accessory drive component pulley, or
•
a damaged or bent accessory drive pulley.
Test for a misaligned pulley using a suitable straight edge in the pulley grooves across two or more pulleys. If a
misaligned pulley is found, refer to the service information for the particular component, for the correct pulley
replacement procedures.
5
Inspecting the pulleys should include an inspection for dents or other damage that would prevent the drive belt from
seating correctly in all of the pulley grooves or on the smooth surface of a pulley when the back side of the belt is
used.
6
Accessory drive component mounting brackets that are bent will cause the drive belt to fall off.
7
Inspection of the fasteners can eliminate the possibility that an incorrect fastener was installed. Missing, loose or
incorrect fasteners may cause pulley misalignment from the fasteners moving under load. Over-tightening of the
fasteners may cause deflection of mounting brackets and result in misaligned accessory drive pulleys.
Diagnostic Table
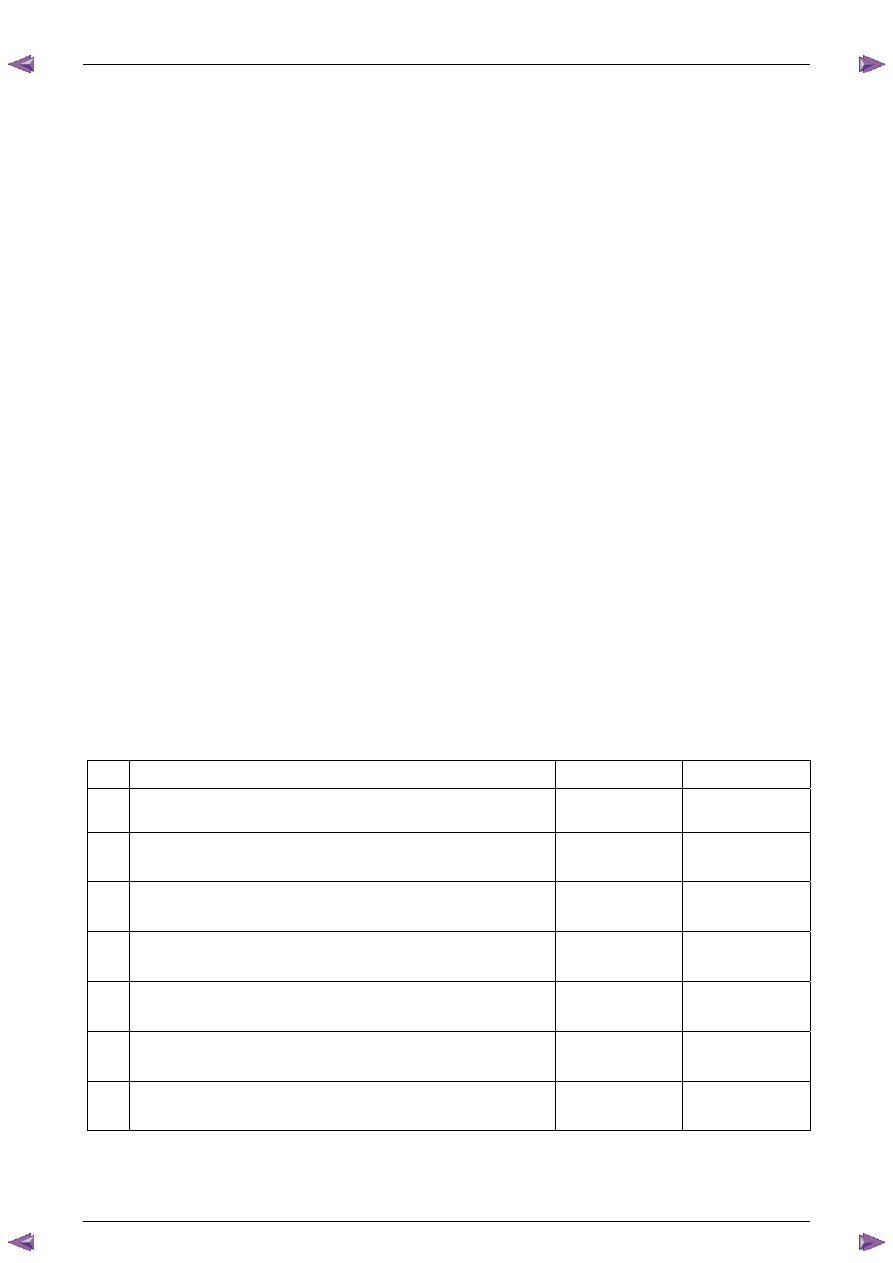
Step Action
Yes
No
1
Did you review the information provided in 2.2 Symptoms, and
perform the required inspections.
Go to Step 2
Go to
2.2 Symptoms
2
Inspect for a damaged accessory drive belt.
Did you find any damage on the drive belt?
Go to Step 3
Go to Step 4
3
Install a new accessory drive belt, refer to 3.5 Accessory Drive Belt.
Does the drive belt continue to fall off?
Go to Step 4
Go to Step 12
4
Inspect the accessory drive system pulleys for misalignment
Did you find and repair any misaligned drive system pulleys?
Go to Step 12
Go to Step 5
5
Inspect for a dented or cracked accessory drive system pulley.
Did you find and repair any dented or cracked drive system?
Go to Step 12
Go to Step 6
6
Inspect for bent accessory drive component mounting brackets.
Did you find and repair any bent mounting brackets?
Go to Step 12
Go to Step 7
7
Inspect for incorrect, loose, missing or damaged fasteners.
Did you find any incorrect, loose, missing or damaged fasteners?
Go to Step 8
Go to Step 9
Нет комментариевНе стесняйтесь поделиться с нами вашим ценным мнением.
Текст